Hello everyone!
I am writing to the forum to seek guidance from anyone with experience in disassembling the Power Trim & Tilt (PTT) assembly on 3-cylinder, 2-stroke Yamaha outboard motors (models 50/60/70 HP, 62F / 6H3 block), specifically on a Yamaha 50GETO, model 62F, long shaft (L), serial number 504715.
My main objective is to extract the complete Power Trim unit to replace the electric motor (which has a broken, threaded shaft stuck in the block) and take the assembly to a workshop for extraction on a workbench. To achieve this, and based on what I have researched, it is necessary on my Yamaha motor to separate the arm that acts as the right side bracket.
So far, I have carried out the following steps according to the standard service procedure:
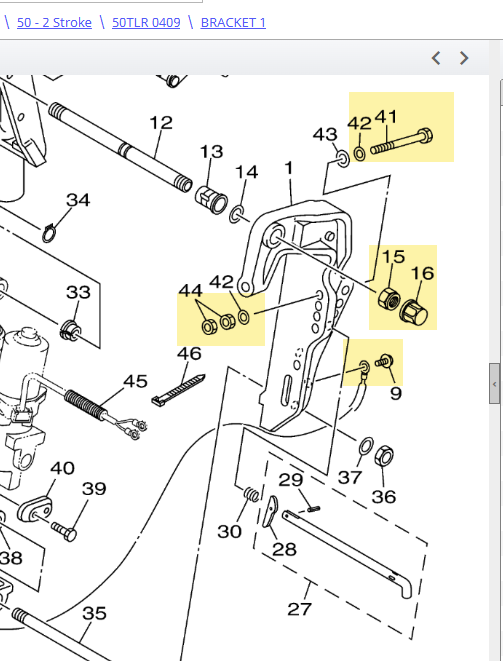
Reviewing the service manual's exploded diagrams (Chapter 7, BRACKET UNIT), I do not see any additional bolts or threaded fixings that should hold both parts together at this point. Here is the link in case you need to download the manual: Manual Montaje YAMAHA 50 GETO 62F
I have applied heat and tapped it, but I cannot get it to separate. In this video for a model like mine, it seems to separate easily (you can turn on subtitles and auto-translate): YouTube Video
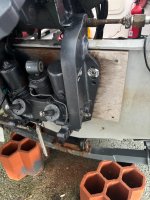
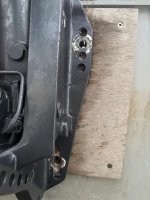
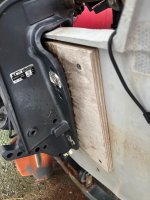
As you can see, I need help because I don't know how to make the right side bracket move freely outward. I am unsure if there is an internal circlip, seal, collar, or pin that is not visible at first glance and continues to hold the arm back.
I know that seizing due to galvanic corrosion is common in the swivel tube / bushing area on this series of Yamaha engines, but I have applied heat with a heat gun and struck it with a nylon mallet, and I still can't get it to budge.
Before trying something more aggressive—like placing a jack between both arms and applying slight pressure—I wanted to know if anyone has encountered this problem and how they solved it.
I am sending you a link with a PDF containing images and the steps I have taken so far: PDF with images
Best regards to everyone, and thank you very much in advance for your help!
I am writing to the forum to seek guidance from anyone with experience in disassembling the Power Trim & Tilt (PTT) assembly on 3-cylinder, 2-stroke Yamaha outboard motors (models 50/60/70 HP, 62F / 6H3 block), specifically on a Yamaha 50GETO, model 62F, long shaft (L), serial number 504715.
My main objective is to extract the complete Power Trim unit to replace the electric motor (which has a broken, threaded shaft stuck in the block) and take the assembly to a workshop for extraction on a workbench. To achieve this, and based on what I have researched, it is necessary on my Yamaha motor to separate the arm that acts as the right side bracket.
So far, I have carried out the following steps according to the standard service procedure:
- Release of the central hydraulic: The manual valve for hydraulic bypass was turned, the tilt-lock pin/clip was removed, and the central pin of the main ram was taken out.
- Trim side bolts: The 6 side bolts of the Trim body have been removed (3 on the left side and 3 on the right side).
- Anode and brackets: The lower sacrificial anode was disassembled, and its fastening bar/bolt was completely removed.
- Transom anchors: The 2 through-bolts securing the right side bracket/arm to the transom plate have been completely removed.
- Steering connection: The steering was released by loosening and completely removing both the nut securing the cable housing and the threaded nut connecting it to the right arm of the motor.
- Electrical connections: The blue and green wires at the relay box and the lower ground terminal were disconnected.
Reviewing the service manual's exploded diagrams (Chapter 7, BRACKET UNIT), I do not see any additional bolts or threaded fixings that should hold both parts together at this point. Here is the link in case you need to download the manual: Manual Montaje YAMAHA 50 GETO 62F
I have applied heat and tapped it, but I cannot get it to separate. In this video for a model like mine, it seems to separate easily (you can turn on subtitles and auto-translate): YouTube Video
As you can see, I need help because I don't know how to make the right side bracket move freely outward. I am unsure if there is an internal circlip, seal, collar, or pin that is not visible at first glance and continues to hold the arm back.
I know that seizing due to galvanic corrosion is common in the swivel tube / bushing area on this series of Yamaha engines, but I have applied heat with a heat gun and struck it with a nylon mallet, and I still can't get it to budge.
Before trying something more aggressive—like placing a jack between both arms and applying slight pressure—I wanted to know if anyone has encountered this problem and how they solved it.
I am sending you a link with a PDF containing images and the steps I have taken so far: PDF with images
Best regards to everyone, and thank you very much in advance for your help!