'93 Sea Ray 200br Overhaul

Sergi

Petty Officer 3rd Class
Joined
Jun 12, 2012
Messages
80
Re: '93 Sea Ray 200br Overhaul

I thought I did post the pictures of the engine mounts making. Of course those mount are also made of high grade polyurethane.
I cut them half in width so I could laminate in between the two halves.
IMG_20130418_211934_zps9d1f4869.jpg

IMG_20130418_215843_zpsee29b75e.jpg

IMG_20130519_163616_zps39c146f8.jpg

IMG_20130519_163633_zps99b1aa22.jpg


Nothing more to it.
 

Sergi

Petty Officer 3rd Class
Joined
Jun 12, 2012
Messages
80
Re: '93 Sea Ray 200br Overhaul

Well, today is the first day of work after a two and a half weeks holidays. Been working on the project all as I could but unfortunately I wasn't unable of ending, and splash it.
Lots of work been done though.

I'll post the progress as a series of pics. I'm just at the back-to-work syndrome, and the fact I could not play with the boat at the water even makes it worse.

Made the front seats:
IMG_20130812_170908_zps166fd83e.jpg

IMG_20130804_202743_zpsd65f7f23.jpg

IMG_20130814_151732_zps83a2204e.jpg

IMG_20130814_151906_zpsc6f7d8ae.jpg

IMG_20130815_183040_zps61fe68f5.jpg

IMG_20130819_154629_zps3cd97569.jpg


You get the waste foam sheet trick? as in the pig, nothing is wasted.

That wood at the sides of the consoles are the molds for the compartment hole recess. I simply used wood for the shape and covered it with transparent film, without any wax or demolding agent.
 
Last edited:

Sergi

Petty Officer 3rd Class
Joined
Jun 12, 2012
Messages
80
Re: '93 Sea Ray 200br Overhaul

Also made the lateral molding supports and reinforcements.
I made them from honeycomb and put two end caps from waste foam that would also double as the engine bulkhead mounting points.
IMG_20130814_151713_zpsad620241.jpg

IMG_20130814_151849_zpsdb0a7f58.jpg

IMG_20130815_183112_zpsab653061.jpg


Pedestal seats supports:
Whatever you do, don't use ticks (T-Nuts). They tend to fail while screwing the seat ripping from the wood, the screw leave free turning, and you get a silly face. failed two from twelve.
IMG_20130819_154645_zpsc79c333e.jpg


And gelcoated it all IN A ROW. (What a morning).
IMG_20130821_204907_zpsaba6e6b0.jpg

IMG_20130821_205003_zps14039d8e.jpg


If you see, I made a recess square hole on the two console supports so I can put doors there. But I suppose I will be better buying pvc doors than making myself.
Both console walls have tabs for screwing covers for making closed compartments.

If I could only find vinyl paint for mounting back the old moldings and protections...
 
Last edited:

Sergi

Petty Officer 3rd Class
Joined
Jun 12, 2012
Messages
80
Re: '93 Sea Ray 200br Overhaul

I was so deceived at the gelcoat look as it ended so rough. It took me a day or two to decide what to make with it. I thought about sanding it all flat and go for another layer. Leveling it or not previously with thickened gelcoat at the more visible areas.
But I finally left it alone for the next season with the hope of testing the boat this one.

So I continued dropping in the engine:
Hi there! I'm the demon mechanic. It was so late at night when that pic was taken and I was tired and peckish at the time.
IMG_20130821_214707_zpsf181ca70.jpg


And sanding the cap. The helper still dropping a hand, but by now it's so deflated about it all. I suppose she thinks she gets more from the orchard. :joyous:
IMG_20130825_130231_zps52dcb4df.jpg


God help us if something drops starboard into that red shark at the right bottom of the pic. IT'S HERS!

I completely dropped the engine and aligned it. Connected and even made him run, but the problem arise when I dropped the original vessel harness. The wires are so rusted that for every system I connect I get so much gremlins that take so long to fix. I'm trying to make work the more healthy sections and will be replacing the remaining.
Basically the damaged areas are those related to the console. Trim drive, gauges... the engine drive (key cables) it's also affected but it's own harness is good.

Still remain for it to splash-test:
Replacing the instrument panel plus steering wheel.
Ending gas tank and ski locker covers.
Making rear engine bulkhead and provisional sun-pad.
End sanding and painting the cap.
 
Last edited:

chconger

Petty Officer 1st Class
Joined
Jul 3, 2012
Messages
315
Re: '93 Sea Ray 200br Overhaul

This is just the most amazing build. Love the materials your using. And they are in the right hands.

For a moment I considered ripping out all my wood and starting again with this stuff. Next time....

Cheers
Chris
 

Sergi

Petty Officer 3rd Class
Joined
Jun 12, 2012
Messages
80
Re: '93 Sea Ray 200br Overhaul

This is just the most amazing build. Love the materials your using. And they are in the right hands.

For a moment I considered ripping out all my wood and starting again with this stuff. Next time....

Cheers
Chris

Thanks Chris! The only place I would think twice about using composites it's in the engine supports. I used the higher grade foam and you saw how I laminated it. But It would collapse while clamping the bolts. Not so serious that I left as is, but if I ever have to re-do them, I would also remember to add the resin inserts on the holes as I did with the transom. There was completely firm during the clamp.

The better part of it, it's that I could lift the hull from the bow with my hands as it was a semi-rigid, before the engine was in ;)
 
Last edited:

Hoosmatroos

Petty Officer 1st Class
Joined
Jul 11, 2011
Messages
250
Re: '93 Sea Ray 200br Overhaul

Amazing what you did in that short time. Love to see the rest of the rebuild :)
 

Sergi

Petty Officer 3rd Class
Joined
Jun 12, 2012
Messages
80
Re: '93 Sea Ray 200br Overhaul

Been working on the ski locker and gas tank covers. I found that a texturized paint roller is a fast and acceptable solution for no-slip surfaces.
There are the pics for the gas tank cover. I added ribs from PU on the underside for more rigidness:
IMG_20130921_144945_zpsc2cc8299.jpg

IMG_20130921_200525_zps2b0a33b7.jpg

IMG_20130921_200507_zps95895631.jpg


*Please take into account that on that last image, the border wasn't already sanded.

I laid the gelcoat in two layers. The second one for the no-slip area. That coat was laid with the normal roller, and then when the gel was almost cured I user the texturized with fast passes.
If you try it before the gel started to cure, the roler will clog and the surface will be un-even.

Someone told me about using coarse (?) salt. Laying it on to of the gel and wiping it with water after it completely cured. But I was concerned about it affecting the gelcoat.
I think that method it's more suited for paints.

More soon.
 
Last edited:

Sergi

Petty Officer 3rd Class
Joined
Jun 12, 2012
Messages
80
:joyous::joyous::joyous:
How I can edit the title to tell that it... SPLASHED!!!!
 

Sergi

Petty Officer 3rd Class
Joined
Jun 12, 2012
Messages
80
Thanks WoodonGlass, I will do like that.

I will also continue with the story and post the last pics of it. I must apologize for leaving that post alone. As the ending of the restoration came closer, I felt more nervous about finishing it faster and lazy about taking pics.

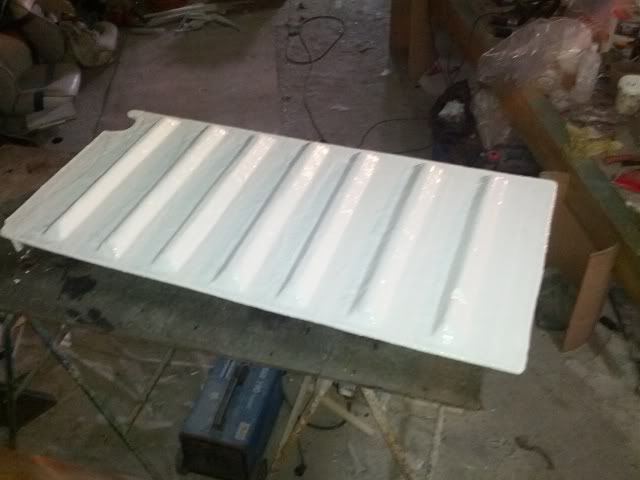
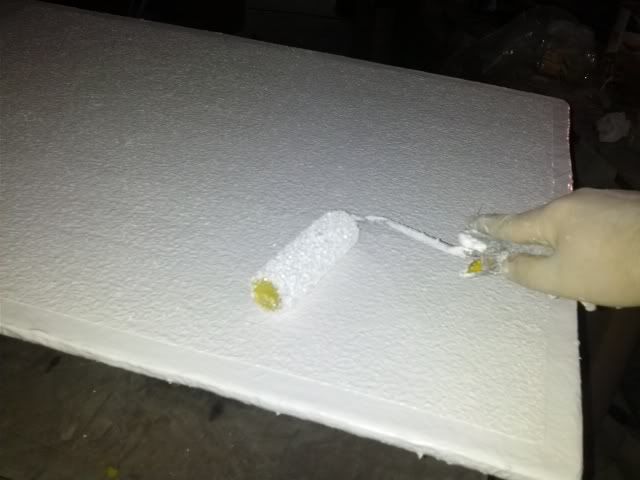
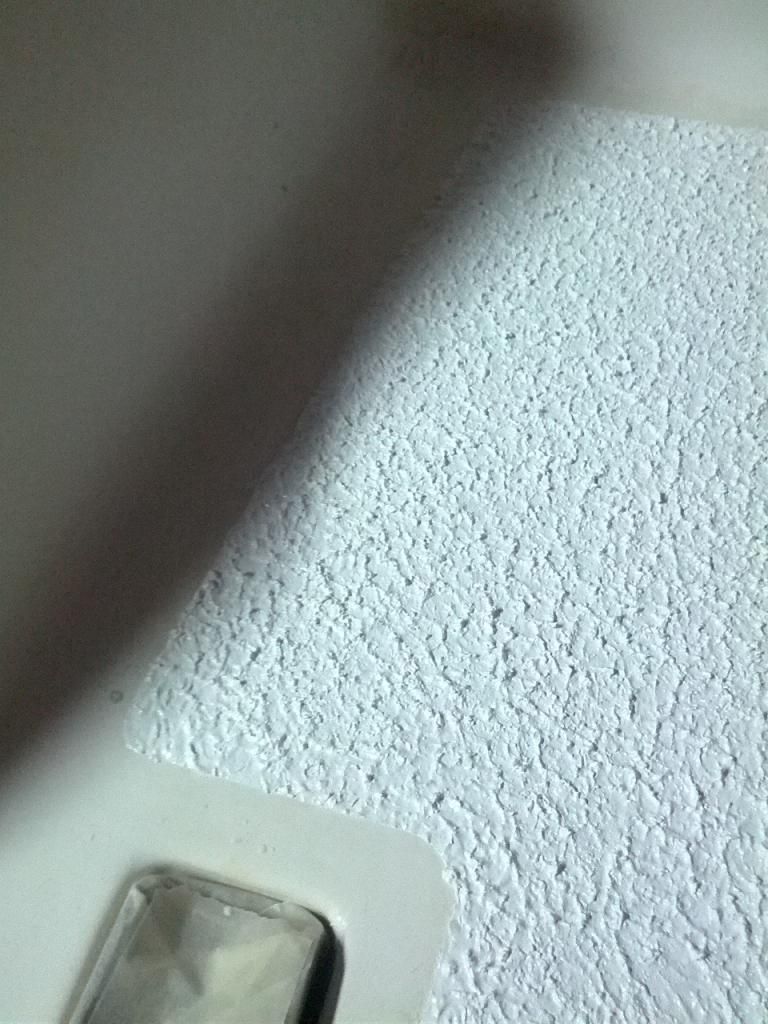
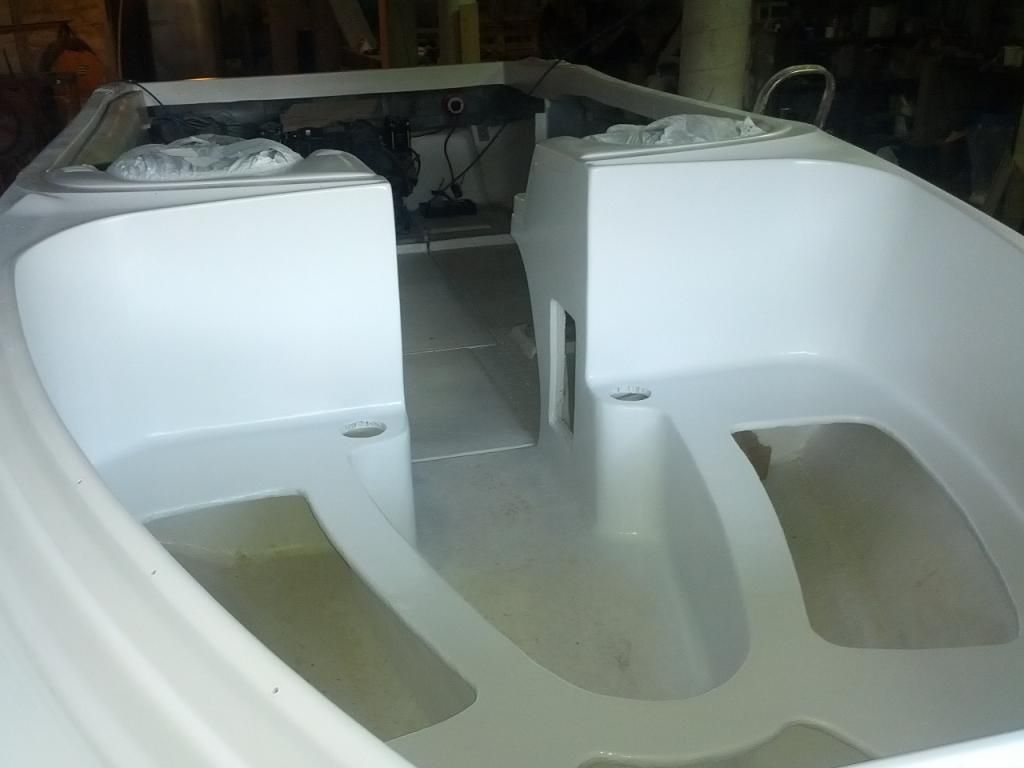
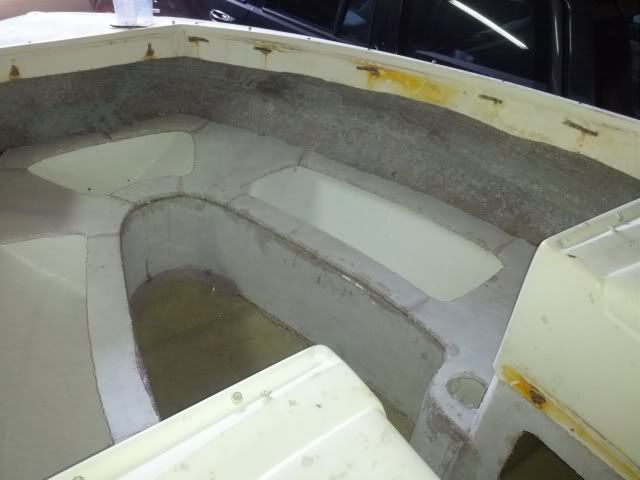
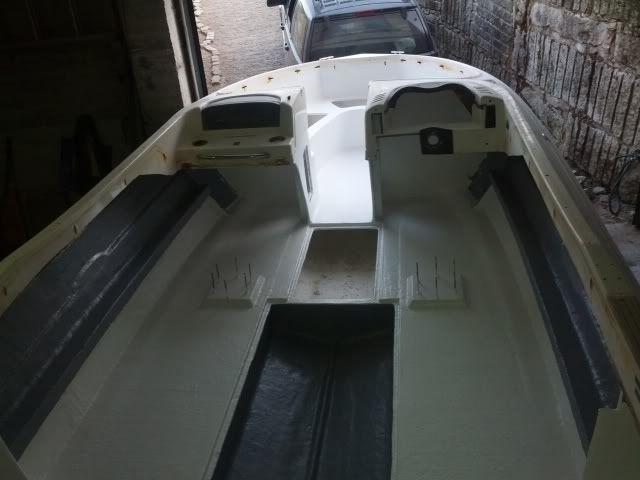
Basically I re-done all the no-slip surfaces using a roller while teh gelcoat cured. And then sanded it until the surface was soft and nice to bare feet.
There's a sample before sanding.
IMG_20140614_204232_zpsummbjq65.jpg


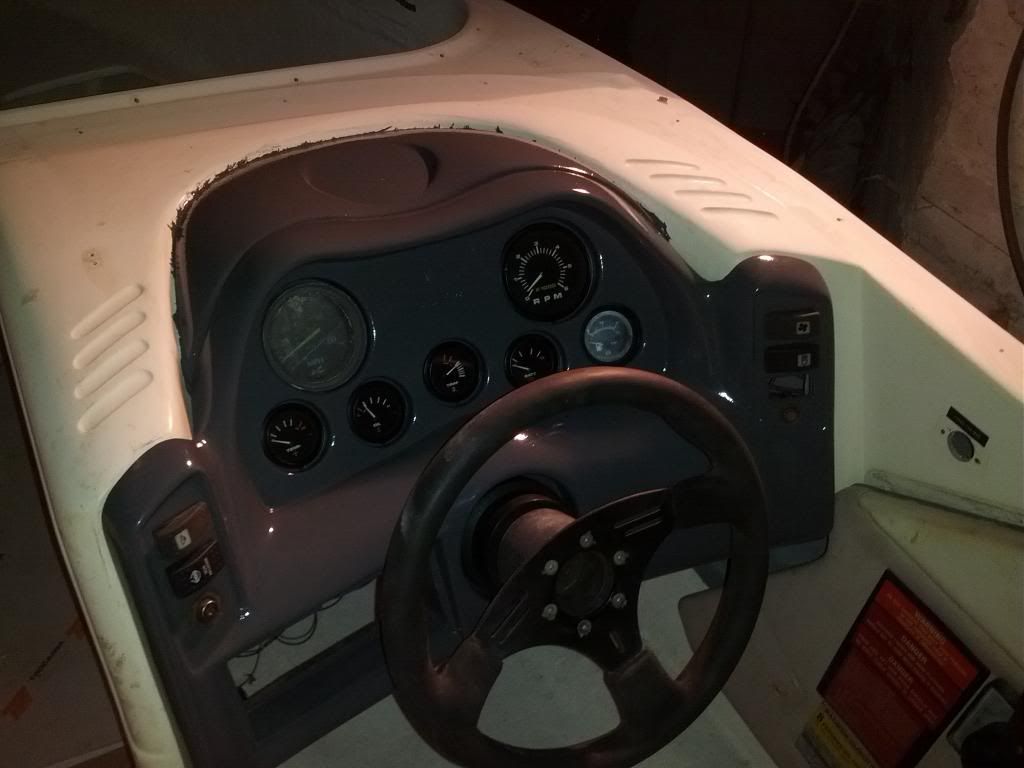
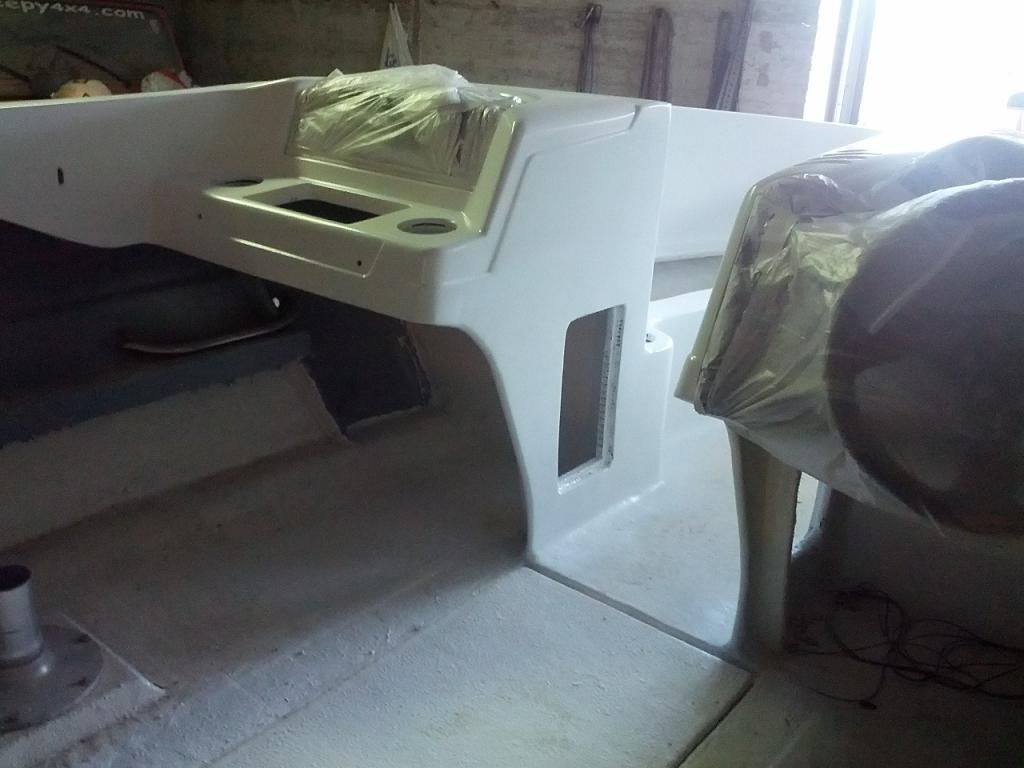
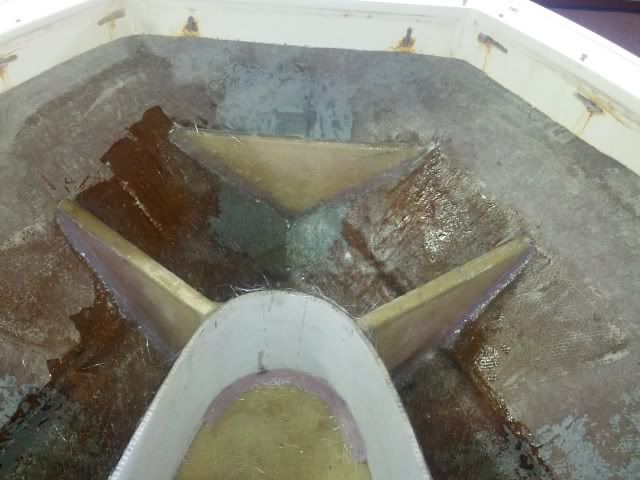
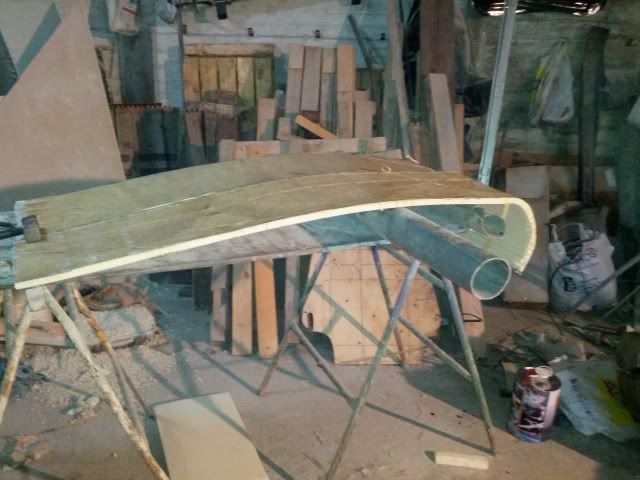
That's a picture of the contro, panel restoration before painting the interiors:
IMG_20131020_203949_zpsgjt2j95z.jpg


Then I painted with poliurethane all the newly built surfaces. That's a picture of how the bow ended. I'm very proud of it.
IMG_20140614_204410_zpsngangljo.jpg

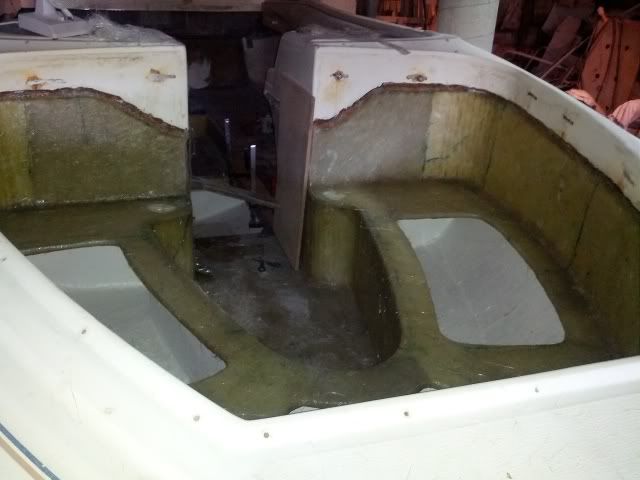
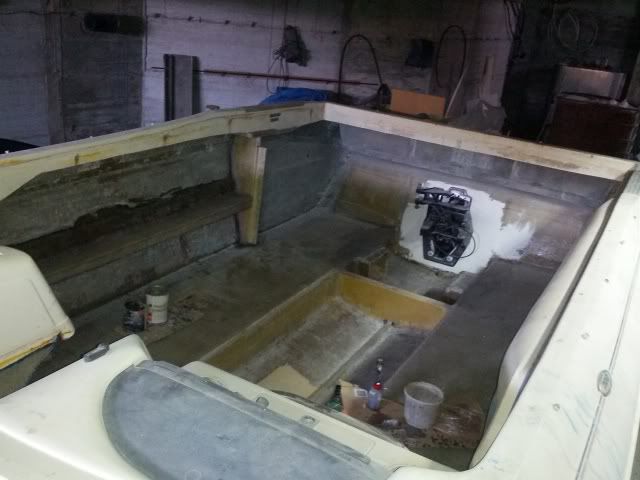
The edges of the seats don't deflect a bit. I can stand still on those edges without it deflecting.

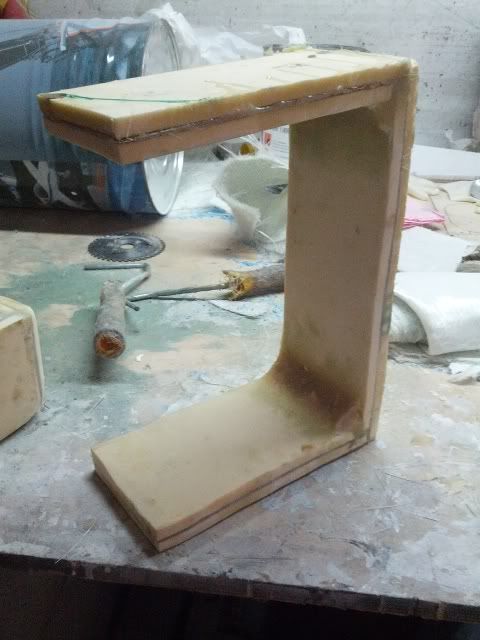
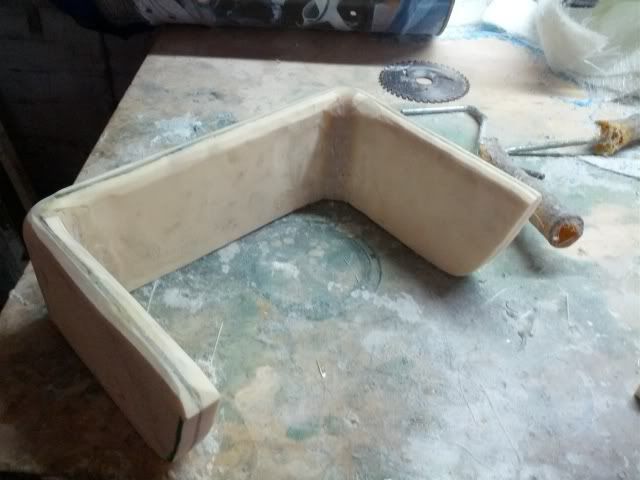
This is a detail of how I modified the consoles feets to be more modern. Those ugly tabs that you can see on the interior are to bolt a covering panel, so the space under the consoles become two lockers.
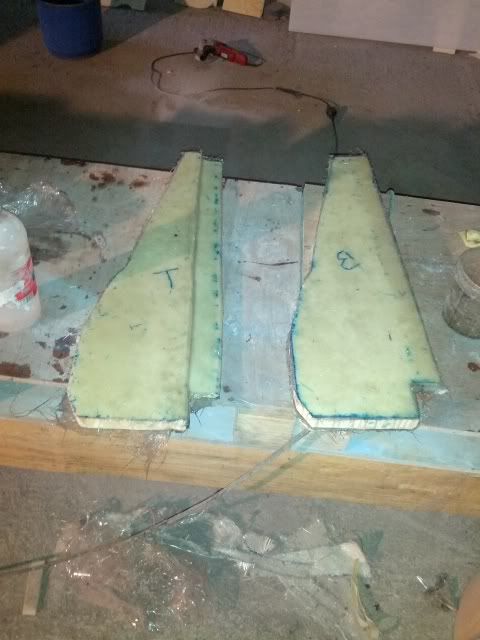
I initially thought about making a custom doors on the sides, but the pvc doors on ebay are so available that I will order a pair of them and bolt in place. I was having hard times moulding the recesses for the doors.
IMG_20140614_204631_zpswi3pjo1n.jpg


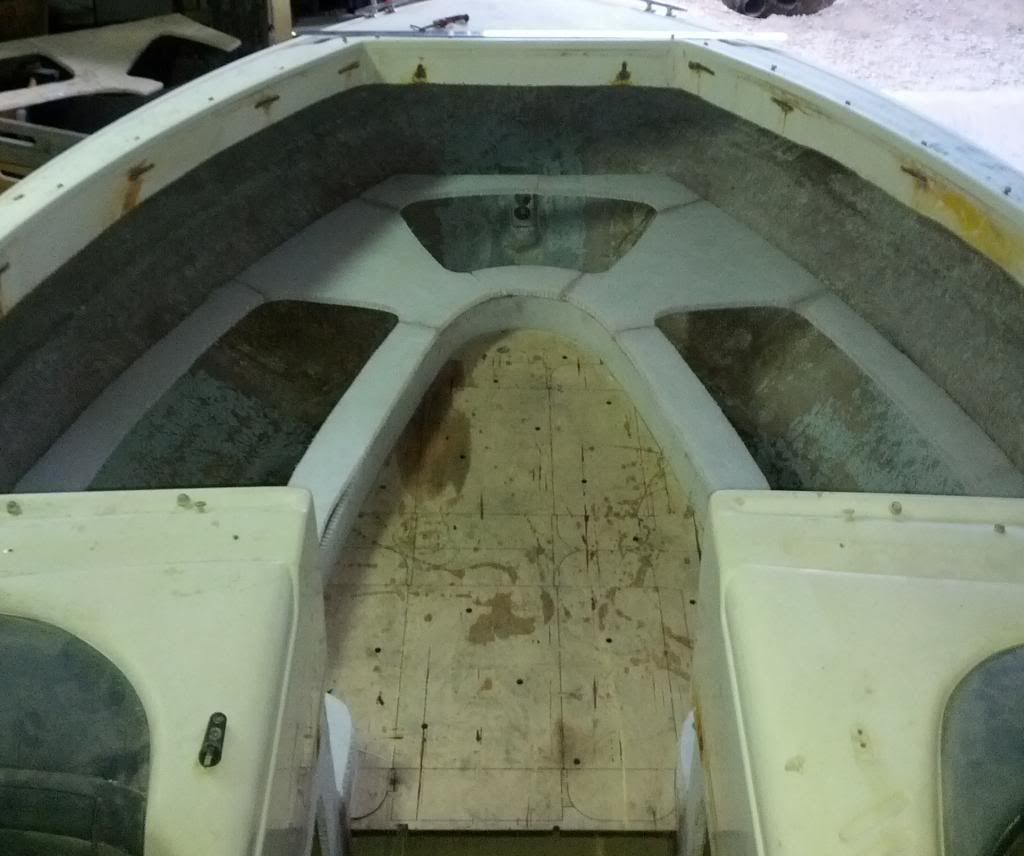
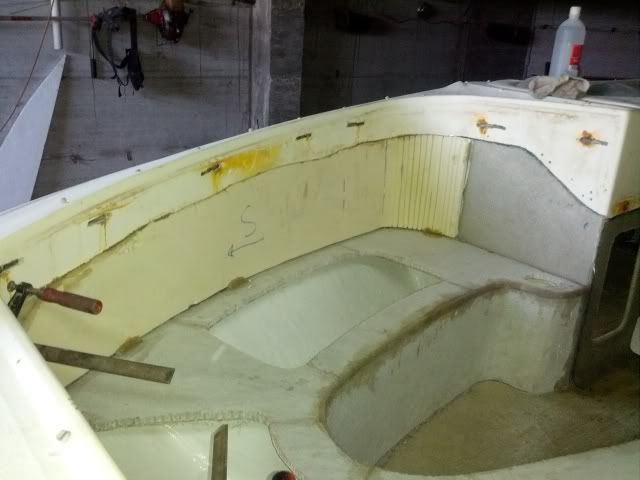
From that picture, I finished the floor.... and ended the rest of the boat (I promise I'll take some pics)

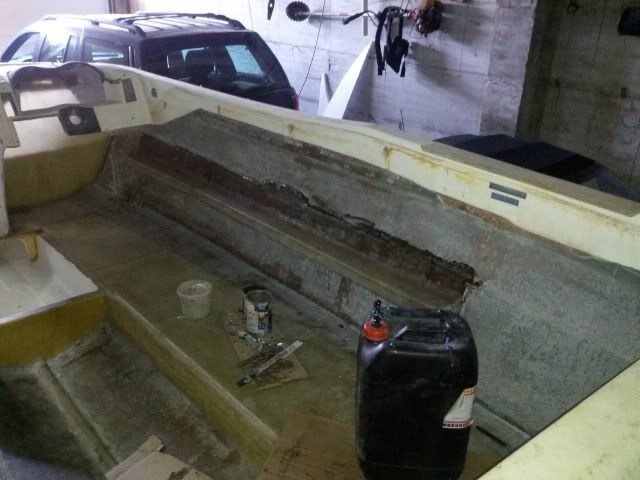
When I made the non-slip surface on the bow, the excess paint on the floor made the gelcoat not adhere, so the edges are lifted. I'm currently repairing it.
I also polished the liner around the boat and it seems now like stainless steel. Painted the rubber black.

So by now It only lacks making all the interiors, cushions and seats, but as the heat already came and we were so tired we mounted the old ones and went to do a testing session at the river.
It was amazing! We all where so excited that forgot to take a camera or even a phone. We all where in swimsuits before leaving the car.
The trailer was incredible for launches. It is fully articulated.
I expected the engine needing adjusting and everything to fail but I was wrong. It started at the first stroke and came into gear easily.
The only problems where: I didn't forgot to wire the switch interrupt, so being my first time at command was very scary when I realized that the thing didn't want to stop while approaching the dock (Doh!) i killed the engine instead.
As I also had to repair the accelerator cable (seized, so I replace the cover) It was a little offset. So I adjusted.
And I found an hydraulic trim leak at the trim motor hose. I fixed later with a new temporary clamp.

So we made some rides with it. I'm not experienced with boats, but my wife has plenty, as his family always had all kinds of boats. she said that she was very impressed of the ease of the boat to climb the hole and the small bit of time it takes.
I noticed that the boat was cruising so level, and I expected some more rear dive, perhaps by the weight reduction, but she told me that she was absolutely perfect. That she never ride a boat that planed that well. It's true that I could barely notice the water going under it and it seemed like flying.
She told me that it was a very very fast boat. Well, it's right. I didn't pass 70% of gas and I don't have a working speedo but I was so scared at the river turnings.

So the conslusion we made about replacing all that wood with composites it's that the boats manners turns more into something like a jet bombardier. That was the feeling I had, and what I wanted.
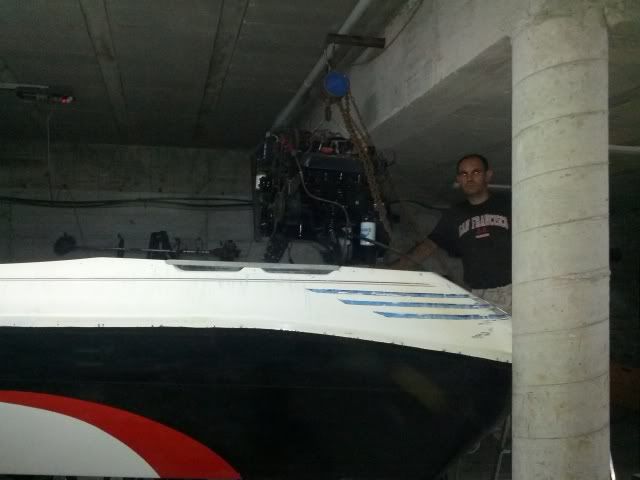
Now.... I'm making some engine cover so we can invite some family.
And we're changing the boats name! We decided for Arcadia. From "The happy Arcadia" country myth.
 

Fastatv

Petty Officer 1st Class
Joined
Sep 28, 2013
Messages
258
Hi Sergi, I didn't follow along but I did read your entire thread. Lots of very fine work my man. My sincerest CONGRATULATIONS To you! Great job!
 

Sergi

Petty Officer 3rd Class
Joined
Jun 12, 2012
Messages
80
Thank you!

Perhaps you still could give me a hand with a small problem I have.
did all the gelcoat job on the bathtub but it's getting so dirty. I tried to wash it for continue the work, but it seems it had sucked the dirt. It's nothing special, just plain dust from getting in after walking on the garage (I still have the concrete flooring on it and currently doing a major garden workings).
I've used a good soap, but even if I use the one that we use to clean trailer trucks I can't get that gelcoat clean.

Is that normal? I thought that gelcoat was more of a finishing surface and not any porous.
I would do without a paint, but seeing how dirty it gets I doubt.
The problem is that I don't discard laying another coat the next year, but if I paint it would be impossible.
 

GT1000000

Rear Admiral
Joined
Jul 13, 2011
Messages
4,916
Many congratulations, Sergi!
That is excellent news on the completion and splash of your boat.
Hope to see some action pictures when you get a chance.
Have fun finishing the details and may you and yours enjoy this boat for many, many years to come...
 

Woodonglass

Supreme Mariner
Joined
Dec 29, 2009
Messages
25,929
Gelcoat IS porous! It will get dirty. Did you use wax in the final coat? Try to find a product that had Oxyalic Acid in it. A lot of Bathroom Cleaners have that ingredient here in the States. Some Solvents might work too! Bleach and Some BarsKeepers cleansers might work. If you get it clean Waxing the deck will help seal it but...It makes it slick to walk on too!!!
 

Sergi

Petty Officer 3rd Class
Joined
Jun 12, 2012
Messages
80
Gelcoat IS porous! It will get dirty. Did you use wax in the final coat? Try to find a product that had Oxyalic Acid in it. A lot of Bathroom Cleaners have that ingredient here in the States. Some Solvents might work too! Bleach and Some BarsKeepers cleansers might work. If you get it clean Waxing the deck will help seal it but...It makes it slick to walk on too!!!

So painting it is mandatory? What about the cap? Or the flooring on newer boats? They don't get such dirt.
 

Woodonglass

Supreme Mariner
Joined
Dec 29, 2009
Messages
25,929
No no, it is not mandatory or recommended. I'm not quite sure what you mean by the "BathTub"?? Could you explain a bit better the area of the boat where the stains are??
 

Sergi

Petty Officer 3rd Class
Joined
Jun 12, 2012
Messages
80
Emmm. Sorry guys, I've done a literal translation for "banera" (with ~ above the n, seems that the forum does not support it). Here in Spain we name like this the space between the consoles and the rear bench available for the passengers. I guess it came from the sailboats, as they only have that... cavity.

Bilge for me would be "sentina". Where all the raw waters end. Usually under the engine :D
 
Last edited:
Top