Woodonglass
Supreme Mariner
- Joined
- Dec 29, 2009
- Messages
- 25,932
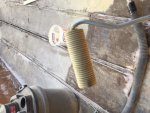
The link I sent you says thier's is 15 1/2" square x11 1/2" tall. Seems to me you could fab that up out of plywood pretty easily and glass it up in no time.:nod:


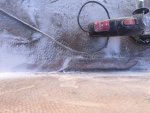
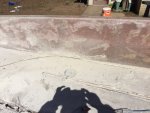
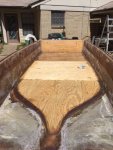
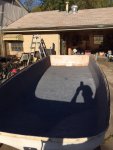
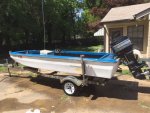
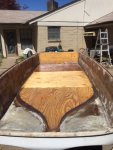
Welp, today I got a lot of prep work done. Most of it wast grinding off all of the old fiberglass putty that ran the length of the boat on both sides that tied the old deck in. It is now nice and flat so I will have a good surface to seat my strings for my grid when I measure for the new stringers. I also ground down the surface where the new transom will seat on the sides and bottom. I still have a lot of glassing to do in that area but i now have a better base to hopefully allow for less shaping of the wood in order to get a good seat. My fiberglass order is in the UPS warehouse here in town so the stern skin work will continue next weekend. The photos's show the area I did the grinding on.
All this work today raised some more questions. From what I understand I am supposed to use a buffer between the stringers and the hull. Well, what about the floor and the hull where it meets the sides? From what I understand, I need to leave a gap between the edge of the deck and the side and then fill that in with fiberglass putty, but, what about where it rest on the bottom hull at that point? I have read where people mention PL between the stringers and the hull, but, what is PL? And, should I use that on the bottom edges of the deck where the deck meets the hull? There are no stringers there at that point so secure it to and the bottom of the deck will be touching the hull at the perimeters.
Thanks guys, and gals.
Aaron
")
PB is discussed in the link I posted back in Post# 44
Here's a video on how to make PB.
Ok. I think I'm good on how to make the PB. It's what I referred to as fiberglass putty in my post 82.
My main question is does there need to be a buffer od this between the bottom edge of my deck and the bottom hull?
Like I said, I have no stringers on the perimeter to fasten the deck to. I do plan to fill in the gap between the edge of the deck and side hull.
Am I overthinking it? Should I not worry about the bottom side?

A lot of progress should start being made on this project now. Looking ahead, I realize I do not know what thickness of plywood to use for the deck. Im thinking 1/2. Would that be about right for my little boat?
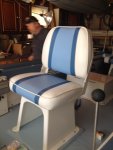
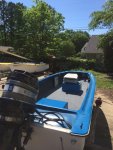
Also, I am going to build my own seat boxes. In my head I am thinking to use ? or 3/8 plywood. Then, wrapping them in glass then CSM, then gel coat. What Im concerned with the most is that I want them to look exactly like the ones in the attached photo. When thinking about how to fasten the plywood together, Im thinking I need a frame to attach them to but I want the boxes to not have the frame once finished.
What Im thinking of doing is making the top out of a thicker piece of ply, may ? with edges angled to make the pyramid shape. Then hot gluing the vertical supports in until I get the outer wrapped and cured. Then removing them and wrapping the inside.
What do y'all think? Is there a better way?
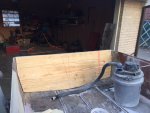
Weekend update: I got the new transom cut, glued and screwed together, and fitted today. I also made a hard fiberglass roller on my lathe. I coated it with Bees Wax, so maybe it will last longer than one application.
I use the disposable 4"rollers as well. They work for me. I just had a little bit of difficulty today and thought that it would sure be nice to have a bubble buster.
My lathe is the small harbor freight one. It sure come in handy. I turned these chess pieces with it. Although i haven't finished my knights yet.