Prime and Paint Aluminum Boat

SlipperyOar

Petty Officer 2nd Class
Joined
Apr 12, 2024
Messages
119
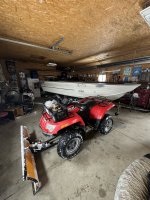
I’m at the point where I’m ready to put some fresh colour onto my aluminum boat. I’ve read through almost every thread regarding painting aluminum with lots of notes taken but I have a few additional questions that haven’t been answered. Currently the boat has 99% of the existing paint on it, a few spots are bare aluminum from scratches and what not. I’ve began feathering out any scratches to make the surface flush and once feathered I have used a vinegar/water mix following by some etching primer out of a spray can.

I plan on washing up the entirety of the surface with some soap and water, then 220 grit sandpaper on the random orbital sander and then cleaning the surface with some sort of mineral spirit.

Would a 2K epoxy primer (high build) be best to apply a solid primer coat(s) first followed by the top coats. Or do i need to line if the surface is mostly well adhered existing paint that’s been scuffed up?

does anyone have suggestions on the process, and the paint and primer types to use to give this its best results? I’ve got fair experience with painting and will be using a HVLP gun for paint and primer application.

Hoping to find a good Honolulu blue and silver to represent my Detroit lions while out on the water!
 

Attachments

  • IMG_0675.jpeg
    IMG_0675.jpeg
    1.8 MB · Views: 2

MikeSchinlaub

Petty Officer 2nd Class
Joined
Jan 14, 2025
Messages
179
With the size of those bare spots, I would recommend a good Direct to Metal primer. It has replaced the old acid etch primers. We use Excel primers at work, with good results. Their dtm primer can be mixed as high build primer and sealer, so you can just use one product throughout.

220 is a bit rough, I would go 320, and avoid the rivets with your orbital. You can go back over those with a scotch brite.

Clean up with a wax and grease remover, mask it, the use a tack rag. Primer it, sand it, clean and mask again, then spray sealer so the sanding scratches don't show through the paint.

Heads up, silver is one of the harder colors to spray.

What kind of stuff have you sprayed? A big job like this will be different than a spot in or one side.
 

SlipperyOar

Petty Officer 2nd Class
Joined
Apr 12, 2024
Messages
119
With the size of those bare spots, I would recommend a good Direct to Metal primer. It has replaced the old acid etch primers. We use Excel primers at work, with good results. Their dtm primer can be mixed as high build primer and sealer, so you can just use one product throughout.

220 is a bit rough, I would go 320, and avoid the rivets with your orbital. You can go back over those with a scotch brite.

Clean up with a wax and grease remover, mask it, the use a tack rag. Primer it, sand it, clean and mask again, then spray sealer so the sanding scratches don't show through the paint.

Heads up, silver is one of the harder colors to spray.

What kind of stuff have you sprayed? A big job like this will be different than a spot in or one side.
Will I need to apply this first coat of the excel primer you talk about followed by a sealing primer and then the top coat?

Previously I’ve painting a smaller 12’ boat with basic tremclad that turned out quite well but I flipped it whereas I’m wanting to keep this around a while and would like to make it look much more professional
 

MikeSchinlaub

Petty Officer 2nd Class
Joined
Jan 14, 2025
Messages
179
Primer first, let it cure overnight at least. Then it gets sanded, be careful with your orbital, you'll sand through it pretty quick. You'll have to clean it and go around with a light looking for any spots you missed.

You could also rub it with a dry guide coat to help you see what you sand.
20250227_104647.jpg

Once you're sure it's all sanded well, you thoroughly clean it again and mask it for paint. When you're ready to paint, you mix the excel (if that's what you choose) as sealer according to the instructions. It has a reducer for this. Sealer is just a very thin layer of primer that you can spray over once it's flashed, rather than waiting for it to cure and sanding again. It will cover any small burns and keep you from seeing the sanding scratches in your paint.

Are you going to base/clear or single stage it?
 

MikeSchinlaub

Petty Officer 2nd Class
Joined
Jan 14, 2025
Messages
179
If you don't want to clear, you'll need to get single stage paint. It will cover sanding scratches better, be a bit more durable, but have less UV protection and less forgiving to spray for the silver.

3 coats of primer, sand it, then three coats of paint. Wait 15-20 minutes between coats of paint. Touch the paint on your masking paper, with a light touch you shouldn't leave any fingerprints when it's ready to spray over. No sanding between coats

The key to spraying a big job like this is to keep the paint wet as you go. So spray a few feet down one side, then the other. Keep doing that until you get to the other end and you bring the sides together. If you take too long on one side, and the other side starts to flash, the overspray won't blend into the paint. You'll have dusty looking lines in the paint.

Look for an auto body supplier near you. They can help you pick out materials for your budget, and should have paint chips to pick colors from.

Is any of this making sense to you? It's a bit hard to describe without being there to show you. Can you draw up a rough sketch of the pattern you want to end up with?
 

SlipperyOar

Petty Officer 2nd Class
Joined
Apr 12, 2024
Messages
119
If you don't want to clear, you'll need to get single stage paint. It will cover sanding scratches better, be a bit more durable, but have less UV protection and less forgiving to spray for the silver.

3 coats of primer, sand it, then three coats of paint. Wait 15-20 minutes between coats of paint. Touch the paint on your masking paper, with a light touch you shouldn't leave any fingerprints when it's ready to spray over. No sanding between coats

The key to spraying a big job like this is to keep the paint wet as you go. So spray a few feet down one side, then the other. Keep doing that until you get to the other end and you bring the sides together. If you take too long on one side, and the other side starts to flash, the overspray won't blend into the paint. You'll have dusty looking lines in the paint.

Look for an auto body supplier near you. They can help you pick out materials for your budget, and should have paint chips to pick colors from.

Is any of this making sense to you? It's a bit hard to describe without being there to show you. Can you draw up a rough sketch of the pattern you want to end up with?
Yes this reply made complete sense to me and helped me out lots!

I’ve read about doing a layer or epoxy primer, then the 2K primer and then topcoat. Is this overkill or will doing a 2K primer over the scuffed paint and self etching primer on bare spots be sufficient?
 

MikeSchinlaub

Petty Officer 2nd Class
Joined
Jan 14, 2025
Messages
179
I'm pretty sure 2k just means high build. The important part is compatibility with bare metal. So what you want is a high build direct to metal (not acid etch) primer. This will fill in minor imperfections, and give you a sandable base. Even though it says metal, it will adhere just fine to your paint. I'm recommending the excel because it will work for you over the bare and painted areas, and will save you from having to buy multiple primers. Other brands might have something similar. You'll have to see what's available around you. Ask your local supplier, or the manufacturer if you're buying online. Just watch out for hazardous shipping charges for online orders, it might put an affordable paint out of your budget if it applies.

I'm not sure about the epoxy, I've used it all of one time now for sealer.

The self etching, or acid etch, primer has been phased out, at least around here. The newer stuff I think is supposed to be less harmful to the environment. If you do manage to find acid etch, you'll have to use urethane or epoxy primer over it or the acid can bleed into the paint job. That's what my supervisor told me, I never used it.
 

SlipperyOar

Petty Officer 2nd Class
Joined
Apr 12, 2024
Messages
119
I'm pretty sure 2k just means high build. The important part is compatibility with bare metal. So what you want is a high build direct to metal (not acid etch) primer. This will fill in minor imperfections, and give you a sandable base. Even though it says metal, it will adhere just fine to your paint. I'm recommending the excel because it will work for you over the bare and painted areas, and will save you from having to buy multiple primers. Other brands might have something similar. You'll have to see what's available around you. Ask your local supplier, or the manufacturer if you're buying online. Just watch out for hazardous shipping charges for online orders, it might put an affordable paint out of your budget if it applies.

I'm not sure about the epoxy, I've used it all of one time now for sealer.

The self etching, or acid etch, primer has been phased out, at least around here. The newer stuff I think is supposed to be less harmful to the environment. If you do manage to find acid etch, you'll have to use urethane or epoxy primer over it or the acid can bleed into the paint job. That's what my supervisor told me, I never used it.
So I've went and gotten myself some primer, i went to a local auto body supplier who have supplied painting supplies to our farm before which we've had great success with. I purchased some Intergard 345 two part DTM epoxy primer with its suggested activator and reducer. They supplied me with some measuring cups for mixing to the proper ratios and some filters as well free of charge to help me on my way. This product is supposedly excellent for DTM applications as well as priming over previously painted surfaces. I'm going to hit the whole boat with 220 grit on a DA and all the bare spots ill feather out with 220. Then ill go over each bare spot with 120 grit so rough up that bare metal surface a bit more. I'm thinking i'll do two coats within the recoat window and then use some 2k urethane surfacer over the second epoxy coat to build up any of my poor feathering spots. This should give me some sandable material to really smooth it all out prior to colour.

Initially i thought id jump right from the epoxy coat to my topcoat but i plan on painting the bottom of the hull a glossy grey colour and the sides a blue. If i went topcoat after epoxy i figured i would go past the recoat window on the second colour. But then again i could do a single coat of colour if the epoxy coat finishes out nice and smooth and cover the whole boat in grey, followed by taping off the bottom and doing the blue now that the hull is fully covered in paint. Still up in the air on which approach i'll do so im holding off until i'm 100% on a plan.
 

MikeSchinlaub

Petty Officer 2nd Class
Joined
Jan 14, 2025
Messages
179
Avoid the rivets with the da, just lightly hit those by hand.

I don't think you really need the heavier grit for the bare spots, but it won't hurt if you do.

I would suggest getting the whole thing in primer and sanded. Then you mask off for the color you want to spray that day. Spray one color, peel off your tape and let it cure. Next day remask for the second color and spray.

If I understand this correctly, it sounds like you intend to use the epoxy and urethane in one spray session. I've never tried to do it this way, so check with your supplier about the chemical compatibility of the two. It wouldn't be a problem if you let the epoxy dry, sanded, then used urethane. It might be an issue though if the epoxy releases it's chemicles into the urethane because it hasn't fully cured.
 

MikeSchinlaub

Petty Officer 2nd Class
Joined
Jan 14, 2025
Messages
179
A quick bit of advice for masking a hardline. Do your big area first, leaving a small bit of unmasked surface above it. Finish with one line of tape. That way, you only have to peel a tape line when you're done, and don't risk dropping paper into fresh paint.

1000008268.jpg
 

SlipperyOar

Petty Officer 2nd Class
Joined
Apr 12, 2024
Messages
119
Avoid the rivets with the da, just lightly hit those by hand.

I don't think you really need the heavier grit for the bare spots, but it won't hurt if you do.

I would suggest getting the whole thing in primer and sanded. Then you mask off for the color you want to spray that day. Spray one color, peel off your tape and let it cure. Next day remask for the second color and spray.

If I understand this correctly, it sounds like you intend to use the epoxy and urethane in one spray session. I've never tried to do it this way, so check with your supplier about the chemical compatibility of the two. It wouldn't be a problem if you let the epoxy dry, sanded, then used urethane. It might be an issue though if the epoxy releases it's chemicles into the urethane because it hasn't fully cured.
not necessarily the same session, just enough to allow the epoxy primer to begin curing but applying before the recoat window closes. The instructions state it needs to be sanded after the recoat window but if applying a topcoat or additional primer within the recoat time it doesnt need sanding as its not fully cured, which will give a chemical bond of the two
 

SlipperyOar

Petty Officer 2nd Class
Joined
Apr 12, 2024
Messages
119
A quick bit of advice for masking a hardline. Do your big area first, leaving a small bit of unmasked surface above it. Finish with one line of tape. That way, you only have to peel a tape line when you're done, and don't risk dropping paper into fresh paint.

View attachment 406463
i'm not sure if i totally understand you here, say i paint the bottom first its grey colour, i would tape off the area to be painted blue and then lay tape onto the edge where the colours will meet?
 

MikeSchinlaub

Petty Officer 2nd Class
Joined
Jan 14, 2025
Messages
179
First, I'm imagining two colors on one surface, like blue primary with a gold stripe. What I'm picturing may not be what you intend.

Anyway, here's a quick example.
20250328_143715.jpg

Grey lower, black upper, butted up against each other. If I was spraying grey first, I would cover most of the black, leaving a small strip uncovered.


20250328_143743.jpg

Then tape off that small strip.

20250328_143832.jpg
This way, you only peel off the small tape line when you are done with your first color. You don't risk the paper drooping into the fresh paint. Trust me, I've done it and had to fix it.
 

MikeSchinlaub

Petty Officer 2nd Class
Joined
Jan 14, 2025
Messages
179
Ok I read your post again, because I was at work and distracted the first time.

So grey on the bottom, blue sides. Where does the silver (for some reason I thought it was gold) from the original plan come in? As striping in the blue?
 

SlipperyOar

Petty Officer 2nd Class
Joined
Apr 12, 2024
Messages
119
Ok I read your post again, because I was at work and distracted the first time.

So grey on the bottom, blue sides. Where does the silver (for some reason I thought it was gold) from the original plan come in? As striping in the blue?
With silver potentially being tougher to paint I’m going to get more of a glossy grey. The blue will be on the sides and the grey on the bottom. I have a photo showing the paint scheme I’m thinking of. Ignore the black stripe between the two colours as I don’t think I’ll do it.
 

Attachments

  • IMG_0950.jpeg
    IMG_0950.jpeg
    73.1 KB · Views: 3

MikeSchinlaub

Petty Officer 2nd Class
Joined
Jan 14, 2025
Messages
179
With silver potentially being tougher to paint
As long as you can keep a consistent pattern and don't sag it, it wouldn't be that hard. It would actually be a bit easier with single stage because it builds thick enough to cover the sanding scratches better. The downside is that if you sag the paint, you might have to respray the side.

Spray the blue first to get a feel for it. Any sags in a solid color can be sanded and buffed out.

Would you be fine with doing the stripe with vinyl striping? It would be the perfect thing to hide any wonkiness where the colors meet.
 

SlipperyOar

Petty Officer 2nd Class
Joined
Apr 12, 2024
Messages
119
As long as you can keep a consistent pattern and don't sag it, it wouldn't be that hard. It would actually be a bit easier with single stage because it builds thick enough to cover the sanding scratches better. The downside is that if you sag the paint, you might have to respray the side.

Spray the blue first to get a feel for it. Any sags in a solid color can be sanded and buffed out.

Would you be fine with doing the stripe with vinyl striping? It would be the perfect thing to hide any wonkiness where the colors meet.
The vinyl stripe is something i didnt think about but in terms of hiding the painters tape lines it might be the way to go! I'll look into that, I'm trying to figure out my rub rail insert replacement issue right now before i go ahead and start sanding and prepping for paint.
 
Top