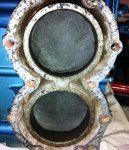
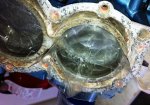
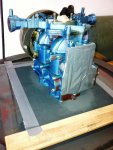
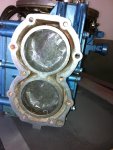
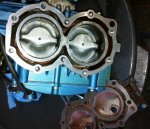
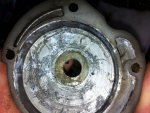
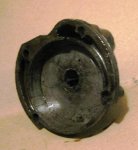
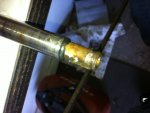
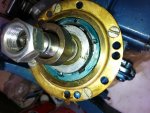
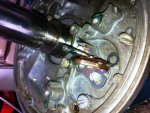
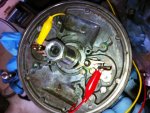
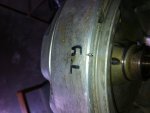
1956 Evinrude Fleetwin freshen-up

oldybutagoody

Petty Officer 1st Class
Joined
Dec 30, 2011
Messages
207
Re: 1956 Evinrude Fleetwin freshen up. **UPDATE**

Re: 1956 Evinrude Fleetwin freshen up. **UPDATE**

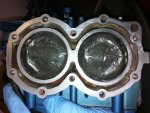
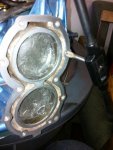
Good to get the update. I had the exact same issue with my '57 Fastwin. I lapped the head as you did and replaced the head gasket and all was good. Nice series of pictures showing how to lap the head. I wish I had them as reference when I did mine.
 

HighTrim

Supreme Mariner
Joined
Jun 21, 2007
Messages
10,486
Re: 1956 Evinrude Fleetwin freshen up. **UPDATE**

Re: 1956 Evinrude Fleetwin freshen up. **UPDATE**

I think every single head Ive ever dressed had a low spot between the cylinders.
 

RogersJetboat454

Commander
Joined
Jul 9, 2010
Messages
2,964
Re: 1956 Evinrude Fleetwin freshen up. **UPDATE**

Re: 1956 Evinrude Fleetwin freshen up. **UPDATE**

Thanks for the responses guys. I do hope this makes for a nice visual reference for someone if they are rebuilding one of these.

I had some time to play with this afternoon, so I decided to clean up the deck and base of the powerhead.

What you are about to see can be a risky proposition with out the proper prep and cleaning work. Silica Carbide is one of the many things that cylinder hones can be made of, and if any happens to remain in a cylinder, it can and will hone your cylinders, pistons, and rings in ways you would never want. Many people would razor blade the remainder of the old head gasket off the deck, and call it fine. It will probably work just fine doing it that way too. I on the other hand tend to be a little anal-retentive with engine jobs. Consider this the flat-rate auto tech in me that never liked come-backs. I did this at my own risk, and if you choose to follow this, you are doing so as well.
You have been warned....;)

Now that that's out of the way, time to see what all the fuss is about.
I decided to use the same method on the deck that I did on the cylinder head to be sure the deck is true (here's where half of you may go :confused::eek::facepalm:). To do this I needed to be sure this engine was sealed against intrusion from the sand paper dust. The obvious big area of concern was the cylinders. So this is what I did;
IMG_0323.jpg

Using my old asbestos friend as a template, I cut out some nice circles from some old gasket material with an exacto knife. Since the openings of the head gasket are ever-so slightly larger, my gasket circles were a bit over sized which made for a nice tight interference fit (easier to seal). Kinda like this;
IMG_0324.jpg

Next step, I used packing tape to seal the cylinder plugs in, and also cover the remaining exposed cylinder wall.
IMG_0325.jpg

I like the packing tape for a couple reasons. It's nice and sticky with out leaving any goobers behind when you peel it out. It's smooth surface is less likely to retain dust, and any dust that does happen to get on the tape is easily wiped off. But you can use what ever tape you like....

The excess tape sticking out of the cylinders was cut flush with the deck. The powerhead base was taped off with duct tape (I like duct tape too), and the carb opening had a clean dry paper towel jammed into it. It was go time now. I started off with 1200 grit just to see where I was at; IMG_0327.jpg

This picture wasn't the greatest, but if you can tell the deck did in fact have some high and low spots which more or less mirrored what I encountered with the head.
IMG_0328.jpg

About 25 minutes of figure 8 sanding happened. I did drop down to 1000 grit for the next couple sheets, as 1200 just didn't seem to cut it. I let the weight of the powerhead keep it down on the sheet of paper, and grasped the end while moving it around. It seemed to do the trick, and quickly cleaned deck up. I didn't paint this up like the cylinder head to re-check true. Since it cleaned up fairly easily with the high grit papers, I wouldn't imagine it was that far off anyway.

I've run out of file space on this post, to be continued....
 

RogersJetboat454

Commander
Joined
Jul 9, 2010
Messages
2,964
Re: 1956 Evinrude Fleetwin freshen-up

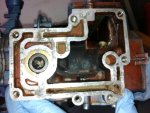
So... after all that sanding this is the end result;
IMG_0331.jpg

Not perfect, but fairly clean. There appears to be a bit of pitting around the rim of that bottom cylinder, just like on the head. But again, the head gasket should be able to make up for this.

Since the cylinders were still sealed off to protect them from schmeggy-weggys getting in them, I figured now would also be a good time to re-tap the head bolt holes IMG_0332.jpg, and also clean off the base of the powerhead.

I did a quickie scrape with a razor blade, which can get someone into trouble real quick by gouging an aluminum part like this. No aluminum was hurt in the making of this picture;IMG_0333.jpg

Not perfectly clean, then again the base of the powerhead doesn't see the high pressures that the cylinders do, thus the sealing surface isn't quite as critical as what a head gasket requires.

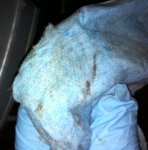
Everything was lightly blown off with compressed air, and the exposed surfaces were gently cleaned with carb cleaner sprayed on a shop towel. Time to remove the tape and plugs from the cylinders. The white glove, or I guess blue shop towel treatment was used to check for the presence of carbide dust in the cylinders. A shop rag was liberally doused with carb clean, and both cylinders were wiped out with the same rag. Here is the results;IMG_0335.jpg

A slight amount of dust on the edges of the cylinders, and the rest you see on the towel is just oil residue, and maybe a slight amount of regular dust from the cylinders being open to air for the past couple weeks. A second wipe with a clean dry shop towel showed no remaining dust.

The cylinders were then re-coated with PB blaster so they wouldn't be dry or flash rust. This is the pair together after they've been all cleaned up; IMG_0336.jpg

Don't they look smart.... :)

Think I will work on the leg next. I have a feeling I know why it's leaking. At the time when I put it together, I didn't have access to a service manual, so it didn't occur to me that the gaskets for the LU required any sort of sealer. All the gaskets were fitted dry, so this may be why she is leaking a bit of gear oil.
 

RogersJetboat454

Commander
Joined
Jul 9, 2010
Messages
2,964
Re: 1956 Evinrude Fleetwin freshen-up ** Trouble in the LU**

Re: 1956 Evinrude Fleetwin freshen-up ** Trouble in the LU**

So with the time I had today, I decided to pull the lower unit off the midsection and take a look to see if I could find whats leaking.

My conclusion is the seal between the lower pump housing and lower unit case is the main culprit, but the shift rod O-ring is leaking as well.

The seal to the pump housing is easy, I'll just use the correct sealer this time (duh). The bushing retaining the O-ring for the shift rod I assume needs to be pulled, and will probably become toast in the process, correct? Not a big deal, the bushing is 7 bucks from BRP.

The big deals are as follows;

The water pump housing is in tough shape. Being probably 21 or 22 years old when I did the impeller in this, and probably just wanting to get the job done I probably passed it off as "it will work for the time being". It is how ever showing gouging, and the opening for the drive shaft appears elongated as seen here;
IMG_0338.jpg

NOS housings are available, but at a minimum of $51 for what will be an occasional use outboard. I turned to fleabay and found a housing from a '54. Looks like it's in much better shape, and for $14.50 including shipping, I didn't think I could go wrong;
bttrpmphsng.jpg

What do you guys think?

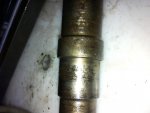
The other problem is the dreaded pinion shaft. Not sure if the spring has sprung in this one, since I could turn the shaft by hand with a bit a resistance. The main concern is this;
IMG_0337.jpg

A nice big chunk of the shaft eroded away from where the key is. I believe this shaft came from a lower I bought from NJ, so it stands to reason that may have been a lower that had salt water intrusion. If I remember correctly, this could have been a concern when I put it together the last time, but I believe my cousin, the owner of this motor and a mechanical engineer said try it out. I want to make it right though. I did find a NOS shaft, but the clown selling it wants $200 for it. With out the sentimental value of this motor that's about what this motor is worth on a good day. Again fleabay provided, and I'm rolling the dice on this one;
q135.jpg

It was $20 with shipping, so not a huge loss if it's a dud.

BTW, are there any obvious signs when the springs let go in these shafts, other then high resistance while assembled? I took a picture of the collar of the absorber of my shaft, and it appears there is a witness mark below the collar. Just wondering if this one was starting to go south anyway? Here is a pic of the collar;
IMG_0339.jpg
 

RogersJetboat454

Commander
Joined
Jul 9, 2010
Messages
2,964
Re: 1956 Evinrude Fleetwin freshen-up ** Pre-weekend update**

Re: 1956 Evinrude Fleetwin freshen-up ** Pre-weekend update**

Not hugely productive this week due to a lack of supplies. Ordered all that I should need. Complete engine gasket set, lower seal kit, impeller kit, points & condensers, ignition wire kits, carb kit, new low speed needle for the carb, OMC fuel connector O-rings, OMC shift rod bushing and seal. Last thing I need to do is get my hands on a tube of 3M 847.

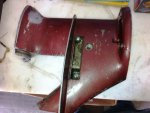
I was not digging the red lower, so I decided it was time for a color change.
IMG_0342.jpg

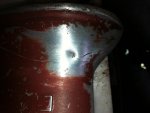
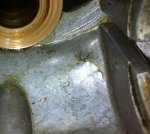
Taking a closer look, I saw where there was a bit of a dent in the lower.
IMG_0343.jpgIMG_0344.jpg

May or may not have been a concern for leakage. Nothing ever seemed to leak out of this while it was full of oil. Even still I figured it would be best to seal it off. I tried working with some sort or aluminum brazing wire that's supposed to melt at a low temp, like what a regular propane torch can put out. Unfortunately, it just couldn't get the area hot enough to effectively melt and bond the wire to the material. I didn't feel like trying MAPP either, and risk melting the lower. So I elected to patch her up with a little bit of JB on the outside. Seems to have adhered OK, and with a little feathering with sand paper you wouldn't know it's there unless you really looked for it.

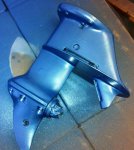
As far as changing the paint color, I scuffed the old red paint and bare aluminum with a 100 grit sanding sponge. Shot it with a few coats of high build primer. Lightly sanded the primer with 1K grit paper. For the actual paint, I'm far too cheap to order the paint from NY marine, or track down paint that BRP supposedly carries for this motor. After all, I have spent a crap load more then I expected to for this motor. I got in the zone (rare occurrence for me), and found a can of light metallic blue Duplicolor that is supposed to be a GM body color. It's fairly close. A bit lighter, and a bit less greener then the original polychromatic blue, but certainly a lot closer color then holiday bronze. :D

See what you think;
IMG_0346.jpg
 

RogersJetboat454

Commander
Joined
Jul 9, 2010
Messages
2,964
Re: 1956 Evinrude Fleetwin freshen-up ** Question**

Re: 1956 Evinrude Fleetwin freshen-up ** Question**

Since my posts tend to be long and wordy, I will ask my question to the experienced right off the bat.

I received all my new parts today. The ignition tune-up kit is a genuine BRP. My question is about the felt used to lube the magneto cam.

The current felt for my magneto cam disintegrated to oily mush;
IMG_0356.jpg

Unfortunately what I have to go by is a condensed service manual in a PDF (can't beat free), so I'm not entirely clear on how to install the new felt, but I would assume it would go something like this and trimmed to size;

IMG_0361.jpg

Yes?

The other questions I have is about the mag plate and lube.
This engine does not have an oil seal on the upper crank as Chinewalker pointed out. What it does have is an oil slinger that I assume keeps the bulk of the oil from welling up into the mag plate. This is the guy;
IMG_0354.jpg

I assume where it doesn't really seem to physically contact the crank, plus it's an odd part number for this that is NLA, no sense in disturbing it, right?

Also, what are people using for grease on the mag plates? There is a liberal amount of old grease on the retainer for the mag plate, and also on the mag plates collar where it rotates on the block halves. What are peoples opinions? Leave the old grease alone, or replace it, and with what? White lithium? Bearing? Molly?

The BRP tuneup kit did not include grease for the point piviots. Any recomendations there?

Thanks in advance.
 

RogersJetboat454

Commander
Joined
Jul 9, 2010
Messages
2,964
Re: 1956 Evinrude Fleetwin freshen-up ** Question**

Re: 1956 Evinrude Fleetwin freshen-up ** Question**

Crickets...
 

RogersJetboat454

Commander
Joined
Jul 9, 2010
Messages
2,964
Re: 1956 Evinrude Fleetwin freshen-up

OK... No answers, so I came up with my own, and they will be discussed as follows.

First off, here is my haul of goodies that I recieved yesterday;
IMG_0348.jpgIMG_0351.jpg

Despite the tarnishing, that's a NOS low speed needle for my carb, since mine was in sorry shape.

The other pic is all the gaskets I needed for the power head, lower unit, along with a water pump kit, points and condensers, ignition wire kit, and carb kit. I must apologize, because this stuff wasn't ordered from Iboats. I could have ordered allot of the stuff here, but not all of it since this is an older motor. The price difference was only a few dollars, so it made sense to get it all from one source. That source is a little bitty one man outfit dealing with vintage restoration parts. Not much of a competitor for Iboats.

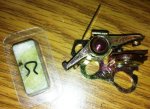
I was actually impressed that my source for these parts included BRP brand points and condensers instead of Sierra. I wasn't sure if BRP would have even made new sets for this old of an engine, but there they are, BRP P/N 172522.
IMG_0353.jpg
They even have the original OM (O around the M, for "Outboard Marine") stamped on them like the original OMC pieces. Perhaps BRP shipped the original OMC tooling to Turkey (county of manufacture) when they acquired OMC's assets?

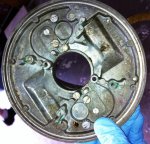
So todays work commenced with tackling the ignition system. The mag plate had all the old grease wiped off, then it was washed down with Lectra-Motive contact cleaner;
IMG_0363.jpg

I like Lectra-Motive for this job since it does fairly well at removing the oils and grease without leaving a residue. If you will notice, most of the bolts that retain the ignition components are attached to the mag plate. Not only does this assure they are clean too, but it also keeps them in order with their respective location so you don't have a work bench with a bunch of different screws that you are playing the guessing game on where they go when it's assembly time. I also did this;
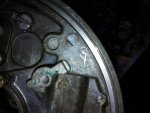
IMG_0367.jpg

You see the "B" scribed on the plate? That's for quick reference that the coil that lives there is for the bottom cylinder. I did do a mark for the top one as well. It looked like this; T :p

Scroll down....
 

RogersJetboat454

Commander
Joined
Jul 9, 2010
Messages
2,964
Re: 1956 Evinrude Fleetwin freshen-up

The mag plate support and retaining ring were removed, wiped down, and sprayed with some Lectra-Motive. I dug deep into my bag of lubricants, and after some careful consideration, this is what I decided to use;
IMG_0365.jpg

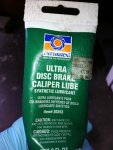
Slide grease? Yep... My considerations for using this stuff were that it's thick, it's meant for high temps, it shouldn't melt into oil at high temps, and it's pretty water resistant. Good reasons in my book. So the support and ring had a thin coat applied to the surfaces of where the ring contacts the support, and the support contacts the bottom of the mag plate.
IMG_0368.jpg

The opening of the mag plate that pivots on the block halves had a thin coat applied as well.

It was time to start setting up the points. Since BRP doesn't include any form of lube with the tune-up kit, again after some long hard consideration, I put a little dollop of the slide lube on the pivot pins for the points. Something like this;
IMG_0371.jpg

The points were installed along with their clips and retainers. The lock down screws for the points were left snug (but not too snug) so that they could be adjusted with the eccentric screws. The crank was rotated so that the contact (the part that touches the mag cam) of each the points was on the part of the magneto cam that said "TOP". They were then adjusted to a tight .020 with a feeler gauge. Some would say good enough at this point. Millions of these engines run trouble free with this setting. I wanted to dial it in a little bit more....

With only the points now on the mag plate, I fed a couple of jumper wires through the holes for the ignition wires and clipped them to the place on the points where the coils and condensers are screwed on. Like this;
IMG_0372.jpg

The mag plate was installed on the retaining ring with the two screws specifically tasked for this job (two other screws that hold the center of the coils also screw into the ring, but are not needed for this). A ground wire was then clipped to the block (I chose one of the carb studs for this). The flywheel was cleaned up, and two notches on either side were found and marked, like this;
IMG_0373.jpg

TY stands for Top cylinder, yellow jumper (you can use any color jumpers you like).
The flywheel was then loosely installed on the crank. My multi-meter was pulled out, and set on the ohms scale. What am I doing? Seting the dwell... ;)

Dwell relates to the amount of crank shaft angle that the ignition points open or close. The idea behind setting the dwell is not only to correctly charge the coils, but also to open the points at the correct time, thus collapsing the magnetic field in the primary windings of the coils, causing secondary ignition to fire the plug.

I don't know if all universal ignition Evinrudes and Johnsons have the markings on the flywheel and mag plate to do this, but mine did. I got the information for this procedure from here; http://www.outboard-boat-motor-repa...on 3 HP 1952-1967 Ignition System Tune-up.htm

Scroll down again please... ;)
 

nwcove

Admiral
Joined
May 16, 2011
Messages
6,293
Re: 1956 Evinrude Fleetwin freshen-up

just got done putting the mag plate back on a 58 7.5, ( 20 mins ago) . did the ohm meter on the timing, but im sure after installing the coils and condensors , my work on the points setting isnt as exact as it was.
 

RogersJetboat454

Commander
Joined
Jul 9, 2010
Messages
2,964
Re: 1956 Evinrude Fleetwin freshen-up

I don't have a lightwin, but it's the same ignition. So following the lead of that site, I started checking to see where my point's are opening in reference to the two notches on the mag plate. This is what it looked like initially;
IMG_0378.jpg

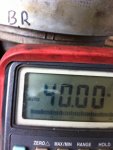
Under that "BR" (for bottom cylinder, red) is the notch on the flywheel to denote where the points open for the bottom cylinder in relation to the mag plate. If you can make it out on my mag plate, there are two raised bars that theoretically the notch on the flywheel should be at when the points start to open, causing the ignition to fire. As you can tell, mine was off a few degrees. Following the information from the above posted web site, I started to adjust the points through the opening in the flywheel, rotating the adjustment screw a little bit at a time. Each time I made a fine adjustment, I would then rotate the flywheel by hand, and observe where my multi-meter would indicate infinity (meaning open points). My multimeter does this by displaying "40.00" with the 4 blinking. Some other meters will display "OL", or "Ouch" when they are indicating resistance is infinite. After a little bit of fiddling, I got it down with-in the two marks on the mag plate;
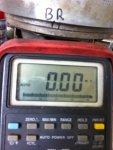
IMG_0379.jpg

At first glance you may say "but wait a minute, your meter was saying no resistance"! Well when I snapped the picture, the 4 was in mid blink ;). The points were then locked down, and checked again, and I repeated this procedure on the on the other side.

At this point, it was time to invite the rest of the ignition back to the party. I removed the mag plate again so that I could install my pretty new wires. I made it a point to put some dielectric grease on the tips of the plug wires where they get inserted into the coils. For anybody who may be following this for info for their rebuild, this link pretty much covers troubleshooting the system, and component locations (a good reference for both); http://forums.iboats.com/showthread.php?t=531940

As far as the oiler wick for the mag cam that I asked about in one of my previous posts, I installed it as it was pictured, and it was trimmed a little bit as it seemed to get a bit close to the points at full length.The condensers were installed, and everything was secured. I made it a point to be sure that the laminates of the coils were flush with the bosses on the mag plate. The plug wires were left at full length. I figured it was best to do this to allow all the slack I may need when the power head gets bolted back down to the mid section, and the wires are routed in their final locations. So with everything buttoned up, the flywheel was again loosely tossed on.

I decided that since I now have a head gasket, and some time, probably best to get the cylinder head back on. The head bolts were run through a die to clean them up, and lightly oiled. There was a skim coat of 2 stroke oil applied to the cylinders, and the gasket surfaces were cleaned up with brake clean. The head was then torqued down with an inch pound torque wrench starting with the center bolts first, and working my way out. Initial torque was 40 inch pounds. Then the bolts were re-torqued to 85 inch pounds following the same working from the center out method. This ensures that that head is evenly torqued to the block.

I also installed the transfer port covers with their new gaskets, but before I installed them, I did a little tracing;
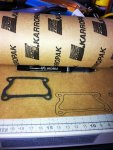
IMG_0382.jpg

I'm pretty good at cutting gaskets from scratch, but store bought usually look and fit just a little better. I figured I can hold on to this sheet of gasket material, and if for some reason I ever need to remove something from the engine, and the gasket is toast, I should be able to cut one no sweat that's a perfect match. I plan on doing this for all the gaskets so I will have a spare set on one sheet.

So with that all put together, hey I can check both spark and compression!!! :D

I pulled out my spark checker, and set it for "SE" (small engine). It was tried on both upper and lower, and I got a nice hot blue spark with little effort spinning the flywheel by hand. I decided to ramp it up a bit to the 20 (20Kv) position, and again two nice hot blue snappy sparks. I decided to really push it, and open it up a full half inch (above and beyond what most people say is required for one of these ignitions to fire across). Top cylinder was able to do it a couple times, not so much on the bottom. Dialing it back in a few threads, and the bottom sparked no problem. I would call this success, considering all this was done while I was flicking the flywheel by hand.

Compression test... The 10,000 dollar question I couldn't answer when this thread started. Again while flicking the flywheel by hand, and holding the power head with the other, this is what I came up with;
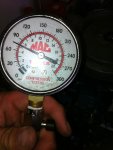
IMG_0383.jpg

If you can't read that, it's a hair over 75 Psi, and both cylinders were dead nuts the same. Pretty darn respectable for a cold engine that hasn't run in years, and was literally being turned over by hand. :D

If I have time, I will tackle the carb tomorrow. I don't know if anybody is following this, at times I feel like I'm writing a diary or book report. I just figure this may be useful for someone who is working on one of these engines (as if there aren't enough posts about them), or maybe if someone wants to pass the time reading while on the hopper... ;)
 

RogersJetboat454

Commander
Joined
Jul 9, 2010
Messages
2,964
Re: 1956 Evinrude Fleetwin freshen-up

just got done putting the mag plate back on a 58 7.5, ( 20 mins ago) . did the ohm meter on the timing, but im sure after installing the coils and condensors , my work on the points setting isnt as exact as it was.
Maybe, but I'll bet even after being disturbed, it was still probably closer to perfect then the set it to .020 and forget it.
 

nwcove

Admiral
Joined
May 16, 2011
Messages
6,293
Re: 1956 Evinrude Fleetwin freshen-up

fully agree.....my meter beeped about an inch before the timing marks....id guess it was out about 10 degrees. i do wish there was a grommet in the mag plate tho, just to dial it all in after assembly.
 

duckland23

Petty Officer 2nd Class
Joined
Apr 23, 2012
Messages
175
Re: 1956 Evinrude Fleetwin freshen-up

Nice that you got your Motor in the shape it is . I still got 40 psi on compression from my engine . But I had her out on the water and she did run very well . I pulled my muscle from carrying the motor down three flights of stairs , what a pain in the but .
 

RogersJetboat454

Commander
Joined
Jul 9, 2010
Messages
2,964
Re: 1956 Evinrude Fleetwin freshen-up

fully agree.....my meter beeped about an inch before the timing marks....id guess it was out about 10 degrees. i do wish there was a grommet in the mag plate tho, just to dial it all in after assembly.

Yeah that would be nice. I did enjoy the meticulous process of setting it up just right, that's my bag. If I had to do this for a paycheck, I would have had to do it allot faster, or better yet buy a timing fixture so it can all be set up with out adding and removing parts.
 

RogersJetboat454

Commander
Joined
Jul 9, 2010
Messages
2,964
Re: 1956 Evinrude Fleetwin freshen-up

Nice that you got your Motor in the shape it is . I still got 40 psi on compression from my engine . But I had her out on the water and she did run very well . I pulled my muscle from carrying the motor down three flights of stairs , what a pain in the but .

Thanks.
Bummer to hear about your motor, are you sure the gauge is right? Doesn't seem like it should run with only 40 Psi. Have you brought this up in your thread? Maybe we can throw some ideas around to figure this out.
 

jbjennings

Captain
Joined
Jul 18, 2007
Messages
3,903
Re: 1956 Evinrude Fleetwin freshen-up

Nice that you got your Motor in the shape it is . I still got 40 psi on compression from my engine . But I had her out on the water and she did run very well . I pulled my muscle from carrying the motor down three flights of stairs , what a pain in the but .

Duckland,
Just for the sake of clarity:
Your motor does not have 40psi of compression and is running very well--or at all. Your motor never did have low compression and you almost positively re-ringed it needlessly--as everyone tried to tell you. You had a spark problem.
Either way, I'm glad your motor is running good.
But if anyone reads this thread when it's archived, a 50's 7.5hp evinrude outboard will not run at all on 40psi of compression.
Rogers,
Nice job on your 7.5. I look forward to some pics of the finished motor.
JBJ
 

nwcove

Admiral
Joined
May 16, 2011
Messages
6,293
Re: 1956 Evinrude Fleetwin freshen-up

Yeah that would be nice. I did enjoy the meticulous process of setting it up just right, that's my bag. If I had to do this for a paycheck, I would have had to do it allot faster, or better yet buy a timing fixture so it can all be set up with out adding and removing parts.

could the timing be set "perfectly" with a cheap timing light?? just curious?
 

HighTrim

Supreme Mariner
Joined
Jun 21, 2007
Messages
10,486
Re: 1956 Evinrude Fleetwin freshen-up

A timing fixture as mentioned is about the best tool you could buy. Saves all the hassle of running jumper leads through the mag plate. When adjusting old points, set it so that the pointer is exactly between the hash marks. When installing new points, adjust so that the pointer is over the first has mark. Once worn in, it will be between. The main reason for setting the points with a timing fixture, or the method you used, is to get them exactly 180 degrees apart. That is important. If anyone wants a timing fixure, message F_R on this forum. He makes them.

I would also reccomend not using oil on the head bolts. They get overtorqued that way, and you could snap them, especially if you are using the original bolts. OMC Gasket Sealing Compound is what is reccomended, I have had good success with it.

Just a note, the top coil is always directly over the carb, if you ever forget to label it.

Cant wait to see how she runs.
 
Top