1962 Sea King Restoration

coolness

Petty Officer 2nd Class
Joined
Aug 4, 2010
Messages
150
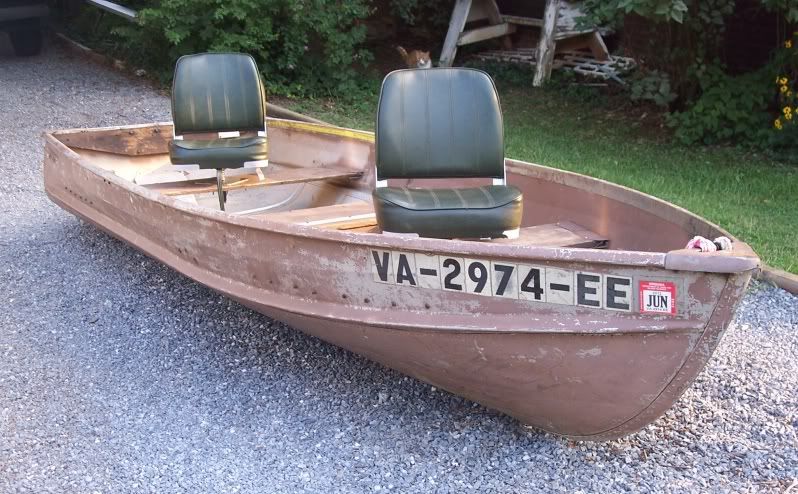
I bought this 12' Sea King V-Hull for $175 from a gentleman who couldn't fish with it anymore. The hull is in good shape. The PO said it leaks a 1/2 cup after 4 hours of fishing. Sounds like a job for Gluvit. Would I apply it on the rivets on the outside of the hull?

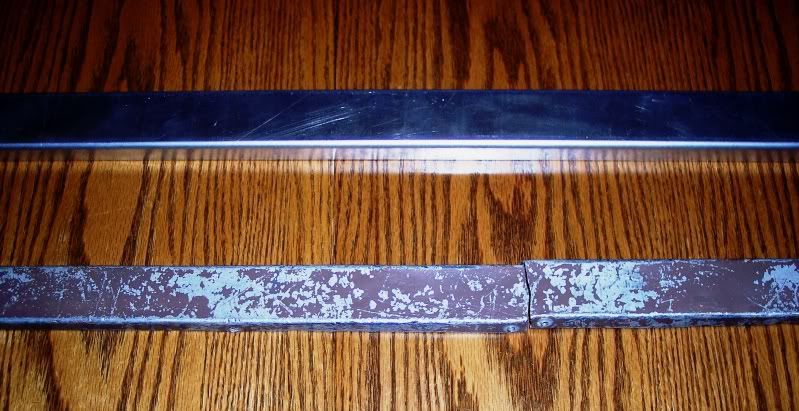
I've removed the seat boards and transom boards. I am replacing the seat boards and the inner tramsom board was rotted, but still useful for a template. I power washed the hull inside and out.

I have a Minn-Kota 65MX to use (Dad had it) and also an outboard I will get from Dad's this weekend in New York State. I can't remember what the make of it is but it did run. I think it's from the 1950's or early 60's. I hope it's less than 10 hp. :) Another project.

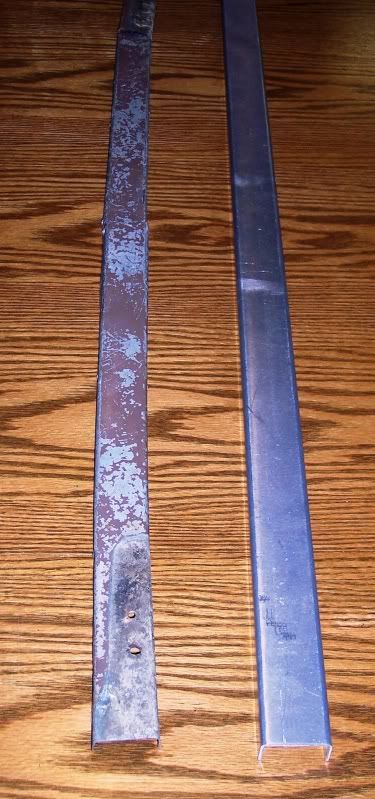
I have to strip the paint. It's not heavily painted; what could I use other than stripper to remove it? I see from reading this forum that I need to use an etching primer and marine paint. What type of wood should I use for the transom board? Not sure about the seat boards either; might want to use a lacquer or waterproof sealer on them for that natural wood look.

I welcome any and all tips. There are many experienced restorers on this forum; it's a great resource and I enjoy reading all the posts. I'm in the process of trying to sell a 1962 Buick and then possibly buy a 1972 Starcraft Capri Tri-Hull I/O I've been eyeing....

seaking.jpg


http://i35.photobucket.com/albums/d199/coolness407/Sea King Restoration/100_2740.jpg

http://i35.photobucket.com/albums/d199/coolness407/Sea King Restoration/100_2741.jpg

http://i35.photobucket.com/albums/d199/coolness407/Sea King Restoration/100_2742.jpg

http://i35.photobucket.com/albums/d199/coolness407/Sea King Restoration/100_2743.jpg

http://i35.photobucket.com/albums/d199/coolness407/Sea King Restoration/100_2744.jpg

http://i35.photobucket.com/albums/d199/coolness407/Sea King Restoration/100_2745.jpg

http://i35.photobucket.com/albums/d199/coolness407/Sea King Restoration/100_2746.jpg

http://i35.photobucket.com/albums/d199/coolness407/Sea King Restoration/100_2747.jpg

http://i35.photobucket.com/albums/d199/coolness407/Sea King Restoration/seaking.jpg
 
Last edited:

coolness

Petty Officer 2nd Class
Joined
Aug 4, 2010
Messages
150
Re: 1962 Sea King Restoration

Here is a better pic of the Sea King. I forgot to mention that the seats came with the boat; excellent condition. :)

100_2734.jpg
 

Woodonglass

Supreme Mariner
Joined
Dec 29, 2009
Messages
25,929
Re: 1962 Sea King Restoration

Nice looking rig. Gluvit is typically used on the INSIDE of the boat. You should use a wire brush or a wire wheel on a drill and clean around the rivets as best you can before applying the gluvit. You can use Exterior Grade Plywood for the wood on the seats. Stain it with Epiphanes stain and then use several coats of Epiphanes Marine varnish. It will last for years. The transom should be coated with Polyester resin and a layer of 6 oz cloth on both sides followed with a couple more coats of resin. That will make it last for ever. If you drill holes in the transom for mounting bolts etc... make sure to coat the holes with resin to seal them up and prevent water intrusion. Sand the outside of the hull with a random orbital sander and 80 grit but don't get carried away. Then use a self etching primer and check out Rustoleums Professional Oilbased paint. Lot's of people on here use it to paint their Aluminum boats and have GREAT results.

Good Luck with your project

I'm just sayin...:D
 

coolness

Petty Officer 2nd Class
Joined
Aug 4, 2010
Messages
150
Re: 1962 Sea King Restoration

Thanks for the tips Woodonglass. Much appreciated!!
 

bananaboater

Ensign
Joined
Jul 27, 2009
Messages
932
Re: 1962 Sea King Restoration

You have to cover over the Gluvit; paint, decking, whatever. The sunlight will destroy it if it is not covered in some fashion.

Most folks use a high grade exterior ply epoxy coated for the transom. Some fiberglass it too.
 
Last edited:

coolness

Petty Officer 2nd Class
Joined
Aug 4, 2010
Messages
150
Re: 1962 Sea King Restoration

Where can I find Gluvit? I looked at Home Depot last night and they had no idea what it was... I do see that it's available online and expensive. Anyone have any left over you can spare?? :)

I've had to remove and will replace the aluminum channel/cap that runs along the top of the transom board. It's cracked (broken) in 3 places and will not be wide enough for a 1 1/2" board. The old transom board is 1 1/4" thick. (?) A friend at work can make it for me; if not aluminum then galvanized. Thoughts??
 

JAFO1

Petty Officer 1st Class
Joined
Jul 1, 2010
Messages
279
Re: 1962 Sea King Restoration

if not aluminum then galvanized. Thoughts??[/QUOTE said:
I don't think aluminum and galvanized metal are comparable. Don't use treated wood for the transom, the chemicals in the treated wood will have a bad reaction with the aluminum boat. Other, more knowledgeable iboaters will chime in to correct me if I'm wrong.
 

Woodonglass

Supreme Mariner
Joined
Dec 29, 2009
Messages
25,929
Re: 1962 Sea King Restoration

Gluvit should be available at Marine Dealers i.e. Marine West or other such places. Check your Yellow Pages. It IS Expensive. If your want to try and go "On the Cheap" You MIGHT try this


http://www.boatersworld.com/product/MP80812934.htm?utm_medium=productsearch&utm_source=google

I am NOT recommending it. Just saying it MIGHT work for a while.

I Still recommend using the Gluvit. And again I recommend using exterior Ply and fiberglassing for your seats and your transom. It will last longer than any other wood you could use.

I'm just sayin...:D
 

coolness

Petty Officer 2nd Class
Joined
Aug 4, 2010
Messages
150
Re: 1962 Sea King Restoration

I guess I'd best use the Gluvit.;)

My son and I removed 24 screws from the Sea King tonight. Man, they were rusted. They were holding the front and back seat mounts (for the boards) The PO had moved the front seat back and the back seat forward for more room. Great idea but he used screws and nuts.... I had to cut some off with a hacksaw. The old holes where the mounts were previously located had screws and nuts in them... What a mess.

My friend at work made a new aluminum transom cap for me today. He made it 1/4" longer and wide enough inside for a 1 1/2" inch board. He also brought the sides down by 1/4' on each side. He did a great job. :)

I removed the bow cap as well. It also was screwed on with bolts and nuts. Rusted.... I am going to use all new aluminum rivets to replace the screws. It's coming along well. Vacation next week so it will be on hold for a bit....

Here is a pic of the new and old transom caps.

100_2791.jpg


100_2790.jpg
 

Bob_VT

Moderator & Unofficial iBoats Historian
Staff member
Joined
May 19, 2001
Messages
26,065
Re: 1962 Sea King Restoration

WOW I can tell you a WHOLE bunch of people would love to have a friend that makes nice transom caps! That is the nicest I have seen ;)
 

Woodonglass

Supreme Mariner
Joined
Dec 29, 2009
Messages
25,929
Re: 1962 Sea King Restoration

That IS a Friend!!!! Can I borrow Him when I start MY project?????


I'm just stayin...:D
 

coolness

Petty Officer 2nd Class
Joined
Aug 4, 2010
Messages
150
Re: 1962 Sea King Restoration

Yes - he did a great job on the transom cap. I told him he should open a shop. He is a maintenance man and sheet metal mechanic. He is one talented dude.

Question - the inner transom board will be 1 1/2" thick. Should I glue (liquid nails) 2 pieces of marine grade plywood together and cut it to shape or use one piece of some other type of wood - say oak, etc....I like the 2 piece idea.
 

JAFO1

Petty Officer 1st Class
Joined
Jul 1, 2010
Messages
279
Re: 1962 Sea King Restoration

I just did my transom, with the advise of many here. I used A/C exterior grade and laminated it using poly and glass. I think you could get by with PL adhesive (from Home Depot and such). After I laminated the plywood, then I cut and shaped the blank. I felt it would be easier to cut two rectangles, laminate, and then shape one piece vs. shaping two pieces and then gluing.
 

coolness

Petty Officer 2nd Class
Joined
Aug 4, 2010
Messages
150
Re: 1962 Sea King Restoration

Hey JAFO1!! Thanks. I think I will do just that. Don't want it to rot!! :D
 

Woodonglass

Supreme Mariner
Joined
Dec 29, 2009
Messages
25,929
Re: 1962 Sea King Restoration

The transom should be coated with Polyester resin and a layer of 6 oz cloth on both sides followed with a couple more coats of resin. That will make it last for ever. Pay close attention to the edges of the plywood with the resin and the glasss. If you drill holes in the transom for mounting bolts etc... make sure to coat the holes and the screws and bolts with resin to seal them up and prevent water intrusion.

I'm just sayin...:D
 

coolness

Petty Officer 2nd Class
Joined
Aug 4, 2010
Messages
150
Re: 1962 Sea King Restoration

Hey guys - I arrived at my Dad's in New York State (near the Finger Lakes) and couldn't wait to look at that old outboard he had in the back room.

Wow!! I had no idea... It's a 1948 Scott-Atwater 3.6 hp. I couldn't believe that it was such an antique. We had it running a few years ago and it ran well. It should power the Sea King just fine.....

It's intact but needs a check-up and I want to give it a new paint job. Needs a new rubber steering handle. What a sweet find..... Keep ya posted!!

Any idea what the value could be?? Never gonna sell it though. :D
 

coolness

Petty Officer 2nd Class
Joined
Aug 4, 2010
Messages
150
Re: 1962 Sea King Restoration

I haven't updated for a few days..... I have finished sanding the hull and wire brushed all the interior rivets. I cleaned up the front nose piece and rear corner brackets. I took them off the boat. :)

I used a wire wheel to remove the rust from the posts on the swivel seat mounts; I sprayed on a couple coats of rust converter and painted them with Rustoleum for a top coat.

Tomorrow I am buying marine grade plywood (3/4") and will make the inner and outer transom boards. The inner board had a "wing" shape; I'm going to make it rectangular. I'm gluing two pieces together with epoxy to make it 1 1/2" thick. The outer one was small so I will also make that larger to accomodate both the Scottie and the Minn-Kota. Thanks to good tips here on iboats, I'll give them 3 coats of Polyester Resin. Same for the seat boards.

As for painting, I need to put in rivets where I took out unnecessary bolts and nuts. Then comes the Gluvit...

How is this for paint - Rustoleum Self-etching primer followed by 2 coats of Rustoleum oil-based paint for metal. I'm going to roll and tip. ;) Do I lightly sand between coats of primer and paint?

I think I'll paint the outer hull white and the inside gray. Sound good? Any tips and/or suggestions? I've read about the chromate and it looks like nasty stuff...

It sure is a lot of work but it's awesome to see the results.
 

Woodonglass

Supreme Mariner
Joined
Dec 29, 2009
Messages
25,929
Re: 1962 Sea King Restoration

Wet sand with 220 after priming. Don't forget that poly resin is NO GOOD with out fiberglass mat.

I'm just sayin...:D
 

coolness

Petty Officer 2nd Class
Joined
Aug 4, 2010
Messages
150
Re: 1962 Sea King Restoration

I accomplished quite a bit today on the Sea King. I could not find Marine Grade Plywood. I found out it would be $80 a sheet!! In a city with 2 Lowe's and a Home Depot. :confused:

I finally did find a 7 layer plywood at Lowe's that will do the trick for the transom and seats. It was quite heavy (solid with no voids) I talked with a contractor guy that was buying lumber; he was quite knowledgeable. Unlike the Lowe's or Home Depot guys... (no offense if anyone works there) :)

He said it will work just fine with the Fiberglass mat and resin and last a long time. I cut the seat and transom boards today. I glued and clamped the transom boards together. I was able to use a table saw that used to belong to my Dad. ;)

I also bought a Pop rivet gun and rivets; I installed rivets where there were previously screws and nuts. They were a bit long so I sawed them shorter and smoothed them off with a grinding wheel.

I've decided to paint the outside Hunter Green and the inside a smoky gray. I still have to buy a self-etching primer. Hope to resin the seat boards tomorrow. I also have to order Gluvit tomorrow.....:cool:
 
Top