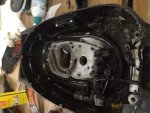
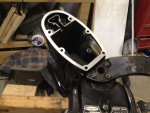
1975 Mercury 200 20 hp powerhead swap

pbeamtn

Cadet
Joined
Jun 8, 2008
Messages
25
In an earlier thread, I determined my new-to-me 1975 Mercury 200 (S/N 4148487) was worn out. It had only 60 PSI compression in each of its two cylinders. So, I decided to purchase a powerhead on eBay that claimed 115 PSI on each for $80 + $30 shipping. For posterity, I'm going to document what I am doing to swap the powerheads and hopefully have an operational motor before the weekend. I intend to take to boat on vacation in 2 weeks, and would hate to get stranded with the family. Please chime in if I am doing something stupid as I have not worked much on outboards before.

The online manual I am using is found here:
http://boatinfo.no/lib/mercury/manuals/mercury_1965-1989_2-40.html#/0

I have a Seloc manual coming, but it has not yet arrived.

Also, if you do things right, you can get parts diagrams here:
https://webapps.brunswick.com/literature/literatureSearch.do

I thought it would be a good idea to replace the crankshaft seals while the powerhead is out, but I am now thinking that is a bad idea. On the flywheel side I can see the edge of the seal, but it looks hard to remove. I'm also not sure if I need to pull the small cover over the bearing or not. The seal on the crank side is totally hidden. The manual does not cover simple procedures like replacing the seals, so the only instructions I have are complete block disassembly, and that looks too complicated. I see no evidence of leakage, so I am going to assume the seals are good.
 

pbeamtn

Cadet
Joined
Jun 8, 2008
Messages
25
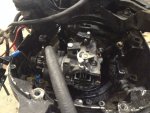
Started in earnest this evening hoping to get the old powerhead off. Here is the old motor:


Getting to the flywheel, there is a label that points out two bolts that should be removed to install the puller. I had read that you should not use a puller that applies pressure on the outside, so I borrowed a flywheel puller from my dad. Then I had to go to Lowe's and get some 1/4-28 bolts to put into the flywheel. Next time, get screws longer than 2".


The flywheel was stubborn! I had to apply more pressure than made me comfortable and some "love taps" from a hammer and it finally popped off.


I did use some penetrating oil but I don't think it penetrated very far. There was, however, a puddle around the seal, which leads me to believe the top seal was probably leaking.
 

pbeamtn

Cadet
Joined
Jun 8, 2008
Messages
25
I've had the carburetor off a number of times, so exposing and removing it is no big deal.

photo 1.JPG

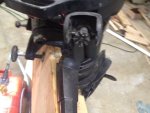
I recall from the manual that removing the throttle is something that needs to be done. It took me a while to figure out the thing to do was to remove the two torx screws in the tiller handle and pull the throttle shaft out.

photo 2.JPG


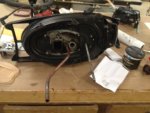
The it seemed all I had to do is remove 6 nuts from the bottom and pull the powerhead off. I could get 3 with a socket -- on one the stud actually came out. Two required an open end wrench where you could only turn a fraction and then turn the wrench over and move a little more. However, taking the 6 nuts off did not immediately free the powerhead. I lifted, pulled, tapped and everything I could think of and it barely budged. I did manage to pry on the front studs and it finally broke free. However, i got more than I expected:

photo 3.JPG

It looks like there might be two bolts in front of the powerhead I need to remove to just get the powerhead off. It was not my intention to pull the water tube and the shift rod. I also don't have the gasket that goes here, so I'll have to make a new one since it would take a week or more to get one sent to me.

Enough for the night. I hope to finish disaasembly and start putting things back together tomorrow night. I might have to reference these pictures to see how it goes together.
 
Last edited:

pbeamtn

Cadet
Joined
Jun 8, 2008
Messages
25
Went ahead and ordered the two gaskets between the powerhead and the driveshaft housing from iBoats with 2 day delivery. Hopefully, they will come Friday and I can finish things up with time to test this weekend. The part numbers are Sierra 18-0333 and 18-0334. They are not cheap, but I began to doubt my ability to make reasonable gaskets from scratch.
 

OCboat

Seaman
Joined
Apr 26, 2007
Messages
73
Good luck with the swap. I will be following this thread in case I need to do something like this in the future. Your pictures are not showing up for me. I'm getting small blue boxes with question marks in them.
 

pbeamtn

Cadet
Joined
Jun 8, 2008
Messages
25
I'm seeing the blue boxes as well. I have been having issues posting with Google Chome -- it always says there is an error, but past posts have shown up. I will attempt to repost those pictures plus new ones. I intend to get everything back together today and see if it runs. I have lots of pictures to post, so I'll try IE and see if that works any better
 

pbeamtn

Cadet
Joined
Jun 8, 2008
Messages
25
Received the Seloc service manual, and it is exactly the same as the electronic version listed in my first post. It is, however, much easier to read the paper version.

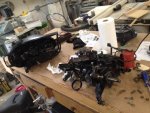
I put the new and the old powerheads side by side so I could transfer the ignition components.
photo 1.JPG


I finally figured out how to separate the old powerhead from the adapter plate. The factory used a lot of gasket adhesive, and there was some corrosion around a couple of the studs. The bottom cowl doesn't leave a lot of room to pry, but things finally came apart. I forgot how much fun it is not to clean off gasket surfaces, but I finally got them clean.

photo 3.JPG


photo 4.JPG
 

pbeamtn

Cadet
Joined
Jun 8, 2008
Messages
25
I'm having some trouble getting pictures to post properly, so I'll describe the rest of the story now and follow up with pictures later.

I got everything assembled and noticed I broke a wire. Fortunately, I had a lot of pictures to reference so I could find out where it went. Unfortunately, it went to the kill switch and broke off right at the base of the switch. There was not enough wire sticking out to solder to, and the switch was hard to find so I used the soldering iron to melt away some of the plastic to get something more substantial to solder to. Then I topped off with some RTV. I still think I need to look for a new switch.

One of the things I was anxious to do was to test compression since this was a used powerhead I had no way of knowing what kind of condition it was in. The seller said 115 PSI, and I wanted to verify. When I hooked up my compression tester, it read only 60 PSI -- the same as my old powerhead! This was disappointing, and I felt like i wasted a lot of time and money doing this. It seemed suspicious that every cylinder I tested measured 60 PSI, and after some investigation I determined that this is a common problem with Harbor Freight compression testers. I took it back and exchanged it, and the new one reads 55 PSI. I was ready to quit, but I borrowed a Snap-on set from a friend, and it reads 125 PSI and 120 PSI, so I'm in business! I may vow again to never ever buy something from Harbor Freight that is more complicated than a wrench!

Unfortunately, I am back to my starting place. Reassembled, I have to use a shot of starting fluid to get it to start, but then it runs and pumps water fine. I put it in my little pond to try adjusting the carburetor, but something is just not right. I'm going to have to study to determine whether the timing is right and exactly how I am supposed to adjust the carb. Perhaps, there is still some small piece of dirt left in the carb that I have missed.
 

Chinewalker

Fleet Admiral
Joined
Aug 19, 2001
Messages
8,902
Your starting issue may be choke related. Those cable-chokes have a habit of getting out of whack to the point where they don't fully close. Make sure it is adjusted so that the flapper closes all the way.
 

pbeamtn

Cadet
Joined
Jun 8, 2008
Messages
25
Thanks. I am going to check all the carb stuff again tonight. The fact that I can spray a little starting fluid in the carb and the thing will start leads me to believe I am not getting the proper amount of fuel when starting. I just wish I had spent the past 2 weeks looking in this direction instead of chasing what that stupid HF compression tester told me.
 
Top