1977 Cruise Boats Restore

RobbyA

Petty Officer 1st Class
Joined
Jun 5, 2010
Messages
306
Re: 1977 Cruise Boats Restore

Just caught this thread and read it. Super nice job!!! Even though you lost your phone, you still had plenty of good pics to look at. Keep it up!
 

ezmobee

Supreme Mariner
Joined
Mar 26, 2007
Messages
23,767
Re: 1977 Cruise Boats Restore

Good point Greg. I'm having a strength/weight dilemma myself. I built my bow deck here http://i176.photobucket.com/albums/w200/ezmobee/New Boat/DSCF2539.jpg out of 1/2" and cutting the hatches out just killed it in the strength dept and it's already cracked in two places. I'm going to have to rebuild it and am trying to decide whether to use thicker ply or just better brace it.
 
Joined
Aug 17, 2009
Messages
941
Re: 1977 Cruise Boats Restore

Now that the boat has been refitted internally and is structurally sound it was time to lift the boat off the trailer to take a look at the under side of the hull and make changes to the trailer bunks as well. Since I will be using this boat mainly in the upper part of the Chesapeake Bay region and there is a good chance that it may sit in the water for a couple of weeks from time to time, I decided to bottom paint the hull. It currently has bottom paint on there already. I moved the boat into position and lifted it off the trailer and onto a pair of stands. Once it was up in the air, I carefully inspected the bottom for any signs of damage, gouges, etc. Guess what...the bottom was in GREAT shape! There were no dings, scratches, gouges whatsoever! UNBELIEVABLE! Man that just saved me a ton of work. So I proceeded to sand and clean the bottom up for a new coat of antifouling paint. I thoroughly sanded the old paint and removed nearly all of it. I then came back and wiped everything down with acetone. I taped off the water line on the hull and applied two coats of a water based ablative bottom paint?black in color.

Before:

P1010914.jpg


After:

P1010917.jpg


While the boat was off the trailer, I had a chance to make changes to the bunks. Originally there were only two bunks on the trailer. The original bunks were not located under the stringers. So I relocated the main bunks to line up on the main stringers. I also lengthened them to better support the stern of the boat. I then added two additional bunks on the outside to support the outer most chine area were the hull side meets the hull bottom. These bunks better stabilize the boat on the trailer. Finally I re-carpeted the bunks and added those plastic skid plates to them so the boat slides easier on and off the trailer. Sorry, not a great pic of this but it shows placement. When I get a chance I will take a few pics of the trailer and edit this post.

IMAG0020-1.jpg
 
Joined
Aug 17, 2009
Messages
941
Re: 1977 Cruise Boats Restore

Just caught this thread and read it. Super nice job!!! Even though you lost your phone, you still had plenty of good pics to look at. Keep it up!

Thanks Robby. I have corrected the picture problem and I have tried to make sure and document more as I go. Working by myself it's a little hard to stop and take pics when you are knee deep into something...especially when wetting out glass. :)
 
Joined
Aug 17, 2009
Messages
941
Re: 1977 Cruise Boats Restore

Good point Greg. I'm having a strength/weight dilemma myself. I built my bow deck here http://i176.photobucket.com/albums/w200/ezmobee/New Boat/DSCF2539.jpg out of 1/2" and cutting the hatches out just killed it in the strength dept and it's already cracked in two places. I'm going to have to rebuild it and am trying to decide whether to use thicker ply or just better brace it.

EZ,
I have read your entire thread and your boat turned out great. I remeber reading the part where you fabricated these. Did the lids crack or somewhere else on the box area itself?
 

ezmobee

Supreme Mariner
Joined
Mar 26, 2007
Messages
23,767
Re: 1977 Cruise Boats Restore

The thin areas next to the lids.

I like that bottom paint. Normally I think it's heinous but black was a good choice.
 
Joined
Aug 17, 2009
Messages
941
Re: 1977 Cruise Boats Restore

EZ,

I re-looked at your paost when you made those bow boxes. It looks like quite a good span at the widest part...maybe a lttile too much for 1/2" ply. I don't like to span anything more than around 12"-14" with 1/2" ply. 3/4" would be better and even that will flex a little also.
 
Joined
Aug 17, 2009
Messages
941
Re: 1977 Cruise Boats Restore

The thin areas next to the lids.

I like that bottom paint. Normally I think it's heinous but black was a good choice.

Okay gotcha.

Thanks. It actually gives it a cleaner look IMO than say a color. It goes well with the final paint also...that part is coming up next.
 
Joined
Aug 17, 2009
Messages
941
Re: 1977 Cruise Boats Restore

EZ,

I re-looked at your paost when you made those bow boxes. It looks like quite a good span at the widest part...maybe a lttile too much for 1/2" ply. I don't like to span anything more than around 12"-14" with 1/2" ply. 3/4" would be better and even that will flex a little also.

I didn't notice at first but I see now that you added support under the larger areas...but nothing at the lid/box joint. Maybe just a thin piece of flat aluminum down each underside of where the box lid meets the box part...you know something to support the lid from underneath along that edge.
 

ezmobee

Supreme Mariner
Joined
Mar 26, 2007
Messages
23,767
Re: 1977 Cruise Boats Restore

I didn't notice at first but I see now that you added support under the larger areas...but nothing at the lid/box joint. Maybe just a thin piece of flat aluminum down each underside of where the box lid meets the box part...you know something to support the lid from underneath along that edge.

I have since done that (shabbily) with a 2x4 running under the hinges on each side after my buddy stepped right through a hatch. Clearly the whole thing needs to be re-engineered. At least I have a good fitting template!! I think you're right that some appropriately place aluminum angle would sure things up a good bit.
 
Joined
Aug 17, 2009
Messages
941
Re: 1977 Cruise Boats Restore

Now it was time to move on to the painting piece of this project. Now if you look at the previous pictures you can see that this boat was like a hunk of Swiss cheese ? full of holes. I swear some previous owner just sat around one day putting holes in this thing. So the prep starts. The first thing I had to do was to re-install the splash well. I cleaned up the areas to be glassed and proceed to glass in the rear of the well to the transom and then to apply two layers of 1708 behind the sides of the splash well and the gunwales. I also applied two layers of 1708 behind all gaps and larger holes. You can see here I use scraps of wood to hold the side in place while the 1708 set-up behid these areas. The main thing with this install was to keep the edges lined up as much as possible so that the filling and fairing would go smoother.

P1010949.jpg


P1010952.jpg


P1010950.jpg
 
Joined
Aug 17, 2009
Messages
941
Re: 1977 Cruise Boats Restore

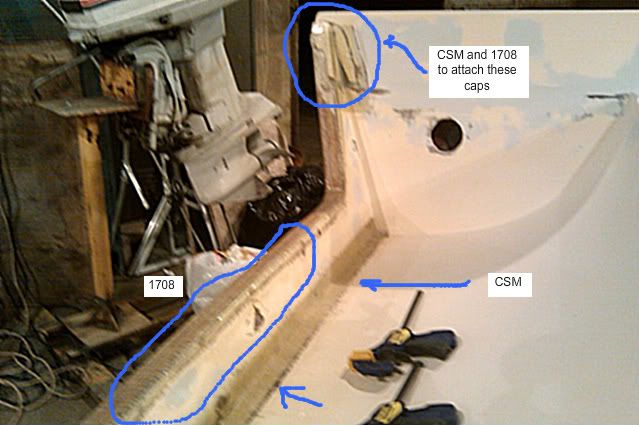
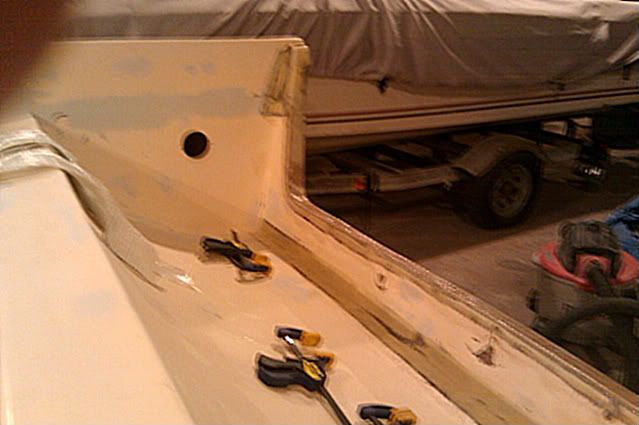
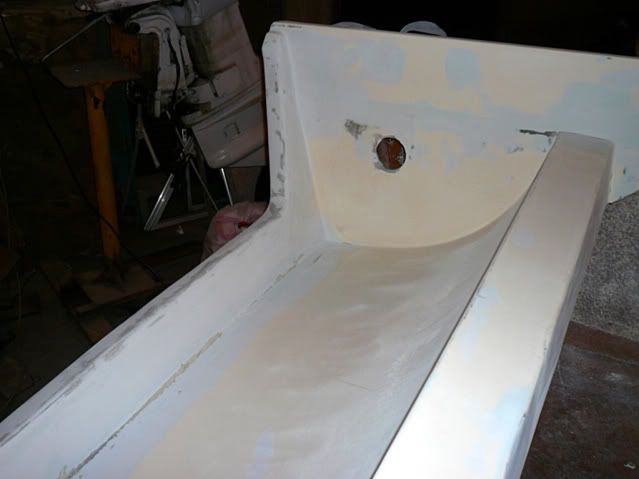
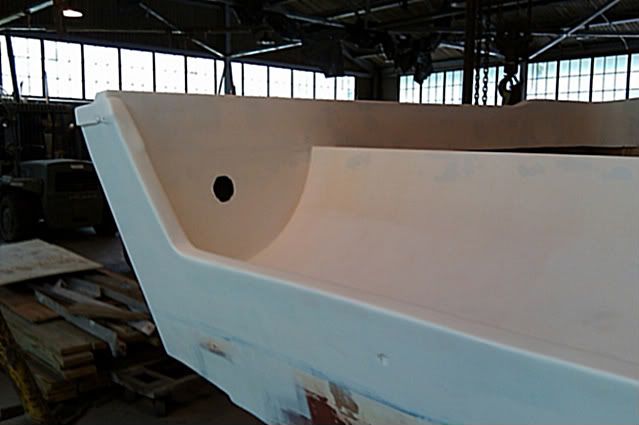
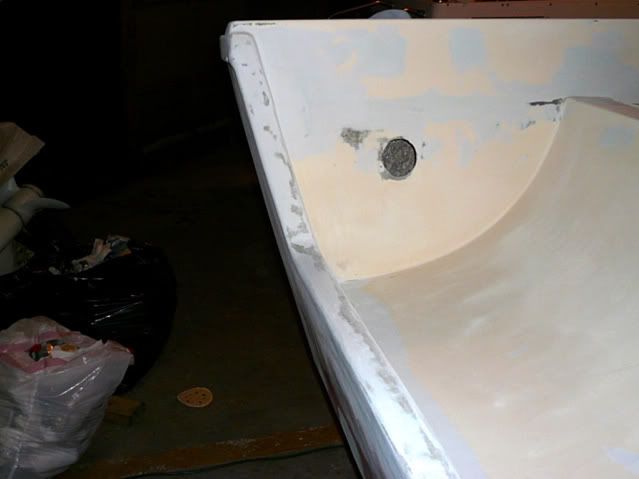
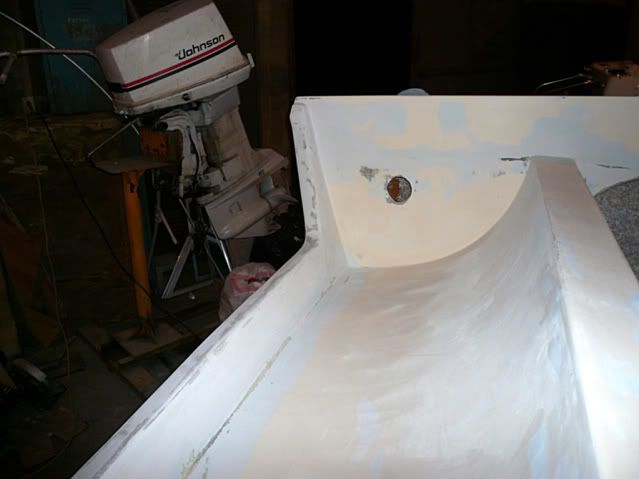
After the basic well was in, I added a piece of CSM along the inside rear edge of the well to re-enforce it and cover a few small cracks and such. I also re-attached those transition caps at the top of the transom as well as cover the top of the transom with two layers of 1708.

IMAG0013-1-1.jpg


IMAG0012.jpg


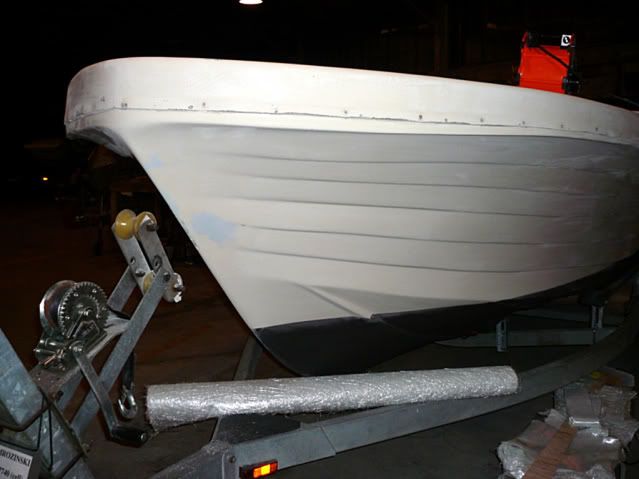
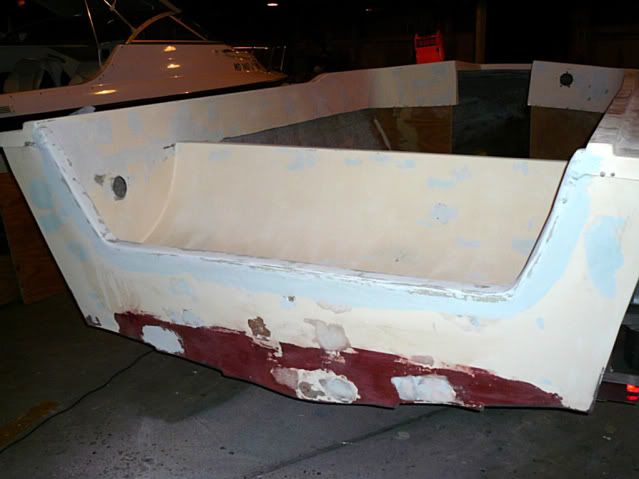
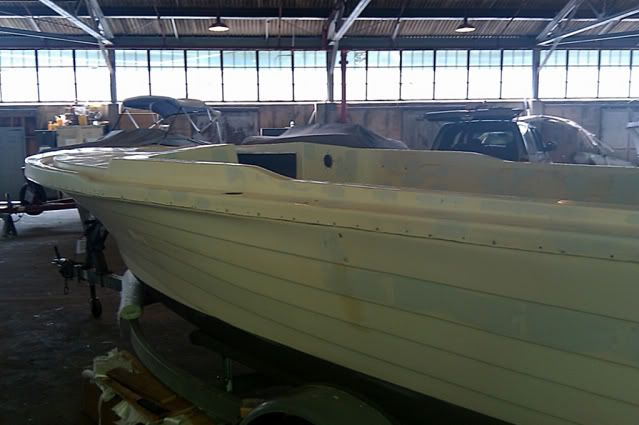
Now once that was all done it was time to get serious on the prep. I first wiped the entire boat down real good with some de-waxer. After that I gave the entire boat a good sanding with 150 grit paper. After this I vacuumed off all the dust so I could better see where all nicks and gouges were. I mentioned before that all of the lager holes (greater than 1/8" dia) were glassed from behind to give the filler material something to hold onto and back against.
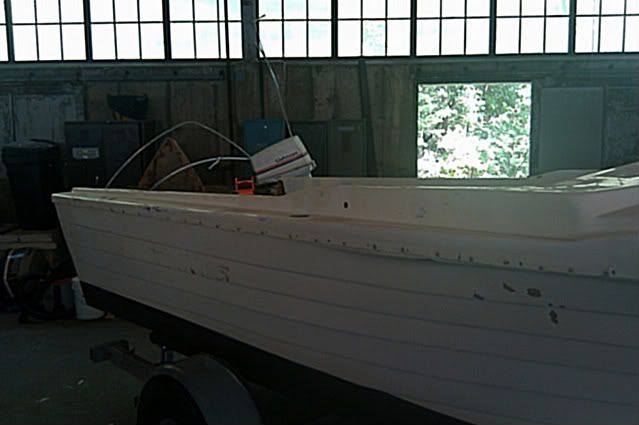
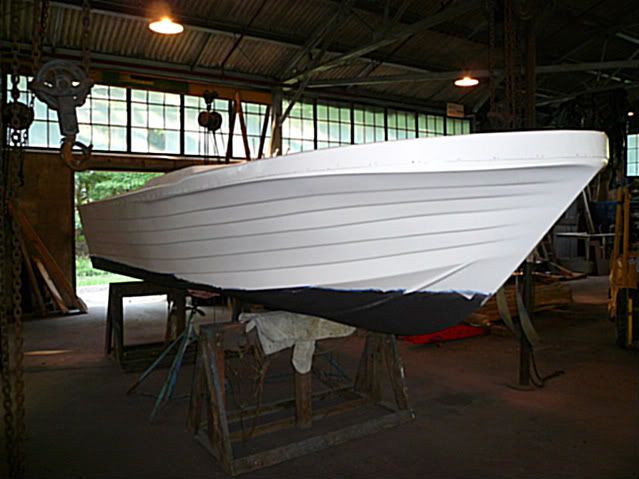
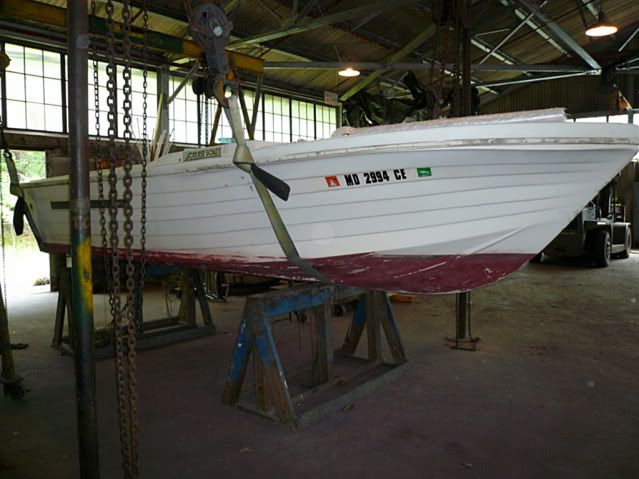
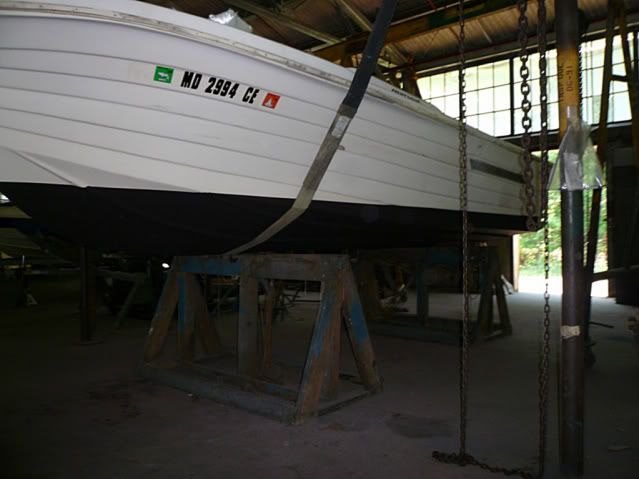
Here is a pic of the hull cleaned and first sanding. Those original decals were a total SOB to get off.

IMAG0001.jpg


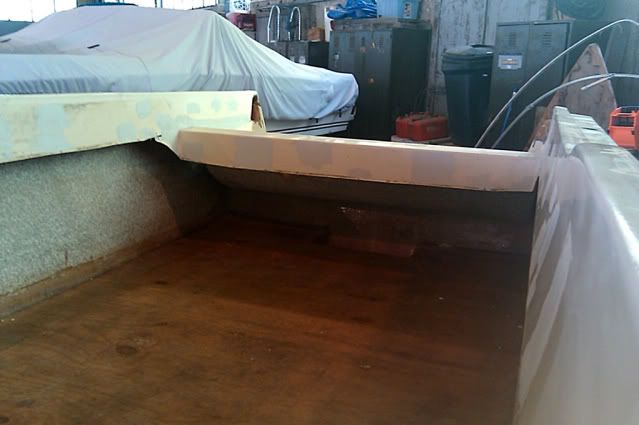
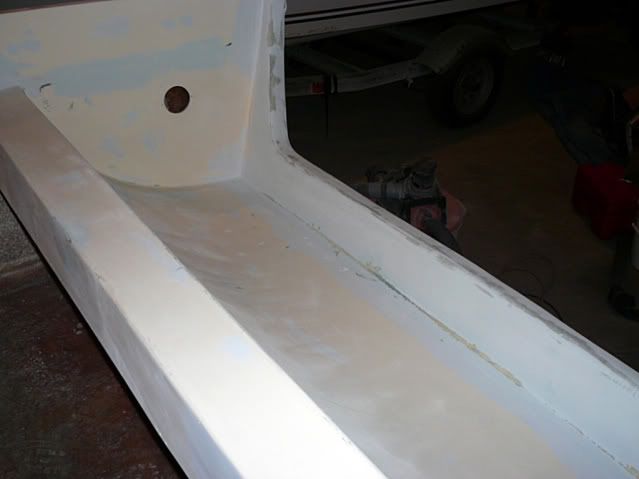
There were also a lot of surface gouges in the hull at various spots above the water line. Once the hull was sanded, I wiped everything down with acetone and proceeded to fill all of the holes and scratches. For filling I used Evercoat Formula 27. I could have used a PB mix but honestly this stuff is very easy to work with and is ready for sanding in 10-15 minutes. You do have to work quickly but once you get the hang of it you roll right along. To make it a structural filler I added ?? chopped strands or milled fibers as necessary. The large gap along the splash well joint I used the chopped strands.

P1020010.jpg


P1020009.jpg


IMAG0009.jpg


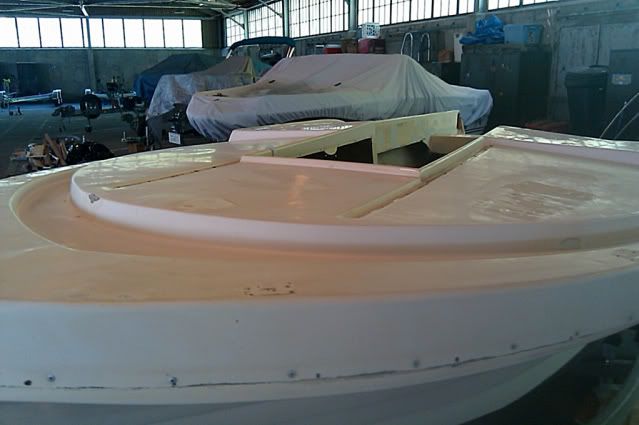
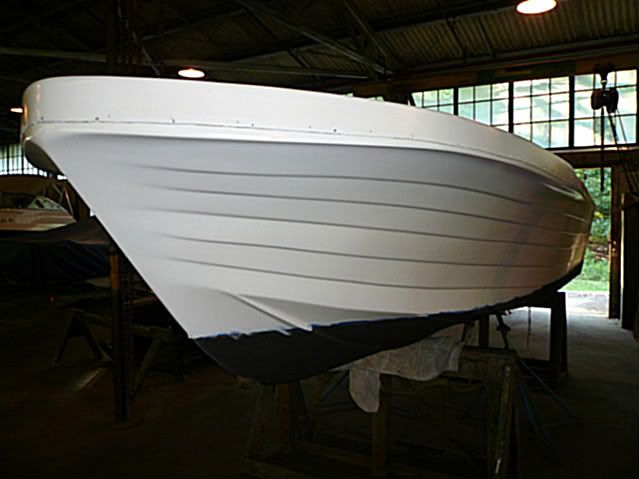
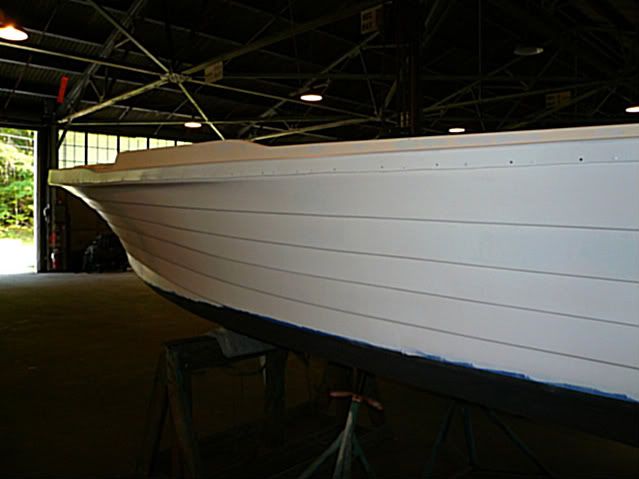
One thing I do want to mention and that is this whole filling sanding and filling and sanding and sanding and filling and sanding and sanding...etc, etc,etc. is a process. Start with the spot filler first and use that until until there are fine lines or shallow scratches left to fill. Then switch to a glazing compound for the final fairing. Evercoat also makes a good glazing compound as well. Also as you sand between fills, use finer grits in the sand paper you use. Also don't just sand the fill area but rather the entire boat. Yes this means you WILL be sanding one heck of a lot. It is painful but necessary. Once everything was smooth and even, I vacuumed off all the dust, wiped the boat down with a tack cloth, wiped the boat down with actone and then once more with the tack cloth right before appling the primer.
 
Joined
Aug 17, 2009
Messages
941
Re: 1977 Cruise Boats Restore

Here are more pics of the prep.

IMAG0010.jpg


IMAG0011.jpg


P1020012.jpg


P1020013.jpg


P1020018.jpg


For the below water line fills, I did use a PB mix since the Formula 27 is for above the water line repairs only.

P1020021.jpg


Once everything was finshed I ended with a 220 grit sanding surface for primer.
 

ezmobee

Supreme Mariner
Joined
Mar 26, 2007
Messages
23,767
Re: 1977 Cruise Boats Restore

Looking good. That boat is going to be smooth and STRONG. Great work.

Off topic, I just took my boat on the bay for the first time ever on Saturday and had a blast. I assume that's where you'll be boating?
 

drewpster

Commander
Joined
Oct 17, 2006
Messages
2,059
Re: 1977 Cruise Boats Restore

This is the really painful part, but it will end. good going!;)
 
Joined
Aug 17, 2009
Messages
941
Re: 1977 Cruise Boats Restore

Looking good. That boat is going to be smooth and STRONG. Great work.

Off topic, I just took my boat on the bay for the first time ever on Saturday and had a blast. I assume that's where you'll be boating?

Thanks EZ. Yeah it's really looking nice now.

That's great. The northern part of the bay is really nice. I assume you launched around Havre DeGrace. The Susquehanna Flats is a great spot for fishing or just hanging out. York isn't that far from there.

Yes. I run my big boat (see my avatar) out of the Bush River. We routinely go to Still Pond, Fairlee Creek and Rock Hall. Sometimes we venture down to Baltimore. This smaller boat I am working on will be for fishing and crabbing locally. I will cruise the same areas and probably won't go any further down past the Bay Bridge with it.
 
Joined
Aug 17, 2009
Messages
941
Re: 1977 Cruise Boats Restore

This is the really painful part, but it will end. good going!;)

Man, you aren't kidding. Whoever said that grinding fiberglass was the hardest part obviously never painted a fiberglass boat. Must have been one of the tinny guys ;). I figured it was going to take me about three weeks to paint. Forget that! It was easily six to seven weeks. I also did this during the heat wave in July and beginning August. Brutal!
 

ezmobee

Supreme Mariner
Joined
Mar 26, 2007
Messages
23,767
Re: 1977 Cruise Boats Restore

That's great. The northern part of the bay is really nice. I assume you launched around Havre DeGrace. The Susquehanna Flats is a great spot for fishing or just hanging out. York isn't that far from there.

We launched in North East, took a ride down past HDG and APG went over to the other side and hung out for a bit in Lloyd's Creek then took the short route back up to North East. Lots of fun.
 
Joined
Aug 17, 2009
Messages
941
Re: 1977 Cruise Boats Restore

Okay now comes the primer. I planned on using Interlux Perfection paint (two-part polyurethane). The recommended primer was the Epoxy Prime-Kote. I also used the recommended fiberglass solvent wash (Interlux 202 Fiberglass Solvent Wash) to wipe down before priming and the 2333N Reducing Solvent as a thinner and brush cleaner. I first had to mask off the water line where the bottom paint started. I then washed down the boat with the solvent wash followed by a tack cloth wipe down just prior to applying the primer. I mixed up the two-part primer and thinned it slightly to improve the flow since I was working in hot weather. The mix has to rest for 20 minutes before applying it. The consistency of the primer was similar to milk. I used foam rollers to apply the primer. I tried the roll-and-tip method but it didn?t work form me. So I went with the roll and roll method which worked out fine since this was the primer coat and was going to be sanded before the paint was applied. Make sure you use a foam roller that can with stand a strong solvent based paint. The first pack of rollers I used couldn?t and quickly fell apart. I applied one even coat over the entire boat. The primer sets-up quickly so I didn?t have much working time. I started at one corner and worked my way around the boat keeping the wet edge going as I went. Do not attempt to go back a try to over roll a previously rolled area. It will leave roller marks in the finish, which leads to more difficult sanding afterwards. I also did the hull sides first and then did the cap section.

Once this first coat of primer had dried I carefully inspected the entire surface for spots that I missed and still needed to be faired some more. You wouldn?t believed how many spots I missed. Oh well, more filling and sanding and filling and sanding etc., etc. Once I got all the remaining spots fixed, I sanded the entire boat with a 320 grit paper to a smooth finish. I again washed down the boat with the solvent and then tack clothed it just prior to the second coat of primer. I rolled a second coat on and let it dry. Once that had dried I repeated the above process again to catch any remaining spots. Any of these spots I touched up with some more primer. Once that dried, I sanded the entire boat with 320 grit paper in preparation of the paint

IMAG0015.jpg


P1020023.jpg


P1020027.jpg


P1020026.jpg
 
Top