1977 Sylvan Sea Monster Side Console Rebuild

Woodonglass

Supreme Mariner
Joined
Dec 29, 2009
Messages
25,929
Uhmmm this IS a Boat Restoration Site, NOT a Kitchen Remodeling Site. Somehow I get the impression you're NOT really talking about Kitchen Remodeling!!!
 

oldrem

Commander
Joined
Nov 7, 2013
Messages
2,002
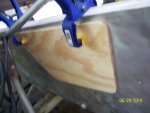
Sanded the transom board down flush with the metal last night, the started fitting the transom outboard plate. I used a spade drill just deep enough from the inside so I will be able to use a spade to make countersinks from the outside for heads and washers.

Transom Outboard Plate.jpg
 

oldrem

Commander
Joined
Nov 7, 2013
Messages
2,002
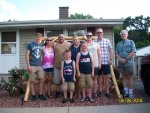
Not boat related, just a proud father/grandfather. My eldest daughter held a party today to celebrate my granddaughters 21st birthday plus my eldest grandsons HS graduation and entry into the Marine Corps in 2 weeks. My youngest daughter and family came in from Michigan. My 8 year old grandson recently auditioned and made it onto a traveling hockey team. Two great kids, two great son-in-laws and 4 great grandchildren.

Family.jpg
 

Woodonglass

Supreme Mariner
Joined
Dec 29, 2009
Messages
25,929
THIS ^^^^ is what makes all the rest of Life WORTH IT!!! :thumb::thumb::thumb:
 

oldrem

Commander
Joined
Nov 7, 2013
Messages
2,002
In spite of perfect weather, I didn't get much done on the boat today. Was another day I was glad I live near the lake. A nice easterly wind kept us at 75 today while it got over 90 a mile west. Did some measuring and discovered that countersinking the bolt heads on the transom outboard plate wouldn't accomplish anything other than weaken it, so I just drilled all the bolt holes through. Pulled the plate and transom board, cleaned up the holes and sanded all the edges and surfaces with the palm sander. Those two parts are ready for the OT treatment. Wanted to make the template for the bow plate support, but thunder storms rolled in halting any further work today.
 

oldrem

Commander
Joined
Nov 7, 2013
Messages
2,002
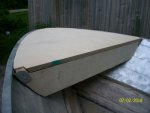
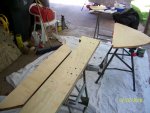
A little bit more done tonight. I made a cardboard template and cut the support for the new aluminum bow plate I'll be making. Got most of the sanding and fitting done, but still not quite how I want it yet. Once I'm happy with it it will be time to fill a few voids with epoxy and mix up a batch of OT.

I hope to have time for the fitting tomorrow evening after I pick up some BOOM stuff for the 4th. Admiral and I are joining friends for some fishing on their boat followed by some tannerite target practice :) bowplate support.jpg
 

oldrem

Commander
Joined
Nov 7, 2013
Messages
2,002
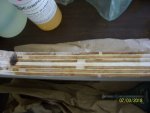
Was all caught up at work today, so I mixed up a small batch of epoxy with cabosil and filled every little void and crevice I could find on both transom boards as well as the screw holes where I used screws to hold the transom halves together.

voids1.jpgvoids2.jpg
 

oldrem

Commander
Joined
Nov 7, 2013
Messages
2,002
Tuesday night I got the bow support fitted and all screws in for a full mock up except the two I have to crawl under to do. Yesterday was play day for the 4th. Lots of heat and some nasty sunburn, but good friends, good fishing, 7lbs of Tennerite, M80's etc all made up for it. Too tired and sore when we got home to do anymore last night. Hoping it cools off a bit by the time I get home tonight to get the mock up finished and take it all apart to start finishing the parts.
 

kcassells

Fleet Admiral
Joined
Oct 16, 2012
Messages
8,738
Feel ya there Rem. Diddled yesterday w/glassing the toaster then grinding....wet as a mop. Then back out again this morn for 2nd coat....Thank Gosh for BUBBLES! and showers!
Still waiting for Zool to show up with his bees and step on the tarp. Haha!
 

oldrem

Commander
Joined
Nov 7, 2013
Messages
2,002
Feel ya there Rem. Diddled yesterday w/glassing the toaster then grinding....wet as a mop. Then back out again this morn for 2nd coat....Thank Gosh for BUBBLES! and showers!
Still waiting for Zool to show up with his bees and step on the tarp. Haha!

Was still hot and humid last night, but didn't have much to finish before pulling it apart. Had my own fun with bees a couple years ago - hate those buggers.
 

oldrem

Commander
Joined
Nov 7, 2013
Messages
2,002
Perfect weather this afternoon for getting the OT applied to the bow and stern pieces, mid 70's, light breeze and low humidity. For every coat on a flat surface I put one or more on the edges. It's supposed to stay like this a few days with only a slight raise in temps so they should dry quickly. Monday night I should be able to start applying coats of straight Helmsman.

Old Timers Formula.jpg
 

oldrem

Commander
Joined
Nov 7, 2013
Messages
2,002
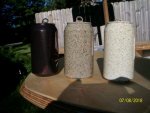
I feel pretty good on what I got done today. Started the morning off playing with spraying metal flake on some color samples I made a couple weeks ago so the Admiral could help decide what the final paint scheme would be. We decided the black would get too hot in the sun and the white was too stark, so the light gray won out,

Paint Samples.jpg

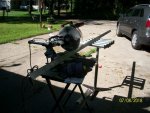
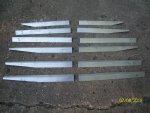
I then set up the chop saw and dragged out my angle grinder and started turning 30 ft of aluminum angle into stringer braces / deck supports. Got all 12 cut to fit where I want with plenty stock left for brackets plus 2 more if I feel I need them further forward. After cutting and fitting the first two I decided I needed a second grinder so I wouldn't have to keep switching from a cutoff wheel to a grinding wheel so off to HF to pick up one they had on sale for $9.99. Made the work go so much faster.

Supprot Braces 1.jpgSuppot Braces 2.jpg
 

zool

Captain
Joined
Aug 19, 2012
Messages
3,432
Cant beat HF for a quick cheap tool!...those braces look great!
 

oldrem

Commander
Joined
Nov 7, 2013
Messages
2,002
Thanks zool

Got two coats of Helmsman on one side and all edges of the wood parts tonight. I cheated a little so I'd be able to get 2 on faster and added a little Japan drier to the first coat. Tomorrow night I plan on flipping them to get the other side and at least one more coat on the edges.

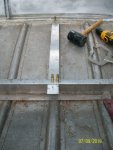
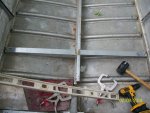
I clamped, drilled and did a mock up of the first set of braces, held for now with 8 Clecos. I've done a lot of blind doweling on wood projects over the years, so have a good collection of dowel points. As the ends of the ribs already had enough holes in them, I used a 3/6" dowel point to locate a hole I wanted to re-purpose on the end of each brace. After marking it I took it to the drill press and got perfect alignments. Not sure yet if I'm going to rivet them in before or after painting. Probably after so I'm not tripping over them while moving around inside.

Suppot Braces 3.jpgSuppot Braces 4.jpg
 
Top