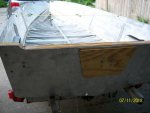
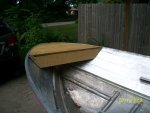
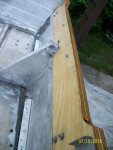
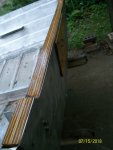
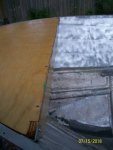
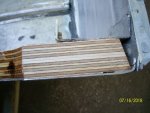
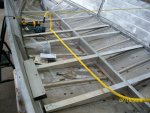
1977 Sylvan Sea Monster Side Console Rebuild

oldrem

Commander
Joined
Nov 7, 2013
Messages
2,002
Thanks guys.

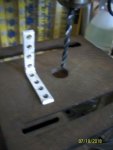
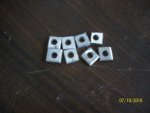
Had some time at work today, so dragged out my small drill press and hand miter and made a few 1/8" spacers I'm going to try for raising the outer ends of the braces.

Spacers1.jpgSpacers2.jpg
 

oldrem

Commander
Joined
Nov 7, 2013
Messages
2,002
Nothing exciting tonight. Got two coats of Helmsman on the flip side of the wood parts, drilled and mocked up 6 more braces and found out the spacers I made were a waste of time. It was too dark when I finished to take any photos.

I'm starting to lean towards riveting the braces in before I paint. I can then put some of the old deck in to walk or kneel on when I paint.
 

oldrem

Commander
Joined
Nov 7, 2013
Messages
2,002
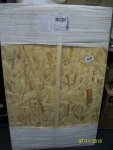
Package arrived today. Looking at the packaging, I think Speedy Metals lost money on this one. It's the sheet of aluminum for my new bow plate. $10 shipping charge - I think they spent more than that just protecting it. Bow Plate 1.jpg
 

oldrem

Commander
Joined
Nov 7, 2013
Messages
2,002
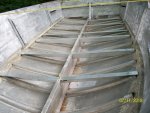
Got the rest of the braces drilled and mocked up, then vacuumed most of the drillings out.

Suppot Braces 5.jpg

Set the new transom wood in and inserted all the new SS bolts to make sure everything lines up. I have several bolts that I'll have to cut before installing.

Transom2.jpg

Laid in the bow support pieces.

bowplate support 2.jpg

Hopefully I'll have enough time tomorrow night to cut bolts, get out the 5200 and some anti-seize and do some actual installing.
 

Watermann

Starmada Splash of the Year 2014
Joined
Jan 12, 2013
Messages
13,822
Guess I must have hit that big button at the top that says unsubscribe, they need to move it, no telling how many other threads got unsubbed too. I had some catching up to do.

The braces are a great idea that is a must for any boat with the single deck support or even doubles. One other thing that can be done with the chewed up rib ends is to put a piece of angle AL the length of the rib ends, it also allows you to set deck rivets anywhere as well as putting an angle brace right at the deck seam joints.
 

oldrem

Commander
Joined
Nov 7, 2013
Messages
2,002
Guess I must have hit that big button at the top that says unsubscribe, they need to move it, no telling how many other threads got unsubbed too. I had some catching up to do.

The braces are a great idea that is a must for any boat with the single deck support or even doubles. One other thing that can be done with the chewed up rib ends is to put a piece of angle AL the length of the rib ends, it also allows you to set deck rivets anywhere as well as putting an angle brace right at the deck seam joints.

The only possible problem with that is the deck would be higher on the ends causing a pitch to the center. That's why the washers I had made weren't going to work. There does seem to be good strength on the rib ends now, so think I'll leave well enough alone.

Tonight I masked off, SE primed and painted the area that will be under the transom outboard plate. Got all but 3 bolts cut to length and dressed with the grinder followed with a file. Had to quit when it was getting too dark to safely use the chop saw.

When I assemble with the 5200 in the holes, my idea is to load up the bolts with it except the end area where the nut will go, apply a small bead under the washer on the inside, apply anti-seize to the clean threads then the nut. Does that sound about right??
 

Watermann

Starmada Splash of the Year 2014
Joined
Jan 12, 2013
Messages
13,822
The only possible problem with that is the deck would be higher on the ends causing a pitch to the center. That's why the washers I had made weren't going to work. There does seem to be good strength on the rib ends now, so think I'll leave well enough alone.

There's always a work around for such things, with some more angle AL you can rivet it on the opposite side of that single deck support raising it the needed distance to level the decking.
 

Woodonglass

Supreme Mariner
Joined
Dec 29, 2009
Messages
25,929
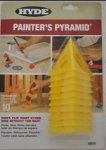
Just an FYI for future reference. Painters Pyramids are great to have when applying Paint or OldTimers to plywood pieces. You can apply top and bottom coats all at the same time. A good investment for any DIY'er. Really cuts down on the time it takes to apply top and bottom coats. You can do the same thing by make some 2" squares from scrap plywood and screwing in some 2" screws. The screw points won't hurt the finish or the wood. I use to do that but finally broke down and bought the pyramids and I use em all the time. Got several projects in the shop right now that are drying on the pryamids
:thumb::thumb::thumb:

pyramids.JPG
 

oldrem

Commander
Joined
Nov 7, 2013
Messages
2,002
Just an FYI for future reference. Painters Pyramids are great to have when applying Paint or OldTimers to plywood pieces. You can apply top and bottom coats all at the same time. A good investment for any DIY'er. Really cuts down on the time it takes to apply top and bottom coats. You can do the same thing by make some 2" squares from scrap plywood and screwing in some 2" screws. The screw points won't hurt the finish or the wood. I use to do that but finally broke down and bought the pyramids and I use em all the time. Got several projects in the shop right now that are drying on the pryamids
:thumb::thumb::thumb:


Too funny you should mention that. I learned about those the day after I did the first side. I picked up a pack to use when I do the decking later.
 

oldrem

Commander
Joined
Nov 7, 2013
Messages
2,002
There's always a work around for such things, with some more angle AL you can rivet it on the opposite side of that single deck support raising it the needed distance to level the decking.

Very true. Will definitely keep that in my notes for the future. Basically constructing a sub frame inside.
 

oldrem

Commander
Joined
Nov 7, 2013
Messages
2,002
Worked my tail off after work today - that is except for the 2 trips I had to make back to work to pick up things I needed. Luckily it only takes me 12 min to get there.

Started by cup brushing all seams below the waterline and all associated rivets (first trip to grab more cub brushes when the old one I was using reached the end of its life cycle). Vacuumed thoroughly, blew it all out, vacuumed the crud that came out of the rib tubes, went back over everything with a small stainless wire brush, vacuumed again, scrubbed it all with a nylon brush and acetone twice.

Went to mix 8 oz of Coat-It when I found out the digital scale I planned to use won't go high enough. Back to the store to pick up our digital postal scale.

Got everything well coated and had a little left, so kept dabbing other rivets until it was all gone. Can't say it's pretty, but it's below deck and should kill the minor leaks I noticed on the leak test.

Won't have a lot of time tomorrow, since I promised to take the Admiral to the Ren Faire. I think I need a short break anyway.

Coat it.jpg
 

oldrem

Commander
Joined
Nov 7, 2013
Messages
2,002
Had just enough time before and after the faire to get the bow and stern bolts and screws in. I hadn't noticed it before, but looks like I'll have to cut, sand and reseal the top corner of the transom on the starboard side before I'll be able to re-assemble the gunnels. I really hate making mistakes like that. At least it's only about a 6" wide section.

Bolts Screws 1.jpgBolts Screws 2.jpgBolts Screws 3.jpg
 

clemsonfor

Lieutenant Junior Grade
Joined
Sep 19, 2005
Messages
1,011
Its amazing what skills you guys have but I guess that's what a lifetime of learning has done for you. It is amazing the things I have learned from reading this that will be useful on other projects as well. And the time that has been taken to write up what your doing! The little side projects like the gantry trolley and the design, the making of spacers for things etc. The length your going to to make this thing perfect!

I have not been on this site much in the last few years but with the addition with my new to me boat I have been logging on more and got the boating bug again. I am subscribing to this one cause I want to see how this one turns out and I hope to remember to check in every now n then to see how it turns out with your amazing attention to detail!
 

oldrem

Commander
Joined
Nov 7, 2013
Messages
2,002
Its amazing what skills you guys have but I guess that's what a lifetime of learning has done for you. It is amazing the things I have learned from reading this that will be useful on other projects as well. And the time that has been taken to write up what your doing! The little side projects like the gantry trolley and the design, the making of spacers for things etc. The length your going to to make this thing perfect!

I have not been on this site much in the last few years but with the addition with my new to me boat I have been logging on more and got the boating bug again. I am subscribing to this one cause I want to see how this one turns out and I hope to remember to check in every now n then to see how it turns out with your amazing attention to detail!

I appreciate the kind words - but I'm learning as I go here myself. Over my many years, I've done a lot of metal and wood work, some fiber glassing, various work on boats but never have I taken one down to the nubs before. I subscribe to numerous threads here - watching reading and learning. Without the wisdom of some of the great wise ones here like waterman and Woodonglass I'd be lost.

For example, before reading waterman s sticky on rivets I never heard of Clecos - now I can't imagine ever doing a project like this without them His use of the stringer braces made sooo much sense I had to use them. WOGs wise words on transom construction, the OT formula and tractor paint have me miles ahead of where I'd be otherwise. Too many others to mention have given me ideas in their builds that my head is spinning.

I just hope to do a job worthy of a few kind words.
 

oldrem

Commander
Joined
Nov 7, 2013
Messages
2,002
Used just the belt sander to knock down the transom tonight. Starboard side was 1/4" high in front and port less than 1/8". Have them soaking up as much OT as they want now. What I thought was a new void, was actually a gap between the skin and board. Mixed up a small amount of epoxy with micro balloons for nothing lol.. Did a little metal work and closed up the gap after vacuuming out the sanding dust.

resand transom.jpg

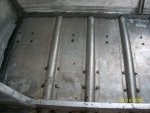
After decades of using a hand rivet tool, I bought a pneumatic one on waterman s advice. WOW I can't believe how fast and easy that it. Got all 12 new braces and 6 angle brackets installed in no time. Took a couple short breaks to add more OT to the transom.

Supprot Braces Riveted.jpg
 

Watermann

Starmada Splash of the Year 2014
Joined
Jan 12, 2013
Messages
13,822
Man that's some great looking ply you're using, if you have any voids on the top edge be sure to fill them so there isn't a ready made pock for water to sit in. I've used what ever I had on had from JB water weld to 5200 to fill any top voids in the ply.
 

kcassells

Fleet Admiral
Joined
Oct 16, 2012
Messages
8,738
Rem,
When your done with that deck you'll be able to have a party on it! That's a serious substructure.
 
Top