1977 Sylvan Sea Monster Side Console Rebuild

oldrem

Commander
Joined
Nov 7, 2013
Messages
2,002
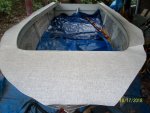
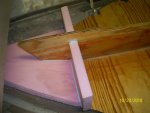
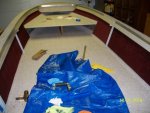
Used the past few nights to measure and make cardboard templates for the topside Nautolex. Went with the Sisal Cool. Today I finish cut the insides for a good fit in the channels and rough cut the outer for final trim after it's installed and dry. Now I need to hope for a weekend with temps over 50 to get it all in. We've been running steadily at 8-10 degrees below normal most of the month with no end in sight. :mad:

Topside Nautolex.jpg
 

oldrem

Commander
Joined
Nov 7, 2013
Messages
2,002
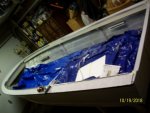
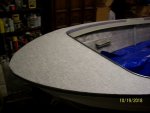
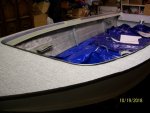
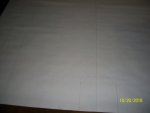
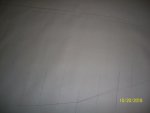
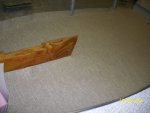
The Admiral is letting me use her garage for a few days to get the Nautolex in. The garage has the water heater and boiler for the hot water heating system, so stays about 10-20 degrees warmer than the outdoor temps. Worked late last night. Lightly sanded and cleaned all topside surfaces, glued down the Nautolex and trimmed it a few hours later with a head knife.

Click image for larger version  Name:	Topside Nautolex 2.jpg Views:	1 Size:	61.0 KB ID:	10670721Click image for larger version  Name:	Topside Nautolex 3.jpg Views:	1 Size:	55.0 KB ID:	10670722Click image for larger version  Name:	Topside Nautolex 4.jpg Views:	1 Size:	70.0 KB ID:	10670723
 

oldrem

Commander
Joined
Nov 7, 2013
Messages
2,002
Thanks Randy.


Proud grandpa here. As of last Saturday my eldest grandson has followed the family tradition going back to my grandfather and is now an official jarhead. Way to go Ryan!

Ryan Marine Grad.jpg
 

oldrem

Commander
Joined
Nov 7, 2013
Messages
2,002
Long busy afternoon and evening. Decided against side panels. I used "caulk saver" foam to fill the gaps along the edges to smooth the transition from the deck to the sidewalls. Also used some 3/8" to plug the screw holes for the seat bases to keep adhesive out of them.

Foam Stops.jpg

Took 14,000 measurements (seems like it at least), then laid it all out on the backside of the Nautolex for the main deck. Had to keep reminding myself that I had to mirror all the dimensions since I was working from the underside.

Nautolex Layout 1.jpgNautolex Layout 2.jpg

Got it all cut and laid in for a good test fit. Should make the final install much easier. Made sure I marked and triple checked all the seat base screw locations.

Nautolex Test Fit 1.jpgNautolex Test Fit 2.jpg
 

Attachments

  • Caulk Saver.jpg
    Caulk Saver.jpg
    64.2 KB · Views: 0

sphelps

Supreme Mariner
Joined
Nov 16, 2011
Messages
11,475
Congratulations Rem ! Grandson looks good in uniform ! Good to know we still have outstanding young men and women willing to sacrifice everything to protect the nation and its freedom...
That nautolex liner is really gunna look nice once complete !
Nice work !
 

Woodonglass

Supreme Mariner
Joined
Dec 29, 2009
Messages
25,929
Make sure and tell your Granson that I am one American that sincerely thanks him for his sacrifice and Service. I wish him all the best and that the Good Lord will bless him and keep him safe!!!
Marine.jpg
 

oldrem

Commander
Joined
Nov 7, 2013
Messages
2,002
Got a good jump this morning for a 10 hour marathon minus a short break to eat dinner with the Admiral.

Started by peeling back half the Nautolex and spreading the adhesive. Laid the rear half then glued in the edges and around the bilge. The Admiral helped me encapsulate the bilge cover in cling wrap so I could use it to hold everything in place while the adhesive sets. Peeled back the front section and did the same with that for a completely seamless install on the main deck.

Nautolex Install 1.jpgNautolex Install 2.jpgNautolex Install 3.jpg

Installed the raised deck and did the same there.

Nautolex Install 4.jpg

Still had some energy left, so started measuring, cutting and installing some of the carpet panels. Finally ran out of steam a little after 7 tonight.

Carpet 1.jpg
 

Watermann

Starmada Splash of the Year 2014
Joined
Jan 12, 2013
Messages
13,822
You reached the top of the hill, now is when the fun stage kicks in. Gotta love that vinyl deck covering :thumb:
 

oldrem

Commander
Joined
Nov 7, 2013
Messages
2,002
Finished the carpet tonight and started installing the helm. Now if I could just figure out where my solid rivets are for the through hull one I need to buck.

Carpet 2 Helm.jpg
 

oldrem

Commander
Joined
Nov 7, 2013
Messages
2,002
Thanks all for the kind words. Yep it's all for fishing.

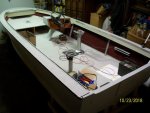
Got the 3 pedestal bases anchored in last night with blue Loctite on all the screws. Did the main wiring with labels and clear shrink over them. Did a temporary hookup to the battery to test everything. Just using 3 switches for now - anchor light, nav lights and bilge pump. Time got away from me and it was 11:30 before I knew it.

Wiring and Pedestals.jpg
 

Watermann

Starmada Splash of the Year 2014
Joined
Jan 12, 2013
Messages
13,822
This is the most fun stage of the resto when a guy can really get going. It's fun for us too seeing the progress :thumb:

I remember the same happening to me out in the garage when all of a sudden it's 3 hours later. Some early mornings before work too. :happy:
 

oldrem

Commander
Joined
Nov 7, 2013
Messages
2,002
This is the most fun stage of the resto when a guy can really get going. It's fun for us too seeing the progress :thumb:

I remember the same happening to me out in the garage when all of a sudden it's 3 hours later. Some early mornings before work too. :happy:

Sad part is I won't be able to splash until spring. Temps have been steadily highs of 40's to low 50's and only getting worse. Season is over here for this old fart.

Promised the Admiral she could have her garage back before the rains this weekend. Was going to pull it tonight, but she said to work a couple more nights.

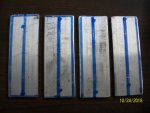
Cut some back plates for support under the gunwales for the new SS flip up cleats. Will drill them tonight on the big press. I repurposed some left over 1/8x2x2 aluminum angle to make them.

cleat backplates.jpg
 

oldrem

Commander
Joined
Nov 7, 2013
Messages
2,002
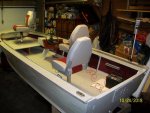
Installed the 4 cleats and secured the anchor light base, then got the wiring secured under the gunwales except the ignition harness. Admiral wanted a preview, so I did a temporary install of the seats.

That's about as far as I can go until I get it back on the trailer and install the motor. I still need to put the rub rail on, but need to clean it up first. Ordered a new insert for it yesterday from Wefco.

image_303572.jpgimage_303573.jpg
 
Top