1979 Champion Bass Boat - Tear Down and Restoration -- with PICS

DHag

Petty Officer 2nd Class
Joined
May 29, 2007
Messages
166
Measuring for Stringers

Measuring for Stringers

Thought I should back up just a little, and show how I measured for the stringers. I couldn't use my old stringer cores as patterns, 'cuz they literally were mush. There was no way they could come out in measurable pieces.

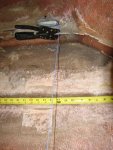
When I cut out the old deck, I left the edge of the deck around the outside, just so I would know where it was supposed to go. I took a chalk line and clamped it to opposite deck edges, pulling it tight.
480527_444490545574368_893969525_n.jpg

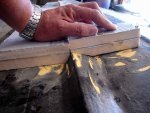
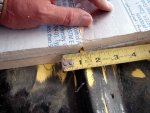
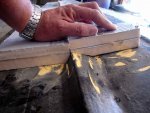
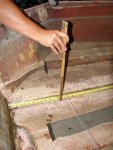
With the chalk line pulled tight, and a tape measure laid up the lines where the stringers are set, I measured from the string to the hull. The tape measure was set against the transom, and measurements taken every foot. Here's my son-in-law taking a measurement, using my grandfather's folding carpenter's ruler that's older than me. Best tool for the job!
557328_444490575574365_1797788512_n.jpg
 

DHag

Petty Officer 2nd Class
Joined
May 29, 2007
Messages
166
Measuring for Stringers

Measuring for Stringers

I printed out a previous picture, and recorded the measurements directly on it. A set of measurements along each inner and outer stringer lines.

292914_444490588907697_394506865_n.jpg

The measurements let me make a scale drawing of the shapes of the stringer forms. Then I took those drawings, and laid them out to make a cutting pattern for the fiberglass.

484549_444490568907699_1006022336_n.jpg

This image is also to scale, 50 inches wide. Except for the transom piece, I will have to cut SIX sets of fiberglass cloth pieces (3 of CSM, 3 of 1708). Only FOUR for the transom. From this, I could calculate how much fiberglass and resin I need to buy for the stringers and ribs.

  • 19 yards CSM
  • 19 yards 1708
  • 10 gallons polyester resin with hardener.
 

DHag

Petty Officer 2nd Class
Joined
May 29, 2007
Messages
166
Measuring for Stringers

Measuring for Stringers

The least expensive fiberglass supplier I have found is US Composites. I bought my epoxy resin from them. There was a problem with my payment. (I tried to use a Visa gift card.) Their customer service was excellent as we corrected the problem. Quick shipping, too.

However, shipping is pricey for resin, and if you order a 5-gallon drum, they have to add a HazMat fee. Their price per gallon is the same, whether in 1-gallon cans or 5-gallon drums. Smaller cans, more shipping cost. Drums, lower shipping cost but a HazMat fee. Take your pick.

Further investigation turned up polyester resin available at Home Depot. It's $5 a gallon higher, but no shipping, so much cheaper. Also found this review on it: "I've built numerous full size boats with resins found at other marine retailers. This one performs just as well at a fraction of the cost."

Advantage, Home Depot for resin. I can buy it a gallon at a time as budget allows. I've been searching for a local supplier of Fiberglass cloth, but so far no joy.
 

rcxdm40

Petty Officer 3rd Class
Joined
Jul 14, 2012
Messages
79
Re: Measuring for Stringers

Re: Measuring for Stringers

Learning a lot reading your post, starting a bass boat myself!
 

DHag

Petty Officer 2nd Class
Joined
May 29, 2007
Messages
166
Measuring for Stringers

Measuring for Stringers

I've been searching for a local supplier of Fiberglass cloth, but so far no joy.

Update: There is a great marine supply in Omaha, and they do fiberglass repairs. I wrote to them. But apparently all they keep on-hand is the same 8-ounce cloth that I can buy at NAPA, at a higher price. NAPA's price is about 10 bucks for 8 square feet. Ouch! :eek:

So, looks like my best bang for the buck for CSM and 1708 biaxial is US Composites.
 

Woodonglass

Supreme Mariner
Joined
Dec 29, 2009
Messages
25,929
Re: Measuring for Stringers

Re: Measuring for Stringers

DHAG,

Just so you'll know, the Gallon cans of resin sold at the Auto Supply houses and the Big Box stores, all have Wax in them. Unless you plan on doing all of your layups Wet On Wet, you will have to sand and acetone wash between layers and run the risk of not having a good bond between layers. Just want you to be aware. Also, according to my calculations the uscomposites 435 resin @ $125 for 5gal is $25 per gallon with a $25 Haz mat fee. Thats $5 more per gal or $30 Shipping to the mid west is about $50 so thats $10 more so $40 per gal. At my Lowe's with tax the Bondo carp they sell is $39.92. I'd rather get the good stuff from USC. Even if it's 8? more per gallon.;)
 

DHag

Petty Officer 2nd Class
Joined
May 29, 2007
Messages
166
Re: Measuring for Stringers

Re: Measuring for Stringers

Also, according to my calculations the uscomposites 435 resin @ $125 for 5gal is $25 per gallon with a $25 Haz mat fee. Thats $5 more per gal or $30 Shipping to the mid west is about $50 so thats $10 more so $40 per gal. At my Lowe's with tax the Bondo carp they sell is $39.92. I'd rather get the good stuff from USC. Even if it's 8? more per gallon.;)
That's another kind of info that only experience can produce. I see from USC's pages that shipping to me in Iowa would be the same as to you in Oklahoma, so your info will hold true for me.

So yeah.... I can spring for 8 more cents a gallon.

Thanks a ton!
 

DHag

Petty Officer 2nd Class
Joined
May 29, 2007
Messages
166
Mold for patching the hole

Mold for patching the hole

Time to patch that hole, finally. Between time demands and budget, I finally was able to order the fiberglass and resin and tools.

I decided the first step is to make a mold for shaping the new fiberglass. The problem I have is that the damage was down a chine, so I have to create a new chine in the repair.
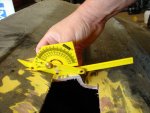
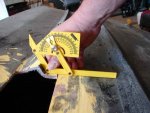
I got this cheap little angle tool off of a clearance table somewhere. I think I paid 4 bucks for it. But it sure is handy.

DSC05949.JPG

I measured the angles of the chine at both ends of the hole. I also made repeated measurements down the matching chine on the other side. Average of my readings came to 30 degrees for this angle, and 160 degrees for the other angle.

DSC05953.JPG

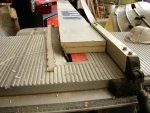
I will be using polyisocyanurate foam as the core material for rebuilding the stringers (coming later). It's the foam stuff you find at the lumber yard that's coated with aluminum foil. It's used for insulation under siding. Polyisocyanurate won't melt when fiberglass resin comes in contact with it. I'm using the same stuff for a mold, and I can reuse part of it for stringers. I glued two pieces of the right dimensions together with spray contact adhesive.

Here I'm cutting the first mold piece to 30 degrees on a table saw. Always wear a dust mask and eye protection with this stuff. It goes everywhere! And some of it is a really fine dust. Can't be good to inhale it.

DSC05954.JPG

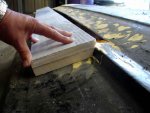
Not a bad fit.

DSC05955.JPG

I cut another piece to match other other angle. Laying them together, the angles are right, but the fit is off. Good thing is, it's off in the way where it just needs to be trimmed.

DSC05959.JPG
 

DHag

Petty Officer 2nd Class
Joined
May 29, 2007
Messages
166
Mold for patching the hole

Mold for patching the hole

Measuring the gap, I need to trim 1/4" off of the right-hand piece.

DSC05958.JPG

I had to trim the left-hand piece almost the same amount. But here you can see it's a pretty good fit. I've got some more cleaning to do, then I need to grind and prep the inside of the hole before setting the mold in place. When I do, I may have to shave the angles just a touch to get a better fit, but for now it's good enough.

DSC05959.JPG
 

DHag

Petty Officer 2nd Class
Joined
May 29, 2007
Messages
166
Sanding the hull

Sanding the hull

I'm back! Sorry for being so long.

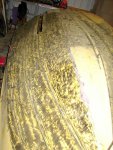
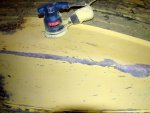
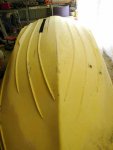
I finally got all the black Durabak coating off of the hull. It looked like a big watermelon. You can see the first section where I started sanding.

DSC05973.JPG

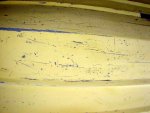
The leftover Durabak is acting like a "guide coat," a thin coat of contrasting color that a car painter will spray on before sanding. As he sands the car, the guide coat will come off first on the high points, and remain visible on low points. The Durabak is showing every ding and scratch in the gelcoat. It's also pretty obvious here that a keel guard of some kind is a good idea.

DSC05974.JPG

I used a simple little orbital sander for the task. I used 50-grit "black zirconium" discs. They are supposed to cut faster and last longer than "normal" discs. That keel sure had been taking a beating!

DSC05979.JPG
 

DHag

Petty Officer 2nd Class
Joined
May 29, 2007
Messages
166
Sanding the hull

Sanding the hull

There she is, all sanded off. This is just the first "rough" sanding. The main purpose is to expose all areas needing repair, fairing, etc.

In this pic, the contrast isn't so great. But you can still see all the beating this hull has taken over the years. The keel is begging for a 6-foot keel guard.

DSC05980.JPG

This is where the bow ring used to be. It pulled out one day while I was loading onto the trailer. The wood block inside was completely rotted. When I repair this, I'm going to use a piece from a chunk of pressure treated 6" X 6" pole that I have left over from building the garage. Of course, that will come later.

DSC05981.JPG

Here are three shots from bow to stern, showing the beating our boats can take over time. Every line is a scratch, and every blotch is a dent. Some of these will sand out. Some will need to be filled with fairing compound. A couple have cracks and will need more repair.

DSC05982.JPG DSC05984.JPG DSC05985.JPG
 

DHag

Petty Officer 2nd Class
Joined
May 29, 2007
Messages
166
Finally -- Going after that hole!

Finally -- Going after that hole!

Now to go after that hole.

I almost made a mistake. I misread a guide on doing this repair, and I was about to do it on the inside of the hull. But I read another guide from West Epoxy, and they said below the water line you needed to do the repair on the outside. I went back and reviewed my original guide, and sure enough, it did say that it was for "above the water line." Some more digging revealed that the patch needs to be on the side of the hull that has the greater amount of pressure, so the patch is actually pressed against the original hull.

So yes. Outside. Plus now I have to re-do my mold.

I thought sanding made a mess! Wow! Grinding out the hole in prep for repairs threw fiberglass dust everywhere! And a lot of it.

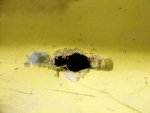
All the guides I have read say to grind around the hole in a 12:1 ratio. So, for my hull, which is 1/4 inch thick, I need to grind 12 X 1/4, or 3 inches around. The edge of the hole needs to be ground to a "knife edge," and feathered back 3 inches to the original hull level. Here I have marked that for grinding.

DSC05988.JPG

You can see all around the hole that a previous owner hit something wide and hard. The damage around the area is well into the gelcoat, all around the main impact area.

After over an hour of grinding (You'd think it would go faster than that, with a 19,000 rpm angle grinder!), here's the final result.

DSC05991.JPG

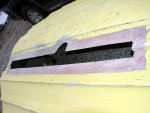
My nice rectangular hole now has a rounded notch in the middle, toward the center of the hull. I'm guessing this was the point of hardest impact. As I ground in that area, I discovered the glass was delaminated there. Can't keep that. A delaminated area is no base for a solid repair! So I kept cutting until the glass was solid again, then feathered it out from there.

The resin for this repair is in the house now, getting warm to room temperature. (It's been stored in the garage, so it was cold.) Tomorrow is supposed to be in the forties, so I'll have no problem getting the work bay up to the 60's or 70's for some glass work. Hopefully time will smile on me tomorrow, and I'll try my hand at some lay-up.
 

Woodonglass

Supreme Mariner
Joined
Dec 29, 2009
Messages
25,929
Re: 1979 Champion Bass Boat - Tear Down and Restoration -- with PICS

DHag, you MUST to this repair both on the INSIDE and the OUTSIDE. Trust me on this one. It is NOT an outside only repair. I'd Highly recommend you do the repair on the inside first. Must easier IMHO. Then do the outside. You should use wax paper and tape to close off the outside and then Flip her to gain access to the inside. Grind the inside just like the outside then lay CSM and 1708 3 layers each.
Flip her and use csm 1708 and two final layers of CSM. Use fairing material to blend it all then gelcoat or paint. That's the correct way to do this repair. That's a BIG repair and double strength and build up is required.
 

DHag

Petty Officer 2nd Class
Joined
May 29, 2007
Messages
166
Re: 1979 Champion Bass Boat - Tear Down and Restoration -- with PICS

DHag, you MUST to this repair both on the INSIDE and the OUTSIDE. Trust me on this one. It is NOT an outside only repair. I'd Highly recommend you do the repair on the inside first. Must easier IMHO. Then do the outside. You should use wax paper and tape to close off the outside and then Flip her to gain access to the inside. Grind the inside just like the outside then lay CSM and 1708 3 layers each.
Flip her and use csm 1708 and two final layers of CSM. Use fairing material to blend it all then gelcoat or paint. That's the correct way to do this repair. That's a BIG repair and double strength and build up is required.

Thanks. You just confirmed some more reading I had just done. Seems 99.9% of the info you can find is for patching bolt holes and such. This ain't a bolt hole! I finally found another write-up on fixing a big hole. It definitely seems to make more sense basically to sandwich the scarfed edges of the existing hull between the new layers, as you describe.

Finding more than one authoritative source for a process makes me feel better about it. The outside-only approach I had stated earlier came from West Systems! I figured they oughtta know. And maybe their process is "good enough." But I' prefer better than that if I can get it.

Yeah, I'm really looking forward to taking another glass dust shower-- :facepalm: --but I'll flip it tomorrow and scarf out the inside to match, then start the lay-up.
 

a1964rn

Petty Officer 1st Class
Joined
Oct 18, 2012
Messages
287
Re: 1979 Champion Bass Boat - Tear Down and Restoration -- with PICS

The West System guide is written for repairs using epoxy, NOT polyester.
Also, the guide does recommend that you provide backing for the repair:

Provide backing to support the lay up of the repair patch as described in Section 4.2 if:
a.—the hole through a non-cored panel is larger than about 1" in diameter.
b.—the hole through the inner skin of a cored panel is larger than about 1" in diameter.
 

DHag

Petty Officer 2nd Class
Joined
May 29, 2007
Messages
166
Transom first

Transom first

I decided that I needed practice before I take on the hole repair, so I thought I would take on finishing the transom first. Good decision.

If you recall, I had set the new transom wood in place, but the inner shell still needed to be laid in. I figured, if I screwed up the glass on the transom, it was no big deal. I could just grind off and start over. In the meantime, I would learn first-hand about laying up fiberglass.

First, I read a lot of stuff on how to do this. One of the best-looking sources said to use a disposable bristle brush to work the resin into the glass. Well, that sounds good. But it doesn't work so well on CSM (chopped strand mat). CSM is bound together with some sort of adhesive so you can work with it, but the adhesive dissolves in fiberglass resin. When you try to brush resin into CSM, it has a tendency to come apart.

For me, the best way to work the resin into the CSM was to lay the CSM in place, pour the resin onto it, then use a resin roller to work it in. I got the 1/2" X 3" roller from here: Fiberglass Rollers Bubble Rollers - U.S. Composites, Inc.. I also got a corner roller.

The transom is nearly vertical, so I set the CSM in place on it, then poured the resin onto it near the top and let it run down. As it ran down, I would work the roller in short strokes through the resin, and was able to distribute it through the CSM. Maybe not the best practice. But it worked for me without shredding the CSM.

I measured the thickness of the old inner transom skin, then looked up what I would need to use to make the same thickness. I used this chart. I used two layers of 1-1/2 oz CSM and two layers of 1708. I laid it up alternating-- CSM | 1708 | CSM | 1708.

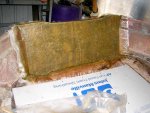
I appreciated reading from more experienced people that the cloth isn't fully saturated until it's "transparent." Well, it never really gets transparent. More like translucent. What I mean is... In the pictures that follow you'll see a sheet of "AP Foil Faced Foam Sheathing" laying in the bottom of the hull. I used this as a work surface to saturate the 1708. I covered the sheathing with a sheet of plastic, then laid the 1708 on it. I poured the resin onto the 1708 and worked it in. When the 1708 was fully saturated, you could see the Johns Manville logo and the print through the 1708. That's what they mean by "transparent."
 

DHag

Petty Officer 2nd Class
Joined
May 29, 2007
Messages
166
Transom first

Transom first

Now the pics.
I learned a variation in the old rule to "Measure twice and cut once." Well, I measured more than twice, but didn't finish my cuts. Here's the first two layers. I got them laid in, then noticed I was having a little difficulty. Something about cutting the height of the glass, but not cutting the length.

The glass is 50 inches wide, and in a long roll. I cut the pieces to fit the 20-inch transom height with some overlap, but didn't cut to fit the transom's 42-inch width. Here's the result:

DSC05992-001.JPG

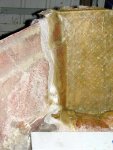
On the left side of the picture, notice that the glass isn't saturated at all. Dry fiberglass is hanging off the side. Also, it's not so noticeable, but see how wide the overlap on the right side is? It's wider than the strip that I had prepped. So while it looks good, it wasn't going to stick properly for that whole width.

DSC05993-001.JPG DSC05994-001.JPG

After only half the glass in place, I covered it to make it set. Then I came back and took off the excess.
 

DHag

Petty Officer 2nd Class
Joined
May 29, 2007
Messages
166
Transom first

Transom first

I purposely overlapped the top of the transom, figuring I would cut off the excess to finish it.

DSC05996-001.JPG

I also thought I could just use a pair of snips to cut it. This is about as far as I got. Wow! That stuff is HARD.

DSC05998-001.JPG

To trim off the transom top, I ended up putting a cut-off wheel on my angle grinder. Quick and easy. So easy, I used it (VERY carefully) on the excess stuff on the left side. Then I switched to a grinder wheel to re-grind the hardened excess.

I said earlier that on the right side of the picture I had laid it in wider than the area I had prepped. I wasn't surprised to see the glass just flake off of the un-prepped area. But it stuck solid where I had prepped it. Here's the result after grinding, ready for the second half of the layup:

DSC06000-001.JPG

Instructions say that you don't need to clean or sand for more layers. But somehow I couldn't live with that since I had made it set up. So I sanded the whole thing again to roughen the surface, then cleaned it with acetone. May not have been necessary, but certainly couldn't hurt. And I feel better about it.

This time I cut the next pieces for both height and width. Look how nice:

DSC06001-001.JPG

Transom's done! All that's left now is to shoot it with a coat of paint. Not necessary since it's inside and hidden. But the old transom shell was finished. So I'll finish the new one.

Lest anyone comment on the uneven coloring on the transom-- I see it too. It kinda looks like there's air under the glass. Trust me, I worked it all out. It's got to be something with the lighting of the photo. It's smooth and even colored when you look at it in person.
 

DHag

Petty Officer 2nd Class
Joined
May 29, 2007
Messages
166
Patch that big hole!

Patch that big hole!

FINALLY the weather warmed up enough that I could keep the temp above 60 in the garage, so fiberglass resin would set up. Sorry for the quality of these pics, but I didn't think to take my good camera with me, so these shots were taken with my phone.

First step: The molds.
Way back in November (Has it been that long already?), I posted about making molds for patching the hole. Here's a link: http://forums.iboats.com/boat-restoration-building-hull-repair/1979-champion-bass-boat-tear-down-restoration-pics-530194-6.html#post4016571 Thankfully, I still had them where I could find them.

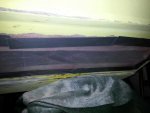
First step was to lay plastic over the hole, so the resin wouldn't stick to the molds. On the outside of the hull, I stretched the plastic over the hole, and just duck-taped it in place.

20130412_161605.jpg

Of course, I had to adapt to the extra-wide area where the original impact on the hull apparently took place.

20130412_161626.jpg

View from the inside:

20130412_161651.jpg

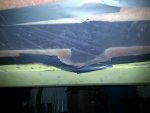
I duck-taped the two molds together, then put them in place over the plastic, and duck-taped them up. It was nice that this happens to be an area of the hull that is flat from front to back, so bracing the foam molds was easy. I just put a 2X4 under the molds' seam, and held it up with a floor jack.

20130412_163808.jpg
 

DHag

Petty Officer 2nd Class
Joined
May 29, 2007
Messages
166
Patch that big hole!

Patch that big hole!

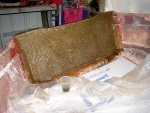
This next pic takes a big jump ahead. Something I didn't take a shot of, you can see through the wet fiberglass in this shot. If you look above, you see the plastic is flat across the hole. But the molds were cut to give me a starting point for the chine that runs down the middle of this patch.

My dad came up with the solution. With a razor blade, with the molds in place, we split the plastic down the center line of the chine. Then we laid a strip of duck tape down the split, sticking the tape and plastic down into the mold in the shape of the chine.

This pic shows my dad working the first layer of chopped strand mat (CSM) with resin. He learned real quick how CSM will come apart if you work it too roughly with the roller, or move it sideways. A 50-inch wide yard of 2-1/2-ounce CSM will absorb about a quart of resin.

20130412_173449.jpg

After the CSM, we laid in two layers of 1708 bi-axial cloth. For those who don't know, that's two layers of woven fiberglass, with the fibers running at a 45 degree angle to the length of the cloth. A layer of 1-1/2 ounce CSM is laid on the back of them, then all three are stitched together. The whole thing weighs 18 ounces per square foot. Like CSM, a 50-inch wide yard of 1708 will absorb about a quart of resin.

Here is the final product, 1 layer of CSM and two layers of 1708, covered with plastic. For those who don't know, polyester resin for fiberglass comes in two basic forms, waxed and unwaxed. (There are various grades, too, but all in the two basic forms.) Regular resin will set up sticky if exposed to air while setting. So you cover it with plastic until set. Waxed resin doesn't need to be covered, as the wax rises to the surface and cuts off the air. It's mostly for finishing work, not layup like here.

20130412_182119.jpg

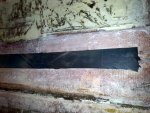
And here's the view the next day, after peeling off the plastic. You can see the original hole as a lighter color. Notice you can see the chine, too.

20130413_155310.jpg

Here is the layup "recipe" I followed:
1. Feather out from the hole a distance about 12 times the thickness of the hull. It's about 1/4" thick, so I feathered around the hole about 3 inches.
2. First layer of CSM, cut the size of the ground-out area.
3. Second layer of 1708, cut an inch smaller than the first layer all around.
4. Second layer of 1708, cut an inch smaller than the second layer all around.

The outside of the hull is feathered more than the inside. So these three inside layers filled in the hole slightly higher than the original inner surface.
 
Top