1979 Champion Bass Boat - Tear Down and Restoration -- with PICS

JDA1975

Lieutenant
Joined
Aug 27, 2011
Messages
1,385
Re: 1979 Champion Bass Boat - Tear Down and Restoration -- with PICS

Thats spot on, foam cored stringers work great, its pretty common practice with newer boats being built. Buying prefab foam stringers is pricier, which is why a lot of the forum builders go with wood. If you make your own molds the glass layup on foam cored stringers will be thicker than wood core, so order more fiberglass to account for that, maybe one of the glass gurus can give you a good layup schedule to achieve the needed thickness.
 

DHag

Petty Officer 2nd Class
Joined
May 29, 2007
Messages
166
Re: 1979 Champion Bass Boat - Tear Down and Restoration -- with PICS

If you make your own molds the glass layup on foam cored stringers will be thicker than wood core, so order more fiberglass to account for that, maybe one of the glass gurus can give you a good layup schedule to achieve the needed thickness.
I've been digging through the manufacturers' web sites, and I've found the layup for them. Most of the pre-fab stringer makers are quite open with how their stringers are made. In a nutshell, they are 2-lb polyurethane foam, overlaid with a single layer of 24 oz. "+-45" or "0-90" fiberglass cloth. Some are stitched cloth, others just bi-directional. Some include a soft polyester backing, claiming it helps adhere to rough surfaces. For larger boats they can include aluminum backing strips and other strengtheners. But for a 17-footer, it's just foam and glass.

They set these in place just like wood. Their own cloth hangs a couple of inches off the sides to be used as the first step in layup. Then you continue to layup over them just like you do with wood stringers. They do the same to make the ribs, using sheet foam with the same glass on each side.

Pretty simple, really. I can see my boat would probably really like losing about 150 pounds or more, using foam instead of wood.
 

DHag

Petty Officer 2nd Class
Joined
May 29, 2007
Messages
166
Re: 1979 Champion Bass Boat - Tear Down and Restoration -- with PICS

How bad were my stringers and foam?

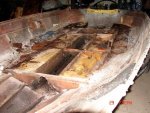
Well, it took me less than an hour to go from this:

DSC05706.JPG

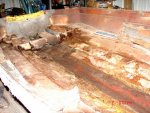
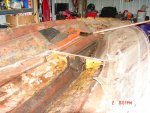
To this:

DSC05713.JPG DSC05714.JPG

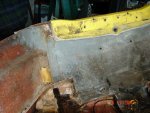
My implement of destruction of choice is the floor scraper lying in the bow. I had not cut out the structure in the stern yet, because I could not tell what might be under it. Now I can finish cutting it out, since I can see the shape of the hull there now. The cross-piece in the front is the one piece that is solid. I think I'll just trim it up and keep it there.

I tested scraping the hull with the floor scraper, and I think it will clean out the old foam to a point where I can sand out the remainder. I'm planning to use a belt sander. I think it will work. We shall see.
 

DHag

Petty Officer 2nd Class
Joined
May 29, 2007
Messages
166
Re: 1979 Champion Bass Boat - Tear Down and Restoration -- with PICS

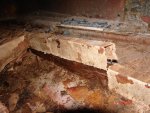
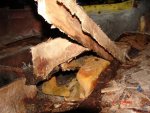
I was pleasantly surprised, and a bit horrified, at how easily the stringers and foam came out. I used my body spoon tool to break around the outside edges of the foam, then slid my floor scraper down the sides. A little pry, and the foam pretty much came out in big blocks. Very little stayed stuck to the hull.

DSC05708.JPG

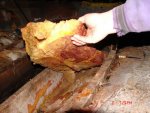
The stringers were all split and loose. They weren't even solidly attached to the hull, and peeled up easily. Most of them I could just lift off. Others, all I had to do was jam the floor scraper under an exposed end and lift.

DSC05709.JPG DSC05710.JPG

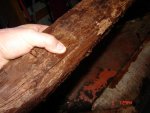
The wood cores were all thoroughly soaked with water, and totally rotten. This is one of the best pieces. If you look closely, you can see the water squeezing out of the wood from under my thumb. This piece of wood is less than 3 feet long, but weighs about 15 pounds!

DSC05712.JPG

Tomorrow my daughter and her husband are coming for the weekend. He just bought an '84 Champion, and he's eager to help me with mine. He's hoping, I know, that he won't have to do what I'm doing. When I get off work tomorrow, I'll finish cutting out the structure in the stern, and do some cleanup on my first cuts. My son-in-law will help me flip it over, then we'll probe the whole hull to find not only the break that sank us, but also any weak spots like bad previous repairs.
 

Seasonally.boating.jon

Petty Officer 1st Class
Joined
Jul 10, 2011
Messages
283
Re: 1979 Champion Bass Boat - Tear Down and Restoration -- with PICS

Yeah I remember those chunks of foam. Be thankful it came out like that. Others weren't so lucky. I'm able to use my original stringers as templates. Perhaps you'll be able to aswell.
Nice work sir.
 

DHag

Petty Officer 2nd Class
Joined
May 29, 2007
Messages
166
Re: 1979 Champion Bass Boat - Tear Down and Restoration -- with PICS

I'm able to use my original stringers as templates. Perhaps you'll be able to as well.
Sadly, no. But that's why I did a detailed drawing of them before I pulled them out. I've also decided to use foam for my stringer cores, so I won't be quite so dependent on having an exact pattern for their shapes.
 

DHag

Petty Officer 2nd Class
Joined
May 29, 2007
Messages
166
Re: 1979 Champion Bass Boat - Tear Down and Restoration -- with PICS

Transom

Here is the transom, close up. It has been previously worked on. It is coated on the inside with something very hard and solid. I have beaten, tapped, and prodded all over it, down the sides, and across the bottom. I can't hear or feel anything that would indicate that there is any problem inside the transom.

DSC05718.JPG

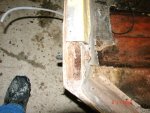
These next two pics are looking down on the top of the transom. The first is the port end; second is the starboard end.

DSC05719.JPG DSC05720.JPG

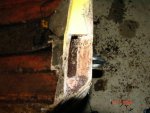
As you can see, there is some rot in the top corners of the transom. I don't yet know how deep it goes. I'm going to dig and drill these spots out until I hit solid wood or it's obvious that it's too deep. Hopefully, I'll hit solid wood and can just clean these out and fill them.

I notice that these areas are around the two stern tie-down eyes, and the bolts to those are extremely rusted. Perhaps there's a connection.

Comments welcome.
 

Woodonglass

Supreme Mariner
Joined
Dec 29, 2009
Messages
25,929
Re: 1979 Champion Bass Boat - Tear Down and Restoration -- with PICS

Take a drill and from the inside drill down low on the transom and check the shavings. If they are dark and wet then you will need to replace the transom. If they are light tan and dry then fill the holes with 3M 5200 remove the top cap of the transom and see how far the rot goes down. If she were mine, I'd replace it all especially since you've got the boat down this far. If you replace everything now, you can rest easy for Decades knowing that the boat is done right and will Never have to be redone in your lifetime.
 

DHag

Petty Officer 2nd Class
Joined
May 29, 2007
Messages
166
Re: 1979 Champion Bass Boat - Tear Down and Restoration -- with PICS

Flipping the Hull

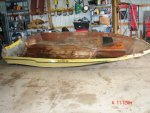
I didn't get any pics of us actually flipping the hull over. But with stringers, ribs, and foam all removed, it's LIGHT. I can easily lift either end by myself. It was a simple matter to slide it off the trailer onto the floor.

DSC05721.JPG

My son-in-law and I simply lifted it up until it was balanced on one side. Then he held it while I moved to the other side. I held it while he joined me, and we lowered it down. I could probably flip it on my own, using my engine crane.

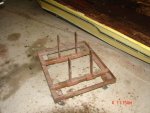
I thought you all might be interested in my solution for moving it around while upside down. I have a pair of engine dollies.

DSC05722.JPG

The four vertical bars on these can be slid across on the bars in the base. Normally, as you lower a car engine down with an engine crane, you set the dolly under it and line up the vertical bars to line up with the oil pan rails. Then set the engine down. Then you can roll it around wherever you want it, and do top end work if you want.

I lined up the bars so they would straddle the transom. One of us lifted the stern while the other rolled the dolly under it.

DSC05723.JPG

I forgot to take the picture of the dolly for the bow before putting it under the boat. But here you can see I set an old flotation cushion on to of the vertical bars of the dolly. Then we rolled the dolly under the bow and set it down on the cushion. This shot is looking up under the bow as it is resting on the cushioned dolly.

DSC05725.JPG

Now I can roll the hull anywhere I want it in the garage.
 

DHag

Petty Officer 2nd Class
Joined
May 29, 2007
Messages
166
Re: 1979 Champion Bass Boat - Tear Down and Restoration -- with PICS

The Damage

Once it was flipped and on the dollies, we started prodding and tapping. We found any and all damage is along the inner port chine. It appears that the boat hit something hard while at moderate speed.

In this contrast-enhanced picture, you can clearly see a jagged white crack. I have marked it with a red arrow. This is about 19 inches long. Not only is the hull broken here, but the whole chine in this area is damaged. Tap down the chine with a screwdriver handle and it sounds solid until you get to this area, then it just sounds mushy.
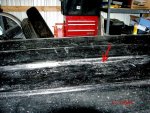
DSC05726.jpg

In this next photo, also contrast-enhanced,, you can see where I have circled and marked all the damage we could find. The front circled are marked "Broken" is the area in the picture above. The area marked "Rough" is an area where the chine is solid, but it has been reshaped, apparently by hand, and it's not straight and smooth like it should be. The area marked "weak" just seems to sound different when it is tapped with a screwdriver handle. I'll have to examine it more closely once I get the black off. There was a heavy but poorly finished patch in this area when I got the boat, and I had smoothed it out before I coated the boot of the hull with Durabak. I don't remember how big it was, though. We shall see.

Question for the experts:
Should I just cut out this whole section and remold the chine? Or should I cut out only the "Broken" section, and just build up and block sand out the "Rough" area to make it straight and smooth again?
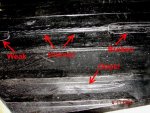
DSC05728.jpg

I have to be honest with everybody, and I'll point out my mistakes along the way. You see where it says, "Oops?" It seems I cut through the hull while cutting out the deck. :facepalm: At least it's a straight cut, and will be easy to fix. :redface:

One last angle on that "Weak" spot in the back. It may not be weak. It may sound different just because it is near the stern. Kinda helps give a perspective of where this chine is located.

RearDamage.jpg

It was a mistake to apply Durabak to the hull. I did it to stop the slow leak I had, and it worked for a couple of months. Then a day fishing on Stockton, windy day with big rough waves, opened up the leak again. Probably from the basically nonexistent stringers allowing the hull to flex and twist. That crack marked "Broken" is probably the source of the slow leak, and it's surely the place where we got it hung up on a stump, and ultimately sunk it.

So now, I tell everybody-- Don't do what I did. No shortcuts. Fix it right.
 

DHag

Petty Officer 2nd Class
Joined
May 29, 2007
Messages
166
Re: 1979 Champion Bass Boat - Tear Down and Restoration -- with PICS

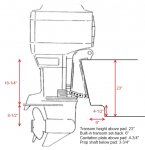
It's cold, so the glass repairs will have to wait a bit. So my mind wanders off to other issues that I'll need to deal with, like, can I improve the motor setup? I did a bunch of measurements on the hull and transom, to determine how the motor was set up.

I have to wonder how much any additional set-back would be effective, seeing as how the boat has a "built-in" set-back of 6 inches already. Perhaps a jack-plate with a minimal set-back, mostly to get up/down adjustability? Also, it seems like the motor is set quite a bit "up" already.

The boat also has the "boat-tail" stern. That's funny to say, I guess. When the back of a bullet is tapered, it's called a boat-tail. Anyway, tapered stern, narrower than the beam.

Any and all comments on the setup, and suggestions, are welcome.

TOOK OUT IMAGE. MEASUREMENTS CORRECTED BELOW.
 

Attachments

  • PresentMotorMount.jpg
    PresentMotorMount.jpg
    85.8 KB · Views: 2

kfa4303

Banned
Joined
Sep 17, 2010
Messages
6,094
Re: 1979 Champion Bass Boat - Tear Down and Restoration -- with PICS

Hi DHag. It looks like you've got it set up just right. I don't think you need any additional set back and the cavitation plate looks to be set just right too. Of course, you won't know for sure until you get on the water, but I think you'll be good. I love the funky built in set back and boat tail. Very unique. Good luck.
 

DHag

Petty Officer 2nd Class
Joined
May 29, 2007
Messages
166
Re: 1979 Champion Bass Boat - Tear Down and Restoration -- with PICS

CORRECTED MOTOR/TRANSOM MEASUREMENTS

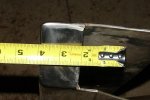
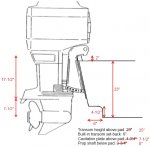
I took another approach to measuring. I set the tape measure stationary in relation to the pieces, and took photos.

I also pulled out the transom plate, which I had not seen off of the boat. My son-in-law had pulled it off while I was away at work. To my surprise, the transom plate adds 2 inches of lift to the motor height!

So here is a corrected drawing of the mounting. It makes a lot more sense. The motor measures 25" inches from hook to shaft. And the transom height, with plate, measures 25" from top to pad. That puts the prop shaft level with the pad.

This fits what I thought I had measured earlier, but wasn't sure of. It looked then, like the shaft was even with the pad. These measurements appear to confirm that.

I also learned that Champion boats have a 12 degree "positive trim angle" built into the transom. With the motor mounted flat on the transom, this lays the motor back. This explains why I always felt like the motor was tilted way back when it was trimmed down. I put in a tilt block pin at the highest point, trying to get the motor not to tilt down so far, which helped the motor run better when idling and trimmed down. Now I know I really need a "Champion cut" jack plate, to put the motor at the right angle.

PresentMotorMount.jpg DSC05735.JPG
 

DHag

Petty Officer 2nd Class
Joined
May 29, 2007
Messages
166
Re: 1979 Champion Bass Boat - Tear Down and Restoration -- with PICS

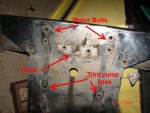
Here is the transom plate that was on the boat. As you can see, there really are no adjustments available in it. The holes marked "Hook" are for mounting a bracket that matches a hook on the motor. There are two holes for mounting bolts, and two holes down below where the trim pump lines actually pass through the transom into the motor mounts.

DSC05736.jpg DSC05738.jpg

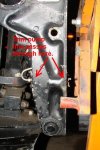
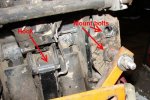
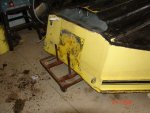
Here is the front of the motor, showing the mounts. (The lower mount bolt holes are bolted to my engine stand.) The "Hook" in the middle just hooks over a mounting plate that bolts to the transom. I guess it's to help hold and line up the motor while you get the bolts in. Anyway, there are no other mounting holes. That plus the trim pump lines passing through the transom pretty much take away any possibility of height adjustments. A jack plate would solve this problem.

DSC05733.jpg
 

DHag

Petty Officer 2nd Class
Joined
May 29, 2007
Messages
166
Re: 1979 Champion Bass Boat - Tear Down and Restoration -- with PICS

I've been running a Piranha 4-blade prop, which helped my hole-shot and stopped porpoising. Mostly, though, I had got it to replace the damage stainless steel prop. Previous owner had hit something hard with it. Hard enough to bend the prop shaft.

Well, I didn't get rid of the old prop, and now I'm glad I didn't. I just took a much closer look at it. I had seen that it was a 14 inch diameter, 21 inch pitch. But I hadn't paid attention to much else.

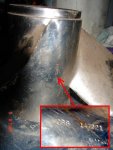
DSC05741.jpg

A closer look: It's a Hoss Triton II, 147221. I don't know what the "72" is. Rake angle?

Just a little searching revealed that the Hoss props are custom made high performance props, with a reputation for being faster than anything else.

So I'll have to have this prop refurbished. Suggestions on the best place to have it done? The Prop Doc at http://www.propmd.com? Or should I contact Hoss to see if they'll do it?
 

ezmobee

Supreme Mariner
Joined
Mar 26, 2007
Messages
23,767
Re: 1979 Champion Bass Boat - Tear Down and Restoration -- with PICS

I'd first check with your local marine dealer. They usually either do prop repair or have someone in place to send them out to. Might save you the cost of shipping.
 

DHag

Petty Officer 2nd Class
Joined
May 29, 2007
Messages
166
Re: 1979 Champion Bass Boat - Tear Down and Restoration -- with PICS

Got an unexpected break in the cold today, so I tried out something different to strip the Durabak off the hull.

I got a knotted-wire cup brush for my angle grinder. It spins about 14,000 rpm.

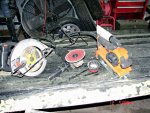
Picture: Circular saw. Angle grinder with sanding disc. Knotted-wire cup brush for angle grinder. Belt sander.
DSC05758.JPG

With the knotted-wire cup brush, at the high speed of the grinder, the Durabak sort of melts, then peels. It flies off in little chunks about the size of rice grains. If I keep the brush moving, it does not dig into the hull material. It does leave some "smears" of black behind, but they are rough and thin.

In wider, straighter areas, the belt sander takes these smears off very nicely, and roughs the gelcoat just as I would want it for painting.

Where the belt sander won't reach, the sanding disc on the angle grinder will do the trick. 30 grit is too coarse, and can cut the gelcoat too quickly. 80 grit is slow to cut through the smears, but will do it. I have 60 grit disc I haven't tried yet, but I suspect it will give me some speed without cutting in.

Beneath the tools, you can see a the results. It's a good result for doing repairs. It will sand down nicely for refinishing. Right now, I'm leaning toward using Dupont Marine Imron to refinish the hull.

Not shown in the picture are safety goggles and dust mask. This process is throwing black bits and yellow dust everywhere. Best to be safe!
 

DHag

Petty Officer 2nd Class
Joined
May 29, 2007
Messages
166
Re: 1979 Champion Bass Boat - Tear Down and Restoration -- with PICS

The Damage

In the process of taking off the Durabak coating, a chunk came out of the chine in the area I marked as "broken" in an earlier picture. Under the chunk, a hole.

DSC05755.JPG

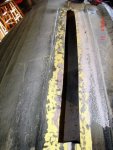
After taking off the black, it was apparent that the whole section that I had marked needed to come out. I used the circular saw. I put the edge of the cutting guide against the chine and it gave me a nice, straight cut on both sides. I took out a piece 4 inches wide and 5-1/2 feet long.

DSC05751.JPG

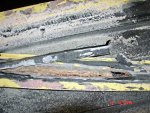
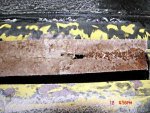
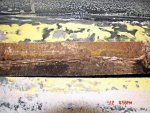
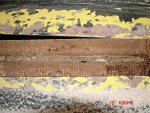
Here are a set of pictures of the inside of the section I cut out. You can clearly see the perforated aluminum strip that I had tried to use to repair this right after I got the boat. That was the wrong way to do it. You can also see the obvious holes, and the long crack between them.

DSC05752.JPG DSC05753.JPG DSC05754.JPG
 

DHag

Petty Officer 2nd Class
Joined
May 29, 2007
Messages
166
Re: 1979 Champion Bass Boat - Tear Down and Restoration -- with PICS

Got this question off-line:
You gonna keep that cut out piece and reshape/form with glass or just make a new one?
I was originally figuring on re-forming the whole piece new. So I've been working out how to get the shape of the chine right.
I cut it out because that's how all the guides I have found say to do it. I cut it an inch and a half outside the damage so I knew I was into good glass. I also knew there was really no way *I* could repair just the chine with it in the hull.
Now... I'm open to suggestions.

It would be easier to get the chine's profile correct if I were to rework it on the cut-out piece, on my workbench. Then chamfer the cuts and splice it back in. The new stringer would add strength to the patch, since the stringer runs right down the chine line. But would this be a "good" or "right" way?

Or would it be easier/better/stronger overall to build in one whole replacement patch? Make a form on the outside including the chine line, and do it all one piece.

Recommendations? Anybody feel free to pipe in.
 

DHag

Petty Officer 2nd Class
Joined
May 29, 2007
Messages
166
Re: 1979 Champion Bass Boat - Tear Down and Restoration -- with PICS

I'd first check with your local marine dealer. They usually either do prop repair or have someone in place to send them out to. Might save you the cost of shipping.
I have to put in a plug for Tim at Hoss Propellers. I sent an e-mail asking if they did repairs on their props, and he responded within two hours. Then I sent him details with three pictures. He responded the next morning.

$150 to have Tim repair it. Normal turn-around is a week, unless I wait 'til summer. Then it could take up to a month. I can think of two reasons to pay extra to have Tim repair it:
  • Great first impression, with quick, courteous response to a simple query.
  • With what I've read about Hoss props, they have a long reputation for accelerating and running faster. If I have Hoss repair it, I know it will be exactly as they designed it when I get it back. May even have an improvement or two that they have developed over the years.

One reason to have it done elsewhere:
  • Maybe lower cost.

One more reason to have it done locally:
  • No shipping.

I haven't decided for sure. I have time yet. I'll check around.
 
Top