1979 Champion Bass Boat - Tear Down and Restoration -- with PICS

ezmobee

Supreme Mariner
Joined
Mar 26, 2007
Messages
23,767
Re: 1979 Champion Bass Boat - Tear Down and Restoration -- with PICS

Locally would be half the cost I'd think.
 

DHag

Petty Officer 2nd Class
Joined
May 29, 2007
Messages
166
Re: 1979 Champion Bass Boat - Tear Down and Restoration -- with PICS

As promised, pictures of how I enclosed the work bay of my garage.

As background, the garage is 40' X 30', of "pole barn" construction. There are 5 large trusses that support the roof, set on 5 pairs of 6"X6" posts. This makes for four 10' X 30' bays. There are three overhead garage doors for the vehicle parking bays, and the 4th bay is work area. The garage is too large to heat economically, plus the entire length of the roof peak is vented, so heat just goes out the top.

The answer is to install a ceiling above the work bay, and a wall and door along its side. Borrowing from how building contractors enclose a work area in plastic, and how body shops use plastic curtains to control temperature and air flow, I finally followed my other son-in-law's advice, and did it with plastic.

After I finished this, sunlight on the south-facing wall, just 10 feet across, made it comfortably warm inside the bay. Outside temp was about 40. Inside was near 70.

The ceiling is supported by 3/16" polyester ropes, extended across the width of the bay, 2 feet apart, between the two end trusses. Each rope supports only about 2 pounds of weight. The plastic is 4-mil polyester, purchased as a 10' X 100' roll from Home Depot.
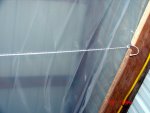
DSC05768.JPG

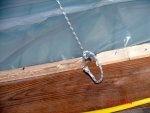
The ropes are connected to the trusses using plain old fence staples.
DSC05767.JPG

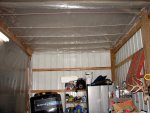
Here is the inside view. The curtain wall is on the left.
DSC05766.JPG

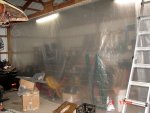
And here is the view from the rest of the garage. The curtain has an opening on the right end. The opening is two sections that overlap by 5 feet, making an effective seal when hanging, but making it easy to pass through.
Now I have to clean up the mess and get back to the boat.
DSC05770.JPG
 

JDA1975

Lieutenant
Joined
Aug 27, 2011
Messages
1,385
Re: 1979 Champion Bass Boat - Tear Down and Restoration -- with PICS

that looks like it will work nicely....add some ventilation, to help draw moisture out...plastic enclosures can have a greenhouse effect if not properly ventilated....otherwise should do you good for maintaining temp and keeping the area clean...or dirty...as the case may be grinding, painting etc lol
 

DHag

Petty Officer 2nd Class
Joined
May 29, 2007
Messages
166
Re: 1979 Champion Bass Boat - Tear Down and Restoration -- with PICS

Right now, I'm stripping the black off of the hull, just a lot of grinding and sanding, and working out how to mold the repair.

After close examination of the piece I cut out of the hull, I did the right thing. The chine section in that piece really could not be repaired with good integrity. The best way to go was to cut out the section like I did, then rebuild that section completely. It will be stronger overall.

I had the idea that I could cut the shape of the chine into a 2X6 board with a table saw, then lay the board in place as the mold. However, that won't work. The line is straight and flat lengthwise. But the angle coming off of the chine toward the gunwale varies as you go forward. A flat, straight mold won't work.

So, I'm working out how to make a mold using the same chine on the other side as a pattern, just mirror-imaged.
 

DHag

Petty Officer 2nd Class
Joined
May 29, 2007
Messages
166
Re: 1979 Champion Bass Boat - Tear Down and Restoration -- with PICS

that looks like it will work nicely....add some ventilation, to help draw moisture out...plastic enclosures can have a greenhouse effect if not properly ventilated....otherwise should do you good for maintaining temp and keeping the area clean...or dirty...as the case may be grinding, painting etc lol
That's the beauty of using plastic as a curtain down the side. I laps onto the floor about 3 inches, so I can anchor it with weights if I want it to stay in place. I can control and vary ventilation by lifting it in various places. Can even set a fan in one end and a filter in the other. Just wrap and tape the curtain around their frames. Not added yet are a set of ropes that will lift the curtain and keep it overhead when I don't want to be closed in.
 

DHag

Petty Officer 2nd Class
Joined
May 29, 2007
Messages
166
Re: 1979 Champion Bass Boat - Tear Down and Restoration -- with PICS

Sorry for the delay in posting. The stuph of life got in the way, plus I had to clean up and rearrange after putting up the plastic around the work bay of the garage. My dad came up to help out over the weekend, and we got some serious work done.

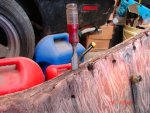
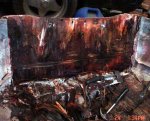
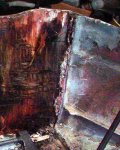
The first thing I did was check the transom for rot. I did this by drilling into the transom from the inside, using a 1/4" bit. I wrapped some tape around the bit to mark the limit of how deep to go, so I wouldn't get into the outer skin. I found what I hope not to find, but exactly what I expected. The wood shavings that came out with the drill were wet and dark. Rot. All the way through the transom. So that's where we started.

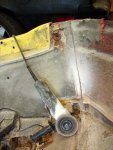
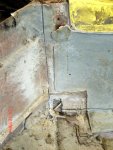
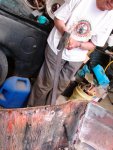
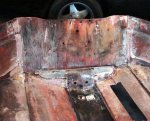
I started by putting a cutting wheel on my angle grinder. We drew a line with a straightedge around the inside perimeter of the transom. Then I cut just deep enough to get through the inner wall.
DSC05786.JPG DSC05788.JPG DSC05789.jpg

Once I had cut all the way around, it was actually very easy to peel the inner wall off of the rotted wood. I just pushed the end of a crowbar under the edges and pried it up. It pretty much just popped off. Pretty gross inside there.
DSC05790.jpg
 

Seasonally.boating.jon

Petty Officer 1st Class
Joined
Jul 10, 2011
Messages
283
Re: 1979 Champion Bass Boat - Tear Down and Restoration -- with PICS

Glad to see your back at it DHag. I would love to see that old basser all shiny and new again.
 

DHag

Petty Officer 2nd Class
Joined
May 29, 2007
Messages
166
Re: 1979 Champion Bass Boat - Tear Down and Restoration -- with PICS

Next step was to get the rotted wood off of the outer wall of the transom, without damaging the figerglass. I saw no need to cut out the whole thing, since the outer wall of the transom is in excellent shape.

We started at the top with a wood chisel. We drove the chisel in about half its length, and worked it back and forth, which started to separate the rotted wood from the glass.

DSC05794.JPG

If you look down and to the right of the chisel, you can see the brass tube of the splash well drain. Almost half of the wood came off with the inner shell.

Next step was more of the same, just bigger. Dad sharpened the end of a piece of 2" X 1/8" flat steel that I had in the corner of the garage. He put a chisel edge on it. With a small sledge hammer, we would drive it down between the outer shell and the rotted wood. We started with about 8 inches. Then we would work the bar back and forth to break the wood. Then pull it out, move it over about a foot and repeat. We worked the bar down in three passes, until we had the bar all the way down to the bottom of the transom.

DSC05795.JPG
 

DHag

Petty Officer 2nd Class
Joined
May 29, 2007
Messages
166
Re: 1979 Champion Bass Boat - Tear Down and Restoration -- with PICS

It took a little more work to get the wood off of the outer shell of the transom. We mostly just worked a crowbar underneath the layers of the rotted plywood and pried out. It splintered and peeled off layer by layer.

DSC05797.jpg

This looks like the transom was worked on before, but was just reinforced, not replaced. I'm not sure. the corners of the transom were filled what looked like fiberglass gel (not "peanut butter"). The gel wasn't solid. It had gaps in it. In this picture, it's the line of pink stuff down the corner.

DSC05797-001.jpg

Once the transom was partly dried out, I put a grinding wheel on my angle grinder and took it to the corners. I ground off the old gel and blended the corner between the side-cut and the transom. This should give me a smooth and straight surface where I can match up new plywood.

DSC05798.jpg
 

DHag

Petty Officer 2nd Class
Joined
May 29, 2007
Messages
166
Re: 1979 Champion Bass Boat - Tear Down and Restoration -- with PICS

So it's pretty well cleaned up now. I have run the grinder with a sanding disc up the lines where the new stringers will be built. Not a final sanding yet, but it's mostly done.

DSC05801.JPG

DSC05800.JPG

The transom looks really clean, but there's still a thin layer of wood on it that needs to be ground off before I fit new wood in.

DSC05802.JPG
 

DHag

Petty Officer 2nd Class
Joined
May 29, 2007
Messages
166
Re: 1979 Champion Bass Boat - Tear Down and Restoration -- with PICS

After a lot of reading and research, I have decided to use pressure treated CCX plywood to rebuild the transom. There are some who will insist that only marine plywood should be used:
  • Naturally rot resistant (but not rot-proof)
  • Exterior adhesive that will not delaminate
  • Free of voids.

Pressure-treated CCX:
  • Virtually rot-proof
  • Exterior adhesive that will not delaminate
  • Can have voids in the layers.

The PT-CCX is far more rot-resistant than marine. Some will argue that the voids in the plywood will weaken the transom and it could fail. But I ran this boat for three years with a totally rotted transom, in some very rough waters. PT-CCX is certainly stronger than rotted wood. The worst that can happen is water get into the voids. But it still won't rot, even if water does penetrate.

I will fill any external voids with PL adhesive, and coat the whole piece in resin upon assembly into the hull.

The only down-side I can see to using PT-CCX is that it is wet when purchased, and must be dried before applying adhesives or resin. According to the Structural Wood Society (formerly PPA - Plywood Pioneers Association), 3/4" CCX plywood weighs 2.2 pounds per square foot. A half-sheet of 3/4" plywood is more than enough for the transom. That's 16 square feet (4' X 4'), so this piece would normally weight just under 36 pounds.

The Pressure-Treated 3/4" CCX that I purchased weighed 49 pounds when I brought it home. So it has about 13 pounds of water, or just over 1-1/2 gallons, left in the wood as part of the treatment process.

Next I'll show what I'm doing to dry the plywood so I can use it for the transom.
 

DHag

Petty Officer 2nd Class
Joined
May 29, 2007
Messages
166
Re: 1979 Champion Bass Boat - Tear Down and Restoration -- with PICS

Since we've been having record hot days (90+ degrees in Iowa in March. That's not right!), my first idea was to simply place the board in the sun and block it so it would dry flat. A couple days in those temps in the hot, hot sun should do the trick, right?

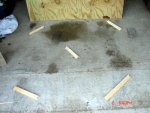
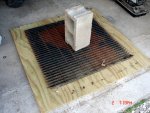
I broke a strip of lathe wood into 5 pieces and arranged them to support the corners and center of the plywood sheet.

1-DSC05803.JPG

Then I placed the plywood on top of the lathe strips, and set a concrete block on a steel grate in the center. My thought was to flip it over as needed in order to keep it from warping.

1-DSC05805.JPG

This was set in the opening of the garage door, facing south toward the sun.

Trouble is, the day after I set this up, the weather turned back to normal. Lows in the 30's/40's, highs in the 60's. There goes that idea. When we picked up the board the first morning, there were puddles of water on the concrete under it, but it still weighed 49 pounds.
 

DHag

Petty Officer 2nd Class
Joined
May 29, 2007
Messages
166
Re: 1979 Champion Bass Boat - Tear Down and Restoration -- with PICS

So here's my next attempt:

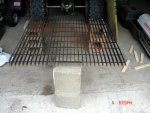
This time, I set three concrete blocks on end, and set the steel grate across them.

1-DSC05807.JPG

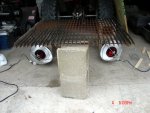
A placed a pair of heat lamps under the grate, facing at an upward angle.

1-DSC05808.JPG

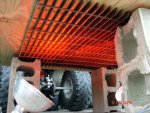
With the plywood on top of the steel grate, the lamps are focused up under the wood. The steel in the grate will be heated by the infrared light from the lamps. The openings in the grate should help hold heat against the wood. It will also channel the heat from the center toward the edges.

1-DSC05811.JPG
 

Seasonally.boating.jon

Petty Officer 1st Class
Joined
Jul 10, 2011
Messages
283
Re: 1979 Champion Bass Boat - Tear Down and Restoration -- with PICS

Hope you have a good plan for drying it out. Thats my major concern. The thought of putting saturated plywood in my transom makes me itch.:D Looking forward to seeing how your drying it. Going with the arruco myself.

google'n plywood weigths now. I want to know the difference between the marine and arruco.
 

DHag

Petty Officer 2nd Class
Joined
May 29, 2007
Messages
166
Re: 1979 Champion Bass Boat - Tear Down and Restoration -- with PICS

And here's the result. It's actually working!

Here are temperature readings taken 12 hours after setting up.

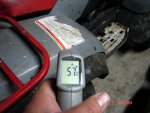
As background, this is taken off of the fender of my 4-wheeler. 57.0 degrees.

1-DSC05812.JPG

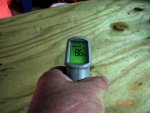
This is taken off of the top surface of the plywood. 86.5 degrees. 30 degrees warmer than ambient. This is heat that is penetrating the full thickness of the plywood.

1-DSC05813.JPG

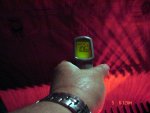
And here is the temperature on the underside. 106.0 degrees. Almost 50 degrees warmer than ambient. After taking the temps, I flipped the board over and left it for 12 more hours.

1-DSC05814.JPG

After 12 hours, I weighed the plywood sheet. It weighed 45 pounds. That's a loss of almost a half gallon of water in 24 hours. Almost a third of the total excess water. At this rate, it would be dry in 3 days. But that won't happen. As it gets drier, the rate of drying will slow down.

I think it will be dry enough if it gets down to 40 pounds, but if it continues to lose weight at a good rate, I'll try to get closer to the "ideal" 36 pounds.
 

DHag

Petty Officer 2nd Class
Joined
May 29, 2007
Messages
166
Re: 1979 Champion Bass Boat - Tear Down and Restoration -- with PICS

Hope you have a good plan for drying it out. Thats my major concern. The thought of putting saturated plywood in my transom makes me itch.:D Looking forward to seeing how your drying it. Going with the arruco myself.

google'n plywood weigths now. I want to know the difference between the marine and arruco.
Yep! And it's working! Half a gallon of water in just 24 hours!

I got the plywood specs here:
www.plumcreek.com/Portals/0/downloads/productInfo/Y510.pdf
Don't know about arruco.
 

Woodonglass

Supreme Mariner
Joined
Dec 29, 2009
Messages
25,929
Re: 1979 Champion Bass Boat - Tear Down and Restoration -- with PICS

The Arauco Plywood is almost void free and use 100% waterproof glue in its laminates and costs less than $40 bucks for a 3/4" sheet. Properly coated and glassed it will last longer than you will have the boat. 20+ yrs. You could already have the transom fabricated and ready for installation. JMHO
 

DHag

Petty Officer 2nd Class
Joined
May 29, 2007
Messages
166
Re: 1979 Champion Bass Boat - Tear Down and Restoration -- with PICS

The Arauco Plywood is almost void free and use 100% waterproof glue in its laminates and costs less than $40 bucks for a 3/4" sheet. Properly coated and glassed it will last longer than you will have the boat. 20+ yrs. You could already have the transom fabricated and ready for installation. JMHO
Thanks, Woodonglass. I'll tell you why I would not have chosen Arauco Ply, if I had known about it.

There are lots of varying opinions on Arauco Ply. Some won't touch it. But then, they wouldn't use anything but regular marine plywood, either. AP has a "composed core" (Arauco's word), which is basically another word for "particle board" or "fiber board." That's neither here nor there if they use a quality resin. Which they do. Some claim it warps easy. Some say the type of wood used in it is more susceptible to rot.

But then, some say my choice of treated CCX is bad, too. Some would have you believe that even the tiniest void in the transom is a failure waiting to happen, and I'm doomed to leave my motor in the bottom of a lake somewhere when the transom breaks. I don't buy it.

Actually, I would have given AP serious consideration except for one particular reason. It's not available in a half sheet. At least not at any of the retailers within 100 miles of me. Trying to watch my budget real close, so I won't buy a full sheet ($45 here) when I only need half. The half sheet of treated CCX was $24. Other than that, I'd still probably have gone with the treated CCX, simply because it is virtually rot proof, not just rot resistant. I have a tendency to keep my machines forever, and I don't want to outlive the transom.
 

Woodonglass

Supreme Mariner
Joined
Dec 29, 2009
Messages
25,929
Re: 1979 Champion Bass Boat - Tear Down and Restoration -- with PICS

Not sure where you got your info on Arauco Ply but it's absolutely incorrect. Check it out for yourself.
http://bluelinxco.myeshowroom.com/brochure/22031/smartlink/34712
It has more plys, maintains flatness, has fewer voids and is overall a much more quality product than any of the other plywoods currently offered in the Big box stores. Been in the "Wood" business for over 35 years and this is some of the best stuff I've seen in a long time.

Most of the big Box Store's here in Oklahoma will cut and sell you 1/2 sheets of their products if you ask. My Lowe's and Home Depot will.
 

DHag

Petty Officer 2nd Class
Joined
May 29, 2007
Messages
166
Re: 1979 Champion Bass Boat - Tear Down and Restoration -- with PICS

Not sure where you got your info on Arauco Ply but it's absolutely incorrect.
I don't want to get onto a side-track of what's the best wood to use, 'cuz there are dozens of threads on iBoats about that. But so you know where I got my info, I started here, on AraucoPly's own web site. That's where I got the info about its having a "composed core."--
http://www.araucoply.com/informacion2.asp?Submenu=1514&cat=0&fin=0&idioma=44

Then a simple Google search on "AraucoPly" gave me lots of information links. Good and bad. The first two "non-commercial" links are to carpentry forums, where they have little good to say about it:

"After cutting a 4'x4' door, it twisted overnight and now fitment for the doors are terrible."
"You'll be ok with that stuff for utility carts or shop cabinets but be mindful that this stuff can and does warp."

The next two are boat building forums:
"Here is my impression: It's really soft, you can sink a screw head into it with little effort. It has voids in the inner layers. Not as bad as BC pine, but still too many for boat use. On the other hand my flooring installer said it was great for underlayment."
"I actually used it to build my V12. It didn't save me a penny. It is very soft..., it checks a lot as most soft woods will and It is VERY thirsty. It takes a minimum of three coats of expoxy to seal it, and you'll feel better with four or five coats. You have to cover it completely with cloth to avoid the checking... I would have had a cheaper and lighter boat had I used quality marine ply."

To be fair, there are lots of hits that say good things about it, too. Overall, I just went with what was familiar, available, in my price range, and met my #1 criterion: ZERO ROT.
 
Top