SlipperyOar
Petty Officer 2nd Class
Thread starter- Joined
- Apr 12, 2024
- Messages
- 194
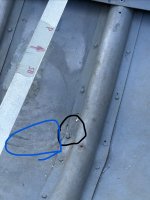
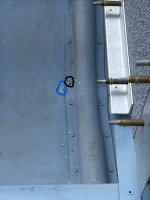
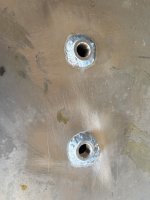
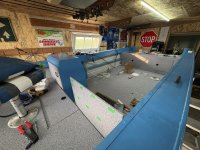
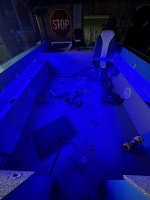
Haven’t gotten around to dealing with the two leaky rivets. Been busy with work and also trying to figure out the best approach to fix these up for good (already disappointed that I didn’t fix these before I painted the underside but can’t cry over spilled milk…). I’ll add the two rivets that showed some leakage below. Btw rivets in question are circled in black and the water circled in blue.
I’m not sure if I should try to rebuck them first and see if that fixes the problem. Regarding the rebucking, from what I’ve been reading I’ll hold a hammer or my hand anvil on the head side (outside the hull) and then have my brother strike the tail end to squish that rivet tight into the hole again. I assume rebucking doesn’t require the full air hammer setup as I’m not needing the add a crazy amount of force.
My other thought was should I just drill out, and replace the solid rivet with a new solid rivet, possibly adding some gluvit into the hole just before I insert the rivet for added insurance. Like I said before the location is at the bottom of the hull, connecting the keel to the skin to the ribs, therefore it’ll never be known that I have 2 unpainted rivets since they won’t be seen.
I realize it’s not a very big leak, literally only 1-2 teaspoons over the course of 25 minutes in the water. But I’d like to know its watertight before I fasten the floor to the framing and spend a bunch of time on flotation foam.
I’m not sure if I should try to rebuck them first and see if that fixes the problem. Regarding the rebucking, from what I’ve been reading I’ll hold a hammer or my hand anvil on the head side (outside the hull) and then have my brother strike the tail end to squish that rivet tight into the hole again. I assume rebucking doesn’t require the full air hammer setup as I’m not needing the add a crazy amount of force.
My other thought was should I just drill out, and replace the solid rivet with a new solid rivet, possibly adding some gluvit into the hole just before I insert the rivet for added insurance. Like I said before the location is at the bottom of the hull, connecting the keel to the skin to the ribs, therefore it’ll never be known that I have 2 unpainted rivets since they won’t be seen.
I realize it’s not a very big leak, literally only 1-2 teaspoons over the course of 25 minutes in the water. But I’d like to know its watertight before I fasten the floor to the framing and spend a bunch of time on flotation foam.