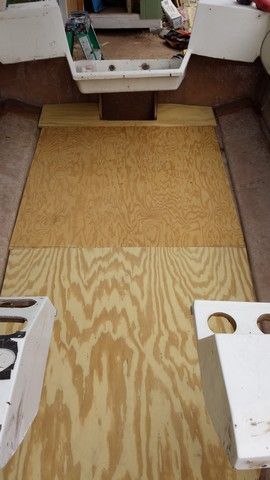
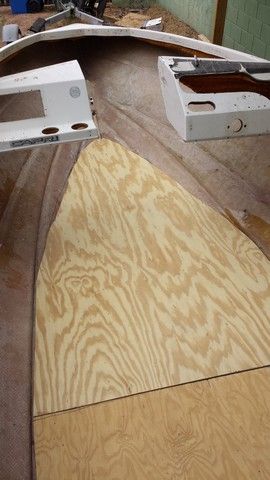
1984 Bayliner Capri 1600 Restoration

azmav

Seaman
Joined
Apr 16, 2013
Messages
61
Re: 1984 Bayliner Capri 1600 Restoration

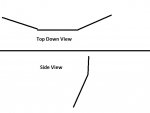
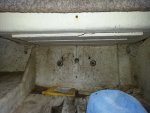
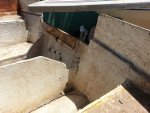
Wow, thanks all for the input and following along! I will try to keep it interesting. GT and Wood, you are both correct on the transom, I have some pictures from earlier in the project when doing my previous thread. I will include them here, as well as a quick drawing to illustrate the shape. Also, I will most definitely be going back with proper thickness of marine ply, or some variation installed all as one piece, with stringers butting up to it and lapped. I have been doing my homework here on this forum and looking to do this boat right.
Bayliner (50).jpgBayliner (54).jpgbaylinercutaway.jpg

RN Joe, I was thinking along those lines this morning. As GT mentioned, there is Seacast, and then Nida Bond from the company that makes NIdacore, the honeycomb panels. But looking top down over the stern of the boat, I am certain that I can make ply fit into where I need it.

Further, looking over your pictures, it is surprising the similarities! The original work on this boat was pretty poor though and only one stringer used the knee bracing. The opposite stringer on the port side ended at a bulkhead at the bilge area, and then the bulkhead stepped the structural support over a few inches into the same panel that can be seen in the second picture.
Bayliner (13).jpgBayliner (49).jpg
 

Woodonglass

Supreme Mariner
Joined
Dec 29, 2009
Messages
25,929
Re: 1984 Bayliner Capri 1600 Restoration

Yup, that's gunna be a 3-piece transom for sure. Ya know you don't have to use Marine Grade Ply. It is the best but your will pay up to $100 more for the plywood to build your transom. If you want to go to that expense then by all means do so. The central portion is the Key component of the Transom and the wings will be structural for towing your wakeboarders and skiers. 2 layers of 3/4" ply, some PB and 2 layers of CSM and 1708 and she'll be as good as new.
 

azmav

Seaman
Joined
Apr 16, 2013
Messages
61
Re: 1984 Bayliner Capri 1600 Restoration

Ya Wood, I hoped to go with Arauco but Lowes here did not carry it in stock so looks like it will be 3/4" AC Exterior. Picked up two sheets, going to measure and cut today and then start working on voids. I saw in another post where a 250 watt light behind the wood in a darkened room will show interior voids and one can punch a hole and fill.
 

azmav

Seaman
Joined
Apr 16, 2013
Messages
61
Re: 1984 Bayliner Capri 1600 Restoration

I am using the method described in Wood's thread about glassing the transom. The problem I am having is when the resin begins to set up and I pull along the edge to leave it hairy, by the time I can wet out the hairy edge, the run off from doing the face causes the base of the hairy glass to setup and it cannot make the bend. On another I attempted to pull sooner and ended up pulling good mat off the face. So should I wet out up to the edge close as I can and then pull the edge hairy and wet the rest of the face and the edge at the same time, or is there some other issue going on with hardening times and proper ratio to the mix. I am using the mix amount called for by the shop here in Arizona and even using a little less hardener to allow for rising temp (working mid day) and attempting to allow for sunlight. (I do not currently have a shaded area to work) The temp right now is 79 but I have been using the 1% ratio recommended for 90 - 100 degree temps so 10 cc per quart I believe.
 

Woodonglass

Supreme Mariner
Joined
Dec 29, 2009
Messages
25,929
Re: 1984 Bayliner Capri 1600 Restoration

Cut the CSM about 2" oversize and then pull the edges "Hairy" prior to wetting it out, OR, cut it to the exact size and then use some scrap pieces of pulled "Hairy" CSM to wrap around the edges. Remember it better to use a Dabbing method rather than a brushing motion when doing this and always precoat the wood first. On the edges make sure any voids are pre-filled as well.
 

azmav

Seaman
Joined
Apr 16, 2013
Messages
61
Re: 1984 Bayliner Capri 1600 Restoration

Your second method is what I ended up doing since I had to go back and cut off the mess, it worked pretty well, but I wondered if it wasn't something like that, so do the tearing before hand. Got it! Thank you sir!
 

GT1000000

Rear Admiral
Joined
Jul 13, 2011
Messages
4,916
Re: 1984 Bayliner Capri 1600 Restoration

Two other things to try out...
1-If the piece of CSM is not too big to handle, wet it out before applying it to the surface {you can do this on a piece of cardboard and use the cardboard to carry the wet piece close to the work** and wet the surface where you are going to apply the CSM with resin beforehand...then dab, dab, dab like a mad man...
2- Another thing that might help, is to lower your catalyst ratio to .75%...believe me when I tell you, your heat and my heat are similar...
work in the shade, then if it seems like it's not kicking off, pull it out into direct sunlight...it will!

Keep in mind that CSM does not really like to go around corners...it helps to round over the edges, but not always...Biaxial cloth is a little more forgiving, but the pre-wetting method definitely helps also...sometimes, if you wet everything out well and it has had a chance to "soak" it all in, it does get a little more give and tends to stay put over a bend...a light touch with the dabbing also keeps it from moving around and lifting a section already laid down...

With one person, the max size of CSM is about 1-2 square feet...if you have an assistant, you can easily double the size of wet floppy resin soaked glass...it will take some getting used to, though...
 

azmav

Seaman
Joined
Apr 16, 2013
Messages
61
Re: 1984 Bayliner Capri 1600 Restoration

Well I will continue to experiment with these methods. Pulling the csm before I wet worked pretty well although it was still a little too long and gave me some headache, next time I will pull it a little closer to the edge. Speaking of headaches, I forgot to shave the past few days and realized I was breathing in some of the fumes while wearing the respirator. Remedied that quick! The three pieces of the transom are done, just a little sanding to do on two of them and one small edge on another. Funny thing, since I am working with the transom in three pieces and needed to wet out the hairy edge, I didn't want to working piece laying on my work station, so I found a plastic lazy susan my wife has for plants and it keeps the board off the table and lets me rotate it to get all around the edges without lifting the piece! My final obstacle will be how to clamp the transom in. I guess I will have to use the existing motor mount holes to run bolts through because the clamps Wood has in his pictures will not fit over the edge of the bottom cap due to the weird angle (see the quick and dirty diagram in post #21). This will work I guess but I has hoped to repair those holes before placing the transom.
 

Woodonglass

Supreme Mariner
Joined
Dec 29, 2009
Messages
25,929
Re: 1984 Bayliner Capri 1600 Restoration

Sure you can use the WOG clamps. The center portion is no problem. The winged pieces can be clamp by making some brackets like this...
clampingbrackets.jpg
 
Last edited:

azmav

Seaman
Joined
Apr 16, 2013
Messages
61
Re: 1984 Bayliner Capri 1600 Restoration

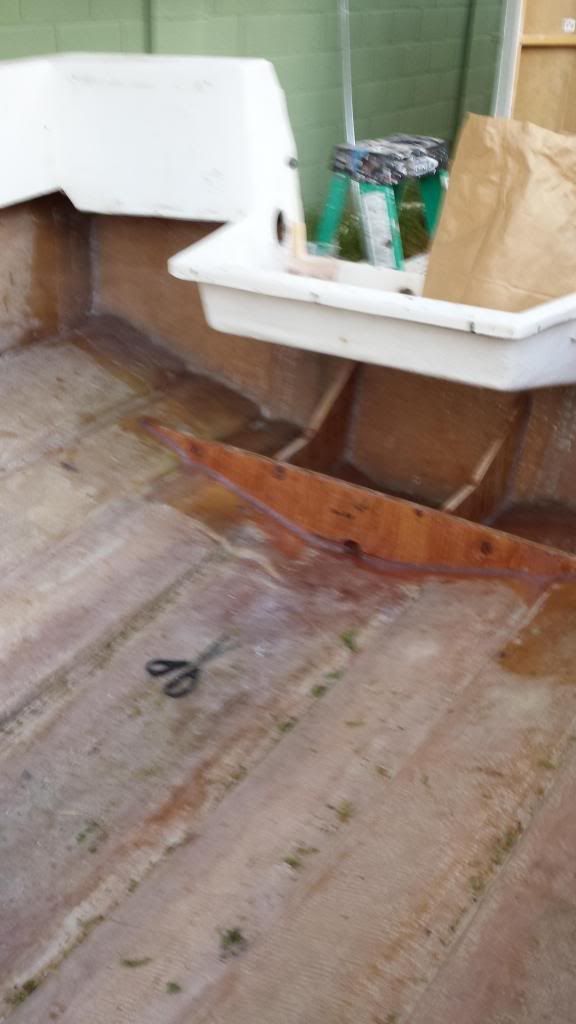
Well after some experimentation and trial and error, I have begun making progress again. The past few weeks have been hectic and full of honey do's, family visits, and wife time;-) Got a little done here and there, and this transom has been a real pain in the design. Once I was ready to move forward, finances caused a wait, but it is worth it. Got the transom glassed in and have most of the supplies I need to get stringers and floor done with a good bit toward seating, etc.

Bayliner (99).jpgBayliner (100).jpgBayliner (101).jpg

Since there is no where to overlap the 1708 across the top edge in the third picture, I used the grinder to remove some material from the rear and wrapped over the top. Some air bubbles I will need to go back and deal with but I will be moving forward with stringers soon.

The guy from Sticky Stuff (great place for fiberglass supplies), here in Phoenix area recommended against using two part foam. Did not have a really good solution, just said of thousands (his words) of boats he remodeled back east, all had wet ruined foam. I am pondering some form of block foam perhaps, or sealed plastic bottles set in two part foam. I know this subject of foaming or not has been done to death, going to keep doing research and see what I can decide on. Already read most of the arguments for/against, foam noodles, etc. The guy at Sticky Stuff did recommend good limber holes and then tilt upward from the bow after a lake outing with a fan blowing up into the spaces. Sounds logical. His argument against foam is that poly resin not being waterproof absorbs so much water over its surface area regardless of gel coat that as the 2 part foam breaks down from constant bouncing on waves, it will absorb the water permeating the hull and no amount of limber holes will dry out the foam once the water gets into it. He agreed that Opps idea on wrapping in plastic sounded good but sounds like a lot of work. His best recommendation was some form of air bladder, checking ebay for deals, etc. We will see what research turns up.
 

azmav

Seaman
Joined
Apr 16, 2013
Messages
61
Re: 1984 Bayliner Capri 1600 Restoration

Well pictures to follow soon, got the cap put back on after finishing transom. Wanted to dry fit before I started putting floor down. Fit looks good, and decided to just leave the cap sitting there while I work on finishing stringers and floor. I was going to take it out to the lake for a test float after finishing floor and reattaching the cap. I would like to verify that everything is balanced and if not, then I can redesign the seating to add weight where needed for better distribution.
 

azmav

Seaman
Joined
Apr 16, 2013
Messages
61
Re: 1984 Bayliner Capri 1600 Restoration

Ok, floor pieces are cut and I dry fit everything to ensure they are all supported around the edges and nothing is too large for the encapsulating layer of CSM. The stringers and bulkheads are all cut to height, bedded, and filleted. Just a few burrs and highspots to clean up with the sander and then will begin layups of 1708 on stringers/bulkheads and CSM on floor pieces. A buddy has a pnuematic rivet gun he can let me borrow and will be fixing the cap down before the floor layups once the pieces are set.


azmav

Seaman
Joined
Apr 16, 2013
Messages
61
Re: 1984 Bayliner Capri 1600 Restoration

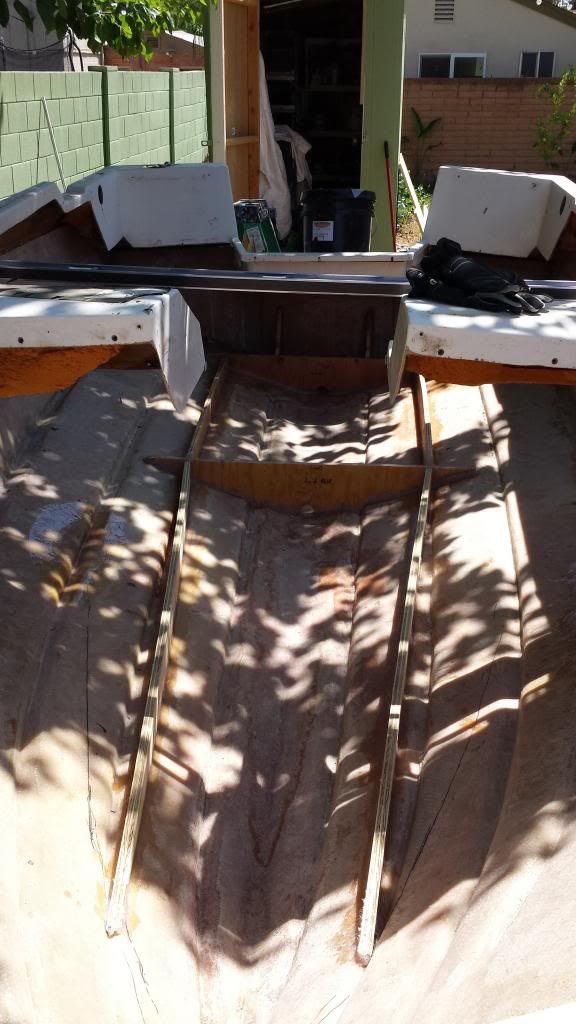
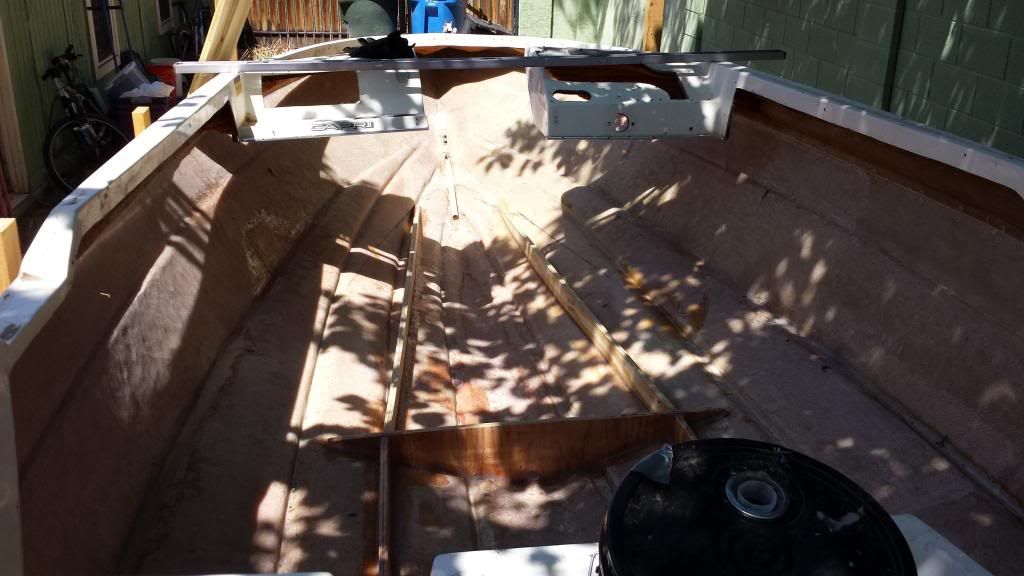
Well, cut short the glassing in stringers and bulkheads as I needed to rivet the top cap in place. Been putting that off but had help from my father this morning and a great help it was, could not have finished without him and his ideas. Looks great! With the heat coming on, I am just trying to finish the interior. I am only going to spot treat the gel coat and buff it out. Next off season I can finish redoing the gel coat and will remove the rub rail at that time if need be.

Bayliner111_zps92c4305d.jpgBayliner110_zps671ceade.jpgBayliner109_zps608bc740.jpg
 

MrDyce

Seaman Apprentice
Joined
May 7, 2014
Messages
40
Re: 1984 Bayliner Capri 1600 Restoration

Looks like it is starting to come together for you. Looking good.
 
Top