Re: 05-10-2012 - re-tab in stringers and transom
Re: 05-10-2012 - re-tab in stringers and transom
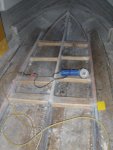
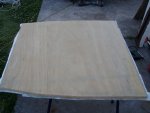
Thanks for the comments woodonglass. Greatly appreciated! I plan to put a couple of layers of 450GSM CSM on the top of the deck. I was going to wax it but the guy at the fiberglass place suggested I flowcoat it before putting the carpet down? I hadn't decided on whether I would be gluing it down now I sorta figured I would though.....
Re: 05-10-2012 - re-tab in stringers and transom
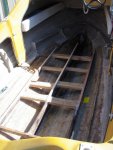
True but carpet gets wet and holds moisture. I think it would just be a better substrate. Heck if you're gunna glue the carpet down, you really only need to lay a couple layers of CSM and wax the last layer for waterproofing then scuff sand just before applying the glue for the carpet No Paint of Gelcoat or anything is required.
Thanks for the comments woodonglass. Greatly appreciated! I plan to put a couple of layers of 450GSM CSM on the top of the deck. I was going to wax it but the guy at the fiberglass place suggested I flowcoat it before putting the carpet down? I hadn't decided on whether I would be gluing it down now I sorta figured I would though.....

")