1986 Sea Ray Seville Restoration

SDSeville

Lieutenant
Joined
Mar 19, 2010
Messages
1,481
Re: 1986 Sea Ray Seville Restoration

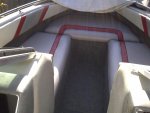
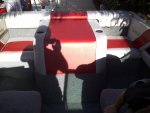
Yeah, it is weird that the cushions each have 2 separate pieces of foam. The rear seats are like that also. It makes it tough to install.

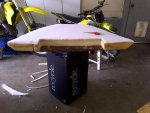
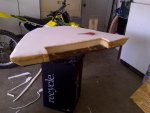
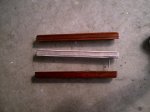
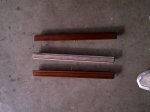
Let me know if you would like the dimensions and locations for those teak pieces.
 

tinkeringwackyone

Chief Petty Officer
Joined
May 2, 2008
Messages
415
Re: 1986 Sea Ray Seville Restoration

You did a great job on the upholstery. spring is here, soon summer.
 

SDSeville

Lieutenant
Joined
Mar 19, 2010
Messages
1,481
My one year anniversary!!

My one year anniversary!!

Well, it has been exactly one year since I brought this boat home and started this thread. Wow, time sure flies. The funny thing is that, even after I found the extent of the damage, I thought I would be back on the water by last June at the latest. Everything I have done seems to take 10 times as long as I plan. Thanks to everyone on this site for your help. While my project is not perfect, I couldn't have gotten this far (wouldn't have even started) without the help, advice, and camaraderie of everyone here.

That being said, I should actually see the water soon. I will spend a couple hours a day this week and all of next weekend (wife will be out of town) and I should be good to go (phase I anyway).
 

lrcustom

Petty Officer 2nd Class
Joined
Mar 2, 2010
Messages
172
Re: My one year anniversary!!

Re: My one year anniversary!!

SD,
Engine Cover and seats look great. Your getting closer to the water.

Throttle Up

LR
 

tinkeringwackyone

Chief Petty Officer
Joined
May 2, 2008
Messages
415
Re: My one year anniversary!!

Re: My one year anniversary!!

Keep pluggin away Glen, you are doing a great job. Hopefully both of our vessels with see water this year.
 

SDSeville

Lieutenant
Joined
Mar 19, 2010
Messages
1,481
1986 Sea Ray Seville Restore

1986 Sea Ray Seville Restore

Still working on the upholstery. Here are pics of the bow cushion before installing the new cover. I used the old foam and added 1/2" of new foam to compensate for 25 years of settling and wear. I glued it on with spray adhesive. The extra foam really helped. The covers would have been too loose if I hadn't added it.
 

Attachments

  • IMG-20110327-00263.jpg
    IMG-20110327-00263.jpg
    141.4 KB · Views: 0
  • IMG-20110327-00264.jpg
    IMG-20110327-00264.jpg
    142.8 KB · Views: 0

SDSeville

Lieutenant
Joined
Mar 19, 2010
Messages
1,481
Re: 1986 Sea Ray Seville Restore

Re: 1986 Sea Ray Seville Restore

Just started working on the teak. I cleaned it with a mixture of 1 gallon warm water, 1 cup TSP, and 1/2 cup bleach. I then put on four coats of teak oil, several hours apart. Here are pics of the first 2 pieces next to one that hadn't been touched.
 

Attachments

  • IMG-20110405-00276.jpg
    IMG-20110405-00276.jpg
    146.6 KB · Views: 0
  • IMG-20110405-00275.jpg
    IMG-20110405-00275.jpg
    148.8 KB · Views: 0

SDSeville

Lieutenant
Joined
Mar 19, 2010
Messages
1,481
Re: 1986 Sea Ray Seville Restore

Re: 1986 Sea Ray Seville Restore

Finally got all the upholstery covered and in the boat. It feels like I just hit a major milestone. It looks like a boat again!!! AMD was right, a little time in the sun and the wrinkles and ripples are starting to lay down nicely. Sorry about the bad pics. The sun was setting, but it was my only chance to snap a few.

I still have to clean up quite a bit inside and finish the teak, but I am mostly done. This week I just need to hook up the gas tank and battery, fill her with gas, and start her up.
 

Attachments

  • Oceanside-Escondido-20110410-00285.jpg
    Oceanside-Escondido-20110410-00285.jpg
    147.4 KB · Views: 0
  • Oceanside-Escondido-20110410-00282.jpg
    Oceanside-Escondido-20110410-00282.jpg
    146.7 KB · Views: 0
  • Oceanside-Escondido-20110410-00287.jpg
    Oceanside-Escondido-20110410-00287.jpg
    141.5 KB · Views: 0
  • Oceanside-Escondido-20110410-00292.jpg
    Oceanside-Escondido-20110410-00292.jpg
    146 KB · Views: 0
  • Oceanside-Escondido-20110410-00277.jpg
    Oceanside-Escondido-20110410-00277.jpg
    147.5 KB · Views: 0

AMD Rules

Lieutenant Commander
Joined
Sep 23, 2004
Messages
1,707
Re: 1986 Sea Ray Seville Restore

Re: 1986 Sea Ray Seville Restore

Wow.!! That looks fantastic... very professional. I think you should tackle the helm seats next fall, as you're upholstery skills are first class. I'm sure you can do it. My carpet is red, and after seeing yours I think I will switch it out to grey.

Awesome... you must be excited!

Hope you post a video of your re-launch.
 

tinkeringwackyone

Chief Petty Officer
Joined
May 2, 2008
Messages
415
Re: 1986 Sea Ray Seville Restore

Re: 1986 Sea Ray Seville Restore

Looks great Glen. The upholstery work is top notch. I won't get to my upholstery this year but maybe next winter. All the lines line up. You should be very proud of that work.
 

lrcustom

Petty Officer 2nd Class
Joined
Mar 2, 2010
Messages
172
Re: 1986 Sea Ray Seville Restore

Re: 1986 Sea Ray Seville Restore

Agreed that looks top notch. That looks excellent. You've done a great job. So go get it wet.

Later
 

SDSeville

Lieutenant
Joined
Mar 19, 2010
Messages
1,481
Fixing small hole from grinder

Fixing small hole from grinder

Thanks guys! I am excited to get this thing back in the water a few hundred pounds lighter than last time.

In addition to connecting the gas tank and installing a new battery, I still have to patch a small hole (about 3/4" x 1/8") in bilge area (directly under a stringer) where I accidentally ground through during demo. I didn't notice the hole until everything was glassed in, so I will have to patch from the outside. I was thinking I would grind a little and use either Marine Tex or a couple layers of matt/glass. Any suggestions?

I would post a picture, but I can't even get to the area until I pull the boat out of my side yard. The hole is on the port side about halfway between the motor mount and the stern directly under a stringer. There is 1/4" to 1/3" of PL between the stringer and the hull.
 

SDSeville

Lieutenant
Joined
Mar 19, 2010
Messages
1,481
Re: Fixing small hole from grinder

Re: Fixing small hole from grinder

I connected everything and fired the engine up this past weekend. The boat is finally ready and I don't have any time to drive the 4 miles and take her out. I am booked solid with work and the kids' sports. Unless I play hooky from work, it will probably be at least a couple more weeks. It is killing me.
 

SDSeville

Lieutenant
Joined
Mar 19, 2010
Messages
1,481
1986 Sea Ray Seville Restore

1986 Sea Ray Seville Restore

Well, I finally pulled it out of the side yard. Here are a few pics of what she looks like from the outside.

I patched the few very small holes (from grinding during demo) by grinding out a few inches around each and filling those large enough (largest was 1/4" round hole) with Marine Tex. Then I used 1 layer of mat and 2 layers of fiberglass cloth. The next day I sanded down to blend back in.

I started to repaint the trailer. I am just going with black Rustoleum as suggested elsewhere on iboats. I should be hitting the water later this week.

IMG-20110430-00301.jpgIMG-20110430-00303.jpg
 

lrcustom

Petty Officer 2nd Class
Joined
Mar 2, 2010
Messages
172
Re: 1986 Sea Ray Seville Restore

Re: 1986 Sea Ray Seville Restore

SD
She Looks Fabulous. A splash next week is great. there are 2 things that you must not forget 1) the plug 2)pictures posted on iboats. Have some fun.

Later

LR
 

SDSeville

Lieutenant
Joined
Mar 19, 2010
Messages
1,481
Re: 1986 Sea Ray Seville Restore

Re: 1986 Sea Ray Seville Restore

Thanks LR. I am so glad the Vaseline brought the color back too.

The plug...Yeah, it's been a while, I do need to go through the checklist before I launch. I will be posting video, so you will see if I remember the plug or not.

How is yours coming?
 

lrcustom

Petty Officer 2nd Class
Joined
Mar 2, 2010
Messages
172
Re: 1986 Sea Ray Seville Restore

Re: 1986 Sea Ray Seville Restore

SD
Have not done very much just some little things. Nothing worth a pic. Work has hijacked me again but that ends this week. So we will see if I can get anything done once past mothers day.
The Vaseline did the same for mine last fall and survived through the winter. Has not shown any fade yet. Very happy with the way it looks and I see yours looks just as good as mine. That red is so much better than the pink/purple/red it was before.

Later
LR
 

AMD Rules

Lieutenant Commander
Joined
Sep 23, 2004
Messages
1,707
Re: 1986 Sea Ray Seville Restore

Re: 1986 Sea Ray Seville Restore

SD, looks great! I think I may have to try the Vaseline method as well. Fantastic hull, and a mirror image of mine but yours looks better ;)
 

Attachments

  • June_9_2.jpg
    June_9_2.jpg
    106 KB · Views: 0

lrcustom

Petty Officer 2nd Class
Joined
Mar 2, 2010
Messages
172
Re: 1986 Sea Ray Seville Restore

Re: 1986 Sea Ray Seville Restore

AMD,
We will probably get a bunch of negative comments on the Vaseline but it does work. Just be sure the hull and iar is warm not cold and use sparingly. It's the mineral spirits in the Vaseline that does the work. Great for removing the oxidation and fade. Let it sit in the sun for about 2 hours and wipe it completely off. After I remove the vas. I polish with a magic eraser. Your red will come allive. then normal care will keep it.
By the way your looks quite good.

SD,
Thanks for letting me borrow your thread for a moment.
LR
 

SDSeville

Lieutenant
Joined
Mar 19, 2010
Messages
1,481
Re: 1986 Sea Ray Seville Restore

Re: 1986 Sea Ray Seville Restore

No problem LR.

AMD, LR is right. Your hull already looks much nicer than mine did before I cleaned it up. Mine was almost entirely pink -- light, chalky pink. I wish I had taken before pictures, but it was on my side yard with about 12" of clearance on each side.
 
Top