1987 28' Chris-Craft 283 Amerosport

Status
Not open for further replies.

BSnB

Petty Officer 1st Class
Joined
Jan 8, 2007
Messages
281
Re: 1987 28' Chris-Craft 283 Amerosport

Ok, I'm climbing aboard my Chris Craft friend. Your thread should be rename "trial and tribulations of the Amerasport 283". lol:) you have had your hands full sounds like. I like the story on the lights also. Did you get the interior lights or exterior. Should not need a ac/dc adapter.

Just a couple thoughts. The table that you are veneering, you could veneer the sides, veneer the top and then add a oak,mahogany or teak L trim around the top edge. No matter what you do with a raised edge, if rough enough things are going to tumble, my thought is its not worth it to raise the edges. I like laying my arms up on the table sometimes, and a flat surface is mors comfy.

As far as the top goes, great idea to put a hardtop on her. The more head room the better. Might offer some rod storage above your head also. I like the first drawing with it up higher. Can you post a pic of your stern where the knotch is, I have some ideas for you there, just don't know if they will work until I see a pic.

Great thread man, you do have good story telling capabilities. I will be following your progress.:D


The lights I bought are exterior waterproof RGB LED's. The connectors are clearly not waterproof, nor would the transformer be, but I wouldn't use the transformer anyway and I'll solder the wires rather than using the connector. I've got this hairbrained idea of using one strip of these lights and mounting them in a rigid sliding door type track along the stern to provide underwater light. I'd make my wire penetration above the water line and run the wires to a switch on the dash with the controller receiver up there somewhere too. I figure it will take maybe half of the 16 foot length of lights for the stern leaving me another 8 feet or so for topside accent lighting.

The notch in the stern that I was talking about, chriscraft254, can be seen on my signature photo. You can see where the swim step extends out over the water. The notch is that right angle formed in profile below the swim step where it meets the stern.

The trials and tribulations of the Amerosport 283 might be too limiting, LOL. I'm not doing amazing things with fiberglass or tin like you or other iBoaters. Maybe my contribution on here is simply to describe the trouble that can come from a hairbrained idea carried out by the hands of an overconfident backyard "craftsman".
 

lil buggy

Senior Chief Petty Officer
Joined
Sep 24, 2011
Messages
766
Re: 1987 28' Chris-Craft 283 Amerosport

agreed^^^^^^^^^ your on the right track.
underwater, it will take extra time, but i would coat all the connections and scissor cut marks with some waterproof? long lasting sealant of some sort. then put it back in the waterproof tube and seal the ends up real good.

an issue besides the water itself will be the pressure that the water brings. i noticed on my set that if you run your fingers across the little transisters while the strip is off and plugged in they light up.(not sure if its electrical or pressure) but its something to think about.


i just had an idea,,,,

just thinkin out loud here but,,
what if you mount the light inside the track and coat that sucker with something like that thick bar top stuff? or some kinda clear rubber you can pour warm so it seals out everything
its almost worth it to take a lil 3light section and bury it in the stuff to see if it effects the lights at all
if it works right you are in if not your only out a few inches

just a thought
good luck this will be an interesting project
 

BSnB

Petty Officer 1st Class
Joined
Jan 8, 2007
Messages
281
Re: 1987 28' Chris-Craft 283 Amerosport

Since I couldn't convince Mustang to do my table top for me, I've begun the process myself.

I ordered some of this stuff http://www.flexwood.com/ a flat cut teak veneer. I bought a 4 X 8 sheet of it because I plan to veneer some additional areas in the cabin. The first project with it is to veneer the putty gray colored table that was original to the boat.

phone 087.jpg

I removed the plastic edging which you see laying on the table top in the photos.

phone 088.jpg

The table itself is in good shape, but the edge strip is not and will be replaced.
 

BSnB

Petty Officer 1st Class
Joined
Jan 8, 2007
Messages
281
Re: 1987 28' Chris-Craft 283 Amerosport

In order to give myself a good surface to apply the glue I lightly sanded the entire top. This also had the benefit of removing the scum that had accumulated under the edge material. I then wiped the entire table down with acetone to remove any wax or grease, in addition to the sanding dust, that would prevent good adhesion.

phone 089.jpg

The glue is a specialized contact cement recommended by the manufacturer. The veneer kit, purchased separately, came with this glue a glue roller and a scraper used to firmly embed the veneer into the contact cement.

phone 090.jpgphone 091.jpg
The glue looks a little like curdled milk as it pours out and the roller gives it a little stippled effect as it's applied. According to the directions, you need to apply a thin consistent and complete coat of glue and let it dry to a tacky consistency. I'm all about tacky! :p
 

BSnB

Petty Officer 1st Class
Joined
Jan 8, 2007
Messages
281
Re: 1987 28' Chris-Craft 283 Amerosport

I'm not terribly patient, but I held off as long as possible to make sure that the glue had dried and set up.

I was smart enough to unroll the 4 X 8 sheet of veneer over the table before applying the glue. I cut a piece of the veneer slightly larger than the table itself. This stuff is really pretty easy to work with. It is real teak wood with a paper back very similar in flexibility to a sheet of poster board.

With some assistance from my wife, we carefully positioned one edge of the veneer along one side of the tabletop keeping the veneer rolled up so that only about an inch long strip of the veneer made contact with the glue. We then carefully unrolled the veneer into the glue and, using the scraper, eased the veneer out flat onto the tabletop, pressing it into the glue to force the bubbles out.

phone 092.jpgphone 093.jpgphone 094.jpg

cool! it worked!:cool:

This scraper is essentially a wooden handle, slotted to accept a blade about 3 inches wide and maybe 1/8 inch thick. the blade is made from some kind of stiff reinforced plastic. you apply the edge of the blade to the face of the veneer and with very firm pressure you draw the scraper in the direction of the grain to press the veneer into the glue and force any bubbles out. If you look carefully at the photos above you can see a faint outline along the edges of the tabletop. I pressed pretty hard and as I reached the edge the veneer would bend down over the edge, cracking a little as it did.
 

BSnB

Petty Officer 1st Class
Joined
Jan 8, 2007
Messages
281
Re: 1987 28' Chris-Craft 283 Amerosport

After making sure that the veneer was firmly bedded I took a new hooked razor knife blade and trimmed off the excess veneer around the edges of the tabletop. Keeping the hooked blade running along the flat of the tabletop edge and drawing in slowly along to make a sharp edge. The blade cut well in the direction of the grain, but became more difficult cutting across the grain of the wood. In a couple of spots the veneer splintered slightly at the cut. With a piece of fine sandpaper, I was able to go along those areas and buff out the edge to a smooth finish. After wiping the veneer down with an acetone dampened towel I applied one coat of spar varnish to seal and protect the teak.

phone 095.jpgphone 096.jpgphone 097.jpgphone 098.jpg

As you can see, the corners of the table are cut off and rounded slightly which makes installing an edge trim a challenge. I don't look forward to mitering and shaping the half-round I hoped to use along that white edge. The previous edging was similar to a rub rail as you can see in an earlier photo. If I can find something nice, that may be the way to go.

I've ordered a compass rose applique that is about 18 inches in diameter which I'll apply to the center of this 35 inch semi-square tabletop. After that is applied and some edging attached I'll finish the top with a clear epoxy bar-top coating for durability.
 

lil buggy

Senior Chief Petty Officer
Joined
Sep 24, 2011
Messages
766
Re: 1987 28' Chris-Craft 283 Amerosport

good work,
yep, i got some table envy:D, that veneer looked easy to work with,,, did it fight ya any?
 

BSnB

Petty Officer 1st Class
Joined
Jan 8, 2007
Messages
281
Re: 1987 28' Chris-Craft 283 Amerosport

It really didn't lil buggy. It is amazingly easy to work with. As I mentioned, it has the flexibility of poster board and cuts easily with scissors. I plan to update the cabin with it as well. Specifically the bulkhead walls separating the cabin from the V-berth. We'll see then, on a vertical surface, how easy this stuff really is to apply. I'm still fighting with the edge trim. the rounded corners are giving me fits!
 

Pmccraney

Lieutenant Commander
Joined
Jul 26, 2011
Messages
1,734
Re: 1987 28' Chris-Craft 283 Amerosport

Great story on the lights... It reminded me of this scene from "a christmas story" (especially the way you narrated/described it...)... "Electric sex in the window"


25thmustang

Lieutenant Commander
Joined
Mar 20, 2008
Messages
1,849
Re: 1987 28' Chris-Craft 283 Amerosport

BSnB, glad to see the veneer work out. The table looks good so far, and once you apply the compass and get it coated it should look excellent!

I look forward to seeing you tackle the Vberth walls.
 

BSnB

Petty Officer 1st Class
Joined
Jan 8, 2007
Messages
281
Re: 1987 28' Chris-Craft 283 Amerosport

Great story on the lights... It reminded me of this scene from "a christmas story" (especially the way you narrated/described it...)... "Electric sex in the window"


Funny you should mention the "Leg Lamp", McCraney. For several years now my wife and I have alternated with my Brother-in-Law and his wife each Christmas giving a gag gift. It all began with a story my Sister-in-Law told on her husband about the upside down tomato growing trellis that she'd gotten from him for her birthday. A truly hideous looking thing that he assembled alongside the garage and easily visible from the street.

Our rules of "engagement" in this war include the requirement that the "gift" be displayed prominently for the entire year. That first year, my wife found an exceptionally large "Attack of the Killer Tomato" stuffed toy which we required that he display in his home office. He battled back the following year with a politically incorrect lawn jockey and we retaliated with a set of Obama Commemorative collector plates the year after.

He won the war a couple of years ago by finding a life sized fully functional replica of the "Leg Lamp". Included in the set was also a miniature "Leg Lamp" night light. We, or course, were required to prominently display this home decor capital offense. It, understandably, got quite a bit of attention. We wrapped it carefully the next year and gave it back to him and since then this lamp has become the gift that keeps on giving as it has now been passed to another family member. I kept the leg lamp night light. :D
 

BSnB

Petty Officer 1st Class
Joined
Jan 8, 2007
Messages
281
Re: 1987 28' Chris-Craft 283 Amerosport

BSnB, glad to see the veneer work out. The table looks good so far, and once you apply the compass and get it coated it should look excellent!

I look forward to seeing you tackle the Vberth walls.

The Compass Rose is ordered and I expect it's delivery any time now. :D I've lightly sanded the top and applied another light coat of varnish. The first coat soaked in to the veneer pretty well. It looks like I'll do one more varnish coat before applying the Compass Rose and then coating the whole thing with the bar-top coating.

I tried to create a table edge using some flat Oak trim but the radius corners of the table won't allow that to work and I don't have the patience to try to wet this Oak trim to bend it. I'm not sure I could achieve the tight radius required in any event. I've looked around at the home improvement stores for some vinyl edge trim without success. I'm still stuck for a solution. I'd like to have the edging applied before I apply the bar-top coating so that everything ties in.
 

BSnB

Petty Officer 1st Class
Joined
Jan 8, 2007
Messages
281
Re: 1987 28' Chris-Craft 283 Amerosport

With all this warm weather, I'm really getting the itch to launch. The biggest problem that I have is that the boat is 2 hours away from home. In order to get the boat wet I've got to focus on below the waterline maintenance right now. I'm going to try to get up to the Marina this week. I've got 3 primary goals.
  1. Prepare the bottom and apply a VC-17 bottom coat (I'm in the water all season and can't scrap and sand like criscraft has done)
  2. Compound and apply a coat of wax at least below the rub-rail. I've got some oxidation due to the former owners neglect. I really like this Heller-Glaanz Cleaner-Wax. We'll test an area with it to see if I need to use a polishing compound first.
  3. Check the props and shafts for balance and make sure that the strut bearings are in good shape
I'm looking to have it launched the first week of April. If I can accomplish the 3 tasks above, I want to get my waterproof RGB LED strip mounted to the stern. I can finish the wiring after it's in the water, but the lights need to be mounted first. I've found some semi-rigid plastic U-channel that I'll glue (4200) to the hull and then screw in with a few small stainless screws. I can the embed the lights in that channel with 4200 and seal it all up. I'll solder the connections, paint them with liquid electrical tape, shrink wrap that and then run the wire up and penetrate the hull above the waterline sealing that up with 4200.

Wish me luck!
 

BSnB

Petty Officer 1st Class
Joined
Jan 8, 2007
Messages
281
Re: 1987 28' Chris-Craft 283 Amerosport

You know, dawg, that's not a bad idea! I used something like that for window casing trim over an arched window in a dormer before. It worked well, it was tough stuff and pretty flexible. I painted that, but it looks like they may have some that can be stained too so that I can get the Mahogany edge look that I've wanted!

Outstanding! Thanks!
 

lil buggy

Senior Chief Petty Officer
Joined
Sep 24, 2011
Messages
766
Re: 1987 28' Chris-Craft 283 Amerosport

BSnB,
you got alot on your plate! lots of luck goes out to you, that commute doesn't help any.
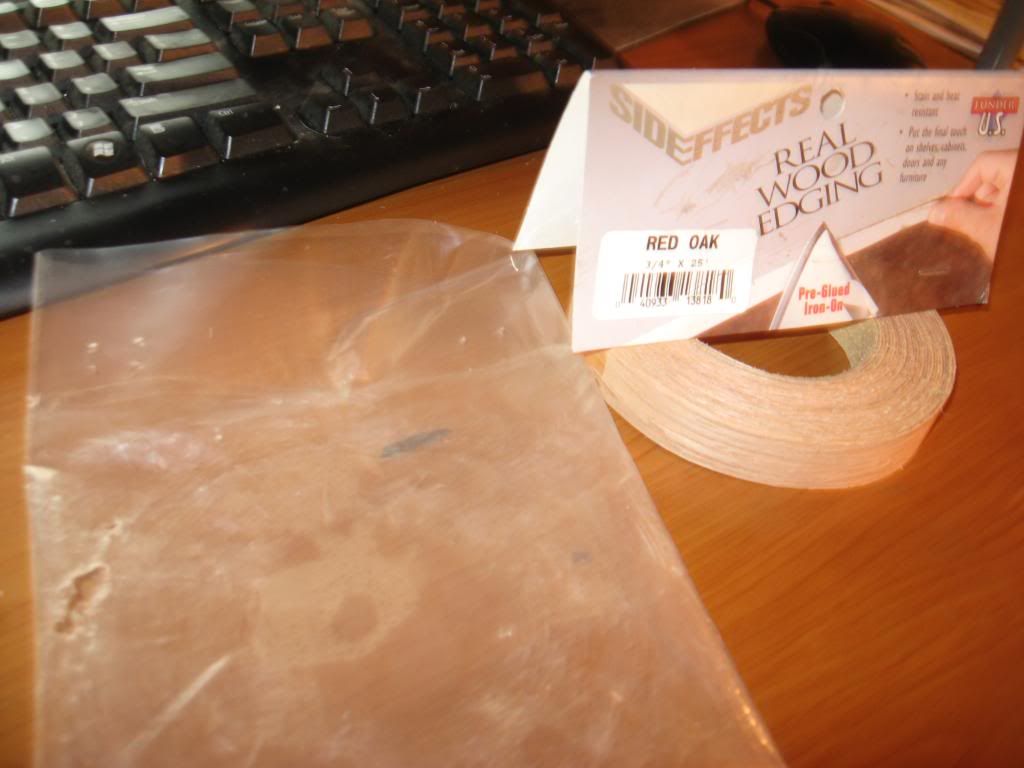
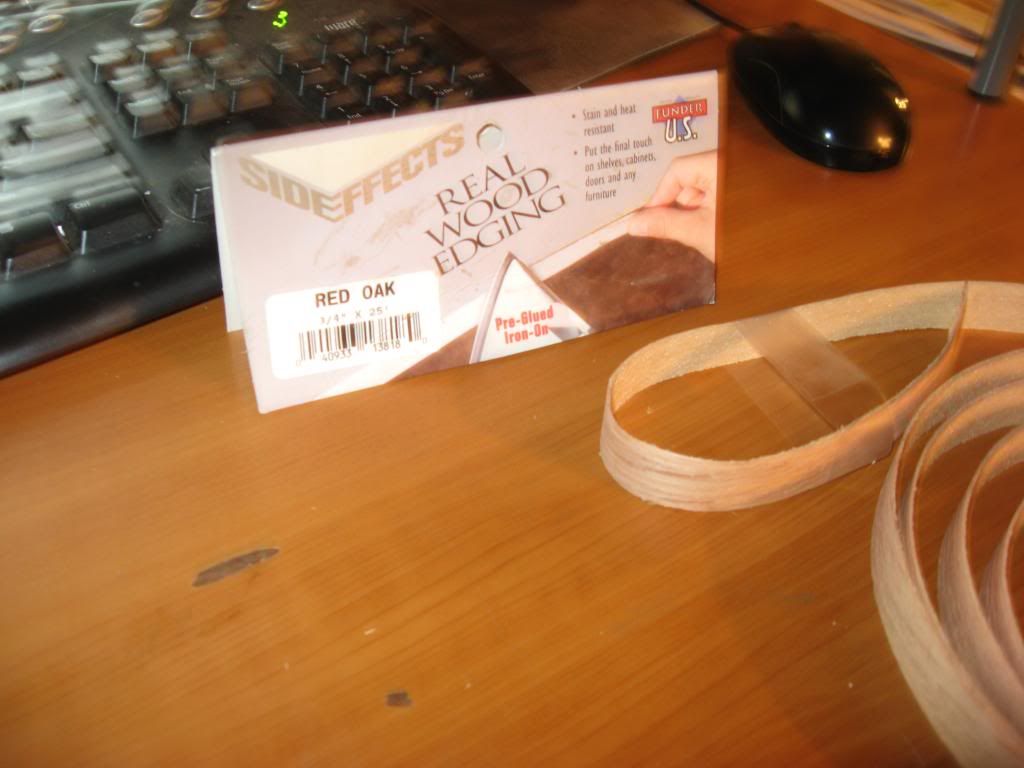
as far as the flexible trim for the table goes i think i got the ticket, last year i needed some end grain trim to neaten up a bookshelf project for the admiral,, anyway i got the "real wood edge" at the loacal hd i think like 8 bucks in red oak. its iron on,,,lol but it is still holding under varnish. if i remember they had several kinds of the bendable wood in stock:D if you have trouble loacating let me know i have a roll left:D 3/4 x 25ft
as you can see in the pics its quite bendable not sure if they have thicker sizes or not, i hope it helps
woodtrim032012001.jpg


i got tape holding it to the tight curl
woodtrim032012002.jpg

hope it helps
 

BSnB

Petty Officer 1st Class
Joined
Jan 8, 2007
Messages
281
Re: 1987 28' Chris-Craft 283 Amerosport

Thanks, lil buggy, I've seen that stuff too, but I've never used it. I'd prefer a more rounded edge for the table and so I'm going to see if I can get a length of that flexible moulding that dawg mentioned. It looks like I can get a length of half-round, flexible enough to bend around the corners I have, and then stain it and varnish it.
 

lil buggy

Senior Chief Petty Officer
Joined
Sep 24, 2011
Messages
766
Re: 1987 28' Chris-Craft 283 Amerosport

gotcha,
rounded is more elbow friendly for sure:D, i like the idea of a L moulding that will beef up the ends some and protect the edge of the laminate, i wouldn't be against square corners that you could sand down to take the harshness out of them, anyway i saw that L wood trim about a 1/4" thick and 1" x 1" in at hd as well , just ideas is all,
have a good day
 

chriscraft254

Commander
Joined
Jun 4, 2011
Messages
2,445
Re: 1987 28' Chris-Craft 283 Amerosport

The table is going to look great. I know this is a day late and a dollar short but........ Just a note for those that have not done laminate/veneer before especially large sheets, here is a tip.

When you apply contact adhesive to the table and to the sheet, the sheet will adhere as soon as the glues contact each other. Building counter tops and veneering so many different things in my line of work, the easiest way to get things lined up is to apply round dowel rods or small pvc pipe on top of the table, then lay the veneer down in position and pull one dowel out from underneath the veneer as you work the roller across the table.

It can be done without, but this will insure that you don't get out of position and have to rip it off and start over. Works really well on large countertops.


They sell small laminate rollers at lowes for edges and the larger ones for large areas. The veneer edging with the iron on works well, but make sure if used it is heated properly or it will peel. The easiest way to trim laminate or or wood veneer is with a router with a straight edge bit. Then sand the edges to finish.


Ok, now as far as the rounded edges on the table, I would simply take a 45 degree triagle square and make those corners 45 degrees. Then miter cut some L trim to wrap the edges. Or go with the flex trim, but be aware the flex trim is composite and sometimes looks like fake wood instead of real wood.

Putting a mahogany or any other color wood around the edge will make the table pop a little.


The stern lights I would point downward under the swim platform just for accent lighting while swimming or hanging out, but I think you would be a lot happier with some underwater lights for underwater applications.
 
Status
Not open for further replies.
Top