


") the hull looks to be in great shape, I do however have some gel coat spider cracks by my drain plug. :/ I might have to grind those down and fill it in with new gel coat.
the hull looks to be in great shape, I do however have some gel coat spider cracks by my drain plug. :/ I might have to grind those down and fill it in with new gel coat.2 - 3/4 pieces of ply is 1 1/2 glued in. 3 layers of 1708 is around 3/16 to 1/4 not including the outer hull. The outer hull is most likely 3/8, putting you at 2 1/8..which is optimal for MC. 2 1/4 is tops, 2 inch is bottom...1/8 deviation around the keyhole is max tolerance for flatness.
that's just what I wanted to hear. I was hoping I wouldn't have to deviate from my plans. Thanks zool I was hoping they could be drying while I finish the rest of the grinding with my dremel tool. I have some hard to reach places with the 4.5 inch flapper wheel. We will see how it turns out.
Here was my attempt at keeping things clean in the driveway before I decided just to hose out all the dust.

It works really good but I wanted to see how far along my grinding was going so I would grind one section at a time, then hose the boat out, then grind another section. It is much easier to see what needs more sanding and what is done.
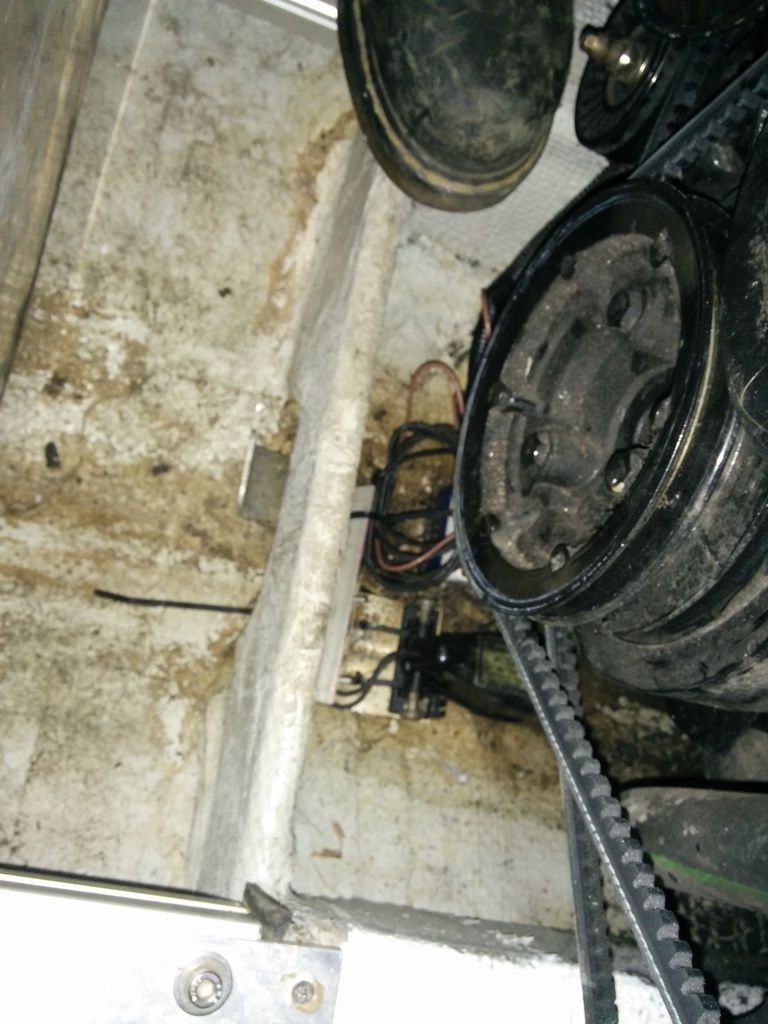
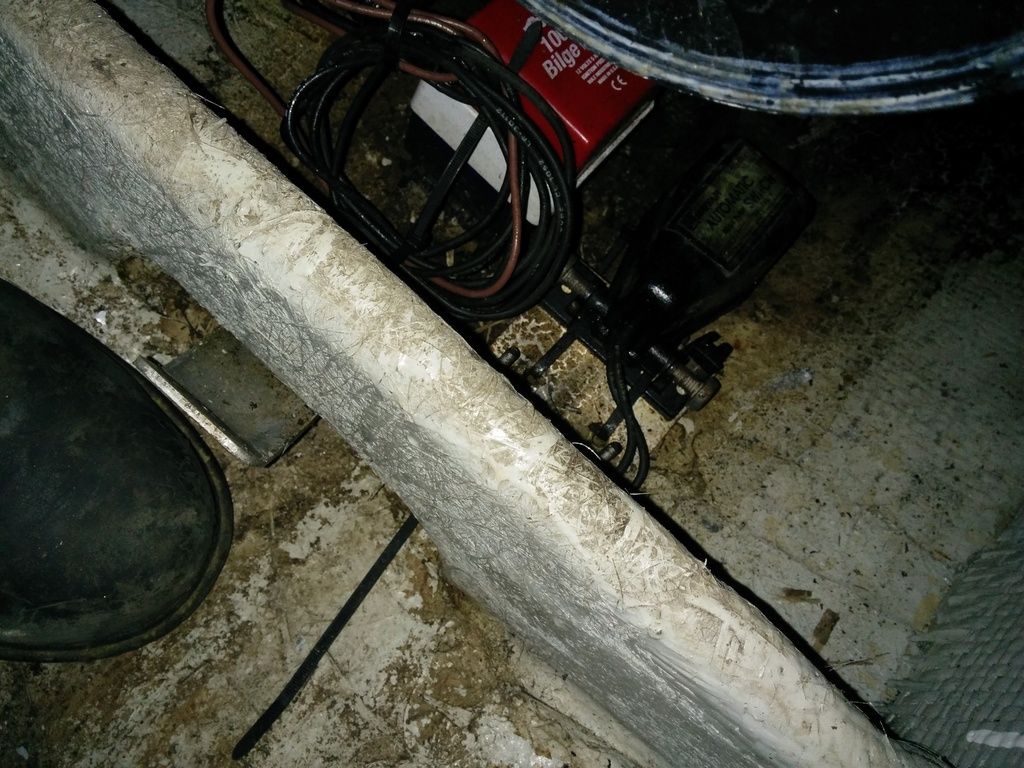
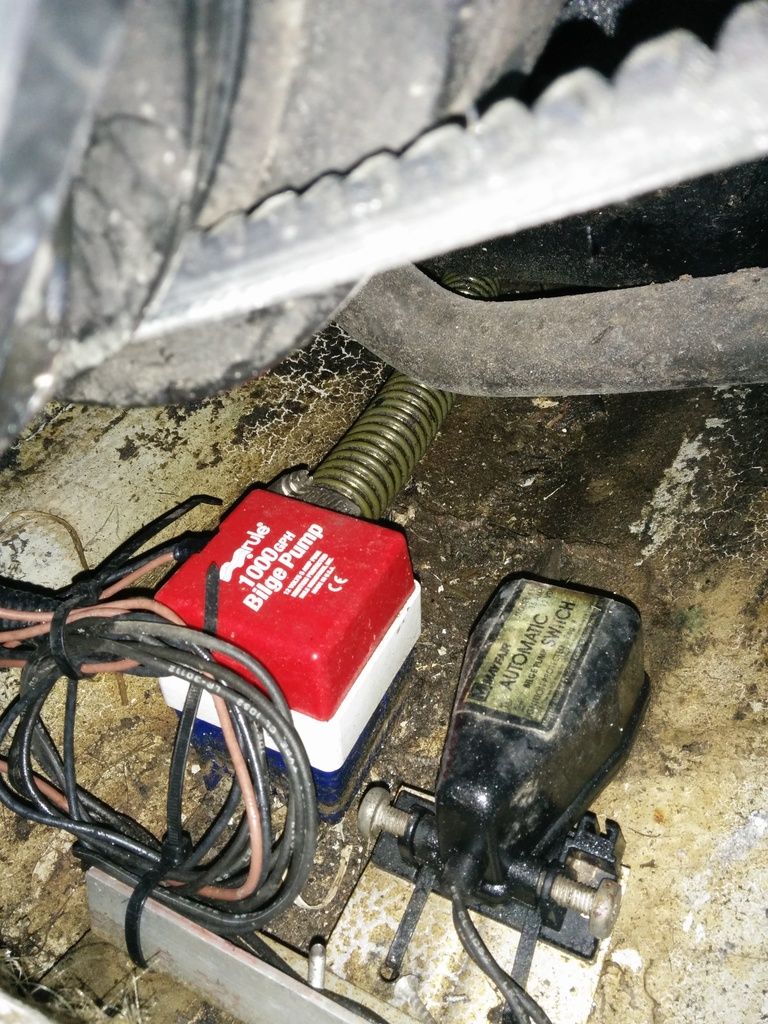
Progress is looking good man! :thumb: I had the same thoughts about my rear bilge pump, and the silly wood 'dam' they glassed in to the hull from the factory. I left my transom and stock motor mounts in place on my rebuild, but the bilge pump is now mounted to a piece of aluminum screwed to the first bulkhead (attached to the front of the motor mounts) which works well, and is easy to pull out to clean or replace if need be. I'll see if I can find a pic to describe how I made it..
when you clamp it the PB should goosh out around the edges and you should immediately form your fillets at this time. When the fillets begin to firm up, usually with epoxy that will take 3-4 hours, you can roll out more epoxy and start your 1708 laminations. I'd prolly lay the 1708 down with the fabric facing down so the mat side would hide the texture since you're using epoxy it doesn't really matter which side goes down first. That's just my preference.
After I woke up I ran to lows and grabbed some all thread for my clamps, test fit both skins of the transom and glued them together with the thickened epoxy. I wish I would have mixed just a hare more... There is one spot on the upper port side of the transom where the peanut butter didn't gush out. I wonder if it would have if I had just one more clamp in that location. Everywhere else was good. Not sure what to do about that... I might try to just squish some peanut butter and see if anything will go in in that spot, throw a clamp on it and make my fillets then. That way if it is weak the fillet might help to hold things together. :/ Will this be ok or should I start over? 


