1992 Crownline 196br stringers, transom and the whole bit

steely85

Petty Officer 2nd Class
Joined
Apr 18, 2015
Messages
121
My cabosil and more resin should come in the mail tomorrow, so I will be buzzing down the rest of the stringers with my belt sander to make sure everything is level side to side and cutting and grinding the lip of the deck off.
Then tuesday I believe I will make the rest of my fillets to transition the 1708 better to the hull. I will also cap the wood stringers with peanut butter and rid the tops of any voids. I think that would make the glass lay smoother without any bubbles.
It is kind of funny that my outer stringers are only 3" high on the outside and my 1708 strips are 6" and 12". Looks like I'll be trimming those down anyways. Another idea I had was if I lay a 4" piece of tabbing, then I capped my stringer with 2 layers one 10" and one 12". That way I would go from one side over the top to the other side and tab everything to the hull, or would that be a waste of fiberglass. I could just use one 10" and one 12 inch piece and just leave out the 4" tab. What do you guys think?
 

steely85

Petty Officer 2nd Class
Joined
Apr 18, 2015
Messages
121
Well I messed up yesterday and today, I was stupid and got a bit ahead of myself when it came down to cutting my stringers. I couldn't figure out for the life of me how to get perfect measurements from one side to the other. I had two friends come over and we all talked things through. They had some good ideas and I had some good ideas and we used bits and pieces from each. However I think we were dead wrong. I was still off on some places and am still a bit confused but that is what happens when you are inexperienced.
I left a one inch lip from my deck to use as a reference as everyone suggests, however I haven't found anybody explain how to use this reference when measuring down to the stringers to cut them to height. Any input would be appreciated.
I put a level on the bottom of the boat going from the back forward to make sure it is level, I'm not sure but I think if that is level then my deck should be level with it. Is this right?
My other thought would be to buy a 2x4 and lay it across the deck lips I left and measure down from there. The only issue is finding a board long enough and strait enough to trust. I would have to cut that board down as I went forward in the boat so I could keep going strait across being I am not sure of the deck's levelness. Any thoughts on this?
 

JASinIL2006

Vice Admiral
Joined
Feb 10, 2012
Messages
5,714
Can you stretch a string from the lip on one side to the lip on the other side? Then you could measure down from the string, a uniform amount, to get all of the stringers the same height.
 

Skiff_man

Cadet
Joined
Jun 25, 2012
Messages
27
I will be putting my boat back together this weekend. Like you this will be my first large glassing experience. I already have everything prepped and ready to go in. I have to put in my deck, foam and glass everything in followed by gel coat. I wish you the best of luck and I enoyed reading your forum and thank you for sharing. I subscribed and look forward to seeing this finished.
 

alvear747

Cadet
Joined
Jun 6, 2015
Messages
17
Wow, making progress! i am about to start the very same project on my stinger bass boat. I am very anxious
 

tpenfield

Moderator
Staff member
Joined
Jul 18, 2011
Messages
18,140
Nice project . . . looking forward to following along. Rather than cut the stringers to height after tabbing them in, you could use the the old deck along the perimeter of the hull as a reference point to set the height of the stringers when to set them to the hull. . . factoring the thickness of the deck, etc.

This approach would save you the tedious task of cutting the stringers.
 

steely85

Petty Officer 2nd Class
Joined
Apr 18, 2015
Messages
121
thanks for the encouragement and tips. I have not updated this last week because I just got back from Michigan for my bachelor party... Talk about a great time, skeet shooting, pistols, bean bag, horse shoes and disc golf. But I think the highlight was the AR-15 and 50 cal sniper rifle my cousin and buddy brought out.


Well back to business as usual, the string idea was great, but it was hard keeping it tight enough so it wouldn't droop in the middle. I'm working on this myself, but my buddy came over the other day and helped me with this. We also got the entire floor cut out and semi-test fit. I didn't feel like getting itchy last week so we just cut the floor and semi-fit it. That was AMAZING, he was a huge help. I believe I am ready now to cut the lip of the old deck off. I will take some more pictures tomorrow and be able to load them up.

I believe the seats are going to be great fit inside the boat. I cant wait to get the upholstery done. Speaking of which, I think I am going to build a "cooler" and put my rear bench on top of it, so the entire area below the bench will be a cooler.
 
Last edited:

steely85

Petty Officer 2nd Class
Joined
Apr 18, 2015
Messages
121
tpenfield, if i were to do it over again I probably would have taken the stringers out to cut them to height, I just wasn't sure how the much adding the foam under the stringers was going to change things. But who knows now, I just have to stay positive and keep pushing forward. :)
 
Joined
Apr 26, 2015
Messages
63
Great looking work. I just got a 95 Crownline 266 Br that I am totally restoring. I have enjoyed your thread and look forward to seeing it finished
 

steely85

Petty Officer 2nd Class
Joined
Apr 18, 2015
Messages
121
Ok everyone. I know everyone has been holding their breath for my next post... lol.
New news in my world:
It has been two months since I touched the boat, we got married in July. So now I an getting back in the swing of things with a new goal of a mid September launch date. Since I have been back I fixed the stringer height issue, vacuumed all the debris, sanded all over the fillets, washed with acetone and added more peanutbutter to finished making my fillers round. I have all the fillets done except in the gas tank area and the engine compartment. I'm hoping to start laying fiberglass on Sunday.
 

steely85

Petty Officer 2nd Class
Joined
Apr 18, 2015
Messages
121
That is about all the updates for now. I can't wait to get the deck on.
 

JameO

Petty Officer 3rd Class
Joined
May 22, 2015
Messages
85
Hey we want more updates. Where are all the pics ??? What's going on??? Iv'e got a lot of nerve, yeah i know , I'll catch up with you soon , Congrats on tying the knot.
 

steely85

Petty Officer 2nd Class
Joined
Apr 18, 2015
Messages
121
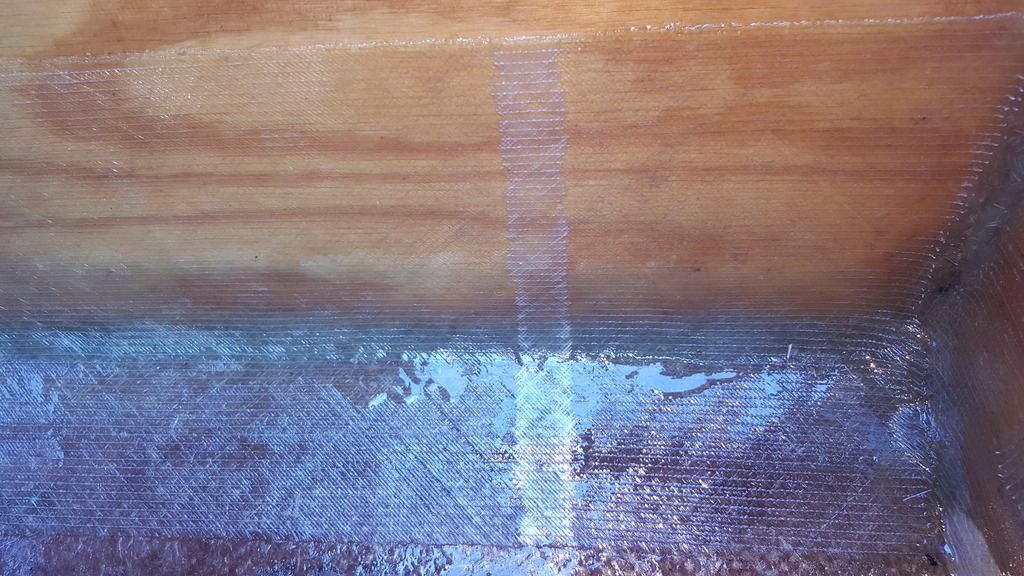
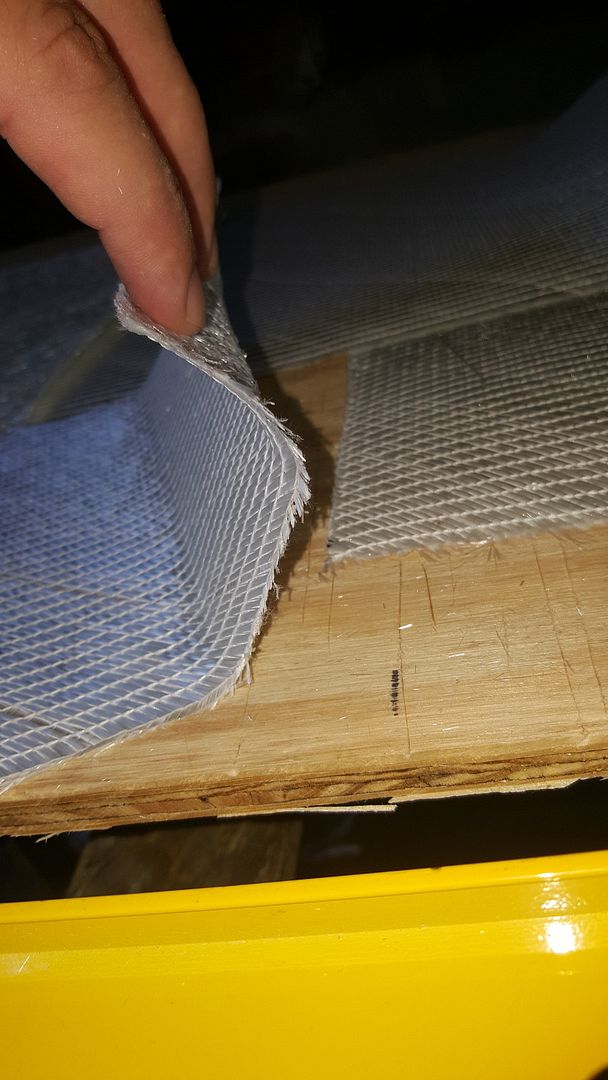
Whats up jameO. Ya I have been hard at work... Yes on the boat. LOL I have been putting the finishing touches on the fillets and glassing the stringers in all week. The outer lip of the floor is also cut off. She is getting there slowly but surely. It is looking really good, the only thing I am not happy with is my second roll of 1708 is not as good as my first roll. This one has a bunch of imperfections. It seems like there is a bunch of glue from the factory in spots that don't seem to take resin. I'm thinking I might have to grind these spots off and lay a patch over it. Here is a picture.

And here it is dry. You can clearly see where the dry glass has a sharp edge to it when i bend it.
 

steely85

Petty Officer 2nd Class
Joined
Apr 18, 2015
Messages
121
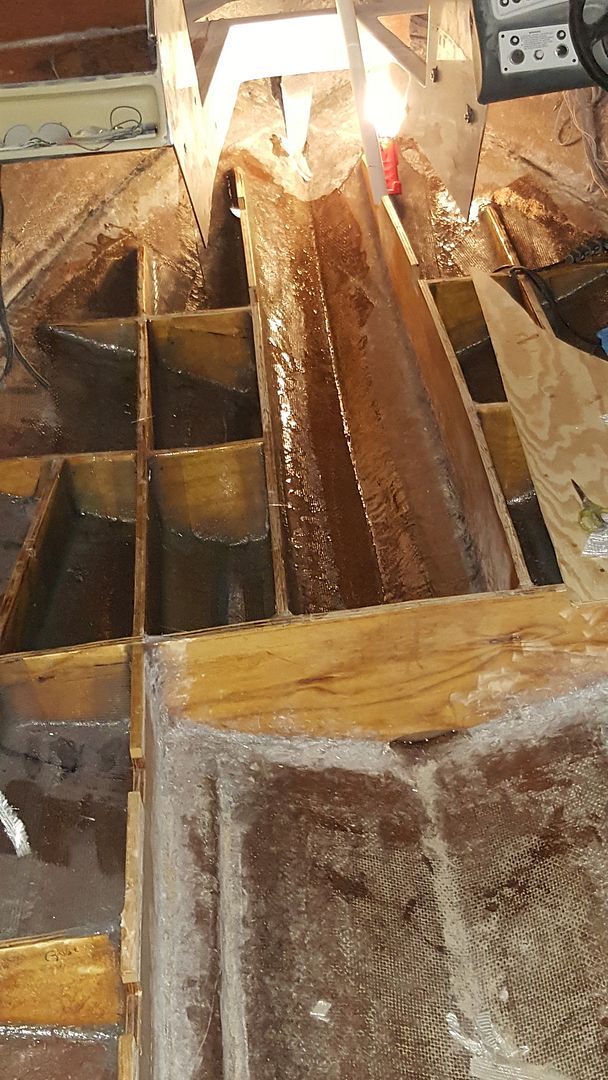
But anyways other than the crappy fiberglass, it is going great. I have all of the front of the boat done. I did that first so towards the end of the job, it isn't so tedious crawling under the dash and front seats. It is smooth sailing from here on out. I currently have done up to the back of the gas tank.

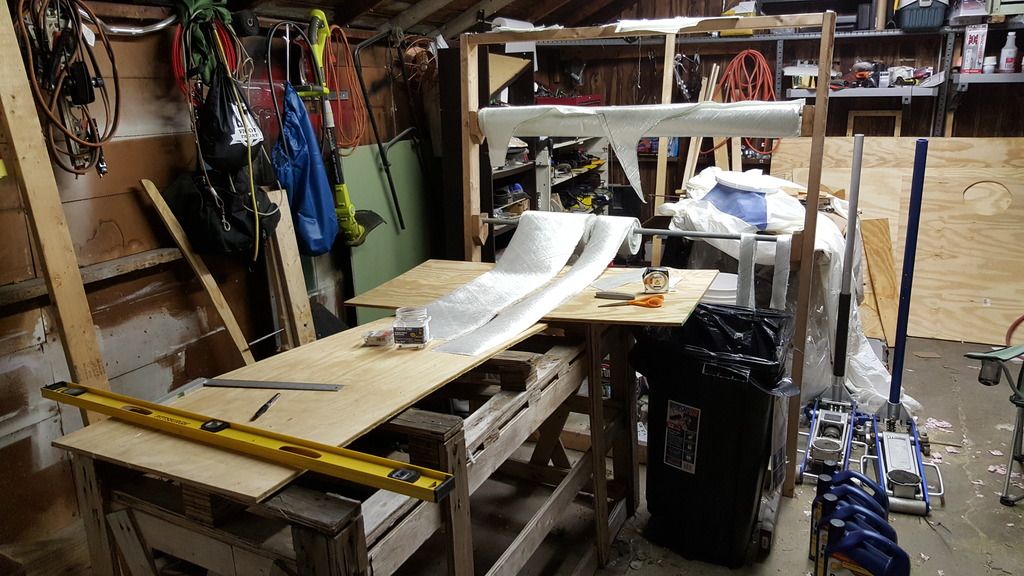
and here is my cutting station.
 

tpenfield

Moderator
Staff member
Joined
Jul 18, 2011
Messages
18,140
Looks like a nice setup . . . you are in production mode :)

I would not worry about the imperfections in the 1708 . . . they look to be about 1/2" wide :noidea: not sure how far they are spaced, but it is not worth doing anything about IMO. The glass seems to be pretty well wetted out, which is a good thing. :thumb:
 

WOEISMEIGOTTA470

Petty Officer 1st Class
Joined
Aug 31, 2012
Messages
375
Steely that is some great progress! Wow, all those stringers/bulkheads made for a TON of work...so tedious doing all that filleting and tabbing, but so worth it that hull is rock solid now! Congrats!
 

steely85

Petty Officer 2nd Class
Joined
Apr 18, 2015
Messages
121
Here is another question. I think I'm going to cover the deck with 2 layers of 1.5 Oz chop strand mat like frisco boater did. However, I will be gluing down carpet, do I need to add gel coat over the deck before I do? I noticed when water got on the polyester resin, that it turned dusky until I cleaned it up and dried it out. Or can I just put the carpet right over the polyester. Thanks guys.
 

steely85

Petty Officer 2nd Class
Joined
Apr 18, 2015
Messages
121
Here is an idea I had after watching frescos video. I want to build seat boxes instead of repairing my bow floor/tub and reinstalling it.
My explanation is in my video, but essentially I want to get rid of a lip that sticks up about 1.5 inches that enters ino the bow of the boat. The bow floor sits on 3/4 inch plywood that sits on 2 layers of carpet that sits on the main deck. So my thought is that I can get rid of the 1.5 inch step up into the bow and remove all the potential water trapping happen in when sandwiching 2 pieces of carpet together. The bow floor was not attached to the main deck in any way it just sat on the carpet so I don't see any dangers in doing this. In fact I think it will make the front stronger by attaching everything and making it all one piece. Please see videos to see what I am talking. Sometimes it is hard to convey an idea without a visual.
Here is frescos seat boxes I want to duplicate. Notice his floor is one level front to back.
http://youtu.be/BsVn3wMG3zM

Here is a video explaining how my bow floor was just sitting on the main deck.
 
Last edited:

rlb81

Seaman
Joined
Sep 5, 2007
Messages
63
I have no advice to offer but I'd like to commend you on the work! Doesn't look easy, and after watching frisco's video linked in your last post I think I'd have that same attitude for the whole project. Keep up the good work, you're getting close!
 
Top