1992 Crownline 196br stringers, transom and the whole bit

steely85

Petty Officer 2nd Class
Joined
Apr 18, 2015
Messages
121
So here is my idea for the front seat boxes. Instead of replacing the front floor tub I don't want there to be a step up into the front of the boat. I want it to be nice and flat. So instead I will take plywood and notch one side about 4 inches using my table saw and gluing it to the fiberglass of the seat boxes. here is a crude illustration.

The plywood would also be glued to the floor making the front seats one with the floor.
Here is an example using a 2x4 piece of wood held up to the front seat wall.

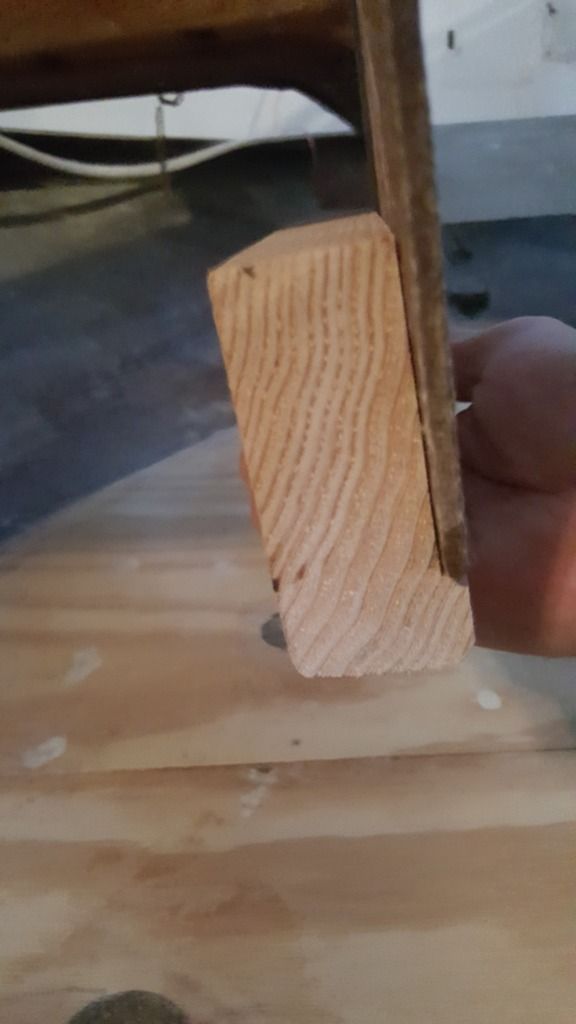
I'll also bolt theme together so hopefully the bond won't crack or break. It will be covered by trim so I am not worried about making it beautiful as much as sturdy.
 

steely85

Petty Officer 2nd Class
Joined
Apr 18, 2015
Messages
121
Thanks, tnstratofam. It has been a long road and I was worried it would just sit there and get ruined. I'm glad I am finally able to get back to it and it is sooo close I can feel the spray of the lake on my face.... or is that the rain. either way lol
 

Baylinerchuck

Commander
Joined
Jul 29, 2016
Messages
2,728
Great thread, and glad to see you're back at it! The work is looking excellent. I've really enjoyed catching up, very inspiring as I'm going through the same rebuild.....well except with a Chap.

Keep up the awesome work. Wondering if you are referring to Lake Anna? Curiosity.
 

steely85

Petty Officer 2nd Class
Joined
Apr 18, 2015
Messages
121
Great thread, and glad to see you're back at it! The work is looking excellent. I've really enjoyed catching up, very inspiring as I'm going through the same rebuild.....well except with a Chap.

Keep up the awesome work. Wondering if you are referring to Lake Anna? Curiosity.

No, I'm referring to smith mountain lake.
 

ezmobee

Supreme Mariner
Joined
Mar 26, 2007
Messages
23,767
Looking real good! And congrats on all the other stuff as well. We're still in the "old rental house" phase and hoping to be where you're at house wise in a year or so.
 

Baylinerchuck

Commander
Joined
Jul 29, 2016
Messages
2,728
No, I'm referring to smith mountain lake.

One of the guys I boat with has a lot on Smith Mountain Lake. Looks like a real nice stretch of water, though I've never been there. Might check it out this summer with some friends.
 

steely85

Petty Officer 2nd Class
Joined
Apr 18, 2015
Messages
121
One of the guys I boat with has a lot on Smith Mountain Lake. Looks like a real nice stretch of water, though I've never been there. Might check it out this summer with some friends.

You should. You would need like a week to check out all the bays the lake has. It is huge. Plus it has bars and good restaurants you can boat up to.
 

steely85

Petty Officer 2nd Class
Joined
Apr 18, 2015
Messages
121
Ok... so I was stripped of my pride and the wind was taken out of my sail. I sanded the deck and the filet so I could get the glaze off from sitting for a year. I then took some acetone to clean everything off and make a good surface for the resin to bond to.

I moved a piece of plywood I had laying on the deck and there was a puddle under it. I thought that was really strange and began checking all the hoses above that area to see if any of them had water that could have leaked down if I bumped it. But they were all dry as a bone so I just figured it came from the board I set on the deck. So I wiped the wet spot with acetone. I came back a few minutes later and there was another puddle!!!!!!! I freaked out and cut the plug out of the floor and there is standing water in there.
 

steely85

Petty Officer 2nd Class
Joined
Apr 18, 2015
Messages
121
What had happened was when I had the boat outside covered with my boat cover some water got on the boat. It wasn't much and I wasn't concerned about it because of the way the boat was positioned the water that got in was mostly on the fillet on the edge of the drivers side floor near the motor. So I believe the water got in through the cracks in the floor sections that were not sealed and it went down the side of the boat under the floor.

I am thinking g I will have to try to take out that section of floor to dry it out unless there are any other suggestions. I dread the thought of all that glue and foam holding down the floor I think I would have to get creative in order to pull it off.

On other thing I find strange is the location of the hole that keeps filling with water. There are no bulkheads where the water is and the holes behind the hole that is filling up are dry.

The hole filling with water is the third one from the rear.
I stuffed it with paper towel in this picture. The boats bow is up yet the rear hole is dry as a bone.


The hole that keeps filling with water is right about where the red dot is in this picture


So please any ideas on either a way to take the floor off with minimal damage to everything else or should I just notch out the section where the water intrusion is.
 

steely85

Petty Officer 2nd Class
Joined
Apr 18, 2015
Messages
121
My idea is to angle my circular saw and cut around the affected areas so the floor can only fit one way and will sit on the angled section of flooring i did not remove for support and glue and screw everything back on when the water is out. Kind of like a Jacko lantern lid.
 
Last edited:

Baylinerchuck

Commander
Joined
Jul 29, 2016
Messages
2,728
That sounds like a great way of opening up the floor so you can put it back. That's a real shame water got in there. I feel your pain.
 

steely85

Petty Officer 2nd Class
Joined
Apr 18, 2015
Messages
121
Ya it sucks, but I'm so glad I found it. And yes I did seal the bottom of the deck.

I have been going out every 10 minutes or to shop vac the inch or 2 of water out of the hole.

The outer portion of the stringers is only like 3 inches tall. I'm debating on popping out the foam on the outside, drying it out then gluing it back in when it is dry. That way I can be sure no water is hiding under the foam.
 

steely85

Petty Officer 2nd Class
Joined
Apr 18, 2015
Messages
121
Ok so here goes... I drilled out the holes I originally drilled out to pour foam into to check for water in other cavities. I knew I would be worried about everything until I actually saw the water and made sure it was completely dry!! So I took my gantry and hooked up my tie down straps to the holes in the floor and cranked up on it so I wouldn't have to apply pressure anywhere with a pry bar and run the risk of popping any bonds I didn't want popped.


Here is a picture for those that are curious about the method friscoboater used to pour foam in his boat. I used the same technique. It filled up the cavities great!!


I popped out the foam where the water was to see how saturated the area was. I found out the reason there was no water coming out of the holes towards the rear of the boat. It was because the foam expanded so far that the foam didn't let water past it. It also was waterproofed enough that water would not seep into the foam, instead there was a little channel that led from the outside of the foam to the plug in the floor. You can see in this picture it is wet on the outside and it is completely dry where the foam was.


I used the PL glue friscoboater used on his boat and it didn't seem to bond as well as I was expecting on the bottom side of the deck that I waterproofed with resin. You can see here it just kind of peels off. It was tough to pull the floor off so I'm not sure where the bonding strength came from, the PL glue or the foam being stuck to the bottom side of the deck.


tpenfield

Moderator
Staff member
Joined
Jul 18, 2011
Messages
18,140
Glad you found the cause of the water and remedied it. Yea, PL and resin just are not made for one another. I suspect it was the foam holding the deck down, not the PL.

In terms of the foam filled cavities, the fill as shown in your pictures is pretty good, better than most, but as you can see there are still some air pockets, which allowed the water to travel within the structure. Most boats have this issue in that the chambers only fill about 90-95% with foam, leaving the air pockets.

I have often wondered if there needs to be small 'vent holes' drilled in each corner of each chamber of the structure to allow air to escape from the chambers even after the fill hole has plugged up from the expanding foam. Maybe even a plug over the fill hole to force the air out of the 'corner vents'.

Anyway, I think you did nice job in fixing the issue.
 

Baylinerchuck

Commander
Joined
Jul 29, 2016
Messages
2,728
Yeah I'm glad you are posting these pics. Like Ted stated, you can really see the voids in the foam. Also a good lesson for me in making 100% sure the deck is sealed. I like Ted's idea of adding vent holes. I definitely don't like the voids at all. It still makes me ill thinking about drilling holes in a new deck......but unless there is another way, holes are unavoidable.

Has any one tried pouring foam prior to laying the deck? Then trimming the height of the foam?
 

JASinIL2006

Vice Admiral
Joined
Feb 10, 2012
Messages
5,714
Has any one tried pouring foam prior to laying the deck? Then trimming the height of the foam?

I remember seeing pictures from one of the members who did just that. I don't remember who it was or what restoration, but I do recall thinking it looked like a huge pain and I think it was rather messy. I also recall some folks wondering about compromising the closed cell nature of the top layer of the foam, possibly giving moisture an easier path to compromise the foam.
 

tpenfield

Moderator
Staff member
Joined
Jul 18, 2011
Messages
18,140
Part of the value of the pour-in foam with the deck in place is that it adheres to the deck as well as the stringer grid, making all the more solid.
 

ezmobee

Supreme Mariner
Joined
Mar 26, 2007
Messages
23,767
JASinIL2006 said:
I also recall some folks wondering about compromising the closed cell nature of the top layer of the foam, possibly giving moisture an easier path to compromise the foam.

That'd be my concern.
 

Woodonglass

Supreme Mariner
Joined
Dec 29, 2009
Messages
25,929
The key to pouring 2 part foam under the installed deck without voids is to calculate the exact cubic feet of the area to be filled and NOT to install it when temps are under 75 degrees.
 
Top