1999 Celebrity 190 - Engine Mount and Stringer Repair

tpenfield

Moderator
Staff member
Joined
Jul 18, 2011
Messages
18,140
Re: 1999 Celebrity 190 - Engine Mount and Stringer Repair

Here is what I would estimate to achieve basic flotation for the boat based on 2800 lbs total dry weight . . .

1) Engine/outdrive = 700 lbs / 490 lb/cu ft = 1.4 cu ft

2) Wood = 100 lbs / 30 lbs/cu ft = 3.3 cu ft

3) Aluminum, etc = 100 lbs / 168 lbs/cu ft = 0.6 cu ft

4) Fiberglass, etc = 1900 lbs / 90 lbs/cu ft = 21.1 cu ft

Total displacement if submerged and without flotation = 26.4 cu ft (adding items #1 thru #4)

Total needed of basic flotation = 2800 lbs/ 62.4 lbs/cu ft = 44.9 cu ft (total dry weight of the boat versus the density of water)

Amount of foam needed for basic flotation = 44.9 - 26.4 = 18.5 cubic feet (difference between the 2 above)

So maybe 25 cubic feet of foam to get a bit more than basic flotation.

If you have some more accurate estimates of the various material weights in the boat (like engine, etc) feel free to plug those numbers in the the math that I have presented. The boat should have a USCG certification label indicating it meet regulations, which include basic flotation. So, the manufacturer probably had just enough foam in the boat to keep it from sinking.

The tough thing about estimating flotation in a boat is that it is not practical to test it in a DIY scenario :eek:
 
Last edited:
bvetter

Petty Officer 1st Class
Joined
Jun 2, 2013
Messages
263
Re: 1999 Celebrity 190 - Engine Mount and Stringer Repair

New development.


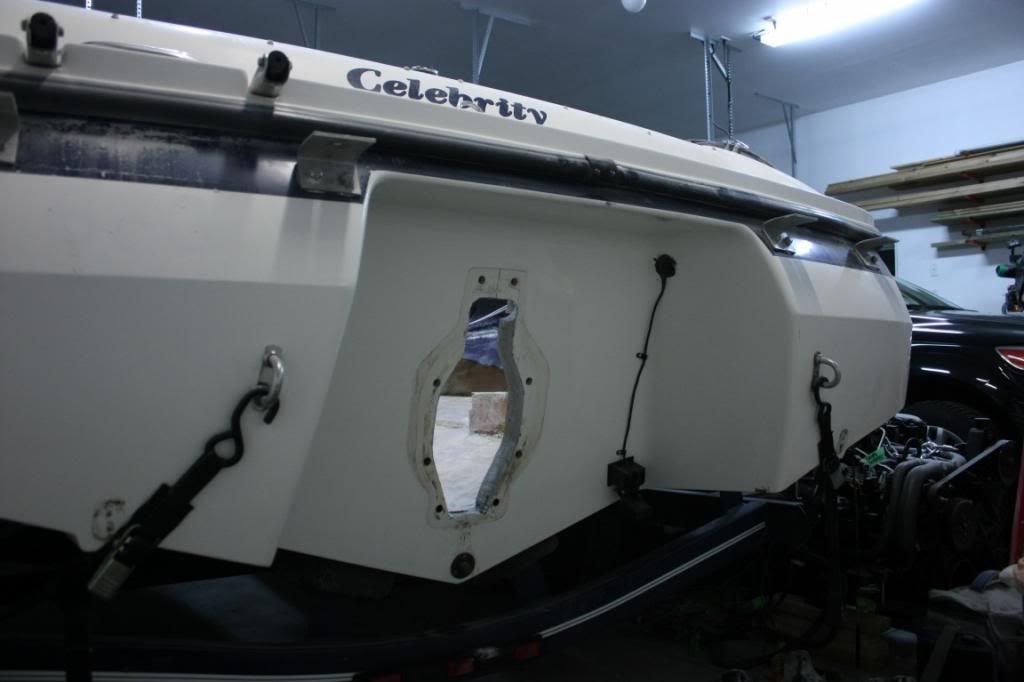
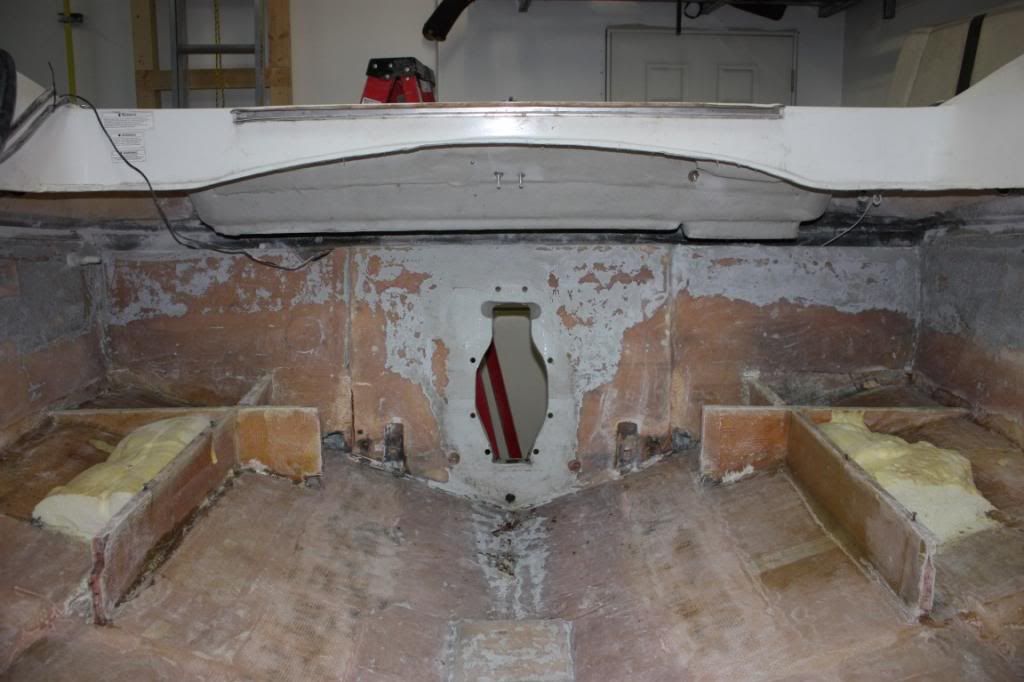
I removed the gimble housing from the transom yesterday, I wanted to grind down the gelcoat on inside the face of the transom so that I would have a consistent surface for new gelcoat when that time comes. Also was interested in seeing the condition of the gimble housing studs (I had seen pictures of severely corroded studs in other posts which had me worried). What I found was positive, six of the studs looked brand new and still shiny. The two bottom studs were a little dark, not corroded, just dark, meaning most likely moisture in the very bottom section of the transom.

I had taken a few core samples of the transom earlier, the samples came out dry, but the wood was slightly darker than normal plywood, almost a pinkish-reddish hue. Either way, last night I picked at the bottom of the keyhole with a chisel, although it did take some effort to pull out wood chips, there was signs of some dampness. The chips weren't wet, but none the less I figured it needs to come out.

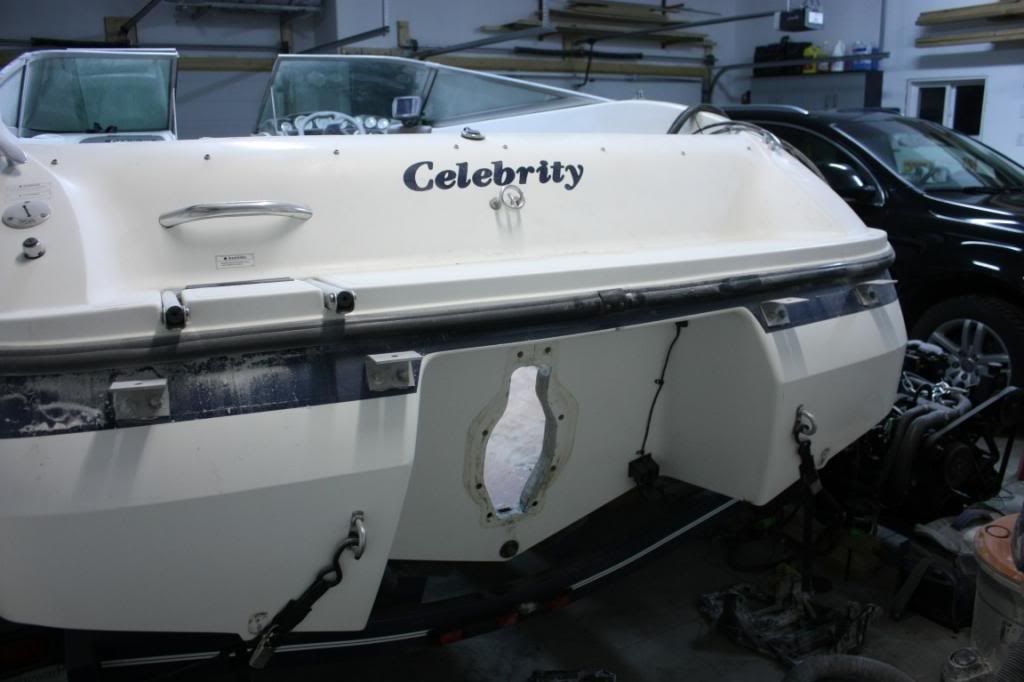
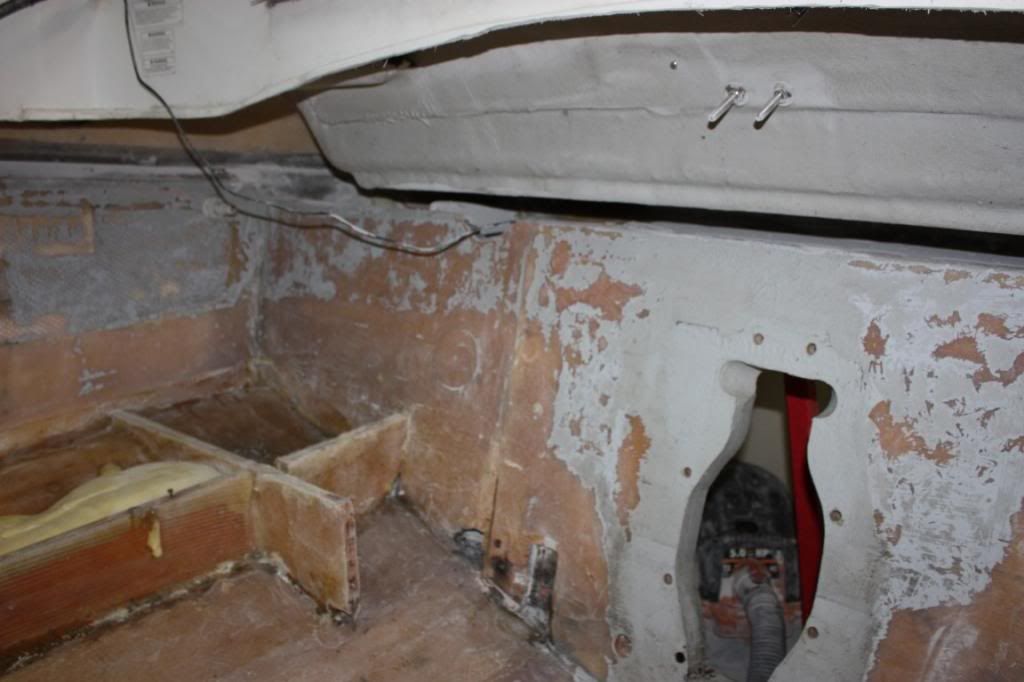
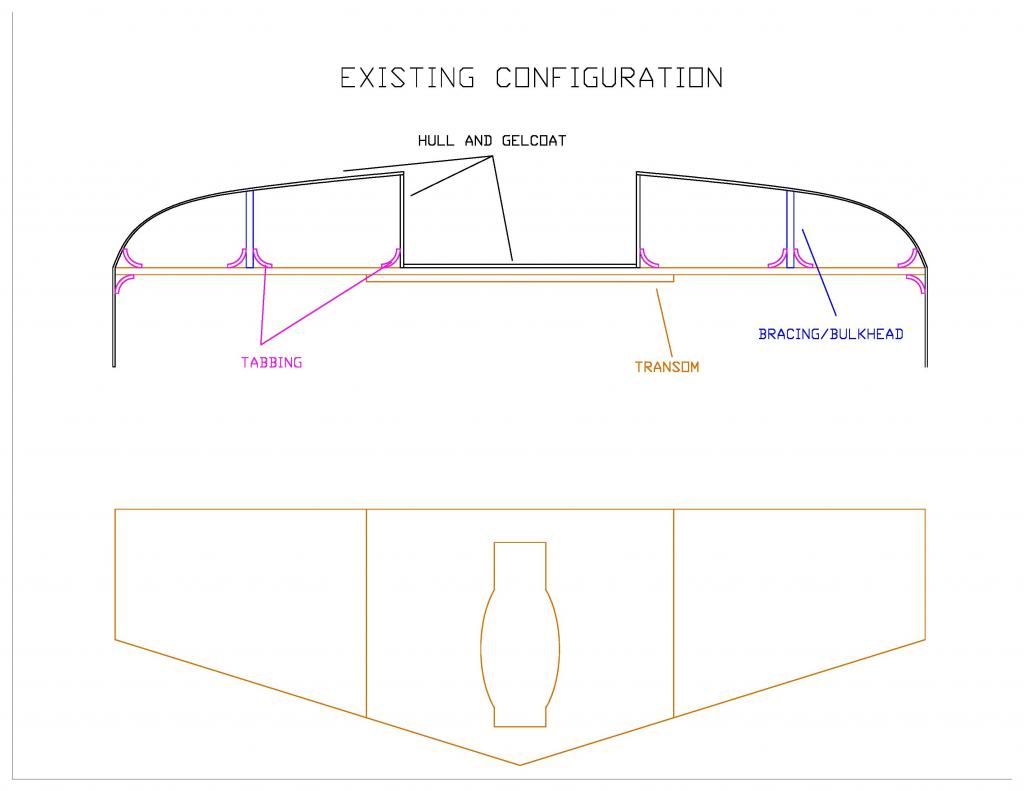
Now, here comes the tricky part. Because of the configuration of the stern, the outside of my transom does not run flat across the back of the boat. Let me rephrase that, the back end has a few cavities on either side of the outdrive which support the rear deck/platform. So even though the actual transom runs flat the full width of the hull inside the boat, it is not backed with resin/gelcoat the entire way, only the portion where the outdrive is mounted. The wings are backed with mat and tabbed into the structure in the rear cavities.


Hopefully those picture codes worked and you're able to see what I'm up against.

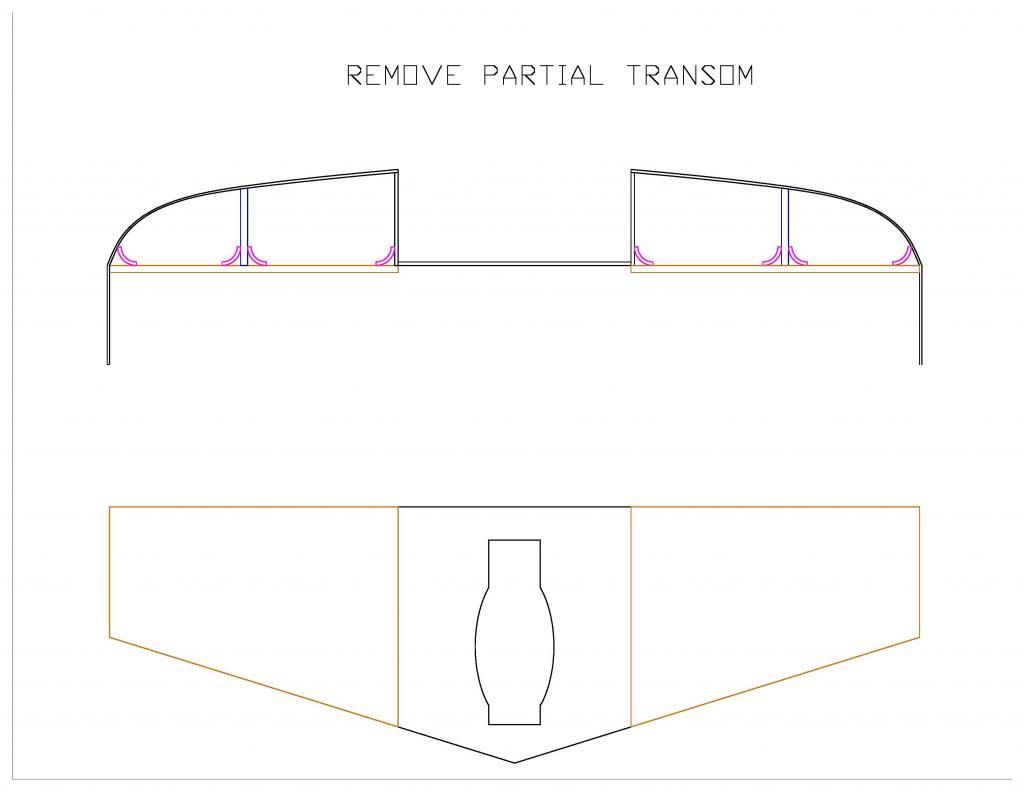
Because I do not have access in behind the transom (on the wings), it would be impossible to re-tab a new full transom without removing the top cap on the boat, a task I am not up for. So, I have come up with a plan to install a new one piece transom, but using the original wings as backing plates. In essence, I will fully remove the centre section (was two layers of 3/4" ply), and leave the wings in place (obviously once I start cutting into things I will be able to get a look at the condition of the wings).

Next post will have my plans, gimme a couple minutes.
 

bvetter

Petty Officer 1st Class
Joined
Jun 2, 2013
Messages
263
Re: 1999 Celebrity 190 - Engine Mount and Stringer Repair

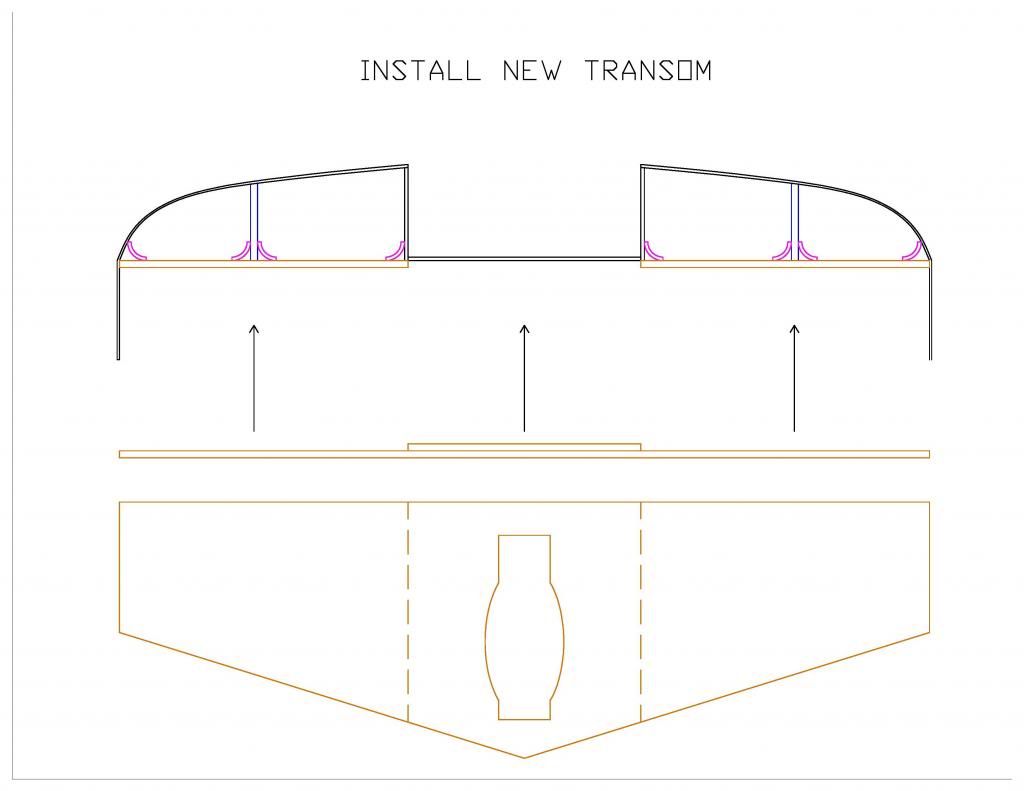
So here is my plan, which I believe will be as strong, if not stronger than the original.

Below is a drawing of the existing configuration.

Hull/Gelcoat is in black
Transom is in brown
Existing tabbing is in pink
Misc bracing is in blue

As you can see, the transom is pretty typical, one 3/4" layer running the full width of the hull, a second 3/4" layer in the center section. The overall thickness at the keyhole is extremely uniform at 2" all around.


In the next drawing I show my plan to remove the center section only, leaving the wings intact. I do not have access in behind them, so even if I cut them out, I would have no way of getting behind there to re-tab in the new transom.


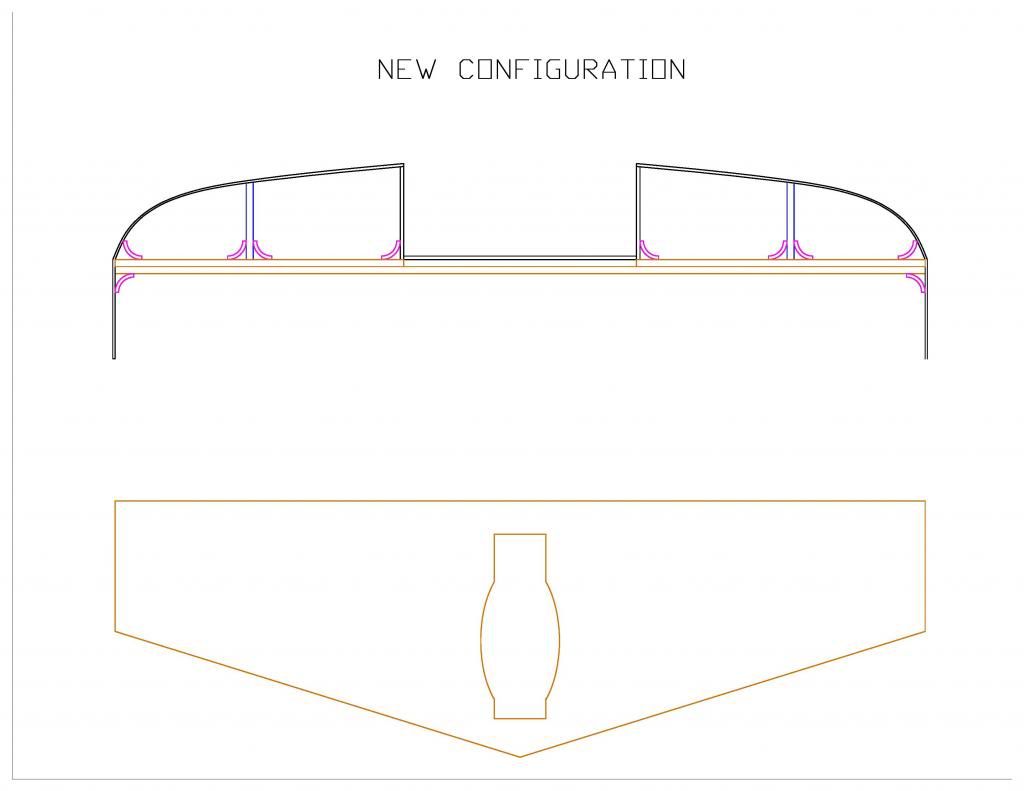
In the next drawing, you can see the new transom design. It is essentially the same as the old, except flipped (the second 3/4" ply layer butting up against the exterior glass/gelcoat. By clamping this into place with a layer of PB, I would be bonding the new one piece the full entire width of the boat and still be able to use the original tabbing as structure in behind the original wings. The front of the new transom would be uniform and flat.


Next drawings shows everything installed, with new tabbing along the sides against the hull.


Thoughts?
 

tpenfield

Moderator
Staff member
Joined
Jul 18, 2011
Messages
18,140
Re: 1999 Celebrity 190 - Engine Mount and Stringer Repair

Should be fine. . . As you know, you need to maintain the specified transom thickness . . . so as long as you have got that covered. Would you be able to inject foam into the cavity between the transom and the hull either side of the outdrive?
 
Last edited:
bvetter

Petty Officer 1st Class
Joined
Jun 2, 2013
Messages
263
Re: 1999 Celebrity 190 - Engine Mount and Stringer Repair

I believe so. There is about a 3" gap between the transom and cap, the trick would be pouring it in there before it sets up. Unless like you say, I could inject foam in there under pressure.
 

tpenfield

Moderator
Staff member
Joined
Jul 18, 2011
Messages
18,140
Re: 1999 Celebrity 190 - Engine Mount and Stringer Repair

I believe so. There is about a 3" gap between the transom and cap, the trick would be pouring it in there before it sets up. Unless like you say, I could inject foam in there under pressure.

I had to make a gravity feed via a large funnel & hose to fill the enclosed stringer boxes on my Formula 242, when doing some stringer repair work. Since you only have about 45 seconds to pour/inject the foam after mixing the 2 parts together, there is a bit of waste.

Here is a picture of the foam pushing out as it filled the cavity . . .

IMG_0469.jpg


I think it would have been better, if I could have used more of a closed container and air pressure to more quickly move the foam (in its liquid state) thru the tube and into the chamber.
 

jbcurt00

Moderator
Staff member
Joined
Oct 25, 2011
Messages
25,111
Re: 1999 Celebrity 190 - Engine Mount and Stringer Repair

Having only the pour IN hole doesn't help either. The foam expands much better if there is an in to pour foam thru & a 2nd hole to let air out as the foam expands towards the 2nd hole. MUCH better expansion rate.
 

Woodonglass

Supreme Mariner
Joined
Dec 29, 2009
Messages
25,929
Re: 1999 Celebrity 190 - Engine Mount and Stringer Repair

This will work Eazee Smeezee!!! Drill a couple of 3" holes in the top of each pour section, one for pouring one for venting and go to work. Do your calculations and you'll be fine. Transom will be a TANK!!!!
 

slow joe

Seaman
Joined
Oct 23, 2013
Messages
60
Re: 1999 Celebrity 190 - Engine Mount and Stringer Repair

Nice work, certainly moving along quickly! I'm signing on to watch this.
 

SWD

Petty Officer 1st Class
Joined
Mar 1, 2011
Messages
284
Re: 1999 Celebrity 190 - Engine Mount and Stringer Repair

Great job so far! Have a Celeb too that will need work in the years to come...so watching this with great interest. Please PM me as I'm only a few hours away from you.(nr Kindersley).
 

bvetter

Petty Officer 1st Class
Joined
Jun 2, 2013
Messages
263
Re: 1999 Celebrity 190 - Engine Mount and Stringer Repair

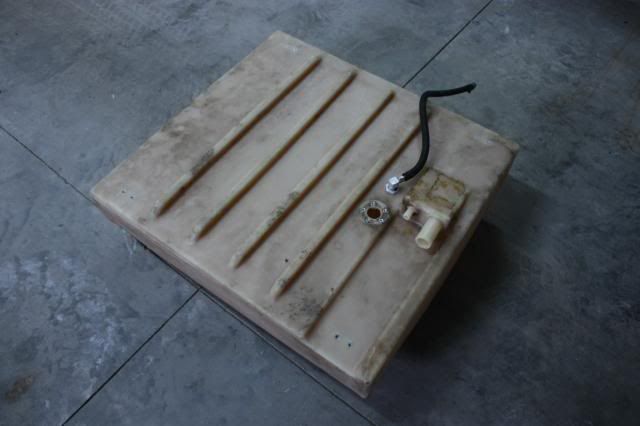
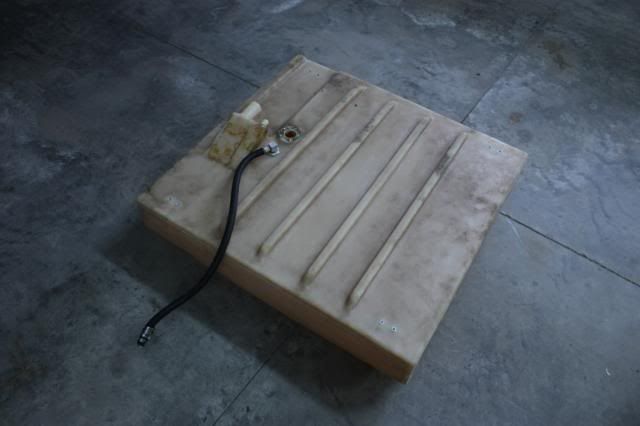
Not too much activity this week, many other things on the go. Did however take the fuel tank to the car wash to give it a good rinse inside and out.


SWD

Petty Officer 1st Class
Joined
Mar 1, 2011
Messages
284
Re: 1999 Celebrity 190 - Engine Mount and Stringer Repair

Put some wood alcohol or gas line antifreeze in there and slosh it around....it will absorb any moisture that is remaining in the tank.
 

bvetter

Petty Officer 1st Class
Joined
Jun 2, 2013
Messages
263
Re: 1999 Celebrity 190 - Engine Mount and Stringer Repair

Put some wood alcohol or gas line antifreeze in there and slosh it around....it will absorb any moisture that is remaining in the tank.

Good idea! I was planning to circulate hot air through it for a while or even just use the shop vac to get air flow, but gas line antifreeze would be much quicker!
 

bvetter

Petty Officer 1st Class
Joined
Jun 2, 2013
Messages
263
Re: 1999 Celebrity 190 - Engine Mount and Stringer Repair

Well, managed to get out to the shop for an hour tonight. Did a good scrub down of the hull with water, then a quick preliminary wipe down with acetone. I am excited to receive glassing materials so I can get this show on the road, hopefully tomorrow!
 

bvetter

Petty Officer 1st Class
Joined
Jun 2, 2013
Messages
263
Re: 1999 Celebrity 190 - Engine Mount and Stringer Repair

Sounds like my glassing material arrived today, will post a pic tonight when I get it home. On that note, I had a question about material for making PB. It seems to me the that most everyone is using 1/4" chopped strand. When I put my order together, the supplier was out of 1/4", but had 5/8" on hand. Any issues with using 5/8" strand instead? I imagine it would somewhat increase the strength of PB, but maybe be more cumbersome to work with due to the long strands? If need be, I could order 1/4" from another supplier, but would prefer to work with what I have. Also, I will be using cabosil to thicken the mixture.

-Brandon
 

jbcurt00

Moderator
Staff member
Joined
Oct 25, 2011
Messages
25,111
Re: 1999 Celebrity 190 - Engine Mount and Stringer Repair

Cut up your scrap CSM & 1708 to make chopped fibers. You will have plenty of waste & scraps. Save pieces of glass the don't cut well, or fray heavily from handling.

You can cut some smaller then 1/4", some 1/4" & some 5/8", almost as you need them. That way you don't have too much of 1 & not enough of another when the time comes. If you think the gap under a stringer for bedding is a bit larger or needs a bit more filler for a cove @fillets, you can custom cut & mix whatever you need for each PB mix.
 

Woodonglass

Supreme Mariner
Joined
Dec 29, 2009
Messages
25,929
Re: 1999 Celebrity 190 - Engine Mount and Stringer Repair

The Milled fibers are used in one Form of PB. "Structural" PB or Hairy PB , or Tiger Hair or whatever you want to call it. It allows the poly resin to be much more resistant to breaking. Poly in it's native cured form is very brittle. The addition of Cabosil will make it thicker and a bit less brittle and easier to apply on vertical surfaces and is all that's needed when you need a thicker resin for wetting out purposes. For bedding stringers and adhering the transom to the stern, then most people like to add some fibers to the mix to make it more "structural" and make it less likely to crack once fully cured. You're correct in your assumption about the length of the fibers. The longer they are the harder it is for you to spread the mix in a uniform manner. The 5/8" will be fine. One of our members likes to use Gallon sized ziploc bags to put the PB in and then cut off one corner and then squeeze out the "Goop" like a pastry bag. Seems to work well, you might give it a try when the time comes.;)
 
Last edited:

bvetter

Petty Officer 1st Class
Joined
Jun 2, 2013
Messages
263
Re: 1999 Celebrity 190 - Engine Mount and Stringer Repair

Yeah, I did read about using a ziploc bag, may be worth a try.

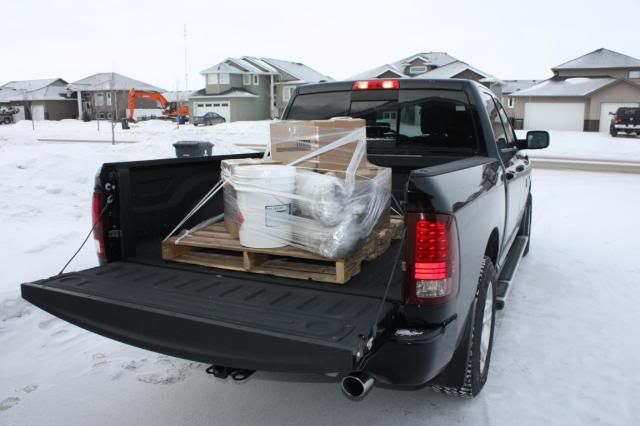
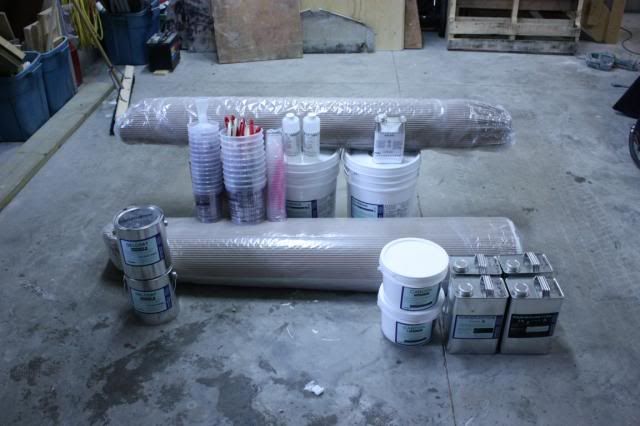
Materials arrived!

I guess $1,200 (Canadian) doesn't get you too far these days....


Here is the count:

-10 gallons unwaxed poly resin
-1L MEKP
-24 lin yards of 50" 1.5oz CSM
-20 lin yards of 50" 1708
-2 gallons cabosil
-8.6kg 5/8" chopped strand
-2x 2 gallon pour-in-foam kits (2lb density)
-2 gallons white gelcoat
-1 quart of airdry (wax additive)
-10 graduated mixing cups (quart)
-10 graduated mixing cups (2.5 quart)
-25 pack of 8oz graduated cups
-5 plastic and 5 wood brushes
-EZ catalyst dispenser

I know I will need to order more resin, but wanted to get a feel for how much more as this progresses so I don't overshoot by a whole lot.
 

jbcurt00

Moderator
Staff member
Joined
Oct 25, 2011
Messages
25,111
Re: 1999 Celebrity 190 - Engine Mount and Stringer Repair

Yep, gonna need a BUNCH more brushes if nothing else. And it looks like a huge truck load for $1200C.
 

bvetter

Petty Officer 1st Class
Joined
Jun 2, 2013
Messages
263
Re: 1999 Celebrity 190 - Engine Mount and Stringer Repair

Yep, gonna need a BUNCH more brushes if nothing else.

Haha, yup. Don't know what I was thinking. At least good 'ol Home Depot will have some.
 
Top