cajuncook1
Chief Petty Officer
- Joined
- Sep 3, 2009
- Messages
- 559
Re: 69 Evinrude How to replace coils,condensers,plugs ,and points
Re: 69 Evinrude How to replace coils,condensers,plugs ,and points
ccvolsdhf,
Couple of suggestions about your carburetor. Here is a diagram to reference to:
- Please don't rely on the previous owners statement that they did a carburetor cleaning( That usually implies that they squirted some carburetor cleaner in the carburetor and called it good.)
- Please get a carburetor kit and do a proper job, so you know that it has been done and correctly.
- Look at parts ( in the diagram ) part # 5 (core plug/welch plug) part# 28 (needle bearing valve) part# 29 (needle valve retainer). Those parts need to be replaced. A lot of times people omit part#5 and part#28.
The only way to properly clean the carburetor is to remove part#5 (core plug/welch plug) and make sure it does not have junk in there. This can affect your engine running and idling at low speeds. *** Also part#28 is either not removed and gets soaked in carburetor cleaner and get distorted and causes a flow/obstruction issue preventing proper idling at low and idle speeds. (So when you remove the core plug and slow needle valve make sure the needle bearing valve and needle valve retainer is removed and replaced after you complete a carburetor soak and cleaning.) Use the new parts in the kit.
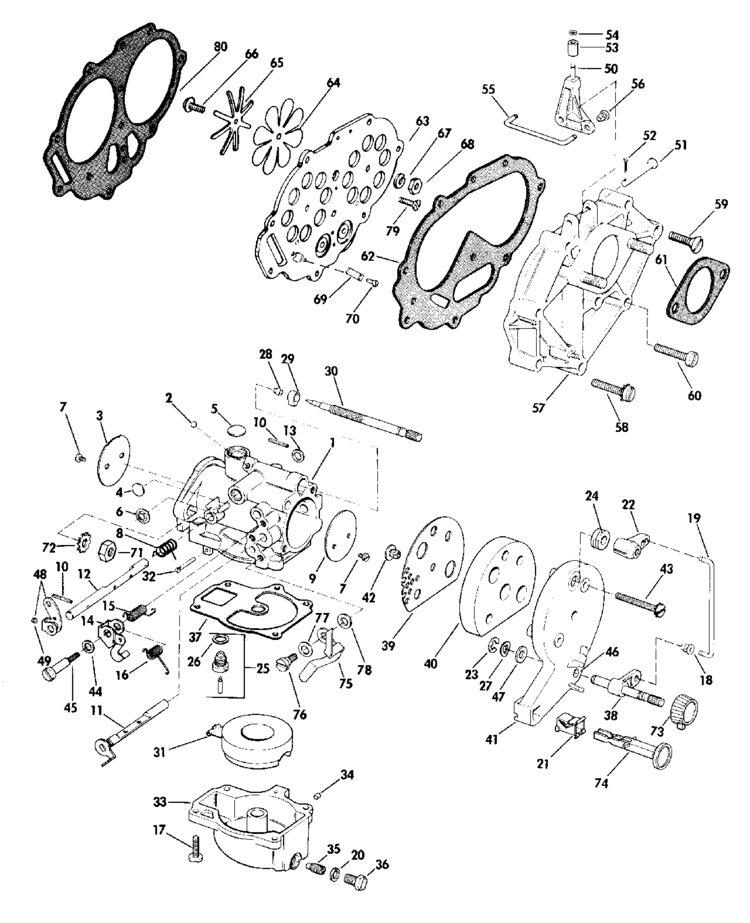
I assume you have a new carburetor kit and you have clean the carburetor, blown all the passages with air. This also includes the expansion/welch plug.
- remove the core/expansion plug (item #5) to make sure that the mixing chamber was free and the three little at it's base was clear and clean. (This step is the one people forget or don't think about and it bites you in the butt sometimes.)
- Blow all the passages with compressed air after the carburetor dip?
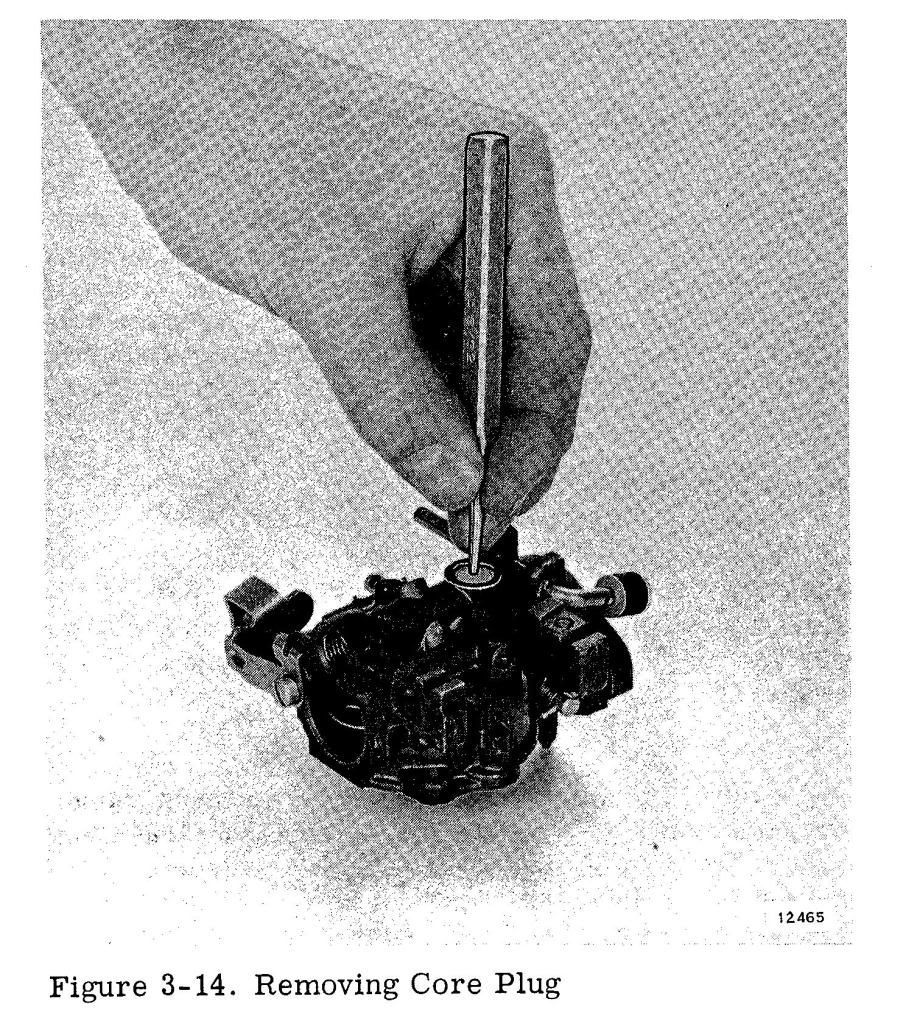
Here is a procedure for removing the expansion/core plug for cleaning.
Nonremoval of that core or expansion plug to do a complete carburetor cleaning is probably the one issue that plagues a lot of us. It is also a source of frustration because the trash and goo that is in that pocket can't always be cleaned with carb clean or blown out. In the future if when you get a carburetor kit and do a complete carburetor cleaning, always remove the core or expansion plug and replace with a new plug.
I am going to supply some diagrams for better explanation.
Be very careful if you put the carburetor body in a vise, so you don't damage the linkages or body with the vise.
You can use a punch or a drill to [highlight]carefully[/highlight] puncture a hole so you can remove the core plug. I have used a machine screw to puncture the core plug and used a pair of piers grasp the screw head and pop the core plug out, but be very careful not to go too deep with the drill, punch or screw. You don't want damage the chamber.
Once you have carefully cleaned the chamber, the little holes at the bottom and the needle passage to the mixing chamber then apply the core plug with the convext side up (the rounded side facing the sky).
[highlight]Try not to use wire to scrub out the holes or the needle passage way to the mixing chamber are you could damage or widen the hole and cause mixing problems. Spray carb cleaner or compressed air.[/highlight]
If you do not have a air compressor, then walmart sells compressed air cans with the straws that can be used. $3 or $4 dollars(you have seen the cans of compressed air that we use to clean are computer keyboards and equipment).[highlight]Also remember to disassemble your carb of all plastic and gaskets prior to using carburetor cleaner or dip( that stuff eats gaskets and plastic)[/highlight]. Blow it all out with compressed air.
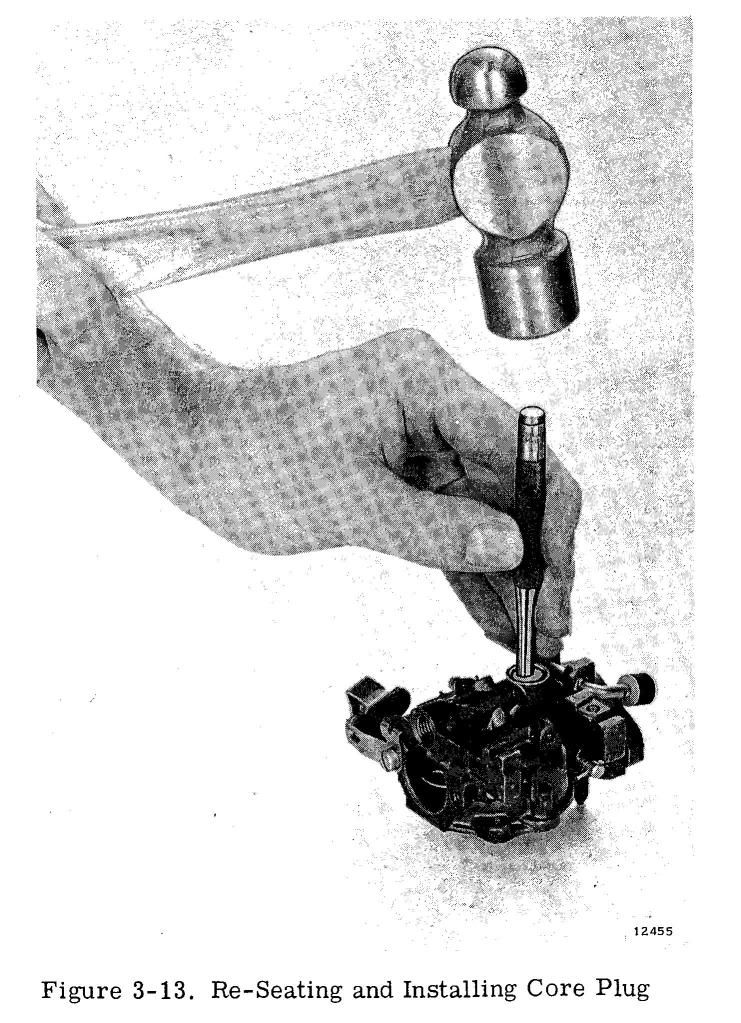
Then take a wide punch or a 3/8 or 1/2 extension from a socket set (it has a wide flat base) and carefully tap(with a hammer and wide punch or extension piece) the core plug replacement in place. The convex (rounded portion) should be somewhat flat when done.
Well, that's how I do it, maybe someone will have other methods.
[highlight]Make sure these are your beginning carburetor settings:[/highlight]
These are going to be the initial settings for the carburetor for starting purposes. Your will later fine tune the settings.
Facing the carburetor you will notice slow speed and idle knob.
- Top needle is your slow idle needle. You will gently turn in (clockwise) until the needle is gently seated..please don't force. Once seated, you will turn out (counter clockwise) the slow idle needle 1 1/2 turns. Leave it there for the time being.
- You do not have a high speed needle. You have fix high speed jet. Please, after soaking the carburetor, blow this jet (part# 35 in the diagram) out with compress air.
Couple of things you can try if you are still having some running or idling issues after you completed your carburetor cleaning and kit.
1.) Check to make sure your fuel hose from your tank is in good shape as well as your fuel connectors, so it does not allow air to enter and cause fuel displacement and poor fuel delivery. Also check the fuel hoses from the motors fuel connector to the fuel pump and the fuel hose from the fuel pump to the carburetor.
2.) Remove the fuel pump adjustable cover and make sure the little screen is not clogged up with trash or gummed up fuel. This can cause poor fuel delivery.
3.) Make sure your bulb and connector is connected closest to your tank with the arrow pointing to motor as the direction of the fuel flow.
4.) Make sure the fuel cap air vent is open. If closed it will not allow the fuel pump to properly siphon fuel because of the increase negative pressure in the tank.
*** If you are testing this motor in barrel, then take the cover off and put a fan blowing next to it, so the motor does not inhale its own exhaust.
6.) Make sure you have fresh mix of gas 87 octane and twc-3 2cycle oil mixed at a ratio of 50:1. Old fuel mix in tank can accumulate water and cause very poor running indeed.
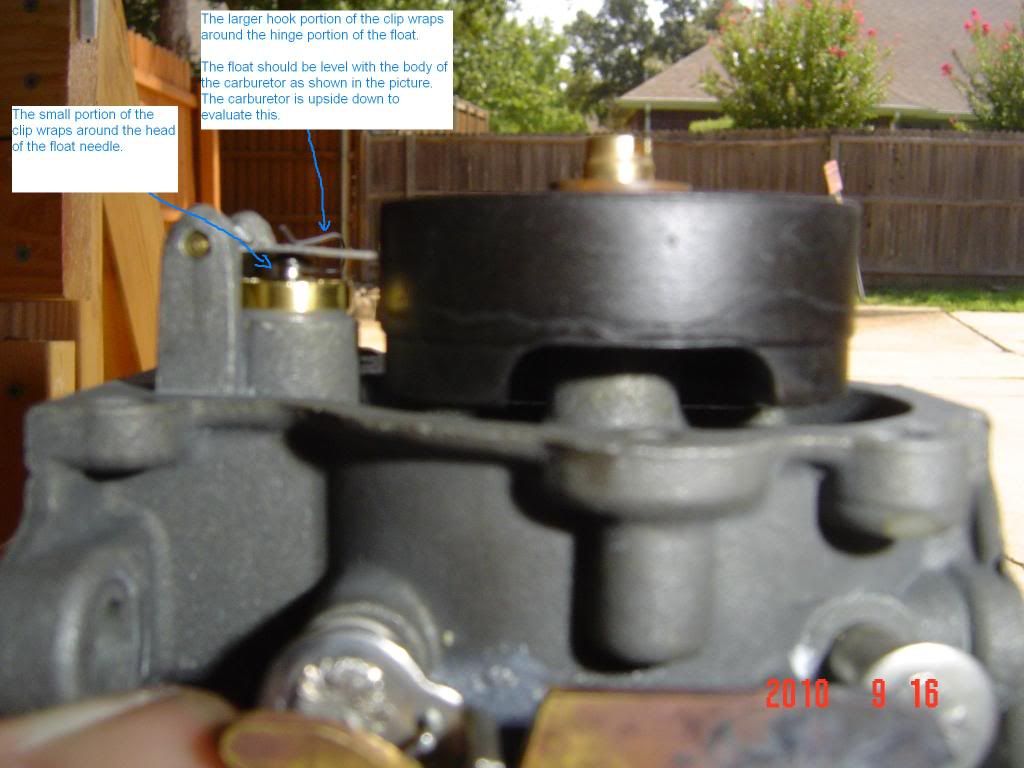
I hope this helps you out. In the secret file link, there is a description how to properly set your float for your carburetor.
Good luck!
Re: 69 Evinrude How to replace coils,condensers,plugs ,and points
ccvolsdhf,
Couple of suggestions about your carburetor. Here is a diagram to reference to:
- Please don't rely on the previous owners statement that they did a carburetor cleaning( That usually implies that they squirted some carburetor cleaner in the carburetor and called it good.)
- Please get a carburetor kit and do a proper job, so you know that it has been done and correctly.
- Look at parts ( in the diagram ) part # 5 (core plug/welch plug) part# 28 (needle bearing valve) part# 29 (needle valve retainer). Those parts need to be replaced. A lot of times people omit part#5 and part#28.
The only way to properly clean the carburetor is to remove part#5 (core plug/welch plug) and make sure it does not have junk in there. This can affect your engine running and idling at low speeds. *** Also part#28 is either not removed and gets soaked in carburetor cleaner and get distorted and causes a flow/obstruction issue preventing proper idling at low and idle speeds. (So when you remove the core plug and slow needle valve make sure the needle bearing valve and needle valve retainer is removed and replaced after you complete a carburetor soak and cleaning.) Use the new parts in the kit.

I assume you have a new carburetor kit and you have clean the carburetor, blown all the passages with air. This also includes the expansion/welch plug.
- remove the core/expansion plug (item #5) to make sure that the mixing chamber was free and the three little at it's base was clear and clean. (This step is the one people forget or don't think about and it bites you in the butt sometimes.)
- Blow all the passages with compressed air after the carburetor dip?
Here is a procedure for removing the expansion/core plug for cleaning.
Nonremoval of that core or expansion plug to do a complete carburetor cleaning is probably the one issue that plagues a lot of us. It is also a source of frustration because the trash and goo that is in that pocket can't always be cleaned with carb clean or blown out. In the future if when you get a carburetor kit and do a complete carburetor cleaning, always remove the core or expansion plug and replace with a new plug.
I am going to supply some diagrams for better explanation.
Be very careful if you put the carburetor body in a vise, so you don't damage the linkages or body with the vise.
You can use a punch or a drill to [highlight]carefully[/highlight] puncture a hole so you can remove the core plug. I have used a machine screw to puncture the core plug and used a pair of piers grasp the screw head and pop the core plug out, but be very careful not to go too deep with the drill, punch or screw. You don't want damage the chamber.
Once you have carefully cleaned the chamber, the little holes at the bottom and the needle passage to the mixing chamber then apply the core plug with the convext side up (the rounded side facing the sky).
[highlight]Try not to use wire to scrub out the holes or the needle passage way to the mixing chamber are you could damage or widen the hole and cause mixing problems. Spray carb cleaner or compressed air.[/highlight]
If you do not have a air compressor, then walmart sells compressed air cans with the straws that can be used. $3 or $4 dollars(you have seen the cans of compressed air that we use to clean are computer keyboards and equipment).[highlight]Also remember to disassemble your carb of all plastic and gaskets prior to using carburetor cleaner or dip( that stuff eats gaskets and plastic)[/highlight]. Blow it all out with compressed air.
Then take a wide punch or a 3/8 or 1/2 extension from a socket set (it has a wide flat base) and carefully tap(with a hammer and wide punch or extension piece) the core plug replacement in place. The convex (rounded portion) should be somewhat flat when done.


Well, that's how I do it, maybe someone will have other methods.
[highlight]Make sure these are your beginning carburetor settings:[/highlight]
These are going to be the initial settings for the carburetor for starting purposes. Your will later fine tune the settings.
Facing the carburetor you will notice slow speed and idle knob.
- Top needle is your slow idle needle. You will gently turn in (clockwise) until the needle is gently seated..please don't force. Once seated, you will turn out (counter clockwise) the slow idle needle 1 1/2 turns. Leave it there for the time being.
- You do not have a high speed needle. You have fix high speed jet. Please, after soaking the carburetor, blow this jet (part# 35 in the diagram) out with compress air.
(Carburetor Adjustment - Single S/S Adjustable Needle Valve)
(J. Reeves)
Initial setting is: Slow speed = seat gently(turn in clockwise), then open 1-1/2 turns(turn out counter clockwise). Do not tighten or force the slow idle needle shut or it may damage the needle.
Start engine and set the rpms to where it just stays running. In segments of 1/8 turns, start to turn the S/S needle valve in (clockwise). Wait a few seconds (10 to 15 sec) for the engine to respond. As you turn the valve in(clockwise), the rpms will increase. Lower the rpms again (turn your throttle slightly slower) to where the engine will just stay running.
Eventually you'll hit the point where the engine wants to die out or it will spit back (sounds like a mild backfire). At that point, back out(turn out counter clockwise) the valve 1/4 turn. Within that 1/4 turn, you'll find the smoothest slow speed setting.
When you have finished the above adjustment, you will have no reason to move them again unless the carburetor fouls/gums up from sitting, in which case you would be required to remove, clean, and rebuild the carburetor anyway.
Couple of things you can try if you are still having some running or idling issues after you completed your carburetor cleaning and kit.
1.) Check to make sure your fuel hose from your tank is in good shape as well as your fuel connectors, so it does not allow air to enter and cause fuel displacement and poor fuel delivery. Also check the fuel hoses from the motors fuel connector to the fuel pump and the fuel hose from the fuel pump to the carburetor.
2.) Remove the fuel pump adjustable cover and make sure the little screen is not clogged up with trash or gummed up fuel. This can cause poor fuel delivery.
3.) Make sure your bulb and connector is connected closest to your tank with the arrow pointing to motor as the direction of the fuel flow.
4.) Make sure the fuel cap air vent is open. If closed it will not allow the fuel pump to properly siphon fuel because of the increase negative pressure in the tank.
*** If you are testing this motor in barrel, then take the cover off and put a fan blowing next to it, so the motor does not inhale its own exhaust.
6.) Make sure you have fresh mix of gas 87 octane and twc-3 2cycle oil mixed at a ratio of 50:1. Old fuel mix in tank can accumulate water and cause very poor running indeed.
I hope this helps you out. In the secret file link, there is a description how to properly set your float for your carburetor.
Good luck!


