81 Sea Ray 26 Sedan Bridge I/O to OB Conversion/Restore (Pics)

Joined
Mar 10, 2011
Messages
64
Re: 81 Sea Ray 26 Sedan Bridge I/O to OB Conversion/Restore (Pics)

So, you seem happy with the hull. By "hunt" were you referring to bow steer?

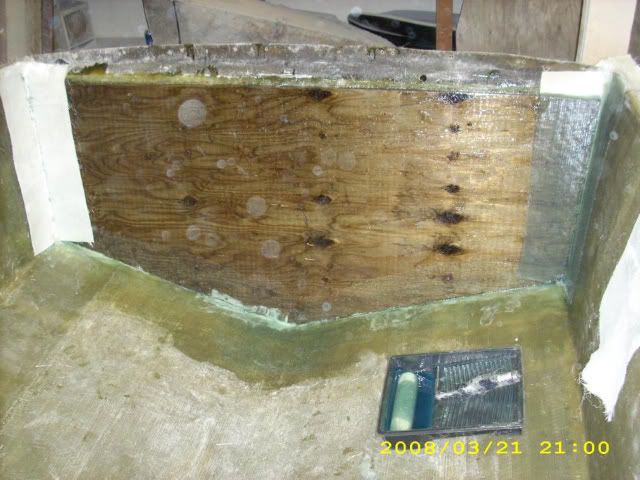
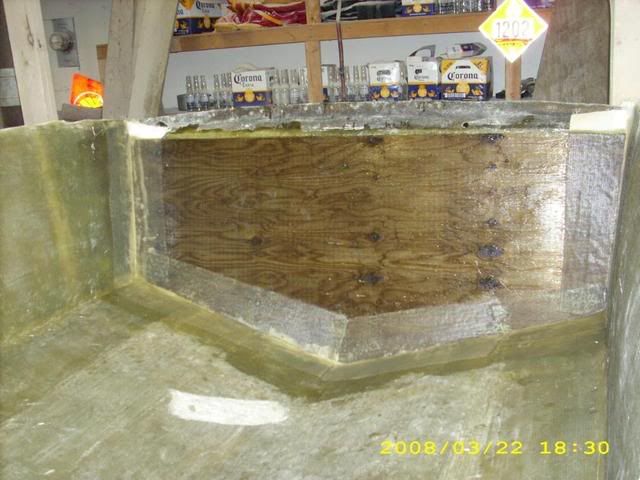
My local FG consultant was impressed with the hull. Someone else told me they tend to be a little bow heavy. As I make a lot of changes, I'm trying to prevent that.

Someone will probably chime in to correct my terminology, but it is my belief that at rest the bow of the boat is lower in the water than the stern. When moving at displacement speed the boat will bow steer. I don't know if you can or want to add enough weight to the stern to overcome that. Doing so may over weight your stern and give you more performance problems then you bargain for. I also have a single screw- that will give me much more room to wander then I would if I had twins twins on the back. In my opinion the boat is properly proportioned especially when on plane. With my tabs down I can hold plane down to about 11 mph on GPS- that is pretty slow in my experience and it speaks to the balance of the boat. I think its a positive.
 

alligatorgars

Seaman Apprentice
Joined
Aug 18, 2011
Messages
42
Re: 81 Sea Ray 26 Sedan Bridge I/O to OB Conversion/Restore (Pics)

Am I missing something? Where are all these pictures of a 26' sea ray that was getting restored? Pictures?
 

CaptainKickback

Lieutenant Junior Grade
Joined
Jul 23, 2011
Messages
1,060
Re: 81 Sea Ray 26 Sedan Bridge I/O to OB Conversion/Restore (Pics)

Better Look At Boat

Got a fairly good day working on the boat yesterday after 5 days of rain here in South Florida. Wanted to work on it today, but as you all know, life gets in the way. The salon demanded my time. Anniversary dinner tonight (wife won?t let me skip that). Hope the weather holds tomorrow.

Anyway, last night, I promised some pictures. So I?ll do several posts in the next few minutes with pictures.

To start with, here is a little better picture of the boat we are starting with than I posted earlier:

EngineOutDayBetterLookAtBoat.jpg
 

Attachments

  • EngineOutDayBetterLookAtBoat.jpg
    EngineOutDayBetterLookAtBoat.jpg
    37.8 KB · Views: 0
  • EngineOutDayBetterLookAtBoat.jpg
    EngineOutDayBetterLookAtBoat.jpg
    37.8 KB · Views: 0

CaptainKickback

Lieutenant Junior Grade
Joined
Jul 23, 2011
Messages
1,060
Re: 81 Sea Ray 26 Sedan Bridge I/O to OB Conversion/Restore (Pics)

New Fuel Tank

I thought it might be of interest to see the shape of the new gas tank. It was an hour and a half drive home with this tank strapped to the top of the SUV (too much crap inside). Can you say Beverly Hillbillies?

GasTankOnCar.jpg


This tank is poly, holds 116 gallons, and will be transverse mounted mid-ship. The old tank was metal, held 120 (minus what would flow out through the 2 holes in it sides), and was mounted fore/aft under the salon floor.
 

CaptainKickback

Lieutenant Junior Grade
Joined
Jul 23, 2011
Messages
1,060
Re: 81 Sea Ray 26 Sedan Bridge I/O to OB Conversion/Restore (Pics)

[h=1]Engines Out [/h]Several weeks ago we gave the engines and stern drives to a guy (Scott) as long as he did the work to pull them and pay for the crane to lift them out. I probably could have gotten some money out of them but wanted to concentrate on the boat, not the old motors. I had no place to store them either. Actually, since the engines are old and hard to find, I was told they would be worth more if broken down and sold as parts. Again, didn?t want to fool with them.

Anyway, I was worried about how I would lift the engines out. The boat is on the trailer and I don?t have a vehicle to tow it with (I had the yard manager tow it into the yard). Also, I don?t have a lot of confidence in the trailer either. So, I didn?t want to tow it anywhere. Besides, since the tops of the gunwales are sitting at almost 8 feet high I was worried about the size of crane I would need to get them out.

Solution: The sign guy for my business had a bucket truck (like the power company workers have). He came out for $120. I figured that was not too bad. I would have expected most crane rentals to be a lot more than that.

Here are some pictures of hoisting the engines out:

EngineHoistOutBucketArrives.jpg


EngineOutDayJustComingOut.jpg


EngineOutDayInTheAir.jpg


EngineOutDayIntoTheTrailer.jpg


Here's a better look at the engines. Bye bye...


EngineOutDayEnginesInTrailer.jpg


Scott paid the $120, but while the bucket truck was there I used it to move my boat on the trailer. When I got the boat, it was way too far back on the trailer. I figured we had 600-800 negative (force direction up at the ball) tongue weight. So we hooked a truck to the trailer, lifted the back of the boat with the bucket truck, and pushed the trailer back. Now we have the boat properly placed. Since the bucket truck was already paid for, it was a freebie for me.
 

CaptainKickback

Lieutenant Junior Grade
Joined
Jul 23, 2011
Messages
1,060
Re: 81 Sea Ray 26 Sedan Bridge I/O to OB Conversion/Restore (Pics)

[h=1]Cockpit Step[/h]Here?s what I?m working on:

Now that the internal support is gone (stringers, bulkheads, some bridge support), things are trying to change shape. The bridge is flimsy. You can see it sway whenever you shake the boat. The sides supporting the bridge are bowing in. The cockpit deck has dropped down a bit.

So, to get everything back into shape, we have put keel stands and boat stands in the proper places to support the hull (it?s now solidly hovering above the trailer). We have also made our own version of beam supports out of 2x4s and 8? x 3/8? bolts, and used them to support the bridge (from inside the salon), sides, and the forward edge of the cockpit deck.

BeamSupports.jpg


BeamSupportsCloseup.jpg


Now that we everything back in the right place, the next step will be a bulkhead at the forward edge of the cockpit deck to support it and the bridge. However, before I can do that bulkhead, I want the cockpit step (picture below) to be shallower. It is currently about a 12? step down, a long one.

CockpitStepBefore.jpg


So, I cut the bottom off the step and will FG in a new bottom so the step will be an 8? step down. That will be much easier to navigate.

CockpitStepInProgress.jpg


I have cut and fit a piece of plywood for the step bottom and glassed on 1.5 oz CSM, both sides. Planned steps for the rest this are:
  • Tab it in on the outside (several layers of 1708 and an 8 oz cloth layer)
  • Peanut butter the inside
  • Tab in the inside (same as outside)
  • Finish layers of cloth
Note: The above 3 types of FG are the ones I bought. Let me know if these steps need to be modified. I?ll post the bulkhead design separately.
 

CaptainKickback

Lieutenant Junior Grade
Joined
Jul 23, 2011
Messages
1,060
Re: 81 Sea Ray 26 Sedan Bridge I/O to OB Conversion/Restore (Pics)

[h=1]Main Bulkhead[/h]I plan a number of bulkheads/ribs, but the first will be the one I call the main bulkhead. This bulkhead will be at the forward edge of the cockpit deck to support it and the bridge. We will use ?? ply and double it up. The aft piece will be flush with the forward edge of the cockpit deck to support it. The forward piece of the bulkhead will go from the hull all the way up to support the bridge. This will not only provide support upward, but lateral support as well.

The pictures below show the overall opening we have to fill Its right at the forward edge of the cockpit deck.

SalonDoorWindowsGone.jpg


SalonDoorwayFromInsideSalon.jpg


We feel we need to do this before doing the stringers from there forward in order to gain support for the sides and bridge. Then we can get the beam supports out of the way. The original stringers started at this point and ran forward, so we think this order of things will be fine.
 

boatnut74

Lieutenant Commander
Joined
Aug 29, 2010
Messages
1,835
Re: 81 Sea Ray 26 Sedan Bridge I/O to OB Conversion/Restore (Pics)

Pics look good. Looks like you are making good progress.
 

oops!

Supreme Mariner
Joined
Oct 18, 2007
Messages
12,932
Re: 81 Sea Ray 26 Sedan Bridge I/O to OB Conversion/Restore (Pics)

hi bud.......

im worried about one thing..........the hull. ! you have all that support in the cabin.....but your supports are pressing against the hull and the trailer.....

keep your eyes on the hull and make sure its straight before you start adding the strings and bulkheads.......the hull is everything !


as mentioned before.......trim tabs will be a major improvement....but it looks like you have them......you need to use them !
also....try to move some weight aft......that will help the bow steer
 

CaptainKickback

Lieutenant Junior Grade
Joined
Jul 23, 2011
Messages
1,060
Re: 81 Sea Ray 26 Sedan Bridge I/O to OB Conversion/Restore (Pics)

Hey oops! Thanks for the info. I understand your concern about the hull. We believe we have it supported correctly now (primary weight on 2 keel stands and 4 boat stands toward the outer edges of the hull). Upon visual inspection, it looks OK. But I suspect visual inspection may not be good enough. Any suggestions on how to tell if the hull is not straight? Just so you know, it seems it is the sides that are weak, not supporting the top well.

Also, earlier you mentioned tabbing the transom (and some knees). Would you suggest more layers of FG on the inside of the transom (tabbed to the hull)? If so, 1708? How many layers?

Thanks again.
 

oops!

Supreme Mariner
Joined
Oct 18, 2007
Messages
12,932
Re: 81 Sea Ray 26 Sedan Bridge I/O to OB Conversion/Restore (Pics)

hi buddy.....

ok....is your keel supported? if you place a few blocks under a bulkhead....one fore and one aft.....it is possible that the side flex may just go away !

stringlines from back to front under the keel or between the strakes will tell the story. you can have a smile.......but not a frown.

this is an excerpt from my thread.

these are picks of the transom being tabbed in.....first with a 1.5 oz csm...then the 24 oz biax the biax is on the sides.....and you can see the chopped strand on the bottom of the resin whetted transom

picgroup21001.jpg


you can see the six inch overlap to the hull and transom

picgroup21002.jpg


got back on the boat today after work...the job today....was to grind the hull..then acetone the old section of the hull and prepair for the big layup....
 

CaptainKickback

Lieutenant Junior Grade
Joined
Jul 23, 2011
Messages
1,060
Re: 81 Sea Ray 26 Sedan Bridge I/O to OB Conversion/Restore (Pics)

I remember those pages. If its strong enough for your new transom, it will be plenty for my seemingly in good shape transom.
 

CaptainKickback

Lieutenant Junior Grade
Joined
Jul 23, 2011
Messages
1,060
Re: 81 Sea Ray 26 Sedan Bridge I/O to OB Conversion/Restore (Pics)

I'm kind of think ahead here, but I bought a spray gun kit from Harbor Freight and I wanted to make sure its the one that Yacht Dr recommended in th "At gel coat stage, need help" thread.

It is a Central Pneumatic, Item #93305 and looked exactly like YD showed. My concern is that YD says it is not an HVLP gun, yet the box says it is. It was the only gun that looked like this. All of the others had the canister mounted on the gun.

Just want to make sure I have the right one.
 

CaptainKickback

Lieutenant Junior Grade
Joined
Jul 23, 2011
Messages
1,060
Re: 81 Sea Ray 26 Sedan Bridge I/O to OB Conversion/Restore (Pics)

Oops! Suggested moving some weight aft if we were worried about being bow heavy. So, I sterted think about weather I should.

At this point, I am still concerned about it, although a bit less than I was before doing the weight calcs that I posted earlier. However, why not be sure?

Looking at our planned layout, I can move the water tank (planned 50 gal) from under the salon floor to the (former) engine compartment. This not only moves the weight back, but allows me to put in an even bigger tank (anchoring out for 2 days at a time, you can never have too much fresh water - btw, we cruise on salt water). And since the generator will raise the temperature in that compartment, the water will be a bit warmer (biggest use is for showers after swimming in salt water).

Thanks for getting me to rethink the layout oops!
 

Yacht Dr.

Vice Admiral
Joined
Feb 26, 2005
Messages
5,581
Re: 81 Sea Ray 26 Sedan Bridge I/O to OB Conversion/Restore (Pics)

Imo .. the 93305 is hvlp and will not help you ..

You need the regular pressure pot ..

YD.
 

CaptainKickback

Lieutenant Junior Grade
Joined
Jul 23, 2011
Messages
1,060
Re: 81 Sea Ray 26 Sedan Bridge I/O to OB Conversion/Restore (Pics)

Imo .. the 93305 is hvlp and will not help you ..

You need the regular pressure pot ..

YD.

Ok, glad I asked. Man this one looks identical to your picture.

I didn't see the one you recommend in the store, so I'll go on their website and look for it.
 

CaptainKickback

Lieutenant Junior Grade
Joined
Jul 23, 2011
Messages
1,060
Re: 81 Sea Ray 26 Sedan Bridge I/O to OB Conversion/Restore (Pics)

I went on the HF web site and found Item #93312. It looks the same. Appears to handle more materials. However it said it is siphon feed. I searched the term "pressure pot" and found nothing.

YD, it 93312 the right one? If not, do you have an Item #?
 

CaptainKickback

Lieutenant Junior Grade
Joined
Jul 23, 2011
Messages
1,060
Re: 81 Sea Ray 26 Sedan Bridge I/O to OB Conversion/Restore (Pics)

[h=1]This Week's Progress[/h]We got a fairly good day on the boat on Monday. Weather was great. Wife and Q worked on replacing all of the rub rail wood backing strips. They got about 90% done. However, the heads of the 30 year old SS screws round off easily, so we will get new screws to replace them.

I worked on the cockpit step. I want you to know this is my first significant FG attempt. So, I?m relatively happy with the way it?s turned out so far. I had already cut a board (1/2? ply) for the bottom of the step, coated it with resin, then a layer of 1.5 oz CSM on both sides. Today I rewet the edge and braced the board in place with my little bottle jack, then tabbed a layer of 1.5 oz CSM over the 3 outside edges. I had beveled the edge of the board, so the CSM went around the corner easily.

CockpitStepInProgress.jpg


Once that got tacky, I did the same with a slightly larger piece of 1708. I pre-wet the surface, but I also found it very helpful to pre-wet the 1708 before placing it on the step. Seems it will be difficult to do this on a very large piece of 1708.
 
Top