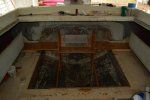
81 Sea Ray 26 Sedan Bridge I/O to OB Conversion/Restore (Pics)

CaptainKickback

Lieutenant Junior Grade
Joined
Jul 23, 2011
Messages
1,060
Re: 81 Sea Ray 26 Sedan Bridge I/O to OB Conversion/Restore (Pics)

[h=1]Cockpit Step Progress[/h]Back to working on the boat on Wednesday, and looking at the cockpit step, I immediately noticed a problem. The edge of the wood bottom must have been sticking out a little on the one side because I found an air bubble all along that side just above the joint. The CMS filled in that gap, but 1708 was too heavy to go into it.


CockpitStepFirstOutsideTabbing.jpg


I did the sides with 1708, but Q did the back. When I started grinding the air bubble, I found that about 50% of the back was air bubbles, so I don?t think he put as much resin on it as I did. Lesson learned. Get the 1708 plenty wet.
 

CaptainKickback

Lieutenant Junior Grade
Joined
Jul 23, 2011
Messages
1,060
Re: 81 Sea Ray 26 Sedan Bridge I/O to OB Conversion/Restore (Pics)

[h=1]Close Up Anchor Locker[/h]There is a hatch over the anchor locker as well as access to the locker from inside. My last boat had only the inside access and that worked out just fine. Since we plan to add a windlass later, we don?t want the top hatch in the way. So, I removed the hatch leaving a 20.5? x 9? hole and I started filling that hole today.

AnchorLockerHole.jpg


Here?s my plan - Access from the inside was possible but limited. Since I am new to fiberglass, I figure I may have trouble working the FG upside down, especially with 1708. So, I am starting from the top. I taped plastic and foam on the inside and cut my FG pieces the size of the hole. So far, I glassed in a 1.5 oz layer of CSM and 2 layers of 1708. It filled the thickness of the FG about 75%.

Next, I will finish filling the thickness of the FG with another 1708 and 8 ox cloth on top. Also, inside, I will place several layers of FG. If I have trouble working the glass upside down, I believe I can tab it with smaller (and less weighty) pieces of FG.
 

CaptainKickback

Lieutenant Junior Grade
Joined
Jul 23, 2011
Messages
1,060
Re: 81 Sea Ray 26 Sedan Bridge I/O to OB Conversion/Restore (Pics)

[h=1]2011 Fort Lauderdale Boat Show[/h]Q and I went to the show yesterday (Friday). I have gone to the show every year for a long time, as well as the Miami show in February and the West Palm Beach show in March. But since we have started this project, I was looking at things from a totally different perspective.

Here are my personal highlights:

Outboards ? We visited the major manufacturers and the main thing we came away with is that probably the best size for our boat will be two 175s. Everyone thought more than that would be overkill (we are not into high speed) and with the 175s, we could save quite a bit of money, both on the cost of the engines and on fuel usage. Also, 175s will be less stress on the transom. We?ll see.

Multifunction GPS/Helm Display ? We plan on making the helm mostly electronic, getting rid of all the individual gauges. So we looked at what all the major manufacturers are offering. Although we won't need it for some time, the Garmin 4208 is definitely the front runner. I?m already familiar with the Garmin GPS operation. In addition, we will use it for engine data display, fuel level/usage monitoring, depth data, and video.

Video Cameras ? With the helm control at the port side of the bridge and the way we want to do canvas, I believe there will be a blind spot (starboard aft) when docking/maneuvering. So, I will put a camera on that spot and display it on the GPS/Multifunction Display (above). However, since it would be nice to use the camera to display the view to the rear of the boat while underway, we will mount the camera on a pan/tilt spotlight. So we looked at a lot of cameras and spotlights. One thing about the boat show, most of the vendors that spend the money to be in the show are the ones whose products are very expensive. So, we will find these units elsewhere.

Sound Insulating Foam ? We found a foam that that deadens the sound vibration of the boat. . It?s also fire retardant. It comes as a liquid that that we will spray to about 40 mils thick. It works by deadening the vibration of stringers, bulkheads, decks, etc. We will use it in the engine compartment to deaden generator noise, and figure it will cost us about $150.

Air Inflator ? On of the features I planned for the boat is to build in an air pump to blow up all the various toys we will have on the boat. I don?t want one of those weak little units from Walmart. I want something that can blow things up quickly. The unit we found has good power and pressure regulation, and its made to be built in.

Generator ? Only Kohler and Westerbeke make small gas generators. The Kohler was a 5KW unit and is fairly small. Westerbeke has a 3KW unit (and is just coming out with a 3.5KW unit) that is even smaller in physical size. We figure 3KW is enough for us since that is approximately 30 amps, matching the single 30 amp shore power connection. Our loads will be set to as to not exceed 30 amps. Westerbeke was slightly higher priced but for space reasons, we will probably go with them.

Windlass ? We want a rope/chain windlass and we looked at a lot of these. We don?t need a very big one based upon the size of the boat and on how I use it (I motor up to the anchor, using the windlass only to pull up the anchor). My only concern is that the units in this size range use ?? anchor line. The manufacturers all say that?s fine for a 26? boat, but I have always had 5/8?. Adding to our weight, once we get on the water, we?ll be rafting up with friends so we will often be holding the weight of their boats as well. The 5/8? line was always enough, so maybe I should step up to a windlass that can handle 5/8? line.

A/C ? We will be putting in a new A/C unit, so we looked at every booth that had them. One strange thing we found is that 75% of the A/C manufacturers (Cruisair, Marine Air, etc.) are owned by Dometic. We figured we need 9,000-10,000 BTU, and found a Webasto 12,000 BTU unit for under $1400, much less than all of the other brands. Anyone have any experience with Webasto A/Cs?

Fiberglass ? Mark, that manages the yard where our boat is (and he operates a jet ski rental) has been telling me to check out Fiberglass Coatings, Inc. in Fort Lauderdale where he gets his FG supplies. He said they are extremely helpful. It just so happened they had a booth at the show. We spent over an hour getting and education on gel coats, color matching, polishing/sanding techniques, and tools. He said come in to their showroom and he will show us how to do everything he was talking about. So, probably next Wednesday, we?ll be there.

So, that was our day at the boat show. It was very interesting for us. Hope the above is interesting to you too.
 

CaptainKickback

Lieutenant Junior Grade
Joined
Jul 23, 2011
Messages
1,060
Re: 81 Sea Ray 26 Sedan Bridge I/O to OB Conversion/Restore (Pics)

Sorry for no updates. Didn't work on the boat this weekend. Again, life gets in the way. Actually it was Halloween that got in the way. Local party Saturday night and then off to Orlando on Sunday for Universal's Horror Night.

Back on the boat soon. I hope...
 

CaptainKickback

Lieutenant Junior Grade
Joined
Jul 23, 2011
Messages
1,060
Re: 81 Sea Ray 26 Sedan Bridge I/O to OB Conversion/Restore (Pics)

oops!

Congratulations on your promotion to Supreme Mariner.
 

CaptainKickback

Lieutenant Junior Grade
Joined
Jul 23, 2011
Messages
1,060
Re: 81 Sea Ray 26 Sedan Bridge I/O to OB Conversion/Restore (Pics)

I am getting close to doing the repair of the holes in the transom left by removing the stern drives. Any tips would be appreciated

My guess is that I should cut out the holes to a rectangular shape to make it easier to cut the plywood pieces to fill them.
 

zopperman

Lieutenant Commander
Joined
Jun 22, 2011
Messages
1,551
Re: 81 Sea Ray 26 Sedan Bridge I/O to OB Conversion/Restore (Pics)

I am getting close to doing the repair of the holes in the transom left by removing the stern drives. Any tips would be appreciated

My guess is that I should cut out the holes to a rectangular shape to make it easier to cut the plywood pieces to fill them.

I'd cut a plug as close as you can get, yes it's a weird shape but this is an important cut, I would NOT do a rectangle. PB it in place and glass over it.
 

oops!

Supreme Mariner
Joined
Oct 18, 2007
Messages
12,932
Re: 81 Sea Ray 26 Sedan Bridge I/O to OB Conversion/Restore (Pics)

its actually a lot of work to cut rectangles......take a piece of cardboard......cut a template.....make your insert one sheet thick and test fit....if good....build it thicker. and use structural peanut butter to place it.....3 layers of 1708 over the area on the inside.....the out side will be a big glass.gell job......just treat it as one big hole....
 

CaptainKickback

Lieutenant Junior Grade
Joined
Jul 23, 2011
Messages
1,060
Re: 81 Sea Ray 26 Sedan Bridge I/O to OB Conversion/Restore (Pics)

Thanks guys. I'll skip the rectangle.

One thing though. Most of the sides of the holes are perpendicular to the transom. But around the top, the holes are bevelled (wider near inside edge) and curved from front to back. It will be difficult making a plug to match the curves. Should I file the edges straight?

Last thing. Planning 2 layers of 3/4" ply.
 

Blue Crabber

Ensign
Joined
Apr 2, 2009
Messages
966
Sorry Captn, I don't have any experience with this stuff so can't offer any opinions. However, I am very interested in your project and am following it closely!

I recently purchased a similar vessel, it's a 1985 Sea Ray 300 Sedan Bridge so I am very curious how yours will turn out!

Keep up the great work.
 

CaptainKickback

Lieutenant Junior Grade
Joined
Jul 23, 2011
Messages
1,060
Re: 81 Sea Ray 26 Sedan Bridge I/O to OB Conversion/Restore (Pics)

Sorry Captn, I don't have any experience with this stuff so can't offer any opinions. However, I am very interested in your project and am following it closely!

I recently purchased a similar vessel, it's a 1985 Sea Ray 300 Sedan Bridge so I am very curious how yours will turn out!

Keep up the great work.

Welcome aboard our thread. Over last summer i was partnered on a 1985 Sea Ray 340 Sedan Bridge. You are right in the middle. We actually looked at the 300 but got a good deal on the 340.

Anyway, my 255 will "act" bigger with the bracket on the back.

We'll be talking...
 

zopperman

Lieutenant Commander
Joined
Jun 22, 2011
Messages
1,551
Re: 81 Sea Ray 26 Sedan Bridge I/O to OB Conversion/Restore (Pics)

Me and oops' suggestion would be to cut a foam or cardboard template of the keyhole then cut that from ply and put it in place with PB, 1708 (3 layers) on the inside... then we'll get to the outside once that's done.

cutting a rectangle could be a mess. If you're replacing the whole transom this is a lot easier, but your transom is good, right??
 

CaptainKickback

Lieutenant Junior Grade
Joined
Jul 23, 2011
Messages
1,060
Re: 81 Sea Ray 26 Sedan Bridge I/O to OB Conversion/Restore (Pics)

Yes, the transom is good. I will cut pieces to shape. But my last question had to do with the fact that near the top of the holes, the sides of the holes are not perpendicular to the transom (hole bigger inside and curved front to back). This means the two pieces of ply to fit a hole will not be the same shape (one a bit bigger) and each piece will have to be beveled to match the contour of the sides of the hole. I'm worried about an air pocket or weak spot if I don't match them up well.


Wouldn't it be best to file them perpendicular to the transom?

Several more questions:

1) when i put in the outer piece of ply, how far should it be set back to allow for FG on the outside, since I want the result to be flush with the outside of the transom?

2) what tool do you guys use to grind/sand fillets? I have tried round router bits (cut too much and uneven) as well as stone bits in a dremel (they just bounce constently)?

Thx
 

oops!

Supreme Mariner
Joined
Oct 18, 2007
Messages
12,932
Re: 81 Sea Ray 26 Sedan Bridge I/O to OB Conversion/Restore (Pics)

the new inserts should be flush with the outside wood......if you flush to the inside of the hull....you will have bumps in the final product.

that is why a test fit is important.

as far as the inside....just get it close....the rest and be filled with glass or pb. and if you wish, faired,

with the fillets.....if you really need to get into tight corners.....you might be getting too anal about them......but a pie shaped sanding block and elbow grease works well.

if you have air... a small round rasp bit works in seconds.
 

CaptainKickback

Lieutenant Junior Grade
Joined
Jul 23, 2011
Messages
1,060
Re: 81 Sea Ray 26 Sedan Bridge I/O to OB Conversion/Restore (Pics)

[h=1]Was Transom Repaired?[/h]Since I will be putting several layers of FG on the inside of the transom, I started grinding it down to the FG. It appears the transom may have been repaired in the past. I see straight lines that form a box around each stern drive hole. The area inside the box had a lot of a white, easy to sand compound over the FG, but there was none outside the boxes. I assume it was a fairing compound.

Does this pic look like the transom was repaired at some point?

SternDriveHolesBoxAndCurves.jpg


The entire engine compartment was painted in a light green coating. Under this coating, and outside the boxes, there was a darker green coating. The light green was easy to sand off. The dark green coating came off harder. I?m wandering if the dark green is the original Sea Ray bilge paint?

Also, in the above picture, you can see the internal curves in the top of the stern drive holes that I have been talking about. These are the curves I thought it might be best to file perpendigular to the transom.

This picture is the overall shape of the stern drive holes.

SternDriveHolesShape.jpg
 

CaptainKickback

Lieutenant Junior Grade
Joined
Jul 23, 2011
Messages
1,060
Re: 81 Sea Ray 26 Sedan Bridge I/O to OB Conversion/Restore (Pics)

[h=1]Transom Strength For Conversion[/h]As I said, I am planning on re-tabbing in the transom as oops! recommends, and then adding a layer of CSM then 2 layers of 1708 over the entire inside of the transom. Q read on some thread somewhere that many I/O transoms are not strong enough to handle the OB bracket. I have read threads in the past where many people argue both sides of the convert/don?t convert argument, but it always seemed those arguing against it didn?t have any facts or experience to go on. They were just giving their blind opinion. When I met with Armstrong in their factory, they said they do brackets for conversions all the time.

In light of the above, do you think I should put on 3 layers of 1708 over the entire inside of the transom? The transom as is seems very solid and strong. Thoughts?
 
Joined
Mar 10, 2011
Messages
64
Have you considered adding "knees" to help share the forces between the transom and the stringers. It would help share the load of the motors hanging off of the back.


Sent from my iPhone using Tapatalk
 

CaptainKickback

Lieutenant Junior Grade
Joined
Jul 23, 2011
Messages
1,060
Re: 81 Sea Ray 26 Sedan Bridge I/O to OB Conversion/Restore (Pics)

Yes. Someone semt me a picture several pages back, however they looked a bit small. I imagine these should be bigger. I am planning 4 stringers about 4" tall, double 3/4" wide. Think i need the knees in addition?
 

erwinner

Petty Officer 1st Class
Joined
Aug 8, 2011
Messages
369
Re: 81 Sea Ray 26 Sedan Bridge I/O to OB Conversion/Restore (Pics)

If you're tearing it all down this far and mounting an aftermarket bracket on it, I can't see why you wouldn't want to go a little overboard with it, just to be on the safe side. Few layers of 'glass and some braces shouldn't take too much time in the long run!
Good luck with the project!
 
Joined
Mar 10, 2011
Messages
64
Re: 81 Sea Ray 26 Sedan Bridge I/O to OB Conversion/Restore (Pics)

DSC_6999.jpg

The "knees" are really just an extension of the stringers vertically up the transom. In your situation they would be best if they were extended at least as high as your bracket will be on the transom and probably should extend a little father past the top of the bracket.

This pic might give you a decent idea. I pulled it off of another site- it was a formula that did an I/O to OB conversion.


Yes. Someone semt me a picture several pages back, however they looked a bit small. I imagine these should be bigger. I am planning 4 stringers about 4" tall, double 3/4" wide. Think i need the knees in addition?
 
Top