99 Larson 186 SEI Ski-n-Fish Re-Deck Project

JASinIL2006

Vice Admiral
Joined
Feb 10, 2012
Messages
5,714
Old Timers Formula is 1 part boiled linseed oil plus 2 parts mineral spirits plus 1 part marine varnish. It is good for soaking multiple coats into wood to give it a penetrating, water-resistant layer.

I would not want to fiberglass over it. The same properties that help it seal wood from water would make it pretty good at repelling resin/glass, I would think.

I don't think treating raw 2x4s with OTF would be a bad solution, and I think the OTF would give you better penetration and water resistance that just poly resin. I still think a layer of glass would be superior, though, but it would be more work than the OTF.
 

eggs712

Petty Officer 1st Class
Joined
May 8, 2012
Messages
354
If you have a tight fit, you can always sand down the 2×4s to account for the width of the CSM.
 

oldrem

Commander
Joined
Nov 7, 2013
Messages
2,002
If you have a tight fit, you can always sand down the 2×4s to account for the width of the CSM.

Or better yet, if you know someone with a planer - have used mine many times in cases like that.
 

QuickPuppy

Petty Officer 1st Class
Joined
Oct 18, 2017
Messages
230
Yep, already had to sand the front support down a bit. Break out the belt sander again!
 

QuickPuppy

Petty Officer 1st Class
Joined
Oct 18, 2017
Messages
230
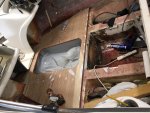
Got the tank back in. Used strips of foam rubber mat for cushioning. Hopefully they won’t break down over time. Found that the fuel sending unit that was working when I tested it four months ago, now seems to be dead or at least inconsistent. 🙄

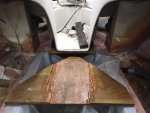
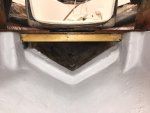
Installed the deck piece under the bow seats. Feels great to finally have that one very difficult to fit piece in place! Still need to fillet a bit more and tab it in, but it’s glued,screwed, and not going anywhere until the next person that wants to rebuild this thing comes along in 20 years or so.

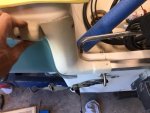
Also got the main center deck board in place. The port rear of this panel would not lay flat against the stringer. Broke several screws trying to pull it into place. Fortunately this area will be under the side storage rail when it’s done. I’ll just have to take the belt sander to it before glassing the whole thing. Going to run a fillet around the underside of the ski locker board to make sure water can’t run under the hatch.

So I see that many of you use either PL Marine or 5200 to coat the threads and screw heads. Does fiberglass adhere to this stuff when it’s cured?

Got the final fitting done on the remaining deck boards so they are ready to be installed in a week or two when I finally have time to get back on the project.

I have cart of supplies ready to buy on Amazon... fuel sending unit, cooling impeller kit, new livewell pump, deck hatch to replace fuel sending unit. Trying to think of anything else I need...
 

Attachments

  • photo287804.jpg
    photo287804.jpg
    1 MB · Views: 7
  • photo287805.jpg
    photo287805.jpg
    775.6 KB · Views: 7
  • photo287806.jpg
    photo287806.jpg
    1.1 MB · Views: 7
  • photo287807.jpg
    photo287807.jpg
    843.7 KB · Views: 9

Bayou Dave

Lieutenant Commander
Joined
Dec 13, 2012
Messages
1,780
The fuel sender problem could just be a bad ground. Clean the wire ends and check it again. Might save you a few bucks.
 

JASinIL2006

Vice Admiral
Joined
Feb 10, 2012
Messages
5,714
Nice job on fitting that piece of deck under the molded bow seats! I lucked out and didn't have to remove that part, but you really found an ingenious way to repair that without pulling the cap. Well done!

For attaching the deck, I didn't use a sealant on the screws. I figured between the PB I smeared on the stringers/bulkheads and the PB I used to fill the dimples from the screw heads, along with several layers of fiberglass, that the deck would be watertight. With fiberglass stringers, deckboards glassed on both sides, PB as an adhesive between the deck and the stringers, I don't see much risk of water intrusion.

Any other holes made after all the glass was in, though, did get full 5200 treatment.

I found the stainless steel screws I used to hold the deck down snapped off with some regularity when I was installing the deck. The fiberglass of the stringers is so thick that you really need a larger pilot hole than you might think, especially larger than if you were screwing into wood.

You are getting close to the point where it will really start coming together quickly. Nothing better than getting to walk on your new, solid deck! Can't wait to see it! Nice work all around!
 

QuickPuppy

Petty Officer 1st Class
Joined
Oct 18, 2017
Messages
230
Been a long while since I’ve had a chance to work on the boat. Had to replace a ton of parts on our van that, on top of a crazy month of work, and travel, set me way behind my intended schedule. I was hoping to be in the water before it got hot here in Florida. That didn’t happen. Oh well.😬

I was able to get to get some things done this week though. I trued up all of the transitions between the deck boards... some had some significant height differences. I also poured the under deck foam, replaced the plugs I drilled for the foam, and filleted and filled the edges and deck seams. I probably need one more pass with that as the PB shrank a good bit as it dried. I ended up using about 2x as much resin for PB as I thought it would take and probably still need to make another 1/2 to 3/4 liter to finish that job.

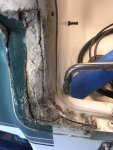
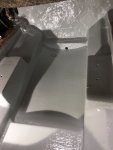
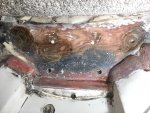
Found a crack in the port side top of the transom. I removed the trim piece and found this (see pics) Any idea if this is structural or just crack putty of some type?
​​​​​​​
 

Attachments

  • photo290747.jpg
    photo290747.jpg
    106.9 KB · Views: 7
  • photo290748.jpg
    photo290748.jpg
    117 KB · Views: 7
  • photo290749.jpg
    photo290749.jpg
    126.6 KB · Views: 7

kcassells

Fleet Admiral
Joined
Oct 16, 2012
Messages
8,738
I think you may be too extreme for the use of putty here. Thats a lot of "filler". Maybe filet some glassed wood in there somehow with PB and then work up a LITTLE putty.
That spots gonna take alot of torque and flex. See what utters dink.
 
Last edited:

QuickPuppy

Petty Officer 1st Class
Joined
Oct 18, 2017
Messages
230
Thanks k... I wasn’t saying to fill it with putty... I was wondering if it was putty and what to do about it.

I did speak to John at Larson and he said, “that filler is not part of the structure. It was just to fill up the gap between the deck and hull cutout. My best suggestion is to replace it if you think you need to.”

My question then is what do I replace it with? And my other question is about the small crack on the top of the transom. That could just be in the gelcoat or it could be a bigger issue.
 

mickyryan

Rear Admiral
Joined
Apr 18, 2016
Messages
4,216
here is the thing, most transom on outboards i have seen damaged is always that side because of torque, i would question why it broke whats allowing it to flex is the transom shot?
 

QuickPuppy

Petty Officer 1st Class
Joined
Oct 18, 2017
Messages
230
Kcassells... correct, I was not able to replace the transom because I couldn’t pull the cap off. I did remove any damaged wood and fiberglassed the removed areas. I filled the removed areas with alternating layers of CSM and 1708, then tabbed with 1708 and covered the whole thing with two layers of 1708.
 

Attachments

  • photo287264.jpg
    photo287264.jpg
    1.3 MB · Views: 2
  • photo287265.jpg
    photo287265.jpg
    856.8 KB · Views: 2

QuickPuppy

Petty Officer 1st Class
Joined
Oct 18, 2017
Messages
230
Yes, it looked like a standard 1.5” thick piece. 75-80% of the wood is still there. Most of the rot appeared to be on the interior side above the halfway mark. Below that point there was fiberglass resin covering the lower half. There were four holes drilled there that were filled with some type of filler and it was around these holes that it was soft. I ground out all of the rot. The worst of it was on the SB side and I ended up taking out about a 4-5” divot about 3/4” deep. See pic...
 

Attachments

  • photo286864.jpg
    photo286864.jpg
    1.1 MB · Views: 2

mickyryan

Rear Admiral
Joined
Apr 18, 2016
Messages
4,216
those bottom 2 holes look like complete rot to me but im not there so but either way , i still say the cap needs to be cut or removed and that transom handled .that black area under where you dug out around the holes i would say is complete rot so only thing you have is top area that has any strength , again just my perspective from pics.
 

QuickPuppy

Petty Officer 1st Class
Joined
Oct 18, 2017
Messages
230
Hey Micky,
The bottom two holes are actually the thru-hull holes for the live well. Anyway, they are supposed to be there and there is no soft wood around them. The dark area is where the factory fiberglass resin is. Also appeared to be no rot here. All of the soft spots were above the black area. The areas that I removed were refilled with between 3-12 alternating layers of CSM and 1708 of increasing diameter then covered completely with two layers of 1708.

Below is a before pic with the problem areas circled in red. This is where there were four holes that appeared to be there from the factory.
 
Last edited:

mickyryan

Rear Admiral
Joined
Apr 18, 2016
Messages
4,216
well I'm sure you got it under control , like i say im only seeing pics and between the first one and this one with the black crud around both bottom holes is im leaning towards rot but eh its not my boat and im not here to debate ya :)
 

QuickPuppy

Petty Officer 1st Class
Joined
Oct 18, 2017
Messages
230
Not debating... just explaining what was there. 😬 I appreciate any input I can get!

The “black crud” around the bottom mostly came off with acetone. Much of that was dirt, grease, and oil.
 
Top