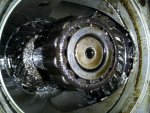
Re: Alpha 1 Gen 1 Upper Outdrive gears grind! Stranded on lake for 6 hours! Pic inclu
Installing the Bearing Race in the Top Cover
Replace the original upper race shims with the equivalent in new.
NOTE: If you have lost the shims... start with a pack of .015".
Oil the bore and the race. We prefer to freeze the race before installation. Use Bearing Cup Driver 91-38918 and Driver Rod 91-37323 to hammer the race into place.
NOTE: If the race just drops in too easy, replace the entire cap.
NOTE: If you **** the race to one side it will spread the bore and ruin the cap.
NOTE: Make sure the race is fully seated.
Pressing the Stub Shaft Into the Lower Gear
Support the gear between two press blocks right-side-up.
Freeze the stub shaft when possible.
Make sure the tin o-ring is in place on the stub shaft.
Lightly coat the end of the shaft and the ring with drive lube.
Press the stub shaft into the gear until fully seated.
This is a tight fit and it requires extreme pressure from the press.
Keep the assembly in the press to install the small top bearing.
Pressing the Small Top Bearing Onto the Stub Shaft
Lightly coat the top end of the stub shaft with clean drive lube.
Use the old cone that you cut out of the old top bearing to press the new bearing into place.
Make sure the bearing is fully seated on the stub shaft.
Installing the Lower Bearing Onto the Lower Gear
Freeze your lower gear if feasible. This will make it easier to press the bearing in place.
Place the gear and shaft assembly upside down in the press.
Use care not to bend or damage the installed top bearing.
Use the bearing cone from the old bearing and an adequate pipe to press the new bearing
onto the lower gear. Make sure the bearing is fully seated.
You will now do a "trial run" assembly to get the lower gear assembly height and rolling torque.
This procedure is done BEFORE installing the two lower seals.
Obtaining Proper Gear Height and Rolling Torque
We must first partially assemble drive to measure and obtain the proper rolling torque.
Squirt a little clean gear lube on both the top and bottom bearings.
Lower the gear and shaft assembly into the housing.
Install the top cover WITH its o-ring in place.
Torque the top cover screws to 20 ft. lbs.
Flip the housing assembly up-side-down.
Slide an old driveshaft (with a pinion nut installed) into the splines of the gear.
This shaft will act as a tool to help measure the rolling torque.
Spin the shaft around and back and forth a little to make sure the assembly turns freely
and that it's not bound too tight. If the assembly won't turn, remove the a shim from the race
in the top cap and try again.
Use your Inch Pound Torque Wrench to turn the shaft in a constant smooth circular motion while
reading the instrument.
The goal is to obtain a rolling torque of 6 to 10 inch pounds for new bearings or 2.5 to 4 inch pounds for used bearings At the same time, you will take into consideration the height of the gear when or if changes have to be made.
Chances are good that your reading is too high or too low.
It is very rare to have the correct rolling torque on your first try.
The rolling torque is changed by adding or subtracting shims from either the upper or lower bearing race.
Which shim you add or remove depends on your gear height.
If your rolling torque is OK, go on and measure your gear height.
The gear height is measured with shim tool 91-60526T and a long .025" feeler gauge.
Oil the inside of the gear housing where the shim tool will be inserted.
Oil the outer perimeter of the shim tool.
The position that you insert the tool depends on the gear ratio of the drive.
The tool has three holes. X, Y and Z.
Use the letter that corresponds to your drive ratio.
Shim Tool 91-60526T
Gear Ratio Tool Position
1.32:1 or 1.30:1 Z
1.50:1 or 1.47:1 Z
1.65:1 or 1.62:1 X
1.84:1 or 1.81:1 Y
1.98:1 or 2.00:1 Y
The tool must slide in all the way and seat against the shoulder in the housing.
The tool must also clear the face of the gear. If the gear is much too high, you won't
be able to get the shim tool slid in all the way.
Once the tool is fully inserted, rock it back and forth a few times.
Take a .025" feeler gauge and slide it between the face of the gear and the flat spot on the tool.
You might have to rock the tool a little until its flat spot is parallel to the face of the gear.
About Feeler Gauges
Contrary to popular belief, a feeler gauge is not supposed to slide smoothly.
The feeler gauge, when the clearance is exact, will be very stiff and it will grab when being
pulled in and out.
If your feeler gauge slips in and out like a glove, you have too much clearance.
If you just can't get the gauge to slip in at all, you don't have enough clearance.
When the clearance is perfect, it will be difficult to slide the gauge in and it will get stuck
and seem very difficult to pull it back out again. It will have a "jammed" feel to it.
If you build the drive with an easy-slip-feel to the gauge, it will not last.
Back to the Shimming Procedure
You need to consider your previous rolling torque measurement and gear height when changing shims.
FOR EXAMPLE: If your rolling torque was too low (loose) and your gear height was too low (too much clearance),
you would want to add shims under the lower race. This will raise the gear and increase the rolling torque.
Use a thicker gauge until you find the gauge that feels tight.
Let's say that a .030" gauge has a nice tight feel, that means the gear needs to come up .005".
You would disassemble the upper, pull out the lower race and add a .005" shim.
Reassemble the drive and recheck the rolling torque and gear height.
Now let's say that the .025" feeler gauge fits perfect and tight. Your height is correct!
You recheck the rolling torque again to find it's too high.
You would then remove the top cap and remove a shim(s) from under the top bearing race.
Reassemble the unit and recheck the height and rolling torque again.
It is not uncommon to have to do this a few times before it's perfect.
This is where most technicians fail. They get impatient and take short cuts.
ANOTHER EXAMPLE: If your rolling torque was too high (tight) and your gear height was too low (too much clearance),
then you have much too many shims under the top race and not enough under the lower race.
Let's say you can fit a .035" feeler gauge just right. That means your gear is .010" too low
Adding a .010" shim under the lower race might help with the height but it will make the rolling torque even tighter.
You would then remove AT LEAST .010" from the top race and then a little more to loosen the rolling torque.
Install the Lower Oil Seals
Now that you have a perfect gear height and rolling torque, remove the shaft assembly and
wipe clean any oil that has dripped where the lower seals press into place.
You will use Oil Seal Driver Head 91-43591 with Driver Rod 91-37323 to install the seals.
The Driver Head is reversible on the driver rod. One side of the tool does the small seal and
the other side of the tool does the larger seal.
Install the tool in the way for installing the larger seal.
Wet the seal rubber lip with a little gear lube.
Slip the seal onto the tool with the seals spring towards the handle (up).
Take some Lock-tight and coat the outside of the seal.
With the housing right-side-up, hammer the seal into place. Make sure it is fully seated.
Remove the tool and reverse the driver head on the driver rod.
Flip the housing up-side-down.
Pick up the small oil seal.
Wet the rubber seal lip with drive lube and slide it on the tool with the spring away from the handle.
Coat the outside of the seal with Lock-tight and hammer it into place.
Make sure it is fully seated. The tool installs the seals at the correct depths.
Flip the housing right-side-up and gently lower the shaft/gear assembly into the housing
being careful to keep it centered as so not to catch the lip of the large seal.
Install the large diameter shims into the nose of the housing.
Start with .025" of shims if you are not sure what you had (does not include the split shim).
Install the thick split shim after the thinner shims.
Make sure the shims are against the shoulder in the housing.
The split shim helps hold the thinner shims in position.
Prepare the ujoint shaft/gear assembly for installation.
Slip the oring into place over the gear and the two bearings until it is in the proper position.
Wet the ring and the threads of the retainer nut with Perfect Seal.
Wet the inside of the housing with drive lube.
Wet the outer races of the two bearings with drive lube.
With both hands, carefully slide the entire assembly into the housing.
Do not force the assembly into the housing.
If the assembly jams, lightly rock the ujoints back and forth to "nudge" the assembly in.
As the assembly slides into place, you will have to turn the shaft to mesh the gears.
IMPORTANT: Older 1.65:1 gears (24-24 teeth) have "timed" gears.
You will find marks scribed into the gears which act as alignment marks.
Line up the marks when sliding the shaft/gear assembly in place.
When the shaft/gear assembly is slid in far enough, you can start to thread the retainer nut in.
Screw the retainer nut in as far as possible by hand while occassionally turning the shaft assembly.
Keep checking for tightness and/or binding when tightening.
As you tighten the retainer nut, the gears come closer together.
Use your Bearing Retainer Wrench 91-17256 and a good torque wrench and tighten the nut to 200 ft. pounds.
Keep checking to make sure the shaft does not bind or that the gears do not collide and jam.
After the retainer nut is torqued to 200 ft. lbs, turn the shaft assembly several times.
Lower Shim Tool 91-60523T into the top of the housing making sure to use the correct side of the
shim tool against the gear. Use the following chart to determine the tool position.