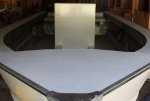
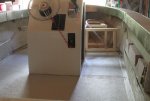
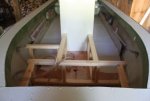
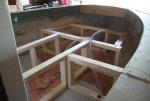
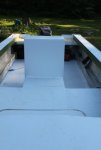
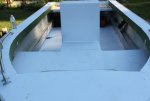
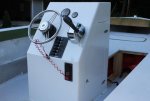
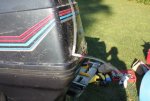
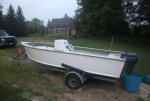
Bluefin Restoration in Progress

wlg

Petty Officer 2nd Class
Joined
Jan 1, 2012
Messages
168
Re: Bluefin Restoration in Progress

Good job!

I have been working on mine for over a year now and still not done. The splash will be worth it all.

Keep up the good work.
 

fleachili

Seaman Apprentice
Joined
Jul 24, 2010
Messages
37
Re: Bluefin Restoration in Progress

Lookin good, she's coming along nicely.

Is she a 17 or 19 footer?
 

evancody1

Cadet
Joined
Mar 12, 2011
Messages
24
Re: Bluefin Restoration in Progress

Sorry guys for the late response, was called to work and haven't had time. I had a Force 50 on her and she still runs real good. I would like an 85 on her, and I still might, been going back and forth on the idea, but I'm thinking of riding the 50 until she quits.

It's a 17 footer...space is a premium so I think I'm gonna shorten the splash well a bit, kinda was a waste of space back there.

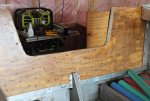
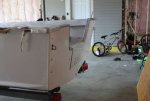
I installed the transom, put two 3/4 inch exterior ply together, previous posted, epoxy coated 2 coats and used 5200 to seal the ends of the boards.. the 5200 was a trial thing, I put it on and put it through the rigors held up real well. Here's a pic of it installed...transominstalled.jpg

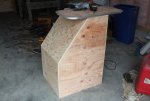
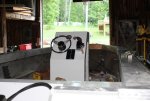
I finally received the gauges, rotary steering cable, and top mount throttle control I'm putting on, need to cut the holes in the center console and cut the access door in and then fiberglass and epoxy. Thinking of hot waxing top coat to make it easier for sanding..

Heres the rough center console pic..

centerconsolerough.jpg
 

evancody1

Cadet
Joined
Mar 12, 2011
Messages
24
Re: Bluefin Restoration in Progress

Putting the finish touches on the transom, using 4200 for sealant on the screw holes, and 5200 for the aluminum transom cap..hopefully I can get the engine mounted tomorrow.. I am using 4inch drain piping (No Holes) to run the steering cable and throttle cables.. Its a lot lighter that PVC Piping.. Using 2 inch PVC for the wiring..I'll take some pics tomorrow..I would like to dry run the cables and wires through and get them into place so I can start putting the deck back on..If you can think of anything I may be missing please let me know, better to know now than when the deck is down...
 

evancody1

Cadet
Joined
Mar 12, 2011
Messages
24
Re: Bluefin Restoration in Progress

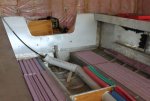
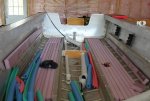
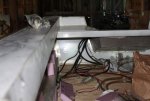
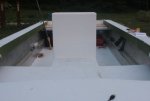
Didn't get to mount the engine today, some screws were bent and i need to go get some replacements.. but as promised some pics of the foam board insulation and the transom coming together.. aluminum trim installed, aluminum plate installed, conduit run for the steering cable, throttle cables (4"), electric wiring (2"), foam board installed...

finishfoamboard2.jpgfinishfoamboard1.jpgtransomback.jpgfrontviewfoamconduit.jpg
 

evancody1

Cadet
Joined
Mar 12, 2011
Messages
24
Re: Bluefin Restoration in Progress

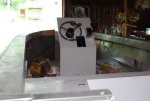
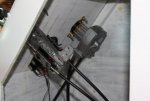
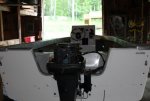
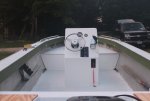
So a lot of work done, haven't had the camera around lately, and the wife booted me out of the garage... I guess I can't blame her I was making quite the mess... So into the barn I go... I finished running the PVC and glued joints together, mounted the engine, and decided to keep the splashwell, so that was put back on... Ran the control cables, rotary steering, tube for the pitot (speedometer), and wires.. Finished the center console, Fiberglassed and epoxy 3 coats then painted... Attaching the throttle controlbox and cables to the engines took a loooooong time, couldn't figure out how to get the gear and throttle to operate properly. Figured out that the guides under the control box needed to be moved, well works great now...

Attached the rotary steering and wheel. I am now in the process of wiring. I am using the same wiring harness but am installing a separate ground bar, to route back to the - side of the battery, and separate hot bar.. It should clean things up a bit underneath the center console..

consolejune.jpgconsolejune2.jpgcablewires.jpgunderconsole.jpgenginemountjune.jpg
 

evancody1

Cadet
Joined
Mar 12, 2011
Messages
24
Re: Bluefin Restoration in Progress

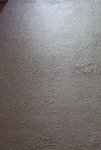
Epoxy coated all the top side deck, glassed the seams. I used two coats of epoxy. Sanded down epoxy and used kiwi grip. Came out real nice, the tread not that aggresive and seems to be very durable.. The true test will come when I begin using it. kiwigrip1.jpgkiwigrip2.jpgkiwigrip3.jpg

Had a bit of a problem with the carb butterfly valve not closing all the way in neutral, and not opening all the way full throttle.. I think I got a handle on it.. I adjusted the throttle cam and push rod, and readjusted the throttle cable on the engine. I needed to pull the spring loaded end out a little further.. still not closing all the way, about 95%, or opening all the way, same 95%, but will adjust it if needed when I run the engine up in a few days, I hope, X...

I also started the Bow deck, planning on a future livewell, pedestal seat, and a couple of storage lockers.. I am itchin to get out and do some fishin, so I think I'll leave that to this winter..Bowdeck1.jpgBowdeck2.jpg
 

evancody1

Cadet
Joined
Mar 12, 2011
Messages
24
Re: Bluefin Restoration in Progress

Well,
Its been a while since my last post, I finished the bow deck ( still needed to do some of the vertical pieces, then I got a bit ancy to go try it out... Got it in the water, and it didnt take on any water, check 1 good. When I tried to start the motor up it wouldn't turn over, I found out the kill switch was wired wrong, quick fix, and the motor started, check 2 good... A rookie mistake coming up, I went to put the boat into reverse, and it went forward, oops!!! switched the control cable, check 3 works good.. ran it out on the river and shortly after, about 5 minutes got the overheat buzzer, limped back in to shore..

Took the lower unit off and the water pump housing to get to the impeller, it wasnt to bad but I placed a new one in there. Cleaned the housing, and back flushed the cooling system with distilled vinegar, then water from the hose.. all this was done through the thermostat housing once I took the thermostat off.. I replaced the thermostat, and the thermoswitch.. Changed the lower unit gear oil... also placed a new tell-tale through the pressure testing hole just on top of the thermostat.

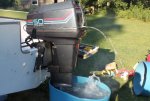
Just got done running it up in a 55 gallon bucket, works great.... ran it in high idle for 10 minutes, switched through the gears, forward and reverse, works good... time to test it out on the river tomorrow...finishbowdeck1.jpgfinishbowdeck2.jpgfinishconsole.jpgtelltale1.jpgtelltale2.jpg
 

kfa4303

Banned
Joined
Sep 17, 2010
Messages
6,094
Re: Bluefin Restoration in Progress

Lookin' good! Also, do you have a pic of your tell-tale set up? I want to do a similar sort of mod to my motor, and I 'm curious to see how you did yours. Keep us posted on the splash. Fair winds......
 

evancody1

Cadet
Joined
Mar 12, 2011
Messages
24
Re: Bluefin Restoration in Progress

kfa,

I'll get some shots of it tomorrow and post them for ya...
 

evancody1

Cadet
Joined
Mar 12, 2011
Messages
24
Re: Bluefin Restoration in Progress

kfa,

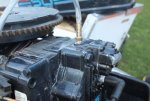
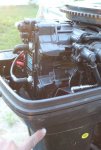
I went out and shot some quick pictures of it... I basically used a 1/8" brass threaded to 1/4" barbed fitting... Ideally it would have been better to have a 90, but they were sold out at my local marine shop.. I put some antiseize lubricant on the threaded side and screwed into the pressure testing hole just atop the thermostattelltalesetup1.jpgtelltalesetup2.jpg. There was just a plug there before. This was just a quick setup, because I wanted to get it started up today.. In the future I will put it through the side of the engine cowl. Right about where I am pointing to.. I am thinking that its gonna get pretty hot in there so with the plastic pipe so close to the engine I am looking for something that might withstand the heat a little better for my permanant fix.
 

evancody1

Cadet
Joined
Mar 12, 2011
Messages
24
Re: Bluefin Restoration in Progress

Splash down,

Went pretty good, some minor adjustments needed on idle control bolt, and the shift rod coupler... I did not have either tightened down good enough and the vibrations from the engines caused them to come a little loose witch made shifting through gears a little difficult..

I retightened both bolts and nuts down, made some adjustments to the shift coupler, and rod, engagement... Centered up the neutral interlock switch, and then recentered the clasp at the end of the shift control cable. I think I have it all locked down tight now.. I might need to do some tinkering here and there but ran through the gears pretty smooth now...

The tell tale works great!!, I will say though, I might need to get some sort of restrictor on the line to meter the amount of water that runs through this, Just doing some trial and error type of stuff... I ran it with the full tell tale water flow and looked at the amount of water coming through the two water/ exhaust holes in the aft part of the engine.. although water was spitting out, when I crimped the tell-tale line, water came out at a much higher rate... This leads me to believe that the tell tale line is taking away some of the water from the cooling system... If I can put some type of restrictor, like an inline valve, to meter the water, this might be beneficial...
 

kfa4303

Banned
Joined
Sep 17, 2010
Messages
6,094
Re: Bluefin Restoration in Progress

Thanks or the pics evan. Glad the splash went well. It looks like your tell-tale set up is the same as the one I had in mind. Although, I'll have to drill and tap a hole into the top of my T-stat cover. I've also read that you have to be careful not to divert too much water. It think a restrictor that will keep the line at 1/8" rather than 1/4" will do the trick.
 

evancody1

Cadet
Joined
Mar 12, 2011
Messages
24
Re: Bluefin Restoration in Progress

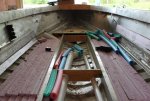
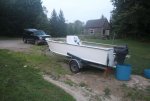
Bow deck just about complete, I just need to cut a couple more hatches for storage... I think that might be it for the season.. I feel the need to do some fishing.. I still need to do the trim pieces along the gunwale, the bow, and along the lower starboard and port sides... happy fishing and until the fall take care all and thanks for the great info on this site.. without it , it would have been alot more difficult, fwdview1.jpgbackview.jpgfullview1.jpgfullview2.jpg
 
Top