Bravoitis Fix . . .

Status
Not open for further replies.

tpenfield

Moderator
Staff member
Joined
Jul 18, 2011
Messages
18,137
I found it works if you use soap, and have the bolts just holding the rubber piece in. Once it slides in, it can be pulled back out some if need be

Thanks for your guidance on this. :thumb: Yes, soapy water. Initially, I had been using the soap on the tube and rubber insert. Just now, I also used soap on the rubber hose itself, as it fits into a tight channel in the transom assembly. I found that I needed to get the position of the hose pretty much exact so that the plastic tube would go in straight. The soapy water on the hose portion allowed me to make slight adjustments of the position.

Here are a couple of pictures . . .

The main issue is that the plastic tube would be misaligned and not able to protrude through the installation fixture.
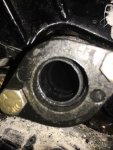
IMG_9915.jpg

With soap on the rest of the hose, I could adjust the alignment a bit from the outside of the boat.

I did get the port drive hose installed . . . :clap2: :happy: :)
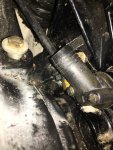
IMG_9918.jpg

So, I'll see if I can finish up the starboard side using the extra soap on the hose.

In other news, I retrieved the 7/16" box wrench that fell into the unknown, but subsequently lost a 7/16" socket to the cause.

On the brighter side of things, Formula boats has announced the 330 CBR now is available with outboards :) (triple Mercury Verados) . . . just got to save up for it. :rolleyes:
 

tpenfield

Moderator
Staff member
Joined
Jul 18, 2011
Messages
18,137
Update:
Starboard side is done. The technique of adjusting the position (and squareness) of the plastic tube from the outside of the transom did the trick. The plastic tube not being in alignment with the hole was causing the rubber compression bushing to be out of alignment, which caused the inlet fitting to be out of alignment . . . and . . . the bolts were not going it straight so they would not properly catch the threads.

Once I adjusted the hose assembly from the outside, things were square enough so that I could thread the bolts.

I also wanted to replace the oil line on the starboard outdrive, so I had some time to start, but still need to fully secure the new hose . . . probably going to need a long needle nose pliers to get a grip on the hose.
 

alldodge

Moderator
Staff member
Joined
Mar 8, 2009
Messages
42,537
As before I had similar issues at first, then used soap as mentioned. Guess I should have mentioned it prior :sorry: but our difference was I was using 100% dawn. Doing it as they said with soap and water was much harder. Once the plastic tube started in the rubber bushing, it slid right in.

Replaced my oil tube, and it was tight. The barbed fitting was real close to the starboard side of the assembly. Figuring its installed and then the nut is tightened on the backside and that presses the barbed fitting against the housing (because they don't hold the other side). To reinstall new one without loosening fitting, I put a tie wrap on the fitting real loose and held while I used more soap and needle nose to slide the hose on. Then tightened the tie wrap
 

tpenfield

Moderator
Staff member
Joined
Jul 18, 2011
Messages
18,137

Lou C

Supreme Mariner
Joined
Nov 10, 2002
Messages
13,024
Great work there Ted...now refresh my memory, last summer when you were troubleshooting your engine that was running at a bit higher temp than its mate, and a shell was found in the raw water system, was that the side with the more restricted hose due to Bravoitis?

BTW, my project is moving along....I cleaned up the deck surfaces of the block....and took really clear high res pix and showed them both to my boat mechanic and the machinist at the speed shop, both felt that it was worth trying to put re-man heads on it. So, going to pick up a pair of re-manned 4.3 heads tomorrow and a set of Fel Pro marine gaskets and carefully put this thing back together....
 

tpenfield

Moderator
Staff member
Joined
Jul 18, 2011
Messages
18,137
Great work there Ted...now refresh my memory, last summer when you were troubleshooting your engine that was running at a bit higher temp than its mate, and a shell was found in the raw water system, was that the side with the more restricted hose due to Bravoitis?

BTW, my project is moving along....I cleaned up the deck surfaces of the block....and took really clear high res pix and showed them both to my boat mechanic and the machinist at the speed shop, both felt that it was worth trying to put re-man heads on it. So, going to pick up a pair of re-manned 4.3 heads tomorrow and a set of Fel Pro marine gaskets and carefully put this thing back together....

Thanks Lou C . . . the infamous shell was on the port side, which was also the side with the more severe Bravoitis. The shell got stuck at the bell housing, which has no Bravoitis. I could have probably gone another season or two with the inlet hoses as they were, since the Bravoitis was very early stages, but glad to have it done now.

Nice to hear you have a good path to re-newed power on your engine. :thumb: My engines are getting a little long in the tooth at 910 hours. I am hoping to go 1200 hours until needing engine work.
 

rick3452

Petty Officer 1st Class
Joined
Oct 26, 2010
Messages
282
For anyone else thinking about doing this...... Through Hull is the way to go, so simple, lots of water... Merc part # 818170A2
 

Ken Stephens

Seaman Apprentice
Joined
Jul 9, 2018
Messages
34
If you install a through hull water pickup will the stern drive get proper cooling. What do you do with the stern drive pickup hose. ? Mercury Bravo 3
 
Status
Not open for further replies.
Top