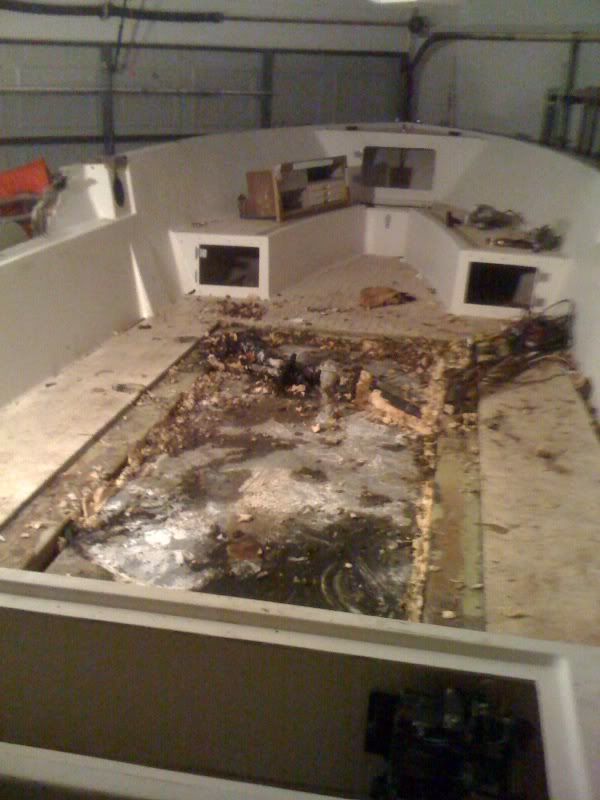
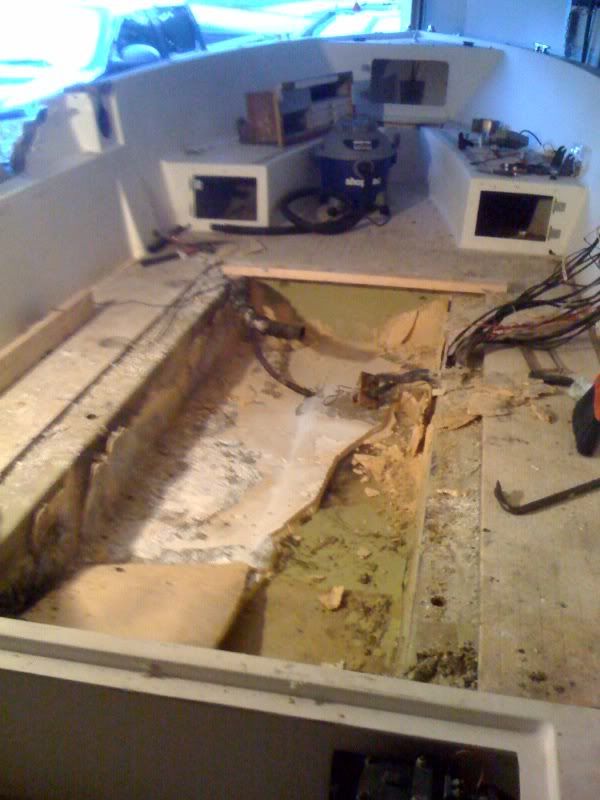
Finally began my summer project and I am already confused...

83mulligan

Senior Chief Petty Officer
Joined
Feb 7, 2009
Messages
687
Re: Finally began my summer project and I am already confused...

hey fish, most of the guys on here seem to use 1/2" or similarthickness AC Ply sealed with resin and glassed. Some use treated ply. The Marine vs. AC vs. treated ply preference is discussed many times over on this forum. Sure, you could certainly use the douglas fir. Seems i've seen mostly some form of ply in that application, assuming you are talking about bulkheads here.
 

jonesg

Admiral
Joined
Feb 22, 2008
Messages
7,198
Re: Finally began my summer project and I am already confused...

I used PT 2x8 for the cross brace.
 

oops!

Supreme Mariner
Joined
Oct 18, 2007
Messages
12,932
Re: Finally began my summer project and I am already confused...

hi killer......the frames can be made out of just about any kind of wood....1/2 ext ply is just fine...

there is very little lateral stress on the frames after the stringers are glassed.

have you done the transom yet?...
i was and still might start a post about using one inch ply as an inital layer of wood...its soooo strong it hardly warps and is a fantastic surface to laminate to. it sucks every thing else straight.

but keep on havin fun bud !
 

gugie

Cadet
Joined
Jun 29, 2005
Messages
25
Re: Finally began my summer project and I am already confused...

Hey Fish... Great progress!
I'm at the same point (Actually a little behind you) you are and am also using 2 x 12 lumber for the stringer as that was what was orginally in my 30' Reinell. My problem is that I have a flybridge and can not take the deck off like you could. My 2 x 12 stringer was spliced in the middle with plywood "stapled" to the 2 x 12! Of course the stringer was encased with fiberglass. Due to the size of my hull I'm having to build up one side with plywood before removing the old wood prior to replacing it with a new 2 x 12.

As for your bulkheads, I'm thinking of using MDO. This plywood has very few voids, uses the same gule as external plywood and the 1/2" is 5 ply. It cheaper that marine grade but more expense than regular external grade.

Are you still leaning towards using fiberglass resin versus epoxy to encase your new stringers? I noticed that you used thickened epoxy to bed your new stringers. I've been ready that some of the contributors in this forum bed their stringers using LP s so am investigating that.

On my bulkheads instead of leaving a gap or using foam to give this gap I'm going to build up hull with layers of epoxy and cloth starting with a 10" wide strip, then a 8" then a 6" and maybe a 4". Hopefully with will prevent the bulkhead creating a hard spot where it meets the hull.
 

fishKILLER1987

Petty Officer 3rd Class
Joined
Mar 22, 2010
Messages
86
Re: Finally began my summer project and I am already confused...

Great info guys! Thanks.

Gugie,

I will be using polyester resin for every fiberglass application on this rebuild. My original intention was to use expoxy resin to bed the stringers down and wrap the stringers with glass but I qucickly changed my mind once I realized how much it would cost to do that. After speaking with the people who I get all my fiberglass supplies from, I had a better understanding on to continue with this rebuild. The company I get my supplies from make thier own resins and also build custom boats as well as repair and rebuild a wide variety of fiberglass boats. They explained to me that it is not always necessary to use epoxy resin when rebuilding a boat. They said the only time they ever use epoxy resin on a rebuild is when the customer specifies so. It is too expensive and doesnt warrant as many applications as the polyester resin does.

What I did was use polyester resin just as I would the epoxy resin. I mixed up polyester resin with cabosil to make a thick peanut butter mixture and used that to bed my stringers to the hull. It worked great. Im now going to use polyester resin to wrap my stringers with glass. Depending on how thick the fiberglass cloth is that you are using to incase your stringers, you will have a really hard time wetting out thicker cloths with epoxy resin. Overall, polyester resin is cheaper, easier to work with, and for the most part cures just as strong as the epoxy.

Hope that helps.
 

fishKILLER1987

Petty Officer 3rd Class
Joined
Mar 22, 2010
Messages
86
Re: Finally began my summer project and I am already confused...

Alright guys, I ran into a snag last night while framing in the cross braces. In the process of installing larger stringers than the boat originally came with, I neglected the fact that the space between the stringers would shrink by about 3 inches. Well, now the gas tank compartment that housed the gas tank and originally fit between the stringers will no longer fit between the stringers the way it should. This brought all work efforts to a quick hault.

So after much thinking, it seems my only option is going to be to do away with the gas tank compartment all together and simply install the tank itself between the stringers. Ive seen many boats built this way so hopefully my build will turn out ok.

I will soon be installing the new deck but I have a couple questions about how the deck is secured to the rest of the boat. I know that some people use screws to attach the deck to the stringers and others use epoxy but how would you secure the deck without attaching it to the stringers??

Also, I know that the underside of the deck must be wrapped in a layer of fiberglass before laying it down in the boat. So my I plan on wrapping the underside in a layer of woven roving. Any thoughts???
 

83mulligan

Senior Chief Petty Officer
Joined
Feb 7, 2009
Messages
687
Re: Finally began my summer project and I am already confused...

With polyester resin you need a layer of csm underneath any type of cloth so that you don't have a resin rich area that is weak and brittle. The csm absorbs any extra resin. I think woven roving is way overkill on the underside of a deck. It's a non traffic area. I'd check out Oops Hull extension thread and see how many ounces of cloth, if any, he used. Just my 2 cents.
 

oops!

Supreme Mariner
Joined
Oct 18, 2007
Messages
12,932
Re: Finally began my summer project and I am already confused...

do away with the gas tank compartment and simply install the tank itself between the stringers.
?

So my I plan on wrapping the underside in a layer of woven roving. Any thoughts???

hi killer.....


i dont understand the difference between gas tank compartment....and just placing the tank between the stringers.???

just make sure the tank cannot move for and aft...or side to side....glass small wood blocks to the hull and screw the tank flange to it.....also make sure that water can get to the bilge under the tank.....if its alum....paint it.

as far as the under deck....if using poly....csm is the stuff....as light a layer as you can....even .75....(if you have 1.5 then rip it in half....it will seperate to .75.....just start picking at the corner and it will split.

if epoxy...just the resin will be ok....(its not as brittle as poly ) use clear sealing penetrating epoxy

as far as the deck it self.......run chalk lines on the new deck where the stringers and frames are....then screw to that using stainless steel screws...remove the screws...then fill the holes with 5200....then re screw it....yes its time consuming....but your deck will last forever.

i dont beleive that epoxying a deck to the stringers alone is enough for the sole of the boat......it needs to be screwed.

cheers
oops
 

fishKILLER1987

Petty Officer 3rd Class
Joined
Mar 22, 2010
Messages
86
Re: Finally began my summer project and I am already confused...

OOPS,

The boat was originally made with a gas tank compartment that was part of the deck, but also housed the gas tank below the deck. Its a wierd deal. My only guess is that the boat was designed this way so that if the owner ever had to replace the gas tank, he could do so without ripping up the deck.

Here is a pic for a better explanation:

boatwork7.jpg


Here is the gas tank as it sat inside the compartment before the deck was removed.

gastank2.jpg


Here is the gas tank compartment after the tank was removed.

So what is the purpose of using such light cloth underneath the deck?? It just seems to me that the heavier the cloth underneath, the stronger the deck will be.

Also, my stringers do not support my deck. I will be relying on foam to support my deck. This is how the boat was originally made and I plan on rebuilding it the same way. I plan on cutting slightly larger deck pieces so I can slide eack side of the deck underneath the gunnels about 1/2 inch or so then using thickened resin to fill in where the deck meets the gunnels then sanding it smooth to make a nice, seemless finish. My only concern is that the deck will only be secured by the putty that I spead in the corners. In my situation, is this the best way to do this or is there a better/stronger way to secure the deck to the boat??
 

83mulligan

Senior Chief Petty Officer
Joined
Feb 7, 2009
Messages
687
Re: Finally began my summer project and I am already confused...

fish, fiberglass the deck from the deck up the side of the gunnels. Do this all the way around wherever it meets the structure of the hull. Tabbing it in will give it the strength.
 

fishKILLER1987

Petty Officer 3rd Class
Joined
Mar 22, 2010
Messages
86
Re: Finally began my summer project and I am already confused...

Good deal...i was thinking the same thing. Just tab it in all the way around and call it a day. The foam should adhere to the bottom of the deck and help hold it in place as well.
 

fishKILLER1987

Petty Officer 3rd Class
Joined
Mar 22, 2010
Messages
86
Re: Finally began my summer project and I am already confused...

Ok, so I've decided that I'm going to forget about trying to squeeze the old gas tank compartment between the stringers and just install the tank itself between the stringer like most other people seem to do.

So now I'm trying to figure out how to mount the tank to the hull. I have seen many people lay the tank down on a couple pieces of rub rail and then fiberglass in a couple 2x4s on top of the tank to hold it in place. But I was thinking of laying the tank down on a bed of foam and then incasing the tank in foam to hold it in place. Is this a good idea or is therea better way to do this??

Also, I know the tank will expand when full of fuel. So how do you allow for the tank to expand if it needs to be secured tightly so that it can't shift around??

Any ideas?
 

83mulligan

Senior Chief Petty Officer
Joined
Feb 7, 2009
Messages
687
Re: Finally began my summer project and I am already confused...

fish, mine has 3 planks underneath it fiberglassed to the hull. Each plank has a dato cut underneath and an aluminum strap to ratchet the tank down. Encasing it in foam does not allow any air circulation and invites problems with condensation. condensation is a bad thing. I think you want to have good air flow all around your tank. Just my opinion.
 

ReelPlumber

Seaman
Joined
Nov 15, 2009
Messages
65
Re: Finally began my summer project and I am already confused...

Looks like really good progress! I am enjoying the pictures.:)
 

gugie

Cadet
Joined
Jun 29, 2005
Messages
25
Re: Finally began my summer project and I am already confused...

The problem is standing water, lack of drainage , foam.
A lot of us are using PL premium construction adhesive to bed the stringers to the hull, stringers should not touch the glass, they need to be spaced 1/4 inch off the glass. Then resin and glass over the stringer to the hull, themselves could be composite foam., stringers But those tend to be expensive, wood is fine if its PT and sealed properly with proper drainage.[


see pic, the strength comes from the glass over the stringer
This is a bad install without bedding.

bad.jpg


Below is a good installation where the stringer is spaced away from the glass hull, this prevents spider cracks in the outter hull gelcoat.

good.jpg


On mine, I trial fitted the stringers then pre-glassed them outside the boat for convenience with unwaxed poly resin, then I only had to tab them to the hull after bedding with the PL, I find it quicker and easier to glass a stringer on 2 trashcans compared to working on my knees inside the hull.
The PL allows 30 minutes work time so it makes positioning easier, after it cures for an hr just finish glassing stringer to hull.

Knee braces are a good way to transmit loads at the stringer to transom joint, I did mine similar to this,
DSCN6459.jpg


They need limber holes to allow drainage between compartments, its easier if done first before install and seal the wood real good with resin, multiple apps until the wood grain is drenched and saturated with resin because thats the likely point of entry.

Sorry for the delay in asking this question. I've read a lot about the need to have this gap between the hull and any bulkhead/stringer. My question is if this gap exists isn't this a weak spot? If I sling my boat (30' Reinell) into the water off it's trailer won't the wood (Stringer/Bulkhead) become detached from the glass because of the pressure on the hull from being slung. Same is true if a you hit a wave and took a pounding. Would it be better in this case to build up the area below the stringer or bulkhead with multiple strips (4 strips?) of glass/epoxy starting with a wide strip and then getting narrower?
 

jonesg

Admiral
Joined
Feb 22, 2008
Messages
7,198
Re: Finally began my summer project and I am already confused...

Sorry for the delay in asking this question. I've read a lot about the need to have this gap between the hull and any bulkhead/stringer. My question is if this gap exists isn't this a weak spot? If I sling my boat (30' Reinell) into the water off it's trailer won't the wood (Stringer/Bulkhead) become detached from the glass because of the pressure on the hull from being slung. Same is true if a you hit a wave and took a pounding. Would it be better in this case to build up the area below the stringer or bulkhead with multiple strips (4 strips?) of glass/epoxy starting with a wide strip and then getting narrower?

The strength comes from the glass that transits from the sides of the stringers to the hull, if you build up the area beneath the stringer you just have to raise the stringer again so its not touching ...so why bother.
PL adhesive is plenty strong enough for spacing the stringer, if you preglass the stringer you won't have to worry about sealing the bottom edge from water either. Or just use spacers that have a bit of "give" to avoid hard spots. On a bigger hull you'd want to use 1708 or similar to tab the stringers, examine the original installation carefully for clues as to how they did it.
 

jonesg

Admiral
Joined
Feb 22, 2008
Messages
7,198
Re: Finally began my summer project and I am already confused...

OOPS,

The boat was originally made with a gas tank compartment that was part of the deck, but also housed the gas tank below the deck. Its a wierd deal. My only guess is that the boat was designed this way so that if the owner ever had to replace the gas tank, he could do so without ripping up the deck.

??


Having good tank access beats cutting the deck up if theres a clog in the vent, it looks like it had a tank coffin, its not necessary to repeat.

My alum tank is glued down with 5200 , it sits on 3 teak planks that are glassed to the hull and stringers. Free air flow around the tank is good.

Be carefull of the fuel feed line height if you start redesigning the tank installation. That fuel fill hose is probably due for changin out by now.
 

fishKILLER1987

Petty Officer 3rd Class
Joined
Mar 22, 2010
Messages
86
Re: Finally began my summer project and I am already confused...

Ok guys, Im back again. I have made alot of progress on the boat over the past few weeks and I hope to have pics soon. But as of now, Im stuck and need some input...

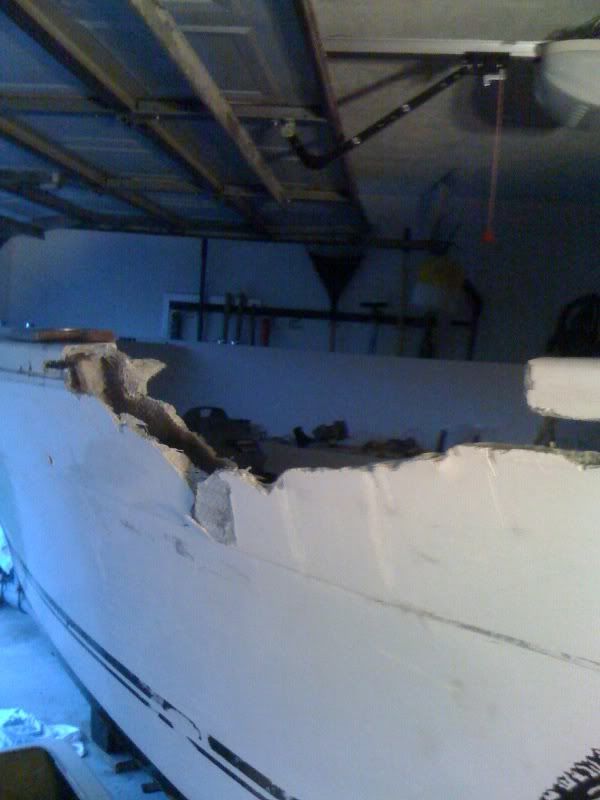
I have begun the major repair of the side damage on the boat. However, I am having some difficulty trying to make a backing to contour to the shape of the boat so I can fiberglass to it from the inside.

This is what I am working with.
fiberglass2.jpg


Here you can see that there is a small ridge that runs down the side of the boat. In an attempt to recreate this ridge in my repair I have tried to mold a piece of thick plastic with a heat gun to make this ridge so that when I make the repair from the inside, the fiberglass will lay in this mold and make the ridge just as it was before the damage. The plastic I tried to mold turned out halfway decent but it is kind of lumpy and Im afraid that when I lay fiberglass on it, the glass will take the shape of the mold and all the lumpy spots in the plastic.

Is there a better way to do this??

I have heard of people using formica but I cannot find any places to get a scrap piece from and a new sheet from home depot is pretty expensive. I have also tried sheet metal, but there is no way I can get that stuff to fit tightly to that ridge.

Any ideas???
 

Woodonglass

Supreme Mariner
Joined
Dec 29, 2009
Messages
25,929
Re: Finally began my summer project and I am already confused...

go to lowes and buy a sheet of 3/16 white gloss shower board (made out of tempered fiberboard) Poly and epoxy won't stick to it. It is $15 bucks for 4x8 sheet. Then just screw it to the hull to form it to the hull and lay in your glass. When your done you can fill the screw holes.

:D
 

jonesg

Admiral
Joined
Feb 22, 2008
Messages
7,198
Re: Finally began my summer project and I am already confused...

You can also pull a mold off the other side of the boat, wax the hull well.
 
Top