Floor replacement question

rickryder

Commander
Joined
Jun 24, 2010
Messages
2,722
Re: Floor replacement question

You could also cut a few patches of csm and fill the void in the skin.
 

mxcobra

Chief Petty Officer
Joined
Jun 27, 2011
Messages
526
Re: Floor replacement question

im going to jump abord to see the results of this one
looks like your doing a fine job
 

Woodonglass

Supreme Mariner
Joined
Dec 29, 2009
Messages
25,929
Re: Floor replacement question

You don't have to have a large piece of cardboard. You can tape 2" cardboard strips together to make the outline of the transom. It's kinda easier that way.
 

62cruiserinc

Petty Officer 1st Class
Joined
Oct 30, 2009
Messages
295
Re: Floor replacement question

How tight does the new core have to fit around the perimeter (plywood edge-to-hull distance)?

I found a large piece of cardboard and made a template. The factory glassing on the hull is rather erratic and it would be hard to follow every ridge and valley. Right now, the template has a few gaps here and there about 1/4" or so. Do I just fill the gaps later with PB?

I'm amazed how erratic and sloppy the factory tabbing job was. In some places its very good and in others its thin. There are even some places where the factory filled in the core edges with foam where there was a larger gap.

I noticed there were 6 holes about 1/2" diameter in the core that were filled in with resin. These holes are distributed over the core and appear to be used by the factory to clamp the core to the transom using bolts while the core was being glued to the outer skin. I am going to use the clamping method that Friscoboater uses in his videos which is 2x4s on the inside and outside clamped together with allthread rod through the outdrive cutout.

I used a sharp hand chisel to scrape off most of the thin plywood remaining on the outer skin. This reduces the sanding time (and dust). Then I will sand the skin to smooth it out and also grind off any remaining tabbing around the transom core. First i have to go to Lowes and buy a tyvek suit for protection. I had one and found out that it rips more easily than I thought when you kneel on the hull. A pair of knee pads should work to protect the suit.

How do you guys seal safety goggles to your face when using a half-mask respirator? The respirator covers most of your nose, but goggles also seal to the nose and the respirator pushes the goggles from your face. Are there special goggles that are used with respirators? I would love a full-face respirator that acts as respirator and goggles, but they are very expensive($130+). I have a face shield but it doesn't provide a tight seal to the face.

Finally, when I make the PB for gluing the core to the transom, do I only add the cabosil or do I also add the chopped fibers to it? It would seem to me that the fibers would interfere with the notched trowel usage.

Thanks
Steve
 

rickryder

Commander
Joined
Jun 24, 2010
Messages
2,722
Re: Floor replacement question

You can fill the gaps around the transom with PB.

Look at the clamps in Woods signature to attach your transom core ;)

I just used safety glasses like the sun glass style not the goggles.

Yes you do need the chopped fibers in the PB....thats what gives it strength....you will have to play around with the trowel and yes it will clog from time to time.
 

93bayliner1800

Petty Officer 1st Class
Joined
May 9, 2011
Messages
239
Re: Floor replacement question

When I spread PB I just used a flat trowel....the notched would grab fibers and make big balls of it!! Lol
 

93bayliner1800

Petty Officer 1st Class
Joined
May 9, 2011
Messages
239
Re: Floor replacement question

As far as the goggles go....I used regular clear goggles....then tried duct tape.....then dealt with fiberglass dust in one eye for a day and bought a full face respirator....expensive yes, but such a good investment for many other things I will do in the future.
 

62cruiserinc

Petty Officer 1st Class
Joined
Oct 30, 2009
Messages
295
Re: Floor replacement question

Well, I sanded the transom outer skin today. I used a tyvek suit with a respirator and glasses-type goggles. After sanding a little, I noticed that some dust was still getting in my eyes, so I added a face shield on top of everything and that seemed to work well. The respirator lower strap kept loosening and I had to keep tightening it. One trick I use to see if the respirator is leaking is to momentarily cover the respirator modules with my hands and inhale, if they are sealing properly it will be difficult to inhale and the mask will attempt to collapse inward. I may still look into a full-face respirator, as it would be a lot more convenient. The tyvek suit kept the itching away, except for one spot. The sleeves kept pulling up a little away from the gloves, which I ignored and now am itching in the wrist area. Here is a picture of me with the whole works:

IMG_3938.JPG

Here is a picture of the transom after sanding:
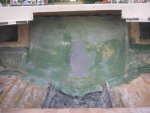
IMG_3939.JPG

I sanded the transom and a band about 5" wide around the perimeter of the transom on the hull. I also sanded into the recessed areas of the transom where the foam was dug out in the upper right and left areas since the core will be tabbed to this area also. You can see the recessed area here:
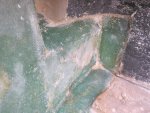
IMG_3942.JPG

The next picture shows how Larson added about 3/4" of foam to the port and starboard hulls and then glassed over the foam:
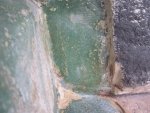
IMG_3943.JPG
This foam layer extends to about 2 feet forward of the transom and then tapers dpown to nothing but the actual hull. The transom was tabbed to the glass on top of the foam. Not sure why Larson did this. I have removed the foam near the transom and will tab the new core directly to the hull. Then I will match the new tabbing to the thicker foamed area with some glass so it looks better than just ending the foam suddenly and having a step there.

I have also made a cardboard template of the core and the next step is to glue up the two 1/2" ply layers for the core, along with the center piece that will taper from 1/2" to 3/4" to equalize the transom thickness for the outdrive.

Thanks for the replies
Steve
 

Woodonglass

Supreme Mariner
Joined
Dec 29, 2009
Messages
25,929
Re: Floor replacement question

I'd recommend cutting the foam back a bit more. Say to 10-12" for the tabbing. You want all the glass to be attached directly to the hull. You can put some foam on the sides of the hull after the transom is installed if you want and then lay some glass over it but IMHO the transom needs to be tabbed directly to the hull sides.
 

93bayliner1800

Petty Officer 1st Class
Joined
May 9, 2011
Messages
239
Re: Floor replacement question

Coat any possible exposed skin with baby powder just before suiting up....makes a huge difference!!
 

62cruiserinc

Petty Officer 1st Class
Joined
Oct 30, 2009
Messages
295
Re: Floor replacement question

WOG: I am going to cut the foam back further to about 10" as you suggested, and also grind the hull out to 10" also all around. I had to stop because my Harbor Freight 4 1/2" grinder got wiped out by the glass dust. I have to buy a couple of new ones since they are so cheap. I read somewhereon the forum that they last longer if you put a woman's stocking over the air intake to filter much of the dust out.

93bayliner1800: Thanks for the baby powder suggestion. I will try it. It beats itching for a day.

I have finished the template and will cut out the two layers of ply and glue them together with Titebond III. Then I will glue the center piece of ply ( the outdrive area "thickener" for lack of a better term) which will taper from 1/2" to 3/4" bottom to top. Then a dry run on the transom to mark the outdrive cutout and then cut it out.

Am I correct about the following procedure for the core?:

1. Coat the wood on all sides with resin mixed for slow cure so it soaks in better.

2. After it turns tacky, put CSM layer on one side and let cure. Then turn over and put CSM layer on other side. Do you put CSM on the ply edges (and cutout) or just the initial resin layer?

3. Drill some holes in transom to allow PB to ooze out when attaching to outer skin.

4. Put PB on core and on outer skin(1/4" notched trowel), put core on outer skin, clamp together using 2x4 clamps with allthread through the outdrive cutout (like Friscoboater in his video). Fillet any PB that oozes out around edges and add PB if needed to edge gaps and fillet it with spoon. Also remove any excess PB that is above the holes that were drilled in the core. Clean up any excess PB around outdrive cutout. Let cure overnight.

5. Apply CSM, 1708, tabbing, etc.

Three questions:

1) roughly how much PB to mix for the transom attach? I will have only one shot so better to mix a little more than be short.

2) If you mix a slower curing resin mix(less MEKP) to give you more time, are there any downsides to this, such as its a weaker mixture, etc.?

3) How hard to squeeze the clamps? I think I read on the forums that you should only lightly clamp to avoid squeezing out too much PB.

Thanks
Steve
 

Woodonglass

Supreme Mariner
Joined
Dec 29, 2009
Messages
25,929
Re: Floor replacement question

You are correct on all counts. I'd say 3 qts of resin would get you close. you'll need about a quart of cabosil per quart of resin and 1 tablespoons of chopped stand per quart. If you do your layup in the shade with temps in the 70's or 80's and move quickly you could use normal Mekp ratio and have 20 minutes work time. Having a helper to mix each quart as needed while you are applying it would really be a help. Clamp hard enough for squeeze out and use it for filleting.
 

62cruiserinc

Petty Officer 1st Class
Joined
Oct 30, 2009
Messages
295
Re: Floor replacement question

Is there any downside to using less MEKP (like 1%)? Such as less strength, etc. I would like to slow the cure down as I am new to glassing and need to get some hands-on feel for the stuff before I get comfortable with it. Also, most forum members say to mix the MEKP and resin before adding filler. A search on the forum showed some rather animated discussions on the subject.

Also, I read in a previous thread on transom core replacement that a person ended up with a non-flat outdrive area (3/32" indented area in the middle) on the outer skin that was flat before attaching the new core. I could see where this could easily happen when using 2x4s clamped with allthread through the outdrive cutout if one of them were cranked down tighter and pulled the outer skin closer to the core. To avoid this, I am considering making a 3/4" ply frame for the cutout to put on the outerskin to distribute the clamping pressure equally around the cutout. The frame would extend past the cutout about 6 inches in all directions and minimize any distortion of the outer skin around the cutout. Any thoughts?

Thanks
Steve
 

62cruiserinc

Petty Officer 1st Class
Joined
Oct 30, 2009
Messages
295
Re: Floor replacement question

This morning I glued up the two 1/2" arauco ply transom pieces with Titebond III:

IMG_4010.JPG

IMG_4012.JPG

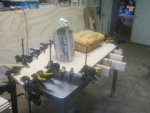
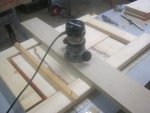
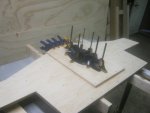
A few days ago I glued the two pieces together for the small outdrive area section of the transom (Is there a special name for this piece?). If you recall from previous posts by me, my outer skin varied from 1/2" thick at the bottom of the cutout to 1/4" thick at the top of the cutout. The original core did not account for this, and the transom thickness varied by 1/4" from the cutout top to the cutout bottom. Mercury says no more than 1/8" variation is allowed. So instead of the small center piece being 1/2" thick, I glued up two 1/2" pieces and then tapered it so that the transom thickness in the outdrive area was a consistant 2" thick. Here is a photo of my tapering jig with router:

IMG_4003.JPG

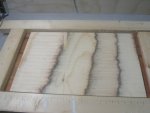
Here is the piece in the jig after tapering:

IMG_4004.JPG

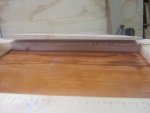
Here is an edge view of the piece:

IMG_4009.JPG

Note that the 1/4" difference in the outer skin thickness was across the cutout. Since the piece was 50% longer than the cutout, the total taper for the whole piece had to be 3/8", with the thickness at the top of the cutout 3/4" and at the bottom 1/2". The actual piece varied in thickness from 7/16" at the bottom edge to 13/16" at the top edge of the wood.

Now it's on to more grinding of the transom area. I bought a new 4 1/2" grinder at HF for $19 and bought the free replacement 2 year warranty for $9 so if this grinder fails I get a new one for the $9 I paid. I was almost finished with the grinding, but i'll take WOGs advice and increase the tabbing area on the hull to 10" from the 5" I had previously. I might also remove the rest of the foam from the two transom crevices so the tabbing can reach further into them also.

Steve
 

62cruiserinc

Petty Officer 1st Class
Joined
Oct 30, 2009
Messages
295
Re: Floor replacement question

I started to grind more of the glass on the boat hull, but couldn't get a good enough seal on the goggles to keep all the dust out of my eyes. Last time it worked pretty well, but not now. So I am going to wait for monday and buy a full-face respirator somewhere locally when more places are open. In the whole scheme of things, its not really too much to pay to protect yourself, especially since it can be used for many other projects. I found a 3M model for $142 at NAPA online, but none of their stores have them in stock. There will be some body shop supply stores open monday and I'll check there.

Meanwhile, I'll work some more on the transom core today since the Titebond will be dry, like cutting out the outdrive hole and adding the tapered center section to it. Then onto wetting it with resin and adding the layer of CSM to both sides before finally gluing it to the outer skin.

I have been searching the forum for the proper recipes for PB when used to glue the core to the skin, but there seems to be several variations in ingredients (cabosil or no cabosil) and percentages of chopped fibers (50/50, 25/75, etc.). OOPS has also warned against certain mixes creating too much heat and damaging the resin. I realize that this subject has been discussed before, but could someone please make a suggestion? With the cost of resin and possibly screwing up the core that took so long to build I would like to avoid a major mistake here.

Thanks everyone
Steve
 

Woodonglass

Supreme Mariner
Joined
Dec 29, 2009
Messages
25,929
Re: Floor replacement question

PB recipe for gluing transom

Equal Parts of Resin and Cabosil, 1/4 cup of Chopped milled fibers per Quart of Resin/Cabosil. Add a bit more cabosil to get the consistency needed to be like creamy peanut butter. It's not brain surgery! After it's like you want it add the hardener and mix for about 30 secs. then spread. You'll need about 3 quarts maybe 4
 
Last edited:

62cruiserinc

Petty Officer 1st Class
Joined
Oct 30, 2009
Messages
295
Re: Floor replacement question

Today I cut out the outdrive hole in the transom core. The two layers are tightly glued together and look like one piece of plywood. The Titebond III did its job well. Here is a picture of the edge of the part that was cut out:

IMG_4014.JPG

Then I did a dry test fit on the boat to make sure the cutout was right. After that, I cut out the hole in the small tapered center section and glued it to the main transom core. It is now ready for an overnight cure:

IMG_4013.JPG

Then the plan is to wet the wood with resin and then put a layer of CSM on both sides before gluing it to the outer skin with PB.

On a side note, I had a chance to check over my failed HF 4 1/2" grinder. It turns out that the plastic screw holding one of the brushes had backed out. When I tightened the screw, It worked again! Even though I already bought another one, I'm still happy this one works again.

Steve
 

93bayliner1800

Petty Officer 1st Class
Joined
May 9, 2011
Messages
239
Re: Floor replacement question

Looking GOOD!!!! very nice work! When I make PB I mix resin and hardener just like I am laying glass...mix for a minute...then add my fibers and cabosil and mix which usually takes another minute. I have yet to have it harden before laying it all down, and I usually mix up to a quart at a time. Fyi...I mixed two quarts when I installed my transom. I know WOG knows his stuff....I just see it being very difficult to get a good mix of MEK when it is like peanut butter.
 

62cruiserinc

Petty Officer 1st Class
Joined
Oct 30, 2009
Messages
295
Re: Floor replacement question

Thanks for the replies, WOG and 93bayliner1800.

The plywood I used was Arauco 1/2", a few weeks ago I bought 6 sheets from Lowes before they ran out (apparently no more coming for a long time due to Arauco plant fire).


I'm still surprised that Larson would violate Merc's specs on transom thickness uniformity (Merc says 1/8" max variation, the Larson had 1/4" variation).


I asked this question before, but nobody seems to have an answer. If I mix the MEKP at 1% for a long working time (temp will probably be in high 70s here) will there be any negatives (such as weaker mix) other than having to wait longer for cure?


Also, I think I am going to make a 3/4" thick ply piece (similar to the small tapered piece on the center of the core), cut it out for the outdrive hole, and use it as a frame on the outside of the transom for gluing the core to the inside. Since the core is now stiffer than the glass skin, it is possible to distort the flatness of the glass around the opening by clamping it with 2x4s in a few spots only. This will result in more complexity for the clamping of the core to the skin, but I feel it is a worthwile tradeoff to prevent a bad situation. I have read a previous thread somewhere on the forum where a member ended up with a 3/32" low spot in the middle of the cutout after clamping and gluing.


Thanks everyone for talking me into a complete transom core and stringer replacement instead of a patch job. A patch would have required almost the same amount of work and would have been far less reliable and strong.


I have done a lot of woodworking (construction and cabinetry) but never fiberglassing. With the help of this forum (thanks everyone) I have managed to avoid a lot of trial-and-error mistakes ($$). I'll probably still make some mistakes but not as many! In life I've learned that if you aren't taking chances on doing something you have never done before you will never improve your skill set. Making mistakes now and then is preferrable to never trying anything new (at least to me it is).

Thanks Again
Steve
 

Woodonglass

Supreme Mariner
Joined
Dec 29, 2009
Messages
25,929
Re: Floor replacement question

I would not go below 1 1/2% on my MEKP ratio. If the temps are in the 70's you'll have plenty of time. TIP: You can always set your resin in an ice chest and "Fool" it into thinking it's cold outside. It really works. You can mix the MEKP before or after the Cabosil and Fibers. I've done it either way. In the beginning I did it first to make sure I got a good mix. Later on I started doing it last and have not noticed any issues. Up to you on how you want to do it. There have been debates on this topic ad infinitum here on the forum. I'm just tellin you what I do.
 
Top