Furrylittleotter's Starcraft Chieftain Revival

Furrylittleotter

Petty Officer 2nd Class
Joined
Oct 16, 2014
Messages
167
Hey, I'm all about Barbq. IN our house it was a religion. Carolina Bar B Q, Preferably Wilber's in Goldsboro!

Tried some spinning on the Boatisserie. Because I do not have a bar running front to back I am unable to align my hubs perfectly, It spins but it wants to move the supporting structure when it does. I added some front to rear braces and loosened the lug nuts to allow "Wobble" but it wasn't enough play and it still moves the support.

I am going to remove one of the bearings and install a U-joint and flange. that should give me plenty of "Wobble".

if that doesn't fix it I will mount the other mount on casters so it can move.


I also made a big order (mostly from iBoats)
Gluvit (2 qts)
Closed all aluminum rivets 3/16 and 1/8( for dash work and interior)
Solid rivets
Dripless shaft seal
Prop bushing
Keyswitch
on/off switches
Deadman switch with lanyard


I think I will use an HVLP sprayer for primer and paint so I am trying to find a self powered one on Craplist...

Planning to paint bottom Rustoleum "Almond" up to rub rail mid way up to top rub rail , then a stripe of polished aluminum and the top white, bare aluminum inside with Sharkhide.

At some point someone took an angle grinder to the boat with a heavy wire wheel so I already bought a Pneumatic inline sander to level that.

I also have a huge polisher, several 2" wide polishing wheels (sewn and unsewn) three types of rouge and a Cyclo polisher for the final finish?Should be pretty cool.

Hopefull I can hire someone to help me with that part, my shoulders are pretty bad off. That stripe will probably get shark hide as well.

Neil
 

Furrylittleotter

Petty Officer 2nd Class
Joined
Oct 16, 2014
Messages
167
ok this Boatisserie has become a jealous mistress, taking all my time! I never thought it would be this difficult, but I didn't build any adjustment into the mounts so when it spun, the legs would shift and readjust themselves, not exactly what you want to happen when flipping a 1000lb boat in your driveway!

I think I finally found my solution. I added a U joint assembly to one end and that gives me all the flex I need,


as you can probably see the U joint doesn't actually spin, it just flexes. THe hub to the right is where the spinning takes place. Heres a couple more shots of my redneck engineering from yesterday:


You can see I also added some large straps to the top of the front mount so it doesn't allow the boat to drop away from the mount when it is upside down.


Hopefully today I can finally work on something else besides the stupid boatisserie?That being said, it places the hull in the PERFECT working position! So that part I am thrilled about, it should be worth all the effort.


from JEGS I ordered:

Sharkhide Protectant(iBoats doesn't carry)
Pneumatic Riveter
2 aluminum pulleys and shaft collars which I hope to rig a primitive "reverse" with
 

Watermann

Starmada Splash of the Year 2014
Joined
Jan 12, 2013
Messages
13,822
Ott are you going to be a guest on that show Rocket City Rednecks? :lol:

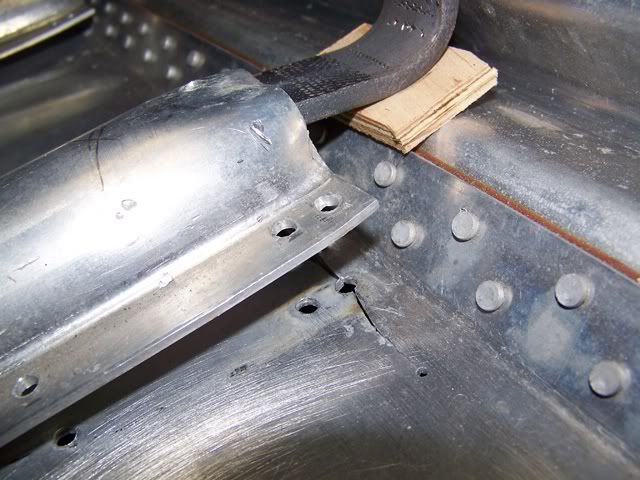
So you're building the boattisserie so you can strip the paint off the bottom of the hull and then prime/paint. Some suggestions but the boat would need to be put back on the trailer first, you should leak test the boat and mark any rivets that may need to be replaced or rebucked. Also do a very through inspection of the areas around the rib ends. These old boats are notorious for having cracks in the hull originating from the rivets holes at the rib ends and some can be very difficult to notice unless looking closely. I saw from your pics that the hull is not retro fitted with stiffeners so that may be another thing to think about.
 

Grandad

Lieutenant Commander
Joined
Jun 7, 2011
Messages
1,504
Hi Otter. I agree with Watermann. From what little I can see in the pictures so far, the hull looks to be in good shape and may have had a protective film of engine oil goo that protected it from corrosion. That goo will also conceal hairline cracks that you need to look out for before getting much further along. With a good grease cutter, she should polish up nicely and allow for a better hull inspection. Having the goo out is also important if you feel a need to use a sealer such as Gluvit as many of us have done. Grandad
 

Furrylittleotter

Petty Officer 2nd Class
Joined
Oct 16, 2014
Messages
167
I appreciate the input and suggestions.Thank you.

I may do a leak test at some point and I have read of the many variety of ways to do them. Unfortunately someone had already completely removed some through hull rivets so an On-Trailer test is not possible right now. Besides If I were to fill my boat with water in the extreme drought we are in my neighbors would probably lynch me.

I am kinda surprised to hear any mention of grease on this boat. It is practically spotless. There is some overspray but no grease or oil. It also has zero corrosion and having looked at the bottom of the hull now I am thrilled with the hulls condition. a few gouges on the keel, and a dent or three but noting really even worth mentioning.

This boat has great "Bones". I can see no evidence of abuse other than attempted repairs.

I do have a lot to do, but my plan is to seal every single seam and rivet below the waterline, inside and out with gluvit, prime, prime, and paint the exterior and sharkhide the interior, fill every crevice with foam and fit large scuppers so the deck is self draining.

I don't know a bunch about boats but it seems impossible for a boat to sink if theres nowhere for water to sit or "Fill" I think I can fit enough foam in the floor and 2 inches over the original floor line (including no "step down" into the cabin so that it will hopefully be impossible for the boat to lower into the water regardless of any leaks or even a huge hole, following waves coming in or whatever.

I may be way off on this but if I'm right it won't matter if the boat leaks a little, but water will have to go through 4 layers of paint, 2 layers of gluvit and tho original sealer, which, on this boat appears to be fine.


Darn boatisserie still isn't quite "Right". real close but not quite, so back to it...

Thanks again for the input.

Neil
 

64osby

Admiral
Joined
Jul 28, 2009
Messages
6,826
If the 2 points of pivot are at the same height it should spin and not cause the mounts to shift. A tri pod base for the hubs would also provide more support.
 

Furrylittleotter

Petty Officer 2nd Class
Joined
Oct 16, 2014
Messages
167
While it is true having the 2 points at the same height is good, if you use trailer hubs like I did, you also have to point to two axles DIRECTLY at each other and this i did not do, also did not make mounts adjustable.

Also I do know a three legged base would be self leveling I thought I could do the job with the heavy C channel I had and some cheaper fence poles for supports instead of buying three pieces of heavy metal pieces for each end and trying to figure out a "Head" for the top, rather than just welding the trailer rims I had on.

In hindsight, My plan was flawed, but it sure was fun!

The GOOD NEWS is the BOATISSERIE IS NOW WORKING!!!

I put the U joint on and added braces to the Bow stand but the stern stand still moved around way too much so I removed the trailer hub, ground down the axle stub a bit and bolted on a 2 hole flange bearing, which has PLENTY of wobble in it.

I took a couple of shots at night, you can see I replaced the chains with more fence poles. In theory, the chains are fine, but when this thing shifted the braces moved and it was a little scary, with the solid posts at the bottom, it is not an issue.

That is a TIKI torch sitting on the ceiling inside.

And it turns out my "Throw" measurements were off, because where I should've had 12 inches of clearance, I had 3/8"!


So, all in all and with much gnashing of teeth I feel good about moving forward. I may make a few braces to put under the boat as failsafes, but it seems extremely sturdy and when it is completely upside down it is the PERFECT height and angle to polish the sides like I want to.

Neil
 

dozerII

Admiral
Joined
Oct 25, 2009
Messages
6,527
Persistence pay off, we have rotation. Looking good Ott, now you can move on to boat work.
 

GA_Boater

Honorary Moderator Emeritus
Joined
May 24, 2011
Messages
49,038
Has the UFO Squad from the Air Force shown up yet. :lol: Are you sure that's a tiki torch? I think it's a pilot light for an ox roast, way too big for only a pig.

I'm glad you added the extra legs. I had thoughts of the chains not doing the job.
 

Furrylittleotter

Petty Officer 2nd Class
Joined
Oct 16, 2014
Messages
167


Did some more tinkering with the Boatisserie. May try adding some freeweights to balance it out a bit, but here it is in the daylight. I can flip it using the rope but it certainly is not balanced. It is quite sturdy.

Ordered a ton more parts and did some practicing with solid rivets. Should be straightforward. I piggybacked my trailers and am taking them to a storage yard so the yard doesn't look like crap. I did have one neighbor ask me if I was a hobbyist or if I was a professional boatbuilder. I'm pretty sure she didn't ask because she wants one built.

Neil

This weird paint scheme is what boat looks like if you pant it on a trailer, then wire wheel half of it off. Kinda funny, but that will change soon. The original color of the boat is about the same as the fridge we had in my house growing up (1972 Kenmore)
 

laurentide

Lieutenant Commander
Joined
Jul 24, 2011
Messages
1,869
Pretty slick rig there, otter. Makes my method seem downright primitive...

vQUWmlW.jpg
 

astor

2018's Starmada Splash Of The Year.
Joined
Jul 31, 2011
Messages
425
Nice work Otter. I really like the boatisserie you came up with. I'm not suggesting anymore work on the boat-flippin-fixture, but a simple locking mechanism would be handy. Pretty cool work, Im interested in seeing what other ideas you come up with during the rebuild.
 

Furrylittleotter

Petty Officer 2nd Class
Joined
Oct 16, 2014
Messages
167
Thanks. I have a real simple plan for the boat, but it should be solid.

As far as the boatisserie: I already built a sprocket and pulley crank mechanism, that was supposed to be the big finale, but Im sick of working on the damn thing so ropes will probably suffice. The guy at the trailer storage yard said "Are you the guy with the big boat upside down in his driveway?". Turns out he's my neighbor, a block away. Small town life...

Neil
 

GA_Boater

Honorary Moderator Emeritus
Joined
May 24, 2011
Messages
49,038
Thanks. I have a real simple plan for the boat, but it should be solid.

As far as the boatisserie: I already built a sprocket and pulley crank mechanism, that was supposed to be the big finale, but Im sick of working on the damn thing so ropes will probably suffice. The guy at the trailer storage yard said "Are you the guy with the big boat upside down in his driveway?". Turns out he's my neighbor, a block away. Small town life...

Neil

Oh, Oh. The word is out. :D


The boatisserie looks like bottom work will be a snap.
 

Furrylittleotter

Petty Officer 2nd Class
Joined
Oct 16, 2014
Messages
167
Bottom angle template

I need a flat section at least 4.25" wide by about 5.5' long from prop shaft log to end of rudder. Only the rudder and prop shaft strut need to be heavily reinforced so I mocked up some 1/8" aluminum channel I had. It is about 6" with 1.75" sides and it is 6' long. I will reinforce the rudder and strut section using some 3/16 plate I have as well as possibly using two frame braces I am making here

I bent up a sample section using my Grizzly vice Brake:

THis is the sample to take to the sheet metal shop:


I need to cut al least one of the frames to fit the shaft Log so I fabbed some small channel braces and marked them for the sheet metal shop to bend them. They will rivet where the frames rivet now. I think I need one but I made 4 just in case.


marking angle from hull angle gauge to supports (you can see how long the shaft log is here.) My V drive angle is only 10degrees, thats why the log is so long, a higher angle would be a shorter log.


everything marked and ready to take to metal shop
 

classiccat

"Captain" + Starmada Splash Of The Year 2020
Joined
Dec 20, 2010
Messages
3,412
That boatisserie is AWESOME! Sounds like you're building a local fan-club with it! :D

This other stuff though...i'm totally confused :noidea: :lol: Looks like we'll be learning something from ya here! :thumb:
 

Furrylittleotter

Petty Officer 2nd Class
Joined
Oct 16, 2014
Messages
167
THe class took a field trip today: first we stopped at a Waste-Your -Time Sheet metal shop full of jackasses who had nothing nice to say, but not to be dissuaded we pressed on and found an AWESOME shop : THis is Capital Sheet Metal in Downtown Sacramento (or as the Locals call it "Downtown Cowtown").

They did a great job on my part here using that huge AMADA press and that older Whitney across from it. The Amada is Hydraulic, the Whitney is Pneumatic.

The aluminum was 1/8" so they needed to use "V" presses, not folding presses (aka "Box Folding Presses") so they couldn't fold more bends on that channel I had due to die size, but I saw that coming and had plenty of sheet 1/8" with me, already layed out the way I wanted it.

THey also had to change my dimensions slightly to accommodate their dies. But it was still within my tolerances.

They did a fantastic job, on the spot, for $108.50!

Here is the New flat Keel piece: That piece is 6 ft long. It turned out almost perfect, the angle is just barely off but i think I can just grind tho inside a hair to fit it. I may make end caps for it, and Capital said they could tig those on for me no problem.

Here is one of the 3 frame braces I had made.:

I cut the rounded sections to fit the frames and ground the inside a bit but I think they will be a perfect fit. If not, they can be adapted easily enough.

This brace should allow me to cut a frame to mount the shaft log without losing any stiffness of the hull.

a couple more shots:

So far, so good.

Neil
 

GA_Boater

Honorary Moderator Emeritus
Joined
May 24, 2011
Messages
49,038
You got a deal getting those 4 pieces formed for $108.50.

What are the plans for a rudder?
 
Top