Going foamless

logan944t

Petty Officer 2nd Class
Joined
Jun 26, 2010
Messages
155
Re: Going foamless

Just curious - did you use 3/4" plywood for the deck? I seem to remember that you were trying to flex it slightly with the idea of helping water drain off it - how did it go?


Nope --what was on there was 3/8. I went with 1/2 and the "bend in the middle thing" worked for the last 2 pieces. The 1st piece didnt bend --not sure why but its 95% under the cap at the bow --so Im not worried. The last piece ( about 6" in front of the transom) will bend no problem. Looking by eye you cant see the bend --but its there with a straightedge on it --only about 1/4" deep.
 

logan944t

Petty Officer 2nd Class
Joined
Jun 26, 2010
Messages
155
Re: Going foamless

Great idea putting a slight bend in the floor.


Thank you. The only issue might be the cap fitting again. There are 3 "walls" that stick down and meet the deck. The 2 just forward of the driver and passenger ( half width each) and the aft full width one that is a divider for the fuel tank and battery and covers the bilge.


Since Im gonna enclose and insulate the storage spaces that the forward walls are a part of, it wont be hard to shorten the walls to fit correctly. This area was storage with homemade plywood covers that trapped water. I want to turn them into 2 built in coolers. The aft live well is fairly small and the catfish here typically run upwards of 25" and the livewell definately wont fit even one unless I make it a fishstick first. Im also hoping to land sharks and they have to be cleaned as soon as possible to taste any good.

The aft wall needs to be replaced and strengthened since I plan to put a vertical seat back so a passenger can sit on the deck with their back against the cushion.

There is some evidence that there was a chair screwed to the fuel tank cover. I know there was a casting chair in the bow between the 2 storage places on a piece of plywood. The previous owner had used it to go fishing with just him and his young son and never had a third person aboard. Since this is a dual use boat ( fishing and getting out to the island with family) I need to set it up in a more usable way for both purposes.
 

logan944t

Petty Officer 2nd Class
Joined
Jun 26, 2010
Messages
155
Re: Going foamless

Just stopped by my local marine store to see if I could get the 2lb foam.


After repeating "pourable flotation foam" several times and assuring the counter guy that it existed--he found the stock number. It was even in stock--only in double the quantity I needed.


His price was about 3x what it is online.
 

logan944t

Petty Officer 2nd Class
Joined
Jun 26, 2010
Messages
155
Re: Going foamless

Ok --its been a while.


I finally got the deck installed, tabbed in and a layer of 1708 on top then an additional layer of 3/4 csm on top of that. I had pictures......but they seem to have vanished off my harddrive.


So on to the replacing the foam sides.

DSCF5910.jpg


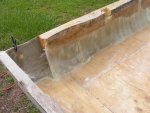
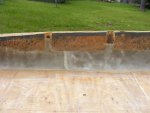
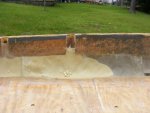
When I cut away the glass and foam on the sides to access the deck I left a strip of foam and glass around the top to act as a template for replacement. After tabbinb in the deck 12" on the outer hull, I glassed a section of 1708 to the old foam and the new deck--leaving a hollow cavity just above the deck.


DSCF5909.jpg


I left access tubes to pour the new 4 lb foam into.


DSCF5911.jpg


DSCF5912.jpg


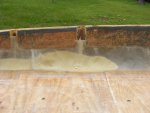
About 60 seconds post pour.


DSCF5918.jpg


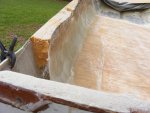
The foam creeps along the cavity and fills any spaces. I used the same technique for port and starboard sides.


The original glass sides were not flat or level or even the same thickness. Im assuming the factory just sprayed foam onto the sides and then glassed over what was there. While the way I did it ( using the glass as a form) has its drawbacks--but it looks better than factory and has a consistent thickness. The foams adhesive qualities I think also has some benefits.


The way that I had to do the last section by the transom was a bit different since I was going for strength and there is a lot of the cap that intrudes into the space so thickness was important. Instead of trying to use 1708 as a form --tacking it to the deck,transom and sides--I used a piece of waxed cardboard. I clamped it to the new sidewall and shaped it to fit until there were no gaps--then put a bead of plumbers putty all around it to seal and spaces. I poured the foam in --removed the cardboard--and glassed (1708) over it. Doing it this way I lost the adhesion of the foam to glass--- but Im hopng that the adhesion of the resin makes up for it.


If I had to do it over again I would have stripped ALL of the foam from the sides and just made a 1 piece form from the waxed board the length of the boat and then glassed over the whole thing.
 

logan944t

Petty Officer 2nd Class
Joined
Jun 26, 2010
Messages
155
Re: Going foamless

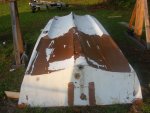
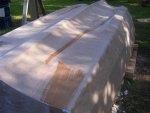
Finally got the hull flipped yesterday with the aid of the gantry, hoist and my son. I think its gained a little wieght since I first started this project.


DSCF5966.jpg


It looks like it was originally brown metallic flake and someone painted over it--and not to good since it is peeling off in large sections.

DSCF5963.jpg DSCF5964.jpgDSCF5965.jpg


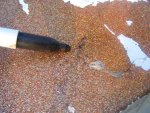
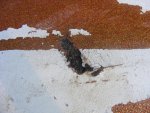
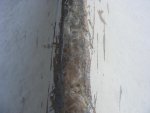
The first 2 pics are thru hull penetrations that I have to sand and fill. The last picture if of the raw parts of the keel where woven is exposed.


Im thinking the best way to fix these problems is to sand a large area out and then fill with a poly PB mix and then feather it into the surrounding area.

The keel will get poly PB as well -- but I want to lay a strip of 1708 about 5" on either side about 20" long and feather that into the existing hull.


What prep does the gelcoat need for paint beyond a roughing up ( 220?) and a rub down with acetone to get the paint to stick?


I am going to roll on a white paint for the bottom-- and yellow for the sides.
 

logan944t

Petty Officer 2nd Class
Joined
Jun 26, 2010
Messages
155
Re: Going foamless

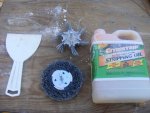
Ok I broke down this morning and started using a stripper. I tried a heavy duty kind first (methyl chloride?) and didnt really like it so I went to wal mart and got a citrus stripper.

The citrus stuff is working better than the other stuff and what it doesnt bubble up it softens.

I also have a abrasive pad ( its like a wire brush --but not wire) that goes into a drill that works excellent for taking the shine off of gelcoat. Im trying to leave gelcoat on and just remove the shine and this is working fantastically.


There are places on the bottom where the gelcoat is already gone-- just the brown flake is left and Im thinking thats the reason they painted the boat.
 

Woodonglass

Supreme Mariner
Joined
Dec 29, 2009
Messages
25,929
Re: Going foamless

Strip it, sand it, but only got to about 150 grit. On your Keel you should lay some CSM and some 1708 You'll need it for the strength of the glass due to abrasion. For large deep gouges in the hull I'd grind and use PB and some CSM and 1708 as well. Clean everything really will with acetone. For a final fairing material Resin with a bit of cabosil and a lot of glass bubbles makes a nice sandable mixture. Use about 1.5% MEKP so you will have a bit more working time.
 

logan944t

Petty Officer 2nd Class
Joined
Jun 26, 2010
Messages
155
Re: Going foamless

Anyone ever use BLP Mopoxy 2 part epoxy paint?


I was looking for enamel hardener at a local hardware store and the guy ( looked like Moses!) suggested Blp epoxy paint since all he had was Japon drier. Ive never seen this brand before but they seem to have quite a few types of marine and industrial paints and Moses said that its popular with boaters around here.


Does epoxy paint need a primer if its being used on dead metal flake?
 

logan944t

Petty Officer 2nd Class
Joined
Jun 26, 2010
Messages
155
Re: Going foamless

DSCF5974.jpg


This is the result of about 12 hours worth of work with


DSCF5975.jpg these tools. I got most of the gelcoat off because it was damaged and Im down to the metal flake layer.


I can now start to repair the keel, 3 holes and various gouges.

Still thinking about using the BLP Mopoxy primer and paint.
 
Top