Handi Cap Modification on trolling motor

wildmaninal

Lieutenant Commander
Joined
Jul 14, 2007
Messages
1,897
Re: Handi Cap Modification on trolling motor

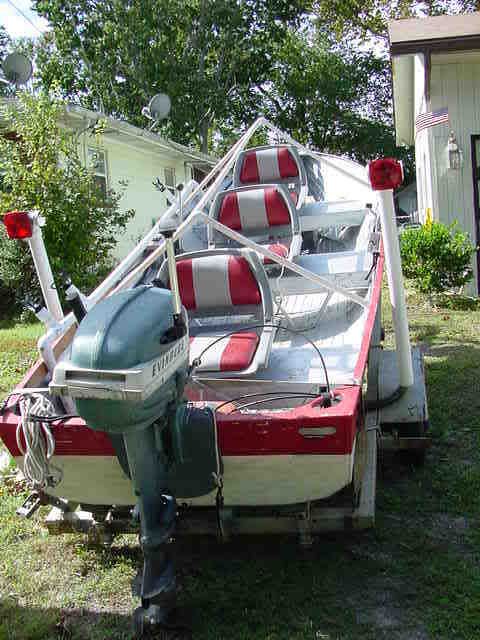
This is the type of seat I mentioned before that I would like to get for the stern and bow pedestals but in a maroon (that I haven't been able to find yet).

http://www.iboats.com/Wise_Deluxe_M...d.250639--list_time.1193451482--view_id.40569

I was sort of torn on the way I wanted to setup the trolling motor controls for the stern. The only way I can see doing this with what limited space I have back in that area I would probably be best off making it hand controlled back on the stern and mount it on the seat. Using a Toggle switch (like you mentioned) and a push button for activating the trolling motor prop. I would like to setup the bow with push buttons for a foot control not hand controlled. I bought some of the 12 awg wiring today $36 for 100ft, by the way it looks I might be using the same color for all the runs I got to do, just mark them. There is hardly any place around here that sells smaller roles. I only paid $25 for the last roll I bought a couple of months ago. Still got to get the switches.
 

tashasdaddy

Honorary Moderator Emeritus
Joined
Nov 11, 2005
Messages
51,019
Re: Handi Cap Modification on trolling motor

i have used those seats in 2 previous boats, and in my fishing boat at present. they made them with gray and maroon. watch ebay also as they come up there also,

MVC-905S-2.jpg
 

wildmaninal

Lieutenant Commander
Joined
Jul 14, 2007
Messages
1,897
Re: Handi Cap Modification on trolling motor

Alright I'll half to do that, I can deal with gray and maroon. I've been planning and drawing here nearly all along not even thinking about the 10 awg wire that I already have ran for the bow deck trolling motor plug in. The trolling motor its self will need 10 awg 30 amps that I already have ran to it. I don't know why I didn't think about the original trolling wires. Can't say that it throws a wrench in to my plans but it has me re thinking the wiring layout. Don't know if the plug I installed for the trolling motor during the earlier wiring project will be of any use or not. If nothing else I might end up having to use 10 awg wire run it from the bow to the stern for the stern toggle switch to activate the trolling motor prop this way I can still use the trolling motor plug in. Weather has me messed up (not talking about rain).
 

wildmaninal

Lieutenant Commander
Joined
Jul 14, 2007
Messages
1,897
Re: Handi Cap Modification on trolling motor

I can say one thing about the wiring on the trolling motor it is much more confusing then I thought it would be. I found out that a regular push button switch (horn switch) will not work for the stern to activate the prop for the trolling motor. Luckily I had a micro switch that was in the boat's storage compartment when I got it, I remembered leaving it in there, after testing the switch it tested good. It's just like the switch in the foot control, so that's going to be my stern switch. I found out I have a wire that was either cut or the past owner must of tried running another wire to the trolling motor its self from the foot control and didn't finish what he was doing. I don't know, all I know is that the trolling motor has been working fine. I will most likely have the wiring all done tomorrow (the 29th). Still waiting on the solenoid. I am thinking about adding another round plug to my bow control panel (like the trolling motor plug) adding one for the electric steering motor. Once again wire diagram revised.
http://s215.photobucket.com/albums/cc244/wildmaninal/?action=view&current=trollingmotorb.jpg
 

wildmaninal

Lieutenant Commander
Joined
Jul 14, 2007
Messages
1,897
Re: Handi Cap Modification on trolling motor

Got the cables ran through a hole in the front of the bow and ran to the electric steering motor that I got anchored to the inner hull under the cap of the boat. I left enough slack in the cables of course to let the trolling motor up or down. I got to find a rubber drummit to put around the cables to help fill/seal in the hole.
http://s215.photobucket.com/albums/cc244/wildmaninal/?action=view&current=Trollingmotor010.jpg
http://s215.photobucket.com/albums/cc244/wildmaninal/?action=view&current=Trollingmotor004.jpg
Busted the bilge/battery compartment door while working on the boat :(, I had it propped up because I have the boat facing up hill and the door fell down hard on top of the door prop and cracked it pretty bad. The worst thing is I got the fiberglass but I don't have the resin to fix the door.
Got a hole drilled for the new plug I plan on using to plug the steering motor switches into. The plug is really a round tow package/trailer light plug. It should be just right because it's a 4 wire plug and I need 2 power wires coming from the plug (added to the bow control panel) to the switches then 2 wire from the switches back to the plug and then to the solenoid. You can see the chrome plug pictured in the bottom right hand side of the picture.
http://s215.photobucket.com/albums/cc244/wildmaninal/?action=view&current=Trollingmotor006.jpg
Got the micro switch added for the stern to activate the trolling motor prop , works like a charm, got to drill a hole through the top of the dadgum door that I said got busted so I can run the wires through.
http://s215.photobucket.com/albums/cc244/wildmaninal/?action=view&current=Trollingmotor008.jpg
Got all the wires for the steering motor ran through the hull, but not hooked to anything yet. Marked any of the same color wires the best I could so it wont cause any confusion. Will half to add another 2 wire plug on the bow control panel for the micro push button switch ran from the stern, so it can feed into the bow micro push button switch.
 

tashasdaddy

Honorary Moderator Emeritus
Joined
Nov 11, 2005
Messages
51,019
Re: Handi Cap Modification on trolling motor

looks like you have it undercontrol
 

wildmaninal

Lieutenant Commander
Joined
Jul 14, 2007
Messages
1,897
Re: Handi Cap Modification on trolling motor

Yes if I can keep from breaking compartment doors like yesterday and nearly breaking my hand as I almost did earlier today I'll be alright :D, thank god I didn't break it, and thank god it wasn't my left hand that has tendinitis. Got a nice swelled spot on my hand from when the power drill got away from me. This is how not to work on a boat :D. I got the motor reversing solenoid in today, don't have it hooked yet. I bought a 6 wire plug (similar to the 4 wire that I mentioned before) to add to the pedestal base so I can plug the switches in and unplug them when removing the seat. We have a 1" drill bit that I was trying to drill out the rest of the hole I already have started but obviously the drill bit is worn. Hurt my hand trying to drill the base while it was fastened to the boat so I removed it and brought it to the drill press. I didn't have the 1" drill bit on the power drill at the time I hurt my hand. I still got to get the hole big enough to accommodate the plug, I tried a reamer and other types of bits but that metal is tough.
 

wildmaninal

Lieutenant Commander
Joined
Jul 14, 2007
Messages
1,897
Re: Handi Cap Modification on trolling motor

I went to connect the wrest of the wires to the motor reversing solenoid and I broke one of the stinking studs loose for the positive connection. So I had to take that apart and solder the stud back in, so far it works. I still got to find one more push button swith.

Now I have another problem the plastic pulley on the trolling motor broke were the eyelits of the cables connect to the pulley. I have thought about this before didn't know if the pulley would hold up or not. I drilled 2 holes in this plastic pulley and I plan on running one by one each cable through a carter pin or split pin and then inserting the key or pin into the the hole. Can't put the pin all the way through the pulley like I was going to do because the wires half to run through the pulley thus the wires would get tangled or twisted. I plan on putting the pin half way through the pulley to use it for attaching the cables to. I have also in mind to make a pulley out of metal, witch if this other plan fails I will probabley folow through with plan B. Using a 11/16 socket and 2 lock washers to make the spiral and welding the washers to the socket, anchoring the cables with a carter key.
Picture of the broken part.

http://s215.photobucket.com/albums/cc244/wildmaninal/?action=view&current=Trollingmotor014.jpg

My plan on how to fix it. (pictures are a little blury).
http://s215.photobucket.com/albums/cc244/wildmaninal/?action=view&current=Trollingmotor017.jpg
I might drill a hole beside the pin (that is sitting in the old hole) for the cable eye to sit in.
http://s215.photobucket.com/albums/cc244/wildmaninal/?action=view&current=Trollingmotor019.jpg
 

wildmaninal

Lieutenant Commander
Joined
Jul 14, 2007
Messages
1,897
Re: Handi Cap Modification on trolling motor

I made a metal pulley, couldn't get the plastic pulley to work without the bottom cable pulling the pin out. I'll half to cut the home made pulley down, I made it out of a 11/16 short socket, 2 lock washers, I used my wire welder to weld the washers on. So far it works but the cables are crossing one another and at times rubbing each other. This is turning into a Frankenstien trolling motor, if I end up making a custom cover to fit the top instead of putting Mercury back on it I'll probabley put Frankenstien Motor.

Pictures of the pulley I made. http://s215.photobucket.com/albums/cc244/wildmaninal/?action=view&current=Trollingmotorb-1.jpg

http://s215.photobucket.com/albums/cc244/wildmaninal/?action=view&current=Trollingmotora-1.jpg

http://s215.photobucket.com/albums/cc244/wildmaninal/?action=view&current=Trollingmotor-1.jpg
 

tashasdaddy

Honorary Moderator Emeritus
Joined
Nov 11, 2005
Messages
51,019
Re: Handi Cap Modification on trolling motor

can you fabricate a double pulley, one for each cable. that way the don't cross.
 

wildmaninal

Lieutenant Commander
Joined
Jul 14, 2007
Messages
1,897
Re: Handi Cap Modification on trolling motor

I could possibly do that. I got this one figured out though, were the cables mount I put the one cable (that attach?s to the top of the pulley) on the top side of the plate that holds the cables in the original slot and anchored it with a piece (that holds the throttle cable on) off of a push mower motor. I also welded a small tab to the back of the plate so it can't twist or turn. This corrected that cable problem. Now I'm back to square one because the pin (even though it was heavier), the pin that I had the bottom cable anchored to pulled out just like it did on the plastic pulley, but it worked for a longer period of time. I'm trying to figure out a way to anchor the cables solid to this metal pulley. The dremel tool I was going to use to detail the pulley kicked the bucket so my father volunteered to go get another on his lowes card, we have yet to do that. Out of curiosity I'm going to ask my brother if he can fabricate a pulley just like the plastic one but out of metal at his work place. I know an old man just up the road whom has a lathe but I don't know exactly how to use one and the man's health won't let him get out of the house any more. This situation has me feeling sort of down, I have such a big mess on the boat it aint even funny. I looked at the motor guide to see how it worked it actually has a better setup, only one big cable and I could probably use the electric window motor I'm using now but just the motor and spiral gear its self not the cable pulleys and gears inside of the top housing. I would like to stick with the mercury motor I have on the boat, it has more thrust. You don't think they sold metal replacement pulleys for the Mercury Thrust 2 do you? I haven't been able to find one on the internet thus far.
 

tashasdaddy

Honorary Moderator Emeritus
Joined
Nov 11, 2005
Messages
51,019
Re: Handi Cap Modification on trolling motor

mercurypartsexpress.com
 

wildmaninal

Lieutenant Commander
Joined
Jul 14, 2007
Messages
1,897
Re: Handi Cap Modification on trolling motor

I found the part and part numbers needed, I'm waiting on them to contact me back to see if this replacement part is made of metal. The only thing I can do if the replacement part is plastic, I might be able to find another model that has a metal coupling and drum control. After researching the Motor Guide description on another site the trolling motor sitting in my shed is a maximum 30lb thrust. I can almost deal with 30lbs of thrust if I end up swapping trolling motors. I don't plan on going fishing on a windy day anyhow. I've spent a few bucks on this project so I don't want to fail or quit it now. Every time I think I got something fixed on the rigging something else seems to fail, now the cable wont stay in place that I mentioned I moved to a higher spot, I have an idea on how to fix that now, but I'm ready for a break lol. I appreciate it once again.
 

wildmaninal

Lieutenant Commander
Joined
Jul 14, 2007
Messages
1,897
Re: Handi Cap Modification on trolling motor

Onward with plan B. The cable broke on the Mercury trolling motor, $44 plus shipping to replace that if I can't find a parts motor. Plus I haven't heard a response back from the other site about the other part. I changed the trolling motors out, I put the Motor Guide on the Mercury mounting bracket. I cut the head of the electric window motor off and placed it on the top end of the Motor Guide with the spiral (or cork screw) gear against the pinion gear. The motor doesn't seem to be strong enough to turn the trolling motor, but I may also have it in a bind. I loaded the track down with white lithium grease hoping this might help it. What gets me is the trolling motor turns slicker than snot with everything undone. I may half to find a way to boost the power on the motor or find a different motor to use. I got a 20 amp fuse running to the motor reversing solenoid and a 20 amp fuse running to the switches. How would I boost the power on the motor?
http://s215.photobucket.com/albums/cc244/wildmaninal/?action=view&current=Trollingmotor025.jpg

http://s215.photobucket.com/albums/cc244/wildmaninal/?action=view&current=Trollingmotor024.jpg

To give you an idea of what trolling motor I'm dealing with.

"http://trollingmotordepot.com/catalog/images/727.pdf"
 

wildmaninal

Lieutenant Commander
Joined
Jul 14, 2007
Messages
1,897
Re: Handi Cap Modification on trolling motor

TD I'm screwed here buddy. The motor I was going to use for the steering even though it still works the armature is burnt and some how has been grounded down. I thought I had another motor around but I have yet to find it. I heard back about the replacement part for the Mercury, and they do not have a replacement part made of metal. They do however have a few Mercury thruster 2s left over new in the box witch I thought was odd because they are older trolling motors, the man said they can make a very good deal on them if I was interested. He's supposed to be sending me pictures of the trolling motors. I appreciate the help along the way and hope that you can help if needed in the future. I'm going to half to find a solution if I want to continue on with this project. I'm also awaiting a local boat repair business to see if he might have a trolling motor to suite me for the modification.
 

tashasdaddy

Honorary Moderator Emeritus
Joined
Nov 11, 2005
Messages
51,019
Re: Handi Cap Modification on trolling motor

damn shame. we tried hard.
 

wildmaninal

Lieutenant Commander
Joined
Jul 14, 2007
Messages
1,897
Re: Handi Cap Modification on trolling motor

I found a solution, I finally found the other window motor. I took the dremal and ground the teeth down on this piece (original piece from the window motor) to mesh with the pinion gear. This piece also locks the plastic gear down that runs against the worm or spiral gear of the motor.

http://s215.photobucket.com/albums/cc244/wildmaninal/?action=view&current=Trollingmotorz.jpg

I took the complete motor and drilled a hole in the center of the round head part (were the pulley and gears are located).

http://s215.photobucket.com/albums/cc244/wildmaninal/?action=view&current=Trollingmotory.jpg

This is the picture (below) of the motor temporarily installed, I used a wire twisted it tight to anchor it down lol until I get it permanently mounted. I may half to replace the motor one more time because it will not go both directions without a fight. I have a feeling that since the shaft of the motor was able to move a little bit it helped but the armature up, because in the original housing the shaft would not move. Right now the motor turns in a complete 360 degree without letting me reverse it, I can't hook it up like that because the wires will twist comming out of the lower unit.

http://s215.photobucket.com/albums/cc244/wildmaninal/?action=view&current=Trollingmotorx.jpg
 

tashasdaddy

Honorary Moderator Emeritus
Joined
Nov 11, 2005
Messages
51,019
Re: Handi Cap Modification on trolling motor

sound like you have a drivers side motor that has the automatic all the way down feature. will it stop when going the other direction?
 
Top