Lund Nisswa Restoration

erikgreen

Captain
Joined
Jan 8, 2007
Messages
3,105
Re: Lund Nisswa Restoration

On the pic thing, you need to resize the pics to something smaller than the posting guidelines. I usually use about 640x480 myself.

For epoxy, I use the pumps for small quantities. Once you prime them, there's not a lot of sputtering or bubbles. My hardener is so thick though that I hate pumping it.

I usually use a kitchen scale and measure by weight. I put a plastic cup on and measure resin, dump it in the mixing cup, put in 1/4 as much hardener, dump it in the mixing cup and stir. Much faster than pumping. The caveat is that some epoxies might require mixing by volume instead of weight.

If that's the case just get a couple plastic cups with volume markings on the side, and pour up to the right mark, one cup for resin and one for hardener. Then make sure you scrape the bottom and sides of the cup to get all the liquid out.

A lot of people here seem pretty positive on PL poly lately... I'm going to try it myself to use to hold my deck on.

Erik
 

lundnisswa

Petty Officer 1st Class
Joined
Mar 2, 2008
Messages
245
Re: Lund Nisswa Restoration

Back Track a bit.
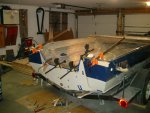
Yesterday I spent the day confirming the boat hull is stabilized and level and the running surface is true/straight, ended up putting in two extra 9 foot bunks under the boat to help firm it up, so there are now four nine foot bunks supporting the hull, it was really flexing alot when in there working, so the boat is now as straight as I can get it. Hope it runs straight in the water when all done.

Lund
 

drewmitch44

Lieutenant Commander
Joined
Jun 26, 2005
Messages
1,749
Re: Lund Nisswa Restoration

No its PL is the brand name. And its "construction adhesive". Its 100% polyureathane. http://www.amazon.com/Henkel-10-2-Ounce-Polyurethane-Construction-P73948125/dp/B0002YVJG8 This is what the tube looks like. Its not like pl6000 or whatever you said. Its PL brand, Polyurethane Construction Adhesive. Its at Lowes in the Paint department where the silly-cone caulk is. Id use it and i did. And im going to use it for my stringers bedding too.
 

drewmitch44

Lieutenant Commander
Joined
Jun 26, 2005
Messages
1,749
Re: Lund Nisswa Restoration

Here it is at the lowes site.... http://www.lowes.com/lowes/lkn?action=productDetail&productId=100575-69-P73948125 . I really think its great and seems like a lot of others do also. And its Polyurethane and thats great!!!! I have really done some tests on it and i wish i had pics of the tests i did. Thats why i will swear by it. You got to rough up the surfaces with sanding or a grinder though. But you got to do that with bonding with epoxy, polyresin or whatever other method you use also. This was just a lot easier and i think it is stronger. I got it on my hands and it took a week to get off!!! So wear gloves if you use your fingers to work it in!!
 

lundnisswa

Petty Officer 1st Class
Joined
Mar 2, 2008
Messages
245
Re: Lund Nisswa Restoration

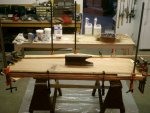
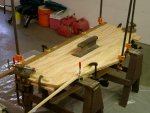
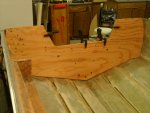
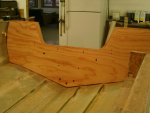
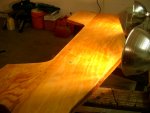
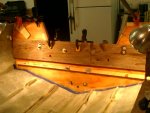
Took every clamp I have, but the Transom halves are together now. Awaiting a 24 hour cure now, do I really have to wait that long?

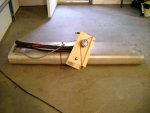
My fuel tank was super Dirty and oily, so I took it outside, scrubbed it with goof off, looks pretty now!

Question; after the Transom halves are cured, do I want to coat all sides with resin/hardner, or just the end grains?

Lund
 

Attachments

  • IMGP2824.JPG
    IMGP2824.JPG
    47.6 KB · Views: 0
  • IMGP2822.JPG
    IMGP2822.JPG
    44.8 KB · Views: 0
  • IMGP2823.JPG
    IMGP2823.JPG
    43.6 KB · Views: 0

erikgreen

Captain
Joined
Jan 8, 2007
Messages
3,105
Re: Lund Nisswa Restoration

Looks good.... do wait 24 hours before sanding/grinding, otherwise you'll gum up your discs. I don't know whether epoxy will stick to wet PL better than dry, you'll have to tell us :)

Yes, coat all sides... you need to keep water from ever touching the wood.

Erik
 

Coors

Captain
Joined
Dec 8, 2006
Messages
3,367
Re: Lund Nisswa Restoration

Encase it all with cloth, as any resin has no strength without it. It will crack, and not be sealed.
Light cloth is good.
 

lundnisswa

Petty Officer 1st Class
Joined
Mar 2, 2008
Messages
245
Re: Lund Nisswa Restoration

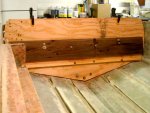
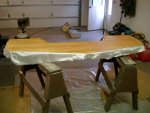
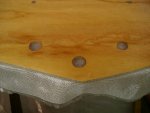
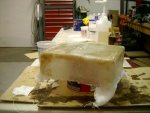
Sort of Scary drilling 13 holes in the nice new Transom you have built, and glued together, but did it any way, one at a time, inserting the correct size Bolt in each hole as I went.

Then it was time to cut out the Splash well, spent the rest of the day tapering the top edge so the Transom Cap will fit over it, the new Transom is 1/8" Thicker than original and I am going to encase it in cloth so that will add a bit more Thickness, all done-ready to glass up.
Now I can get to waterproofing it by encasing with Resin/Cloth.

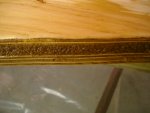
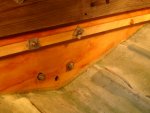
I know, a bit of a gap in spots on the bottom where it meets the hull, but thats the way it turned out, nothing some peanut butter cant conceal, then glass her to the hull.


Lund
 

Attachments

  • IMGP2828.JPG
    IMGP2828.JPG
    56.8 KB · Views: 0
  • IMGP2831.JPG
    IMGP2831.JPG
    44.3 KB · Views: 0
  • IMGP2836.JPG
    IMGP2836.JPG
    39.8 KB · Views: 0

erikgreen

Captain
Joined
Jan 8, 2007
Messages
3,105
Re: Lund Nisswa Restoration

I'd call that a good fit, and a nice job.

The cool thing about repairing boats with epoxy and peanut butter putty is that a small gap becomes an advantage... it gives space for a bit more putty, which improves the strength of the joint (to a point).

Good job, keep going!

Erik
 

drewmitch44

Lieutenant Commander
Joined
Jun 26, 2005
Messages
1,749
Re: Lund Nisswa Restoration

What i did when i put the wood in is use 2 tubes of that PL for the bottom where that gap is you got. I had the same thing when i did mine. The PL filled it in nicely. I used a lot of it so im giving it 2 days to completely cure. How did it go anyways using that PL to seal the 2 halvs together? PM me if you want. Anyways i used PL also on the outer skin to the wood to glue it together. I used the holes that i cut in the wood where the splashwell drains and where the motor mount holes and the hooks on the back of the transom are. I used all of these with big washers as clamps kinda to hold the wood tightly to the outer skin that way i didnt get any air bubbles. PM me and let me know how you are doing. You are about in the same place that i am on my rebuild. My completion date keeps getting pushed back but they say "the more you gring the more you find!" that has held true in my case. Its a good thing that i enjoy workin on her or id be pissed!
 

lundnisswa

Petty Officer 1st Class
Joined
Mar 2, 2008
Messages
245
Re: Lund Nisswa Restoration

My first attempt ever at applying Cloth/Resin to an object, I did the back of the transom that joins the boat with 6oz cloth, the flat surface went really good, but when I got to where I was gonna wrap down around the edge things got a bit dicey, kept wanting to fray and then not lay there, it did not like taking a corner, well I did my best and it was all in all great practice.

Oh and I got to practice a fillet too, I used a 12" disposable cake decorator bag, it went on like caulking, just had to touch it up a bit in spots with a bondo spreader.
Lund
 

Attachments

  • IMGP2842.JPG
    IMGP2842.JPG
    44.4 KB · Views: 0
  • IMGP2843.JPG
    IMGP2843.JPG
    41.8 KB · Views: 0
  • IMGP2838.JPG
    IMGP2838.JPG
    36.7 KB · Views: 0
  • IMGP2837.JPG
    IMGP2837.JPG
    43.9 KB · Views: 0

lundnisswa

Petty Officer 1st Class
Joined
Mar 2, 2008
Messages
245
Re: Lund Nisswa Restoration

Had to take a day off yesterday from Boat building, work got in the way.

Anyway, the back side of the Transom had the chance to cure anyway, upon close evaluation I soon figured out that where I had attempted to make the turn down the short edge of the Transom had indeed bubbled, so I got an "F" on that, but I am happy to say that the Flat surface turned out great, so I ground off the short edge bubbles.

Today I did the other side of the transom, I guess I try to learn form my mistakes, it is now curing, so we will see, I did not attempt to take the sharp turn this time, I just left the extra fabric hanging, will trim and sand it off.

So How in the world do I do that short edge????
 

Attachments

  • IMGP2855.JPG
    IMGP2855.JPG
    50.7 KB · Views: 0
  • IMGP2859.JPG
    IMGP2859.JPG
    43.8 KB · Views: 0

lundnisswa

Petty Officer 1st Class
Joined
Mar 2, 2008
Messages
245
Re: Lund Nisswa Restoration

Keel Patch

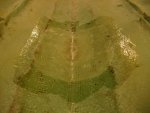
The previously mentioned Keel Rub through, I ground that sucker down until I did not dare grind any more, I actually was through the hull and down to that keel guard which I left attached for now so I would have a backing for the Patch.
Once again, I did my best at this by making three patches of 1708, each 2inches larger than the next, acetoned the area thoroughly-let it dry and applied the patches, man is that 1708 thick compared to the 6 oz I had been using, and it drinks Resin, it was actually hard to get transparent, then when all done some bubbles started to form, so I had those bubble rollers and it pushed them out pretty well.
If not good enough of a patch job on the inside I can always grind it back off, I am also going to put a patch on the exterior.

Had some left over Resin, so I mixed up a small batch of milled fibers in a small cup, very thick, hard to do but I sucked it up into a turkey injector, I had previously prepped some small Transom bolt holes from Transducer mounts, with tape on the outside- I injected the holes from in the boat, hope that works.

OK, let me know if I goofed up that patch, I will grind her back off.

Lund
 

Attachments

  • IMGP2849.JPG
    IMGP2849.JPG
    49.7 KB · Views: 0
  • IMGP2857.JPG
    IMGP2857.JPG
    43.5 KB · Views: 0

lundnisswa

Petty Officer 1st Class
Joined
Mar 2, 2008
Messages
245
Re: Lund Nisswa Restoration

OK, call me crazy.

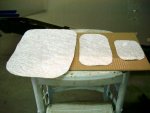
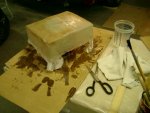
In my practicing of fiberglassing I decided to attempt to build my own battery tray with left-over scraps and resin from each task.

I lined a cardboard box with some slick tape really good, layed up a bunch of scrap in there and much to my surprise it actually worked as a release, came right out of the mold, not astitch of tape or cardboard stuck to it.

So now I am adding more scrap as I go, and of course grinding and acetone prior to each glassing session.

Will cut it off to desired height when all done, sand it good and paint.

The brown stuff in there is some left over peanut butter I mixed with left over resin, figured it wouldn't hurt anything, hate to waste that resin, that is some pricey stuff.

Lund
 

Attachments

  • IMGP2860.JPG
    IMGP2860.JPG
    56.4 KB · Views: 0
  • IMGP2861.JPG
    IMGP2861.JPG
    44.2 KB · Views: 0

erikgreen

Captain
Joined
Jan 8, 2007
Messages
3,105
Re: Lund Nisswa Restoration

Sweet. Trying a mold project while you're working on the boat. A man after my own heart.

It's easier to mold fiberglass than most people think, at least the simpler shapes. It gets a little harder when you do more complex parts or you need to start waxing/prepping your mold... I'm going to try molding a few things this summer, got myself some mold release wax and PVA.

Looks good so far... remember to keep a few scraps around for the odd patch here and there, and in case you want to mix some roving into putty sometime... the biaxial pulls apart very neatly.

Erik
 

drewmitch44

Lieutenant Commander
Joined
Jun 26, 2005
Messages
1,749
Re: Lund Nisswa Restoration

Where did you buy your resin? Just curious.
 

lundnisswa

Petty Officer 1st Class
Joined
Mar 2, 2008
Messages
245
Re: Lund Nisswa Restoration

Ondarvr, I got it~Morse Code.

-..

Lund
 

lundnisswa

Petty Officer 1st Class
Joined
Mar 2, 2008
Messages
245
Re: Lund Nisswa Restoration

Transom was encased/waterproofed with resin/cloth.

Transom installed tonight using PL, all 13 through hull fittings even lined up. Oozed out the bottom nicely, and out the top.
24 hours, clamps come off, might wait 48.

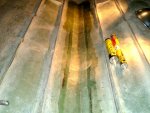
Also put down a strip of 1708 today on inner keel, the length of the boat.

Next up, stringers.
Lund
 

Attachments

  • IMGP2868.JPG
    IMGP2868.JPG
    49.2 KB · Views: 0
  • IMGP2869.JPG
    IMGP2869.JPG
    47.7 KB · Views: 0
  • IMGP2871.JPG
    IMGP2871.JPG
    46.2 KB · Views: 0
  • IMGP2874.JPG
    IMGP2874.JPG
    45.5 KB · Views: 0
  • IMGP2865.JPG
    IMGP2865.JPG
    62.4 KB · Views: 0

drewmitch44

Lieutenant Commander
Joined
Jun 26, 2005
Messages
1,749
Re: Lund Nisswa Restoration

That looks really great! Looks like the wood fit in there perfectally. Great job!
 
Top