New member Richline Tin Restoration

Watermann

Starmada Splash of the Year 2014
Joined
Jan 12, 2013
Messages
13,822
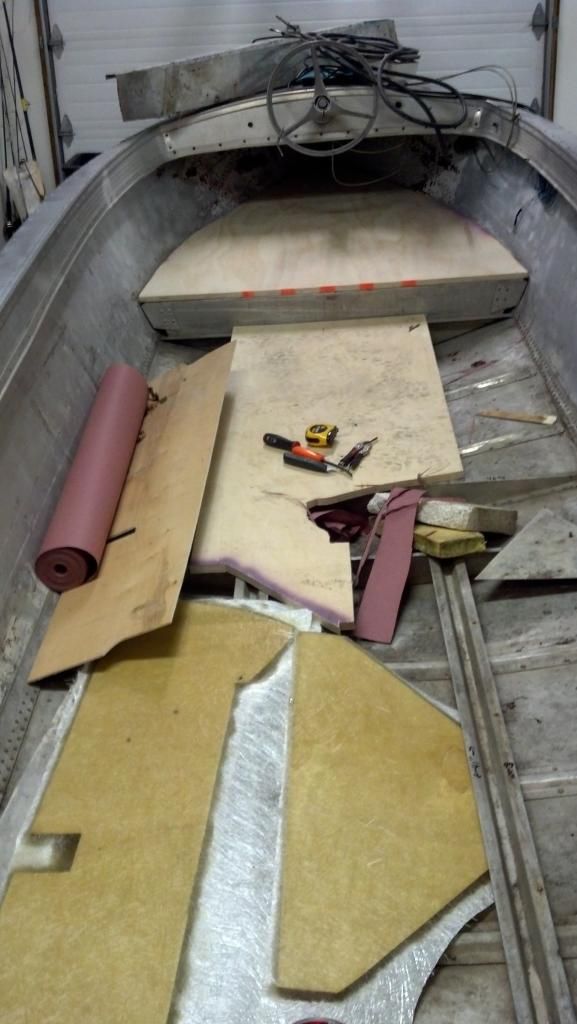
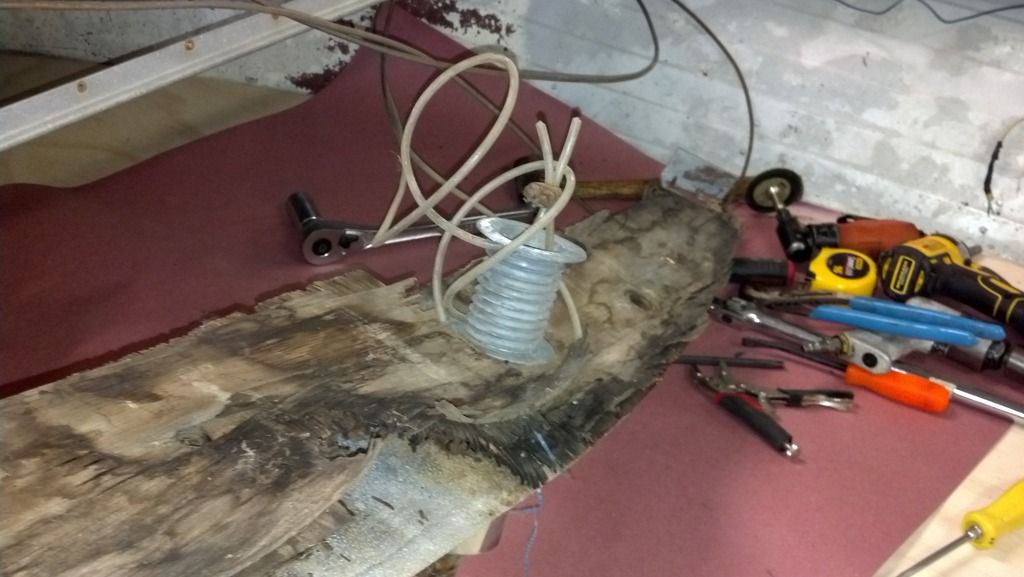
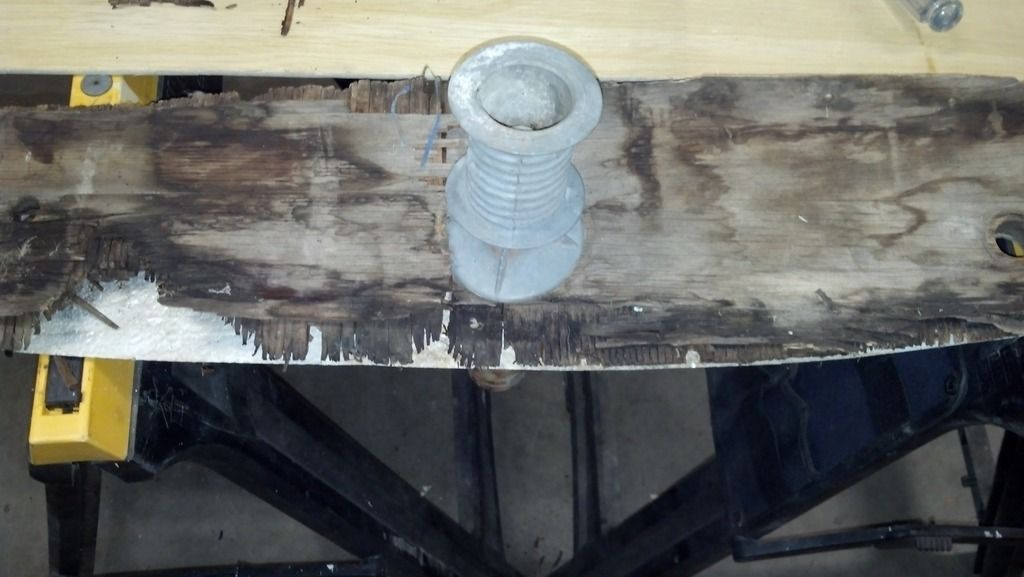
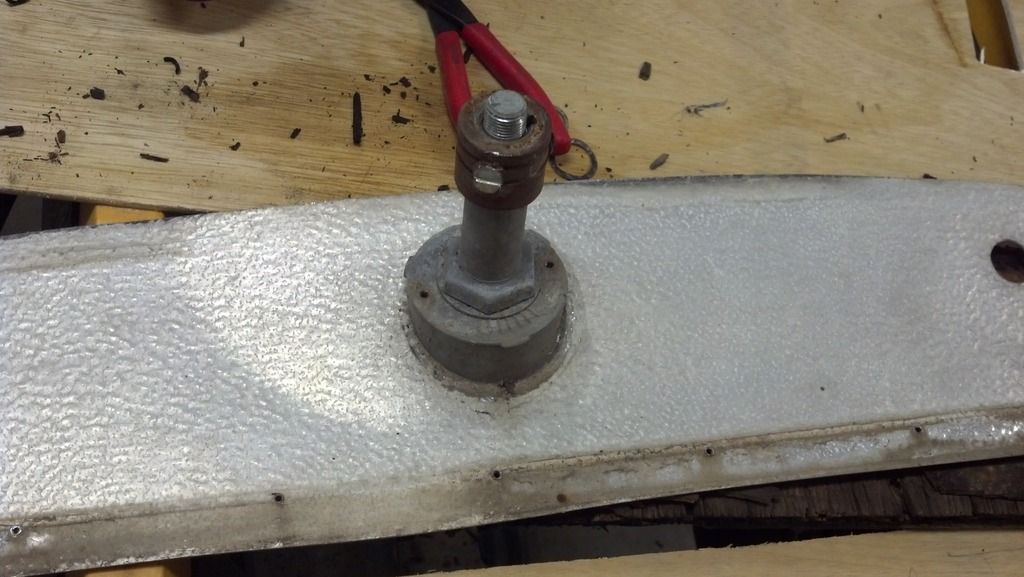
Nice to have templates and not mulch that's for sure. Yeah that old styrofoam is not good, even if it looks good now, how about in a few years, 10 years? Closed cell high density foam boards are the way to go.

That wally dog looks tasty!
 

jigngrub

Fleet Admiral
Joined
Mar 19, 2011
Messages
8,155
I have a concern with my CSM application. After it cured I used a jigsaw to trim off the overhang. It appears as though the glass fractured a little bit due to the fast speed of the jigsaw and 'catching' on the glass and didn't stay bonded at the edge (lifted a little bit it seems).

That's just one of a list of problems with working with polyester resin. The resin kicks before it penetrates the wood well, unlike an epoxy resin that takes longer to set and cure giving the resin more time to penetrate the wood.

Other problems that you have encountered but probably aren't aware of is that stench. That stink as you call it is noxious fumes that can cause health problems with prolonged exposure, the least of which is a respiratory infection with much more serious health problems. That stink is also because those fumes are flammable and could make your house explode like a meth lab. This is why you should only use poly resin in a well ventilated area and wear an approved respirator.
 

Jigginglow

Petty Officer 2nd Class
Joined
Dec 27, 2014
Messages
106
That's just one of a list of problems with working with polyester resin. The resin kicks before it penetrates the wood well, unlike an epoxy resin that takes longer to set and cure giving the resin more time to penetrate the wood.

Other problems that you have encountered but probably aren't aware of is that stench. That stink as you call it is noxious fumes that can cause health problems with prolonged exposure, the least of which is a respiratory infection with much more serious health problems. That stink is also because those fumes are flammable and could make your house explode like a meth lab. This is why you should only use poly resin in a well ventilated area and wear an approved respirator.

I have a whole new level of respect for this process now that I've experienced it. I think I was a little naive to the toxic properties that you describe. While I did wear a respirator during the application process in this very confined space I did remove it a short while later without properly ventilating the area. I was more concerned about losing the heat in the room than anything I guess. I will say that my throat has been plenty inflamed and it is currently 3 days later. I will not be continuing on with this in my garage for this reason. Not to mention the fact I had an open flame in the garage while doing this. This was a pretty careless strategy I participated in. Thank you for emphasizing these things to me. I will shape up now.
 

Jigginglow

Petty Officer 2nd Class
Joined
Dec 27, 2014
Messages
106
I thought I could make some progress this weekend but fell short of my goal. I made a pattern for the upper deck so I could avoid the seam that was in the original install.
image.jpg2_9.jpg

The underside of the old deck held a clue of what the old factory color looked like.
image.jpg1_11.jpg

image.jpg3_6.jpg

This is where the progress halted. I began to cut around the pattern I made and quickly found out my jigsaw blade had met its maker after I last used it to trim some glass overhang. To be continued after I go to town for more supplies.....

image.jpg4_3.jpg
 

Jigginglow

Petty Officer 2nd Class
Joined
Dec 27, 2014
Messages
106
image.jpg1_12.jpg


image.jpg2_10.jpg


Ice fishing season is soon behind us so took some time off and tried our hand at some perch and walleye fishing at LOW.

image.jpg3_7.jpg
 

Jigginglow

Petty Officer 2nd Class
Joined
Dec 27, 2014
Messages
106
Got the forward deck cut and fitted. Making steady progress. I have to wait for warmer weather to complete the next phase of laying my glass. I've had enough of doing it in a confined space with very little ventilation.
image.jpg1_13.jpg

image.jpg2_11.jpg


image.jpg3_8.jpg
 

Watermann

Starmada Splash of the Year 2014
Joined
Jan 12, 2013
Messages
13,822
:Coming right along :encouragement: once the decking is all in things start to come back together pretty quick,
 

jigngrub

Fleet Admiral
Joined
Mar 19, 2011
Messages
8,155
Next time do yourself a favor and use the epoxy resin instead of the poly resin and cloth. The epoxy isn't flammable no does it have noxious fumes and is worked with easily indoors. It has a very low odor and isn't really that noticeable.

Most people think they're saving lots of money using poly instead of epoxy, but the truth is that the epoxy is only $5 a gallon more. $5 a gallon more is worth not having to mess with the glass cloth or matt, not having to work with a flammable mixture, and not having your house filled with noxious fumes. The epoxy also penetrates the wood better and you'll get more square feet of coverage from a gallon because you can use thinner coats.
 

Jigginglow

Petty Officer 2nd Class
Joined
Dec 27, 2014
Messages
106
It was being problematic to get the wheel off so I improvised. I'm having trouble pasting multiple pics so this will have to do.
image.jpg11.jpg
 

Jigginglow

Petty Officer 2nd Class
Joined
Dec 27, 2014
Messages
106
Can someone help me figure out how to separate this mechanism so I can pull the tin off for my template? The thing has to separate somehow but the Norwegian in me isn't comprehending.
image.jpg10_1.jpg
 

Woodonglass

Supreme Mariner
Joined
Dec 29, 2009
Messages
25,929
if you look up inside of the cable race on the backside there will be an interior snap ring like this...
At least there was on mine, and it looks exactly like yours. You need special snap ring pliers to remove it. HF sells em for $4.00 bucks.
 
Last edited:

Watermann

Starmada Splash of the Year 2014
Joined
Jan 12, 2013
Messages
13,822
I take it thats the center piece which has the woodruff key inside it. Obviously you're replacing that helm so I would take a couple of pipe wrenches or a big crescent on the nut below and the pipe wrench on the piece with the woodruff and twist it apart.
 

Jigginglow

Petty Officer 2nd Class
Joined
Dec 27, 2014
Messages
106
Computer is going wacko. Here is the other side I intended to say. I pulled a snap ring off the other side but that still doesn't look like it will separate it enough to pull it through the hole in the tin.
image.jpg1_16.jpg
 

Jigginglow

Petty Officer 2nd Class
Joined
Dec 27, 2014
Messages
106
Wood and Water, I see your posts now. I'll take a closer look. Yes, the last pic shown is the key way side. Thanks for the help.
 

Jigginglow

Petty Officer 2nd Class
Joined
Dec 27, 2014
Messages
106
Here is the entire piece. Getting the big wrenches out now.....
l
image.jpg1_17.jpg
 

Woodonglass

Supreme Mariner
Joined
Dec 29, 2009
Messages
25,929
That Brass looking ferrule is keyed and slipped on a tapered shaft. I had to HEAT mine with a propane torch and then use a BF Hammer to BEAT it off with a flat nosed punch from the opposite side. It WAS cantankerous FOR SURE!!! It was a VERY FRUSTRATING PROCESS!!!! I think I used Liquid Wrench Too!!!
 

Jigginglow

Petty Officer 2nd Class
Joined
Dec 27, 2014
Messages
106
Wood,

As suggested some heat,a punch, BFH, Blaster penetrating oil, and some Norwegian anger persuaded it off.......thanks man!!!!!


image.jpg1_18.jpg
 
Top