No fuel on 120 (2.5l)

acicomp

Seaman Apprentice
Joined
Apr 7, 2016
Messages
44
No Title

Here is my tank fitting...
 

Attachments

  • photo241642.JPG
    photo241642.JPG
    192.3 KB · Views: 0

alldodge

Moderator
Staff member
Joined
Mar 8, 2009
Messages
42,631
No issue, just like my tank but mine are welded. Just remove the barbed fitting and install an anti-siphon valve. My guess is previous owner removed it because it was hanging
 

fishrdan

Admiral
Joined
Jan 25, 2008
Messages
6,989
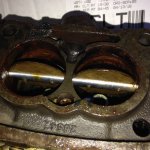
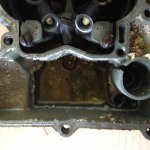
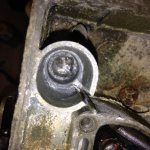
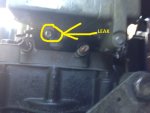
I doubt the fuel pump lobe wiped off the cam, much less pressure on the fuel pump arm than a lifter. If in doubt, pull the pump and look in the block.

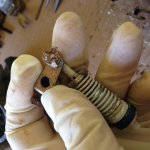
Was your new pump same as the old, filter on top vs filter on bottom. They are not interchangeable (found out the hard way). Was this a brand spankin' new pump, and a "marine" pump and not "automotive"?

Check all of your hoses and connections closely as a small air leak could cause the fuel system to not prime, it will suck air instead. All the rubber lines should be double clamped if they are not already, clock the clamps 180* apart.

Mentioned already, but, hook up a separate tank to the pump inlet and disconnect the carb line, then crank the engine to see if the pump pulls/pushes fuel. Troubleshoot it one step at a time. If the pump isn't pumping....
 
Last edited:

acicomp

Seaman Apprentice
Joined
Apr 7, 2016
Messages
44
No Title

Well... I have determined that I definitely have gas making it to the carb and it's definitely getting in the carb. BUT... It's obviously not getting through the carb. I picked up the rebuild kit from Napa today (Sierra part #) and I just pulled the carb off. Without it even being apart, I can already tell a rebuild was in order according to some of the rust and gunk all over the internals. All I can do now is cross my fingers and hope for the best with the rebuild. I've watched a lot of videos on the Rochester and pulled up a pretty good picture diary from another site. This is my first full rebuild besides small engines. Looks like the old can of Berryman will be coming out between now and the morning...
 

Attachments

  • photo241735.JPG
    photo241735.JPG
    167.6 KB · Views: 0
  • photo241736.JPG
    photo241736.JPG
    146.7 KB · Views: 1

alldodge

Moderator
Staff member
Joined
Mar 8, 2009
Messages
42,631
Oh yes, that needs some cleaning. If you posted this a first we would have said something much sooner
fetch
 

acicomp

Seaman Apprentice
Joined
Apr 7, 2016
Messages
44
It's been a progression to get to this point. First was getting spark/fire back... Then came getting the fuel to the carb... Now to get fuel through the carb... I'm going through this thing one step at a time to make sure it's good to go. I apologize for not sending this pic sooner, but this is the first time I've been this far to actually know I actually had gas to the carb. I'll break it down in the morning and drop it in the dip to soak for a while.
 

acicomp

Seaman Apprentice
Joined
Apr 7, 2016
Messages
44
No Title

I got is all disassembled today and have been slowly cleaning parts through the day. I dipped off and on, per the directions on the Berryman Chem Dip can so I wouldn't turn it all black. I've attached a few pics of what it looked like when I opened it up today. Not bad for "Water ready once you get it registered." Yes, that was in the original write-up on the ad for the boat. I have the parts rotating now in a little cheap HF Ultrasonic Cleaner mixed with some Simple Green Pro HD. Not sure if you can tell from the pic, but the jets were pretty much hidden with all the junk in there. Lesson of the day... (Beyond many others) ALWAYS keep your fuel system treated properly.
 

Attachments

  • photo241814.JPG
    photo241814.JPG
    127.4 KB · Views: 0
  • photo241815.JPG
    photo241815.JPG
    129.3 KB · Views: 0
  • photo241816.JPG
    photo241816.JPG
    159.8 KB · Views: 0

fishrdan

Admiral
Joined
Jan 25, 2008
Messages
6,989
WOW, she's a chunky carb.

Hope the cleaning goes well and it runs good after the rebuild.

With all that crud and corrosion, you're going to need to pay extra close attention to all the little passages and make sure they are squeaky clean.
 

acicomp

Seaman Apprentice
Joined
Apr 7, 2016
Messages
44
I've scrubbed and chem dipped and scrubbed and ultrasonic dipped and scrubbed some more. As far as I can tell, the passages are all open now. I'll reassemble it in the morning and see what happens. Worst case is the carb may have been too far gone and I have to buy another one. Or at least the float bowl if I can find one.
 

fishrdan

Admiral
Joined
Jan 25, 2008
Messages
6,989
Try running a fine wire through all the tiny passages to make sure all the crud is knocked loose. Not aggressive enough to widen the opening, but enough the scrape the sides. I grab my big ol' cheap wire brush, pluck out a cluster of wires, then use one of the wires to clean the passages.
 

acicomp

Seaman Apprentice
Joined
Apr 7, 2016
Messages
44
Well she's running now!! Now to ask the more detailed questions... The service manual was sort of vague, so I figured I might ask some carb gurus... What is the simplest and most straight forward way to make sure the carb is tuned properly? By that, what is the best way to set the fast idle cam screw in relation to the to two idle mix screws? I still have to tweak the choke a bit as it's not opening enough yet, but she's coming along! Thanks for all the help!
 

alldodge

Moderator
Staff member
Joined
Mar 8, 2009
Messages
42,631
Well she's running now!! Now to ask the more detailed questions... The service manual was sort of vague, so I figured I might ask some carb gurus... What is the simplest and most straight forward way to make sure the carb is tuned properly?

With motor running around 700 rpm, turn the idle screw in a little at a time until the motor starts to stumble/misfire. Turn it back out 1/4 turn. Idle circuit is just for idle up to about 1500 rpm.

By that, what is the best way to set the fast idle cam screw in relation to the to two idle mix screws?

If you have a fast idle cam on that carb, remove the carb and go get a marine carb.

I still have to tweak the choke a bit as it's not opening enough yet, but she's coming along! Thanks for all the help!

With a cold motor, adjust the choke so that it closes down with a 1/8 inch gap at the top.
 

acicomp

Seaman Apprentice
Joined
Apr 7, 2016
Messages
44
Thanks for the input. I pulled the part number from the carb (7043183) and have looked at several sites with the same Rochester carb and they all seem to have the fast idle cam. I just double checked the Mercruiser parts manual as well and it also lists the Fast Idle Cam. The service manual calls it the idle cam, however, I think it serves the same purpose. I think the piece I missed on tuning was to disconnect the throttle cable in order to set the idle to 700rpms. Once set to 700rpms, then the idle mix screws are adjusted. I'll see if I can get some time to look again tomorrow.

It looks like I'm going to have to pull it back off. I noticed a leak in the gasket just above the idle mix screws so I need to pull it and double check that gasket before I move forward.
 

fishrdan

Admiral
Joined
Jan 25, 2008
Messages
6,989
You're not going to get a good tune on the carb until the boat is: in the water, engine warmed up, and idling "in gear". This is when you want to make the final adjustments to get a smooth idle at 650-700RPM, or what every your idle RPM spec is.

On land shoot for 750RPM, then (as AD said) turn in one idle mixture screw slowly until the RPM's drop off slightly, engine stumbles, then turn it out a bit, do the same with the other idle mixture screw. You'll most likely need to adjust the idle speed screw after adjusting the idle mixture screws, and also go back over both idle screws a couple of times. Final adjustment needs to be made in the water, for best idle.
 

acicomp

Seaman Apprentice
Joined
Apr 7, 2016
Messages
44
No Title

Well, I have pulled the carb back off thinking I may have had a gasket leaking. I located the leak and it's not a gasket. I have attached an image to show where it's leaking. It looks like it's actually leaking from the small ball shaped area on the carb just above the idle mix screws. For all you experienced carb folks... Is this repairable or should I go ahead and plan to locate another carb?
 

Attachments

  • photo242047.JPG
    photo242047.JPG
    82.9 KB · Views: 0

acicomp

Seaman Apprentice
Joined
Apr 7, 2016
Messages
44
I had a guy recommend I use epoxy to repair the leak... I just couldn't come to trust the life of my family and friends to an epoxy repair on an external carb leak, so I called my local marine repair shop today. As luck would have it, they had a used carb in stock and they are going to have it rebuilt and ready in the morning for me to pick up.
 

fishrdan

Admiral
Joined
Jan 25, 2008
Messages
6,989
Probably could have whacked that plug a couple of times to re-seat it, spread it out a bit, but agree that a fuel leak is nothing to be messing around with on an I/O boat. I wouldn't trust epoxy/JB Weld on a carb full of fuel either, lots of other things, but not that place
 

acicomp

Seaman Apprentice
Joined
Apr 7, 2016
Messages
44
As it turns out, it was the wrong carb. The one they had over at the shop had the vacuum operated choke instead of the climate controlled choke. I am back to the search for one again.
 
Top