Looking really really good. I’m going to have to remember that trick about hanging the carpet above the boat.
with the 3M 77, do you have to spray both sides of material or only the wood? If I recall, that’s stuff doesn’t have a really thick build. I’m surprised people are using it for this purpose, but if it works, why not?
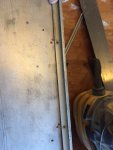
also, how are you handling the flooring at the ends of plywood? Are you simply trimming off flush or are you folding it over the sides? I’ve never worked with this stuff before so I don’t know how easy it is to fold and manipulate and I have to do mine this winter. I noticed a lot of new boats have flooring panels that are screwed down after the flooring is adhered to the plywood segments. I’d rather do what you’re doing. I don’t want screwheads all over the place not only for looks but compromising the flooring.
I started spraying both sides about half way, but that was because of how it was just a bit wider than the floor and started to buckle a bit at the edges. Wear a respirator, I think I lost a few brain cells. I should have just grabbed it after realizing.
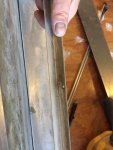
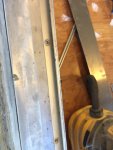
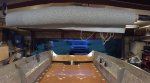
I used the thinner of the 2 choices, this is from Home Depot. I glued it up the sides so I literally have a vinyl bathtub, minus the bow section. I might make that small front piece of deck removable, as DozerII did. Yet I really like the idea of sealing off the deck. I might try to make something to seal off the stern opening, but have it so I can access it if needed.
The PO parked the boat under an evergreen tree and it was loaded with pine needles. And sand, dirt, etc. all that clogged up the rib drain channels.
I laid this out in one continuous sheet, as I think that’s what your asking now that I re-read your post. I’ve seen people make the deck in sections that can be unscrewed and like you I don’t like the idea.
I was just at the epoxy store and seen some 3M 90 spray adhesive which was labeled heavy duty or something. I’ve used the 77 before and there is almost no build at all. I made sure to wipe the deck down with acetone, which is what gave me mixed results in the past on other applications, not boat related.
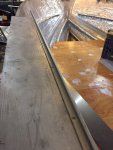
You can pull the vinyl up a bit when it’s still wet, but it’s not that easy. I rolled the vinyl out to cover the deck, then glued the stern part up to the deck cut-out.
Then I rolled it up from the bow to stern and sprayed about a foot of deck then rolled the vinyl forward over it. Smooshed it out, then repeated. After I smoothed out a section, I would roll it back till I could see a few inches of already glued vinyl. Just to make sure I didn’t have an unglued gap.
Depending on what your winters are like, handling the vinyl will not only be difficult but it might crack. I’d throw some plywood and a tarp over the gunnels and put a small heater in the boat. I did it a few times to cure gluvit, 5200 and such. My garage isn’t heated that great but the heater and plywood worked great.