Recommendations for Ladder Screw Hole Repair Below Waterline - Wet Plywood

jmb23802

Petty Officer 3rd Class
Joined
Oct 13, 2014
Messages
79
My boat has a factory boarding ladder that fastens to the hull below the water line with two good-sized stainless wood screws. The ladder frame wraps over the top of the integrated swim platform and fastens with screws up top also so that the swim platform bears most of the weight; however, the screws below the waterline mostly hold the ladder securely to the back of the boat and absorb a little bit of tensile/shear stress if someone heavy steps on the ladder and the frame flexes a little, which does occur with my crew.

The original sealant broke the seal after 12 years and some water got into the hull. The hull is a non-cored fiberglass with a wood backing plate that appears to be ?? plywood. The plywood is pretty wet, not dripping wet, but very moist. I cannot replace the plywood backer without doing deconstruction work inside the engine compartment which would likely involve removing the engine. I drilled out one hole somewhat larger, about 3/8? now and the wood is still wet.
I need to get the boat back on the water immediately to salvage an upcoming boat trip.

I was going to enlarge the holes and put 105/205 epoxy with 404 filler in it (I thought the sealer failed partly because the screws would wobbly very slightly when tightened) before I realized the plywood was wet behind it. So now I am wondering if I should quickly order some g-flex epoxy to replace the 105/205 since it is supposed to bond with wet wood, or, if this even matters and I would be fine with the 105/205 + 404 to get by for a couple more seasons (or at least this season).

I am not sure that the 105/205 making a weak bond with the wet plywood is a big deal since most of the forces on the screws are lateral (shear) forces moreso than pulling forces and the epoxy would conform to the shape of the plywood and be supported by it even if it did not bond well with it. So this theory leads me to stay with what I have and use the 105/205. However, the added bond of the g/flex to the wet plywood would certainly be a plus; however, my concern with the g-flex is it will be too soft to hold the screws nice and tight without any wiggle. I have never used either epoxy in this type of an application.

What should I do? I need to act quickly either way. I have the 105/205 in hand now but if the g-flex will be superior I will pay the $ to get it here right away and do the best repair possible on such short notice. I have had this boat for over a year and had it out three three trips - working on it the rest of the time cutting my teeth and so if I can do a reliable repair now and then fix it right a couple years down the road when I am (hopefully) in a better mood to work on this boat again that would be great.

Thoughts?
 

jmb23802

Petty Officer 3rd Class
Joined
Oct 13, 2014
Messages
79
No Title

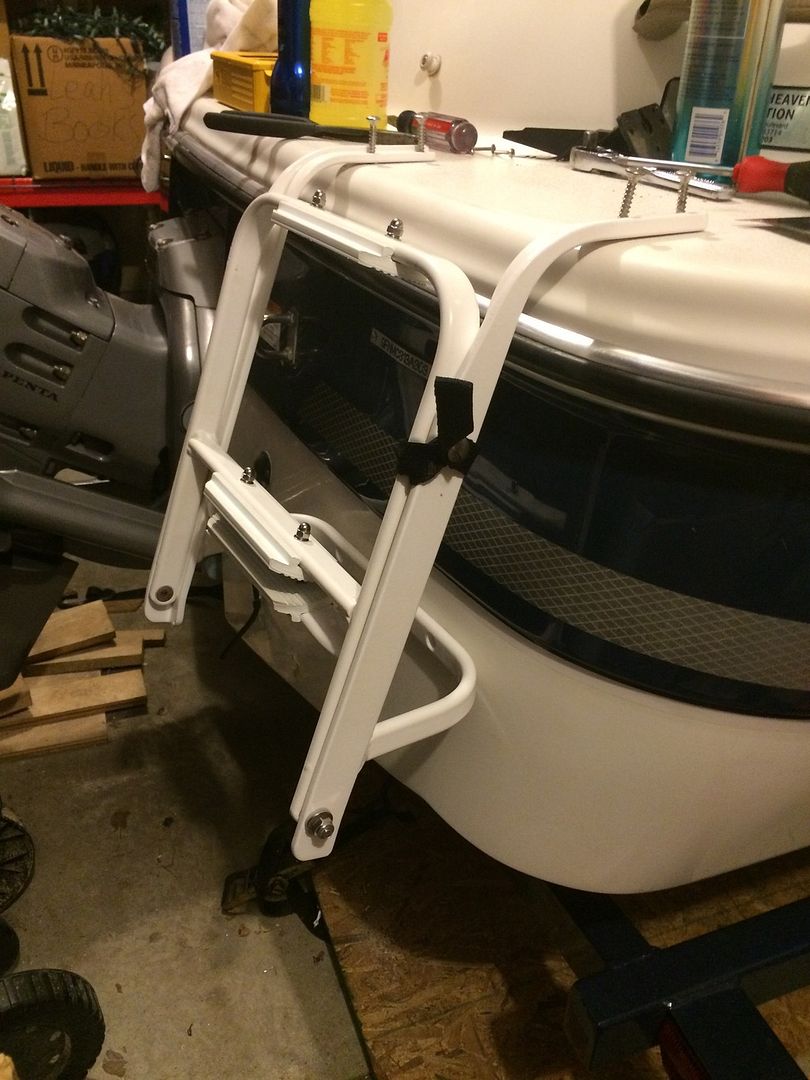
[FONT=&quot]Below is a pic that gives you a general idea what the ladder looks like and how it mounts to the hull. Why they mounted the ladder to the hull in this fashion (thru-hull screws below the waterline) is beyond me.

The thru-hull screws that hold the ladder are 1/4" (measured at the tips of the threads) stainless wood screws that are 1-3/4" long with full length threads and stick out of the surface of the hull about 1/2" when holding the ladder. The ladder brace does not sit flush against the hull, but at a slight angle, so you can see a screw thread (looking from the top down) when the ladder is installed (if installed with not sealant). The ladder sits flush on the top where it interfaces with the swim platform and this part of the mount works great.

Ideally, the repair for the hull screw holes will allow the screws to be torqued fairly tight to hold the ladder against the hull and limit movement, but it seems there would be additional stress from a shear perspective that would push on the screw head if someone "big boned" in the family used the ladder. I am not sure if the g/flex + 404 would provide any advantage over the 105/205 + 404 in this application, or if altogether different approach would be better. [/FONT]
 

Attachments

  • photo218472.jpg
    photo218472.jpg
    89.5 KB · Views: 0

alldodge

Moderator
Staff member
Joined
Mar 8, 2009
Messages
42,572
Since the wood is wet, its only a matter of time before you will have to remove it. To use the wood rot sealant stuff, the wood needs to be dry. The stuff is put in it and will penetrate into the wood. Don't know how much room you have on the swim deck, but if the ladder was changed out to something like the link below with three steps. You could just seal off the lower screws. To use this ladder your need 14.5 inches when stowed. In the stow position part of the ladder would hang over the side. I have a windline model which I installed on my cruiser and it can handle 400 pounds. You would need to have some good wood under the swim deck to hold the load. The ladder when open rest against the rub rail.

http://www.iboats.com/3-Step-Over-P...4326594--session_id.152947444--view_id.165295
 

Woodonglass

Supreme Mariner
Joined
Dec 29, 2009
Messages
25,929
If you use a syringe and inject some acetone into the wet wood it will really enhance the drying of the wood.

http://www.cybis.se/wiki/index.php?title=Drying_Wood

The molecules of the acetone as they evaporate will carry the water molecules away with them as they go!!!. Not all of the water will be taken away but a great deal of it. It really works. If you also inject some good ole' antifreeze into the wood it will kill any mold spores and help keep the wood from rotting in the future too!!! Using a Heat Gun or hair dryer will speed up the drying process too. once you get it dry, your epoxy repairs should be somewhat effective
 

jmb23802

Petty Officer 3rd Class
Joined
Oct 13, 2014
Messages
79
Ok, good info but please bear with me, I have lots of questions as I am trying to sort this out:

If I combine the use of acetone and a heat gun will the acetone ignite or will it be ok if I give the acetone some time to evaporate before using the heat gun? Will the heat gun melt/burn the foam core or the gelcoat?

I am still not sure whether I would be ahead to go with the g/flex epoxy or if the 105/205 mix would be fine. I guess I am concerned about the cracking potential of the 105/205 if there is much of any flex in the ladder that puts stress on the screws vs. my own uninformed concerns about the thread holding capabilities of the g/flex. Again, I have never used either one for this type of repair.

The anti-freeze is interesting ? I like the idea of trying to slow down the rot and the water in the wood has me concerned about the Ohio winters and potential damage. Is the anti-freeze truly effective at soaking into the wood and stopping the rot?

With regard to the ladder, I have already thought about replacing it with a top-mount swing-over ladder to avoid the underwater holes and that may be a great option down the road, but I would like to keep the boat as factory as possible for now. Down the road I will get this mess fixed right (thru-bolts, waterproof backing plate, etc.) if I can get the small problems that are threatening the long-term health of the boat fixed long enough to actually enjoy it a few times. It seems like the epoxy might get me back onto the water relatively worry-free for a little while if I can sort out the best approach quickly.
 

Woodonglass

Supreme Mariner
Joined
Dec 29, 2009
Messages
25,929
This should help clarify things a bit...http://alsnetbiz.com/homeimprovement/homemade.html

Heat gun will NOT damage the gelcoat as long as you don't get carried away and hold it on there for and extended period of time. Keep it moving around and use your common sense and fingers to tell you when it's warm enuf to pull the heat off for a bit. Let the Actetone evaporate for a few hours before applying any heat. It flashes off fairly quickly. Won't ignite very readily with just Heat usually takes and open flame to get it started. If there is Foam?? involved the Acetone May EAT it and the Heat May melt it so you may want to test that!!!!:eek: What Foam are we talking about?? You can thicken and reinforce the epoxy by adding cabosil and glass fibers to it and it will greatly enhance it's strength and screw holding abilities. We call it Tiger Hair!!!
 
Last edited:

DeepBlue2010

Lieutenant
Joined
Aug 19, 2010
Messages
1,305
You don't need epoxy for this job. This is a classic hardware sealing situation. Hardware fittings need to be checked/resealed as needed during maintenenace.

3M 4200 or 4000 both are extreamly good marine sealants and both will take a good a good amount of flexing,, stratching without compomising their integrity.


The 2 problems I can see are the wet backing plate you have (the wet piece of wood) and the hole you enlarged to 3/8


The wood will need to be replaced sooner or later. You can use aceton and heat gun (not contemprenously). If your boat is in salt water, don't worry about any bacteria growing in this piece of wood. But sooner or latter you will need to change it. I know you said you will need to take the engine. A picture will help us confirm this asseccement; there maybe a creative idea to get the job done with the engine in place. I am assuming this board is floating on top and it is not glassed, is this correct?


Regarding the hole you enlarged, I will need to see a picture of it and I will need to know if you enlarged the fiberglass skin only or you went all the way through the wood. If you did not enlarge this hole, I would have just recommended applying a sealant for now and go have fun in your trip. Unfortuantly, you need to deal with this oversized hole first.


We need to see what you see to be able to help you. Post picture of the enginecompartment and this piece of wood we are talking about and close up pictures of the mounting screws holes.
 
Last edited:

jmb23802

Petty Officer 3rd Class
Joined
Oct 13, 2014
Messages
79
DeepBlue I agree with you about using the sealant rather than the epoxy - as soon as I drilled out the hole I regretted it, especially with a trip in the near future. My logic at the time was if the screw was wobbling a little then that caused the sealant to fail and I need to tighten up the screw wobble and the best way seemed to be epoxy given the circumstances - but live and learn, I guess.

I can tell you the hole I enlarged is drilled all the way through the fiberglass and the wood backer behind it. Since the wood backer is in an area that is sealed off I cannot take any pictures of it or know for sure if it is floating or glassed to the hull; however, going by the methods I have seen elsewhere on the boat I would guess there is likely a thin coat of glass on the backside to hold it in place until the manufacturer progressed from the hull formation to the drilling and tapping step of the ladder installation. I could feel something catch on the drill bit on the backside of the hole as I drilled it out but the bit did not stall at all so I will assume that was probably the thin FG layer.

There is a sealed off cavity in the hull (not connected to the liner) that is located between the backrest of the jump seat and the outer hull that appears to be filled with foam since I see foam in the back of the screw holes. Further down on the stern is the speedo pickup and the foam behind the screw holes for the speedo is dry so that area is either sealed off from the ladder foam or the moisture has not traveled very far yet. I have no idea what type of foam is in there but it definitely appears to be foam of some sort.

I will try to get some detail pics tonight of what I am dealing with and post up.
 

Woodonglass

Supreme Mariner
Joined
Dec 29, 2009
Messages
25,929
Well, I'm gunna kinda disagree. The area needs more than just sealant. The hardware has nothing to BITE into now and the area now requires some material build up IMHO. The 3M sealant will not provide this adequately. It IS a good product in that it will cure in a Wet environment and is very strong and flexible once cured. It will provide some holding power for the screws but will it be enough??? Epoxy on the other hand does require a dry environment for proper curing and could be problematic unless you can get the area dry. I agree that this part of the ladder does not require a LOT of holding power put some IS required. Everyone has their own opinions on how things should be done. I'm just and Old Dumb Okie!!!

It's your boat and you should effect the repair as you see fit.
 

jmb23802

Petty Officer 3rd Class
Joined
Oct 13, 2014
Messages
79
Woodonglass, I agree with you that epoxy is probably going to be the best option for an immediate repair for the hole that I have already drilled out since, just as you say, there is nothing left for the screw to bite and 4200 is not a structural sealant.

I think I may have caused some confusion with my comment above about sealant vs. epoxy and I did not state what I meant clearly. What I was trying to say about using sealant rather than epoxy is that I now regret drilling out the hole and wish I had just used 4200 and went on my way (since the screw still had bite in the wet wood before I monkeyed with it and I am tired of working on this boat all season-to-date) for the rest of the season rather than creating a bigger repair right before a boating trip.

You mentioned above using cabosil and glass fibers to enhance the strength of the epoxy. I have some West Systems 404 adhesive filler - would this be on par with your cabosil and glass fibers as a strengthening agent?

Also, have you used the g/flex epoxy from West Systems? It seems to me that since damp wood will be involved in this repair to one extent or another (I doubt I will get the wood completely dry), I am wondering if I would be better off with the g/flex epoxy from West Systems instead of the 105/205? The g/flex advertises better bonding to damp wood...
 

alldodge

Moderator
Staff member
Joined
Mar 8, 2009
Messages
42,572
How hard would it be to cut out some of the wood and glass behind it, lets say 3x8 inch or so. Dry and prep the damp wood the best you can, then epoxy in a 3/4 plywood in and glass over everything?
 

DeepBlue2010

Lieutenant
Joined
Aug 19, 2010
Messages
1,305
Now that I know you drilled all the way through the wood, you kinda of created more work for yourself than you needed to fix the issue. To catch this trip and as a short term solution, is it feasible to seal the hole and ask you crew not to use this ladder at all until you have the time to approach the repair the right way?

If it is, apply a liberal amount of 3M 4000 inside the enlarged hole, cover it from outside with wax or parchment paper and tape over it with strong tape (duct tape would do) so the gravity doesn't reclaim all the sealant. After it drys out, remove the tape and go to your trip. After you come back or when you have the time to approach it correctly, we can discuss options. Just thinking out loud with you.
 
Last edited:

jmb23802

Petty Officer 3rd Class
Joined
Oct 13, 2014
Messages
79
So here are some pics of my boat that will hopefully illustrate how it is laid out.

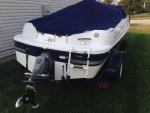
Here is a pic of the back of the boat with the ladder, note the integrated swim platform and the lower ladder brace where the two screws go into the hull:


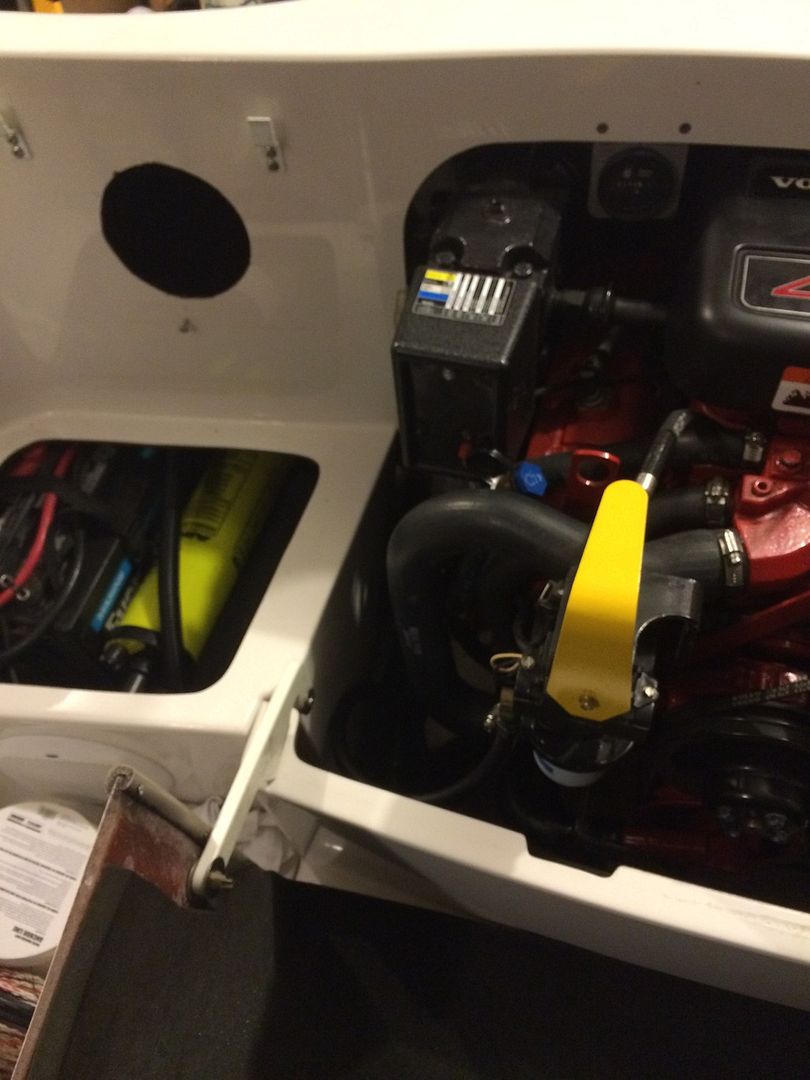
Moving to the inside, this is a pic of the starboard side of the stern from the inside of the boat. The hole in the liner beside the engine is where the seatback for the jumpseat normally goes:


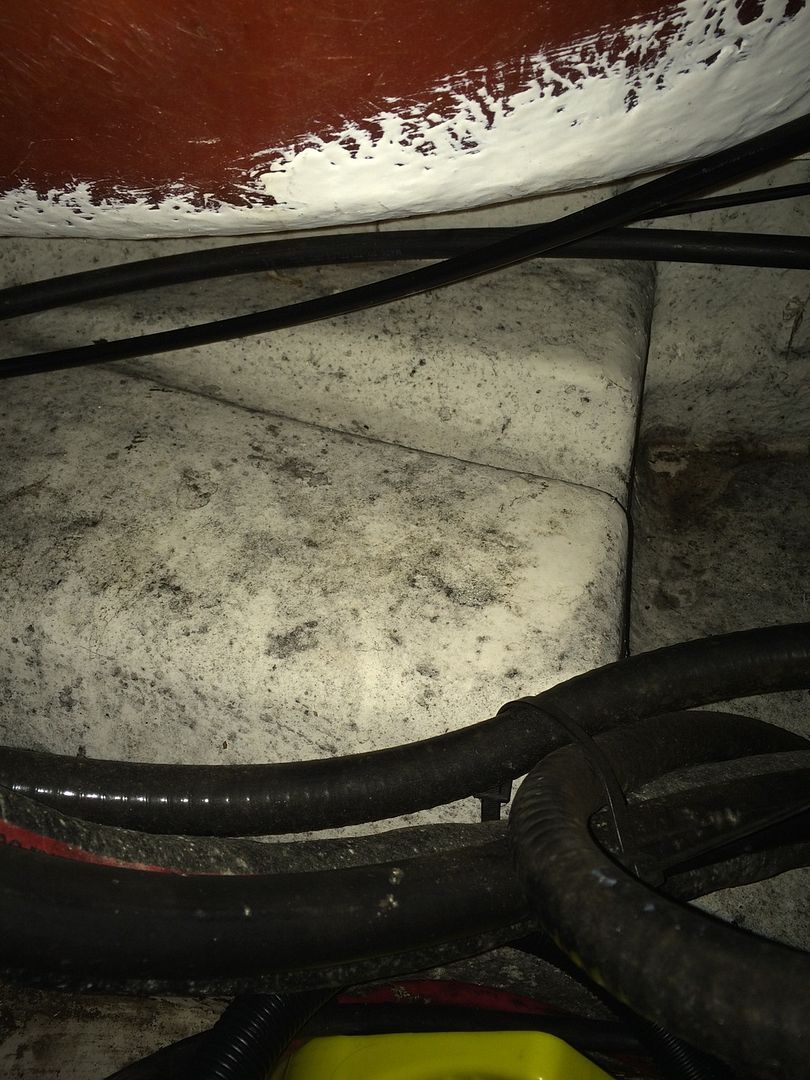
If you peek into the hole behind the seatback shown in the pic above (facing toward the stern), you see this raised area that I can only guess is filled with foam. You can see the stringer in the lower right of the pic. This raised hump would need to be cut open and the foam beneath dug out to get down to the screw holes where the lower ladder brace mounts. Not sure how much of this hump would need to be removed. By the looks of it, I would say the wood I am seeing in my holes is likely glassed in underneath this thing.

A closer peek:


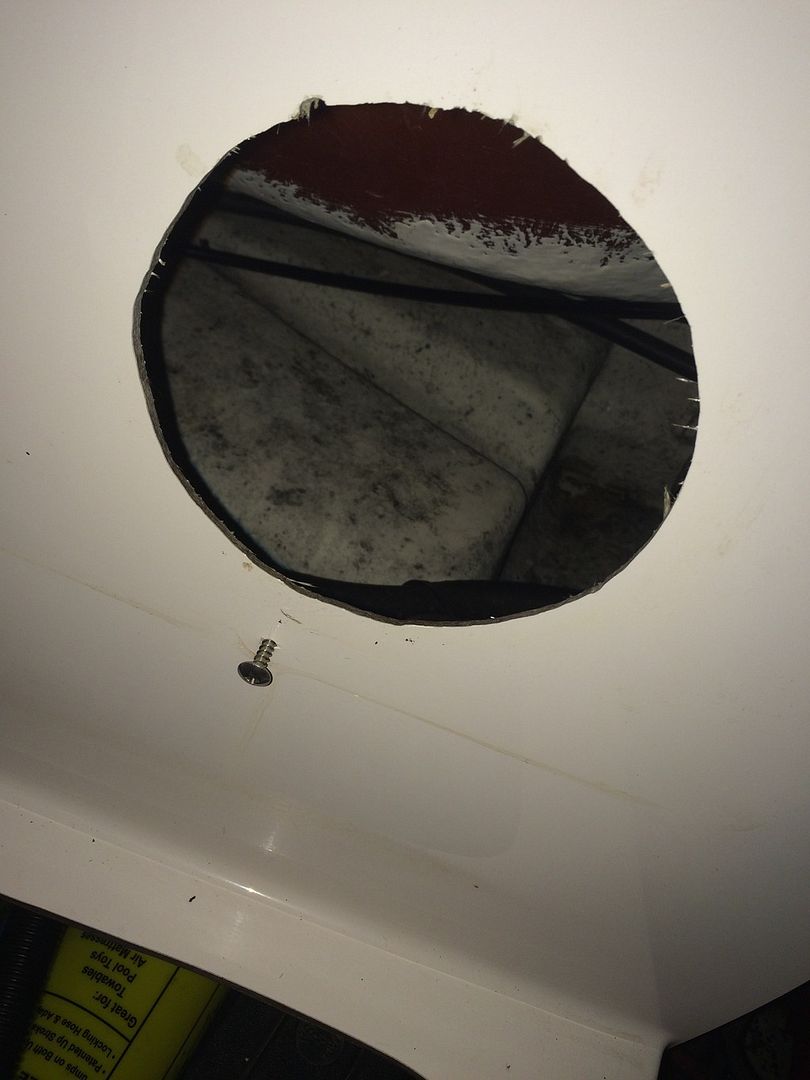
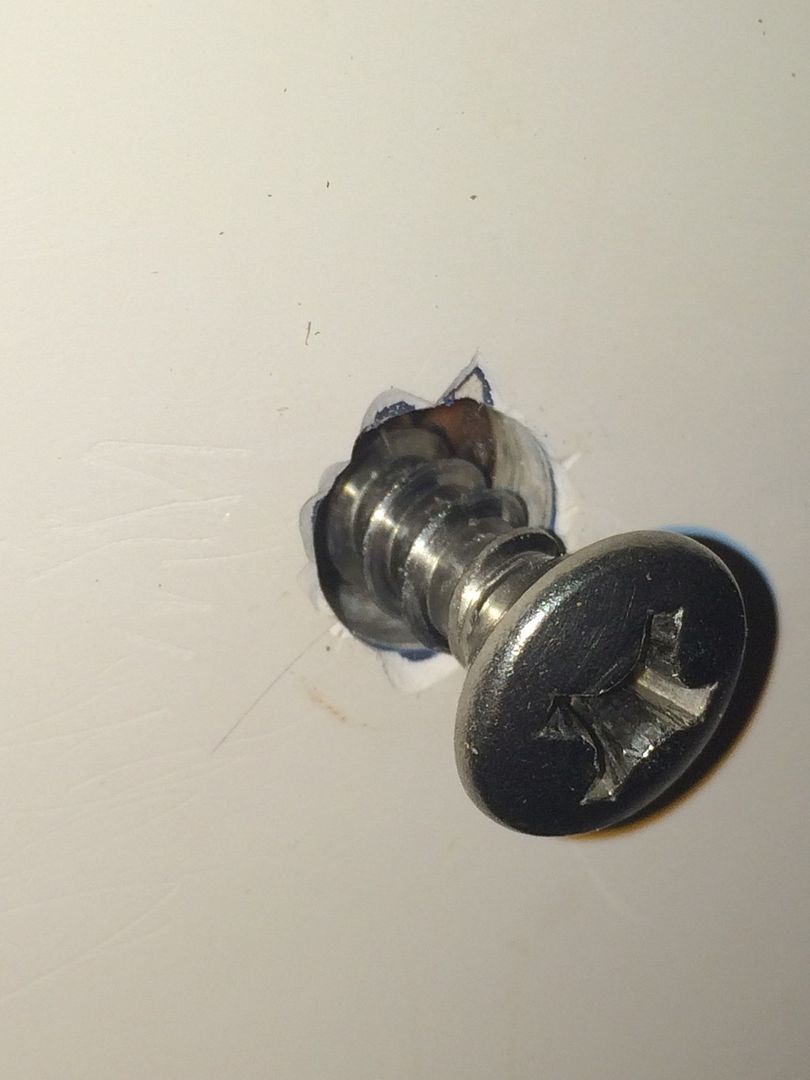
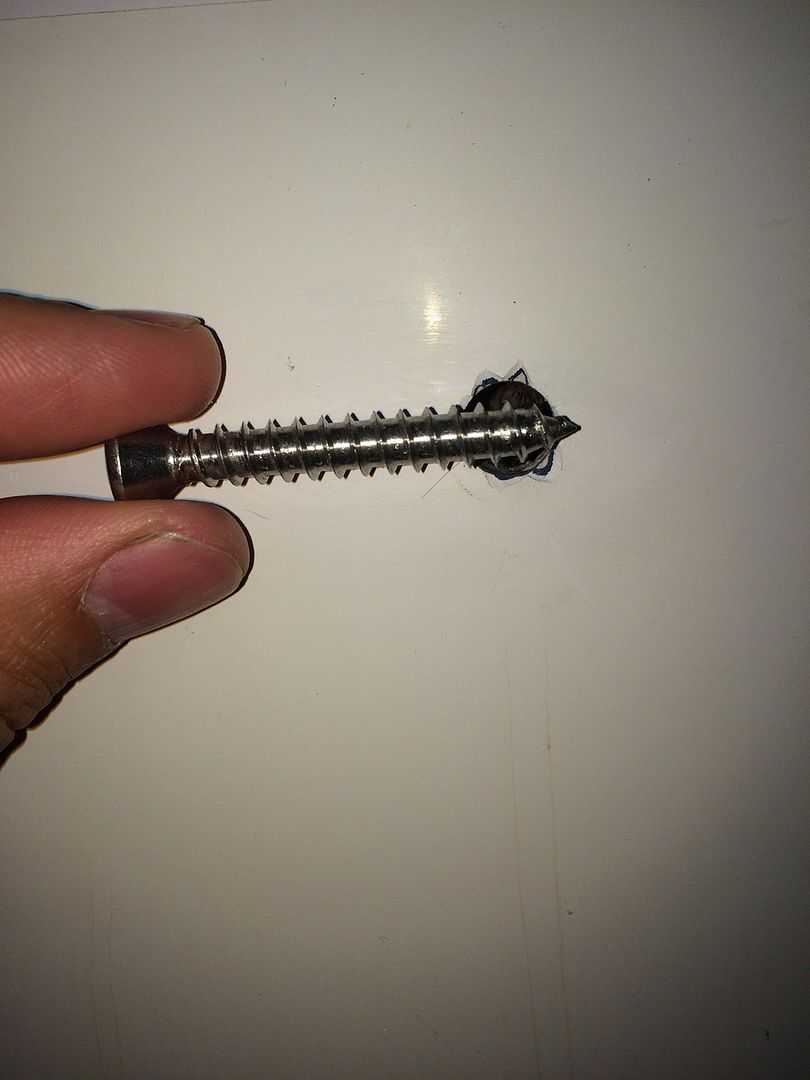
Finally, a couple pics of the screw and the hole that has been drilled out to 3/8":


DeepBlue2010

Lieutenant
Joined
Aug 19, 2010
Messages
1,305
I can see the wood behind the hole in the picture before the last and it is not drilled though. It holds the screw right in the middle of the hole unless my eyes are playing tricks on me. unfortunately, the screw is hiding this area in the last photo. If the wood is gone ( drilled out) by the 3/8 drill bit, how the screw is being held true to the center of the hole like that?

BTW, are you sure this is a 3/8 hole?! Can you measure it for sure
 
Last edited:

Georgesalmon

Lieutenant Commander
Joined
Apr 14, 2012
Messages
1,793
Google "well nut" Not the best idea maybe but would get you through until you can do it right. They have saved my butt a couple of times. They are stronger than they look, and can often be found at auto parts stores. Lots of sizes and they will seal the hole too, no extra gunk needed.
 
Last edited:

jmb23802

Petty Officer 3rd Class
Joined
Oct 13, 2014
Messages
79
DeepBlue ? I confirmed that the hole is 3/8? in diameter. The screw was lying on the bottom of the hole and the pic appears to be an illusion that it is ?floating?. It is possible my screw is larger than I measured. There are some splinters in the very back of the hole that contact the screw but do not make enough contact to hold the screw centered in the hole.

GeorgeSalmon ? a well nut or threaded insert was one of the solutions I have already considered for this repair (but did not discuss on this thread). I think I am going to try an epoxy repair (more on that below) and then take the threaded insert or embedded hex nuts approach if the epoxy will not hold threads.

I greatly appreciate everyone?s replies and I have had a lot to think about over the past 30+ hours. To be honest, it is not evident in this thread how much time and money I already have sunk into this boat over the past 4 months to fix minor problems that have not become big ones yet and I think I have now reached the point (at least temporarily) where I am no longer concerned about fixing any more problems ?the right way? this year due to the amount of cost, effort, and know-how involved (none of which I possess). I have tried to approach every previous repair on this boat with the ?right way? and the long-term in mind. However, like a bad relationship where the other party (my boat) keeps taking way more than they give, I am letting go and just going to focus on what is best for my family, which involves keeping a mind toward safety and protecting my investment while not spending any more money or working time on this boat than absolutely necessary (i.e. routine maintenance) for the rest of this year. My bank account and my family needs me to stay away from working on this boat right now and get back to life. If I can buy some time, I will eventually get it fixed right.

That said, epoxy seems to me to be the strongest and most permanent repair option I have read here and elsewhere, excluding partial boat demolition and reconstruction, so here is what I think I am going to do assuming I can get the wood dried out enough to feel good about this repair. Please offer your critique if you see anything of concern here:
  1. Chamfer the gelcoat and just a hint of the fiberglass on the outside face of the hole.
  2. Dig out a little bit of the plywood behind the fiberglass but do NOT enlarge the fiberglass hole any farther. Basically, create either a slightly larger plywood hole behind the fiberglass or create pockets in the plywood that are wider than the fiberglass. Step 1 and 2 here should accomplish two things: provide more surface area for the epoxy to grip and create a mechanical lock to keep the epoxy from pushing through in either direction, both of which will also provide more stability to support lateral pressures on the ladder screw.
  3. Dry out the plywood as much as possible by whatever means available ? acetone, heat gun, lighter fluid and match (haha?just kidding).
  4. Soak a small piece of sponge in g/flex epoxy and put it near the back edge of the hole in the plywood to make a back-stop in the hole, wetting out the plywood and fiberglass at the same time.
  5. Drill a pilot hole in the epoxy-cured sponge that will accept the ladder screw and hold it in the center of the 3/8? diameter hole.
  6. Fill hole with g/flex epoxy mixed with 404 adhesive filler to a thick mayonnaise or peanut butter consistency, filling from the back of the hole to the front.
  7. Prep the ladder screw with mold release agent (toilet bowl wax and/or hair spray ? either one is equally effective in my home tests) and coat it manually with thickened epoxy from step 6.
  8. Insert screw into hole and thread into the pilot hole in the back stop to hold it in the center of the hole.
  9. Level off the epoxy to the gelcoat surface and install tape, etc. to hold it in shape and clean up the presentation.
  10. After epoxy is cured, remove screw and chamfer the outer face of the screw hole in the epoxy to create a divot that will hold a small pool of sealant to increase the amount of sealant in contact with the screw.
  11. Haven?t decided if I will do this step, but if I do then at this time I will inject a ? cup or more of automotive anti-freeze into the hole (would need to drill out the back side of the hole so anti-freeze would flow through) that would hopefully migrate to the water in the plywood and help slow down the rot/freeze damage process and buy me some time without causing further damage.
  12. Install ladder with 3M 4200 in all screw holes, making sure that a small dollop of 4200 completely covers the hole repaired with the epoxy, most of which would be concealed behind the ladder frame.
  13. Enjoy the boat and keep an eye on the repair.
I plan to have some keel damage repaired in the off-season ? if my FG guy can get in there and fix this the right way for the right price, I will let him have the work. If not, I will carry on, continue to monitor the repair, and be mentally prepared to redo the repair with a different approach if necessary.

I welcome any critiques of the above process. If ultimately the above is a questionable repair and I decide to move forward anyway it will be good to know what I might be able to expect. I prefer to make decisions with eyes wide open.

I have a few days to get the hole dried out before I have to do something to make the trip happen so I will still consider adjustments or alternative approaches, but only if those approaches accommodate use of the ladder, are semi-permanent (until the wood rots), and can be accomplished without significant effort, tools, or know-how.

This is a great forum and I appreciate the great contributions of everyone on this thread! Thanks!
 
Top