nemo2011
Petty Officer 2nd Class
- Joined
- Feb 15, 2011
- Messages
- 157


Yeah, but the GOOD NEWS is I have seen a LOT worse. Keep going and keep the pics comin. When you planning on pulling the motor?
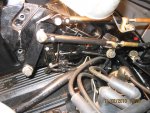
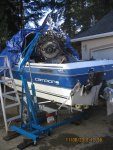
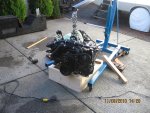
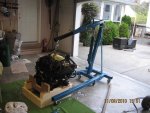
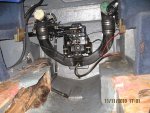
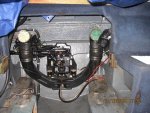
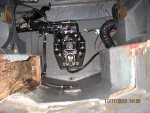
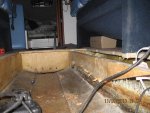
The motor is already out ,just havent posted the pictures yet hope to post them in the AM.
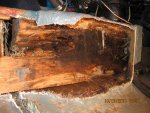
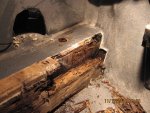
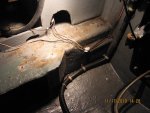
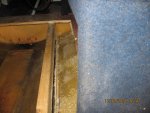
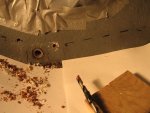
I have a question about grinding out the old foberglass that was at the bottom of the stringer. Should this be ground down too flush with the hull or can it be just cleaned up sanded and gone over top with new glass?
Best is to sand the hull clean... makes a better bond IMO and easier to lay fiberglass on a smooth surface then one with bumps.
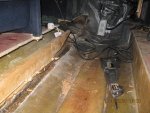
I used a 4 1/2 " angle grinder with a diamond blade to cut the old glass out and the same grinder with a 36 grit sanding disk to make it smooth.
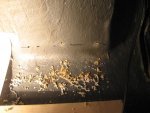
Look at my resto thread second set of pics on page 2 and you'll see how far I sanded down. When you sand the hull go out about 8" on either side of your stringers.
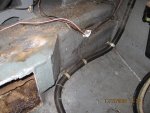
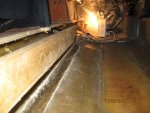
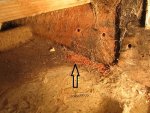
BTW hows your transom look?
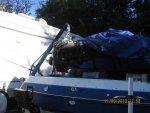
The weather here has been kinda crappy so have not got around too drilling test holes in the transom yet.and besides wife has me busy cleaning up the yard :-(
What did that diamond blade set you back? I have a 4" Makita angle grinder and have been using just steel cutoff blades and switching to masonary blade! Havent got around too using the sanding disk yet!
That diamond saw kick up as much dust(or less)
")
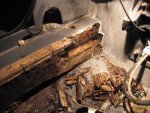
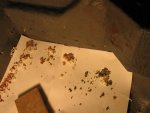
Take a pinch of drill chips and squeeze them between 2 fingers, if you can get moisture from the chips the wood is no good.
You're doing a good job so far.