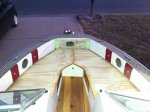
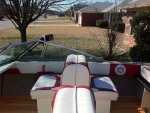
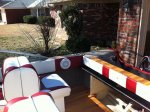
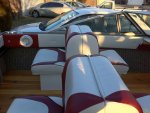
Restoring 1986 Sea Nymph SS155 (pics)

ezmobee

Supreme Mariner
Joined
Mar 26, 2007
Messages
23,767
Re: Restoring 1986 Sea Nymph SS155 (pics)

That trailer is going to be great for your boat. Kinda low-slung which should make launching and retrieving easier. Shouldn't take much to get it all fixed up either. However, don't spend another dime on it until the title/registration issue is resolved 100%.
 

Piece715

Senior Chief Petty Officer
Joined
Jan 26, 2009
Messages
757
Re: Restoring 1986 Sea Nymph SS155 (pics)

Good call on that! I don't plan on touching it until the boat itself is 100% as well. New trailer = new push for finishing the 5% thats left to do on the boat; wiring, dash setup, steering, and 3 cushions to finish. Snow, Sleet, and Ice today = delay on working on the boat... I CAN'T WIN!
 

LonLB

Petty Officer 1st Class
Joined
Nov 19, 2010
Messages
264
Re: Restoring 1986 Sea Nymph SS155 (pics)

If you go the launch route......Do your swapping at the ramp, strap it down best you can and drive home.


If the bunks are resting in the wrong spot, just jack the boat up, using wood, or foam to protect the boat. Loosen up any u-bolts on the bunk brackets, and adjust away. It's not hard really. You will see.
One thing that works well is once setting the bunk board I put the jack under the bunk bracket itself as that helps to put it in perfect position. Especially Important on the middle bunk bracket.
 

Piece715

Senior Chief Petty Officer
Joined
Jan 26, 2009
Messages
757
Re: Restoring 1986 Sea Nymph SS155 (pics)

Thanks for the info LonLB, appreciate it!
 

Piece715

Senior Chief Petty Officer
Joined
Jan 26, 2009
Messages
757
Re: Restoring 1986 Sea Nymph SS155 (pics)

Ok heads up its 76 degrees today in the state of Arkansas. First official boat work day for the season.... IT HAS TO GET DONE!!! ITS SOOOO CLOSE! A buddy and I are to redo the panel that was the straw that broke the spirit last season. Here is the final to do list plus/minus some minor stuff i run across im sure

To DO
1) Remake coaming panel: cut speaker hole in right spot this time, apply sill seal, and upholster
2) Upholster remaining 3 coaming pads
3) Buy foam and upholster bow seating
4) Buy dash gauges and switches and mock up/cut dash; Paint dash
5) Install rotary steering
6) Wire electrical and stereo system
7) Switch trailers: replace bunks and adjust winch stand of new trailer; Paint if desired
8) Splash boat and enjoy the summer on the lake!

Words of encouragement are ALWAYS welcome! I know I can I know I can!!!
 

Piece715

Senior Chief Petty Officer
Joined
Jan 26, 2009
Messages
757
Re: Restoring 1986 Sea Nymph SS155 (pics)

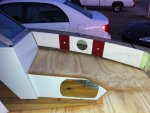
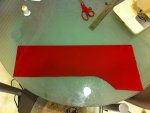
Alright here we go! This is the weekends progress; Finished upholstering all the combing pads and mounted them, used PlastiDip spray rubber on parts of transom and little tray inside boat, put final touches on the wood in splashwell/transom area, cut the dash piece to size as well as the reenforcing ply, mocked up and mounted stereo in ply. Basically my buddy and I had to stop because purchases have to be made to continue.

So hopefully after the Lowes trip today for steering hardware (which btw is kinda BS that my 150 dollar brand new rotary NFB steering didn't come with any mounting hardware), dash hard ware, interior LED lighting, and other bits progress should be continued!

Enjoy the pics; ohhh and the dash was .25" plexiglass lightly sanded with rustoleum paint backed with plastidip. The picture doesn't do it near justice; it really has some great depth and the color match is awesome for just a can of paint i had in the closet.
Transom coaming pad resize.jpg

Stern coaming pad and finished splashwell.jpg

Finished Transom splashwell.jpg

Passenger Bow coaming pad.jpg

Bow coaming pads.jpg
 

Piece715

Senior Chief Petty Officer
Joined
Jan 26, 2009
Messages
757
Re: Restoring 1986 Sea Nymph SS155 (pics)

More pics of the interior! Will post more as progress continues!

Drivers side finished coaming pad resize.jpg

Drivers stern coaming pads resize.jpg

photo.jpg

Dash Panel resize.jpg
 

Piece715

Senior Chief Petty Officer
Joined
Jan 26, 2009
Messages
757
Re: Restoring 1986 Sea Nymph SS155 (pics)

More little stuff accomplished last night although didn't snap any pictures. Will try to take some tonight but got the bilge plumbed, windshield supports mounted to dash, removed walk through windshield middle glass as it was just getting in the way, and cut the plexiglass panel to fit the stereo. I need to find a tach and buy the switches to start fitting that dash panel... question is what tach will work with my motor?!
 

ezmobee

Supreme Mariner
Joined
Mar 26, 2007
Messages
23,767
Re: Restoring 1986 Sea Nymph SS155 (pics)

Very nice progress. Getting close! Any standard outboard tach should work with your motor.
 

Piece715

Senior Chief Petty Officer
Joined
Jan 26, 2009
Messages
757
Re: Restoring 1986 Sea Nymph SS155 (pics)

Yep just looked Evinrude all 2 cylinders less than 70 HP are 10 pole 5 pulse... Thanks EZ! it is close and im loving it!
 

Piece715

Senior Chief Petty Officer
Joined
Jan 26, 2009
Messages
757
Re: Restoring 1986 Sea Nymph SS155 (pics)

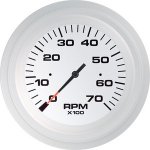
Ok I need help... I'm in the process of buying all the switches and gauges for the dash. Im going with the Teleflex Arctic White Tachometer
Tach.jpg

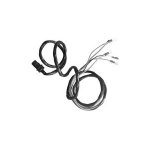
Teleflex IH14767 Tachometer Wiring Harness - Omc
Tach harness.jpg

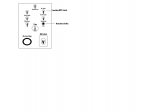
Im going to fabricate a switch panel since i already have a fuse block. Here is a rough design Im shooting for ...
Switch panel.JPG

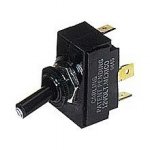
I want to go with the Sierra Illuminated tip switches that are white when dash lights are on and turn red when switch is turned on
Switch.jpg
Question is when wiring im guessing that they would be wired the same way a gauge would be that when nav/anchor lights are turned on the gauges/switches illuminate? Still working on the wiring part... have a fuse block, battery switch, talking with SilverTip in another thread I have he suggested that 16 AWG wiring will be plenty for everything mention besides the stereo and amp. Anyone have some helpful hints as i start in on this task?

Here is the link to that other thread i have about wiring... may give some more info: http://forums.iboats.com/showthread.php?t=504488
 

ezmobee

Supreme Mariner
Joined
Mar 26, 2007
Messages
23,767
Re: Restoring 1986 Sea Nymph SS155 (pics)

Sounds like you're on the right track with the wiring. Pretty sure I have that same tach.
 

Piece715

Senior Chief Petty Officer
Joined
Jan 26, 2009
Messages
757
Re: Restoring 1986 Sea Nymph SS155 (pics)

Question: If I'm using a dual battery set up which on-board 2 bank battery charger would be best for my system? amps? Any experience with different brands; recommendations?
 

Piece715

Senior Chief Petty Officer
Joined
Jan 26, 2009
Messages
757
Re: Restoring 1986 Sea Nymph SS155 (pics)

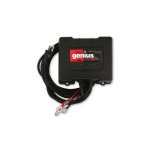
Anyone have any experience with this charger...

NOCO GEN2 NOCO Genius Black 12-24V 2-Bank 20A On-Board Battery Charger - Amazon for $117
319biF1B5EL._SL500_AA300_.jpg

... Been surfing around the forums and this one came up; Just doing some research before i buy
 

Piece715

Senior Chief Petty Officer
Joined
Jan 26, 2009
Messages
757
Re: Restoring 1986 Sea Nymph SS155 (pics)

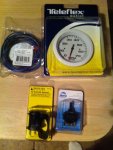
Here are some of the dash goodies... just waiting on a couple more switches and I can finish the dash panel and run the steering. After that all that is left is wiring and covering the bow seats!!! WAHOOO H20 HERE WE COME!!!

photoreszie.jpg
 

ezmobee

Supreme Mariner
Joined
Mar 26, 2007
Messages
23,767
Re: Restoring 1986 Sea Nymph SS155 (pics)

I don't know anything about that charger. I'm sure it's fine, however, if you have a BassPro or Cabelas near you, I know they each would have a $100ish two bank charger that would be equivalent and then at least if it was crap, you could return it. I've been pondering getting one for my boat also.

Funny thing, I have this Die Hard deep cycle battery that I've had for friggin' EVER. Like 6 or 7 years. It hasn't been used much as it was really only ever a back up battery for my old boat but I just started using it more regularly last year when I installed my bow mount (greatest thing ever by the way) and now it's like a game to see how long it holds up.
 
Top