Seafarer transom and deck replacement

GT1000000

Rear Admiral
Joined
Jul 13, 2011
Messages
4,916
Re: Seafarer transom and deck replacement - Updated

Re: Seafarer transom and deck replacement - Updated

it seemed to work well but I don't think I'd use it on anything bigger then small screw holes.

You could also use a piece of "Formica" with a shiny face, resin wont stick to it, won't flex as much as cardboard, and if you don't apply too much pressure to it when filling the hole, even gives you a nice smooth outer surface...
 

Three08

Petty Officer 2nd Class
Joined
Oct 24, 2009
Messages
111
Re: Seafarer transom and deck replacement - Updated

Re: Seafarer transom and deck replacement - Updated

You could also use a piece of "Formica" with a shiny face, resin wont stick to it, won't flex as much as cardboard, and if you don't apply too much pressure to it when filling the hole, even gives you a nice smooth outer surface...

I think that's the stuff I'm using, just a different brand. It's like mdf with a white shinny laminate on one side, I didn't have much luck trying to tape it in place but I found that some 1x2 across the mdf board and a clamp each side worked well.

Didn't get much work done today, I did a little sanding once the sun went down cos it was crazy hot today but nothing major got done. And if the weather report is anything to go by it's gonna be 5 days of rain before I get anymore work done. Dam I need a workshop.

Anyone want to chime in on the best way to fill the splash well/outboard cutout, from the inside or from the outside? I think it will be stronger if I do it on the inside as the repair will be sandwiched between the outer skin and the new core, but I've seen a few of these types of repairs on other forums and they all done from the outside straight onto the new core, would that make for a weaker repair?
 

Three08

Petty Officer 2nd Class
Joined
Oct 24, 2009
Messages
111
Re: Seafarer transom and deck replacement - Updated

Re: Seafarer transom and deck replacement - Updated

Well the rain held out (mostly) and I got some work done after all. I filled the remaining low spots near the transom so I just need to sand them flush and fix any in perfections.

I want to add a layer or 2 of 1808 to the outside skin (from the inside) before I start filling in the outboard cut out, does anyone know if I should overlap the new glass around to the sides of the hull a few inches or should it cover only the transom skin and butt up square the the sides of the hull?

IMG_20120211_192342.jpg
 

zymox

Petty Officer 2nd Class
Joined
Dec 1, 2011
Messages
104
Re: Seafarer transom and deck replacement - Updated

Re: Seafarer transom and deck replacement - Updated

I would have overlapped. This will ensure that your corners are in good condition and more likely not to crack in the future if done right. Also when the transom-core is bonded in place you will not be able to do anything with the corners. Make sure that you overlap all your layers to come also to be sure you get a good bond without any delamination.

Even a shape can contribute to the construction. Think of a sheet of metal that you will try to bend on the height. You can't. Laying flat it's a child job. Same goes for a laminate.

This is why many stringers are hollow. The shape is a square profile beam and is very hard to bend when locked at all 4 sides.
 

Three08

Petty Officer 2nd Class
Joined
Oct 24, 2009
Messages
111
Re: Seafarer transom and deck replacement - Updated

Re: Seafarer transom and deck replacement - Updated

I would have overlapped. This will ensure that your corners are in good condition and more likely not to crack in the future if done right. Also when the transom-core is bonded in place you will not be able to do anything with the corners. Make sure that you overlap all your layers to come also to be sure you get a good bond without any delamination.

Even a shape can contribute to the construction. Think of a sheet of metal that you will try to bend on the height. You can't. Laying flat it's a child job. Same goes for a laminate.

This is why many stringers are hollow. The shape is a square profile beam and is very hard to bend when locked at all 4 sides.

Yep I think overlapping it will be the way to go, I'm just not too keen on overlapping more than 2 inches as I don't really think it's a good idea for the transom tabbing to join to the new glass that's attached to the outside skin.

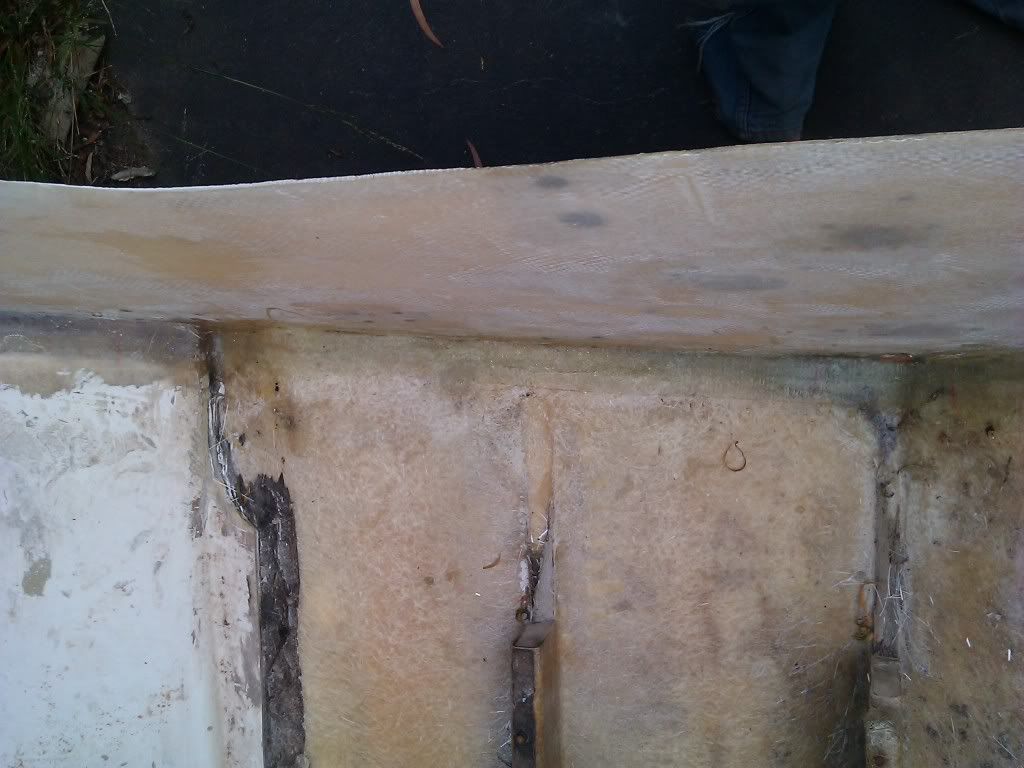
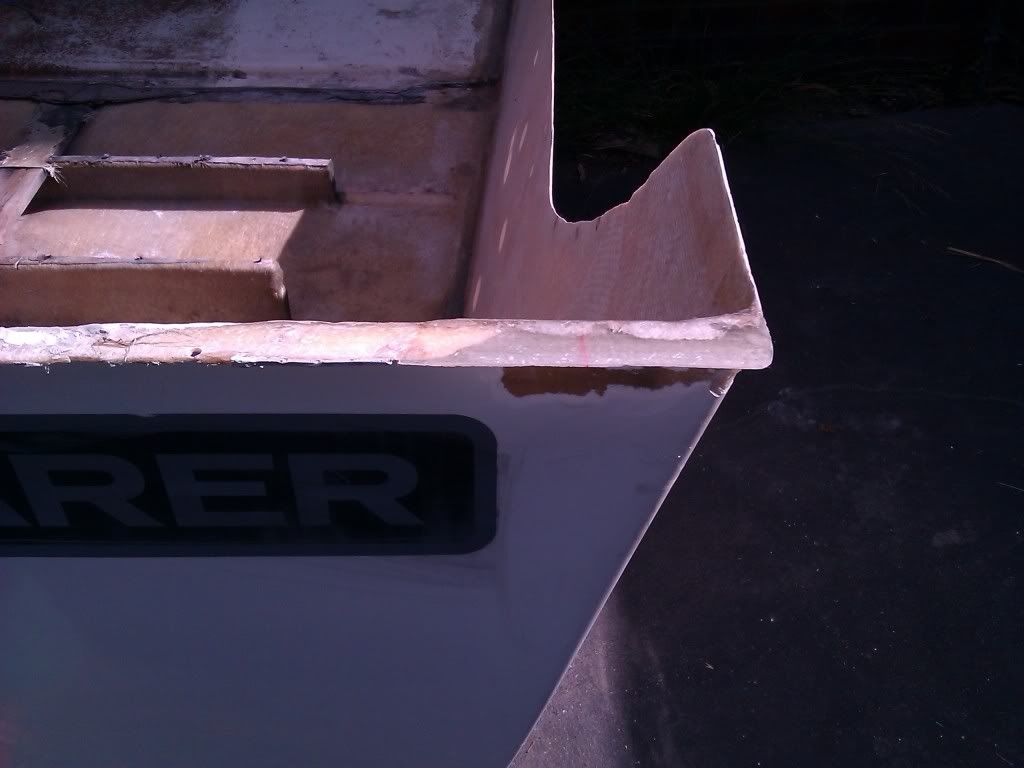
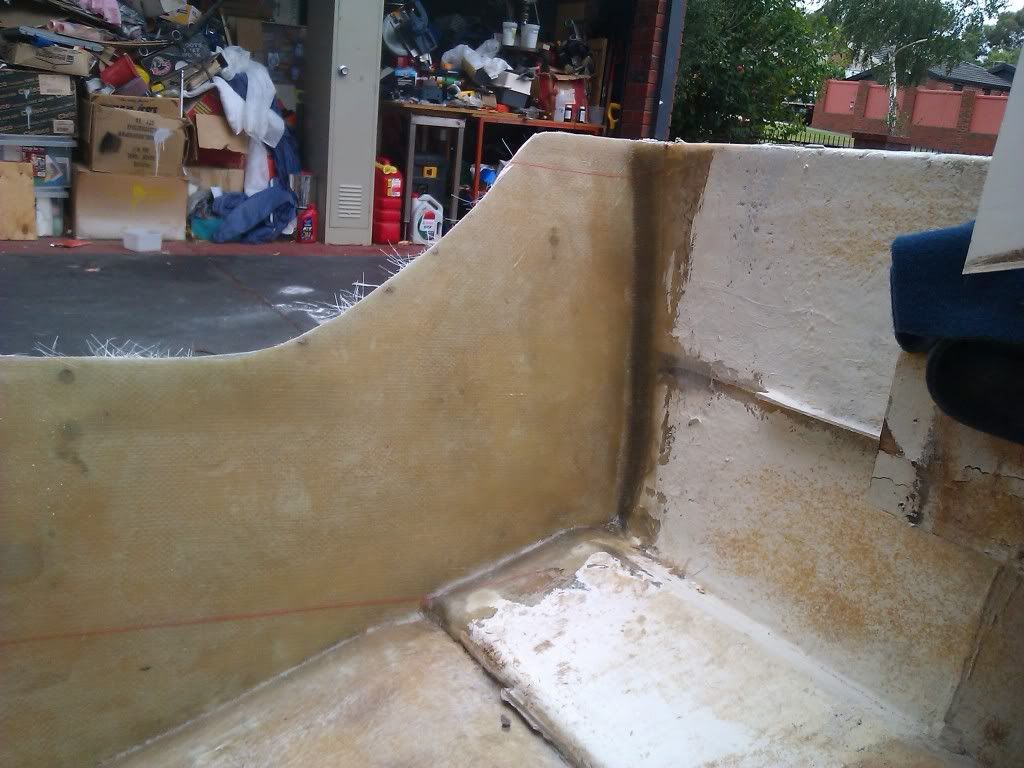
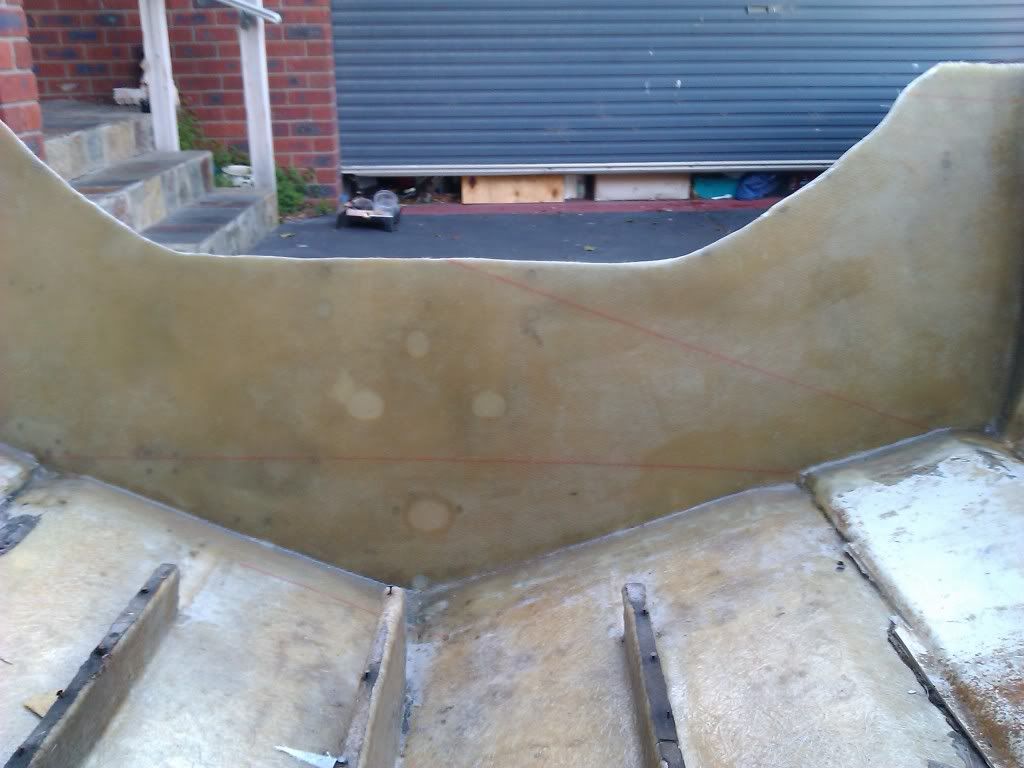
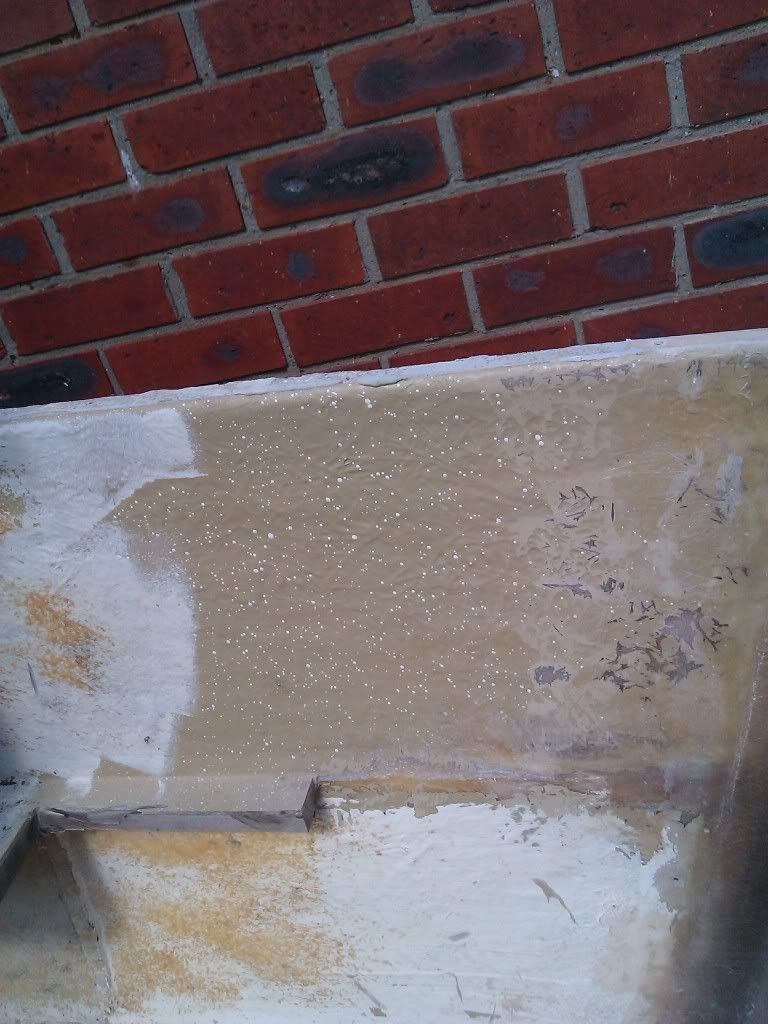
Started fixing the damage I did removing the cap, as I wanted the new glass for it to be under the new glass thats going on the transom. This is a little over size but I'll wait until the cap is back on before trimming it anymore, wouldn't want to take off too much by mistake.


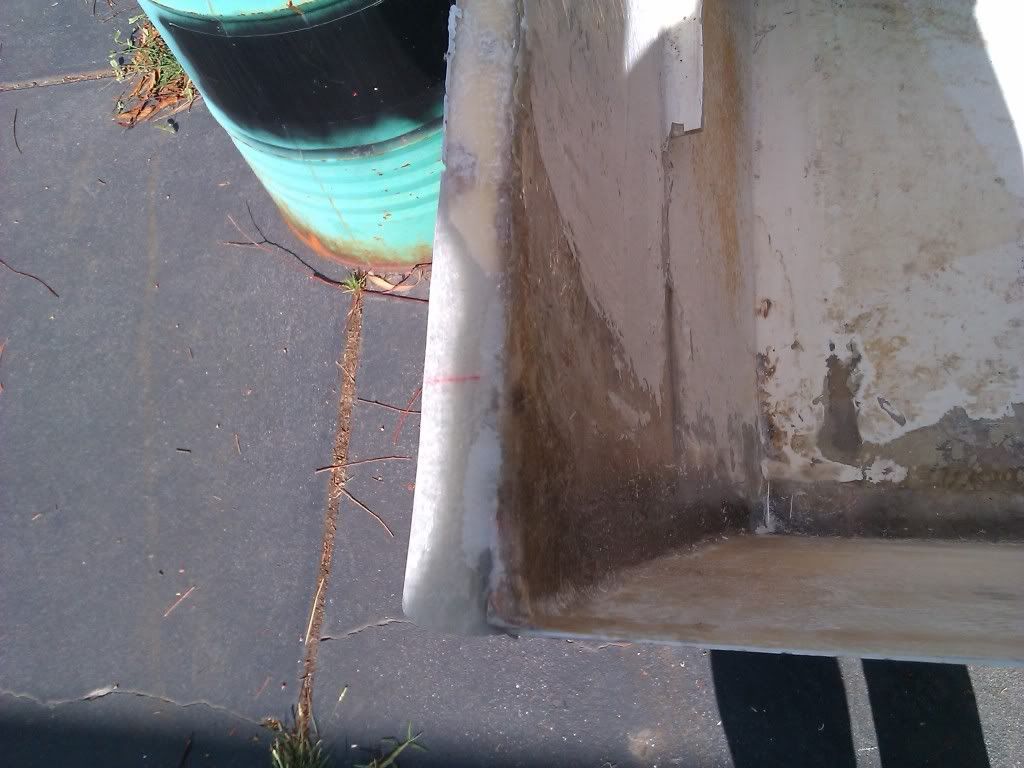
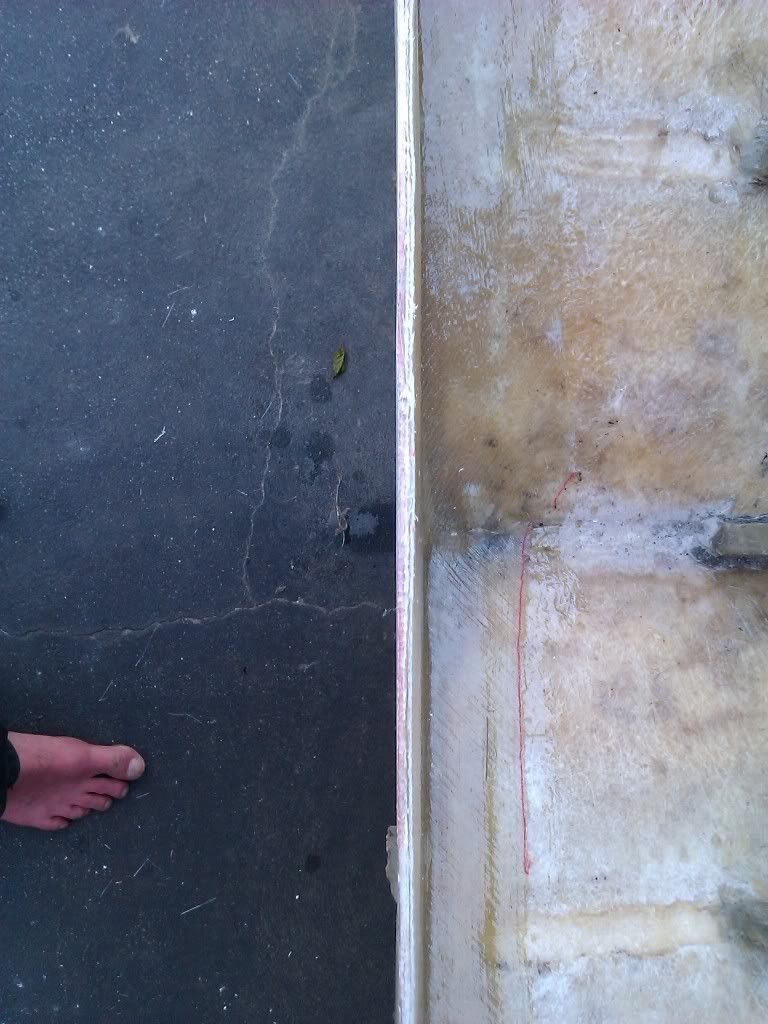
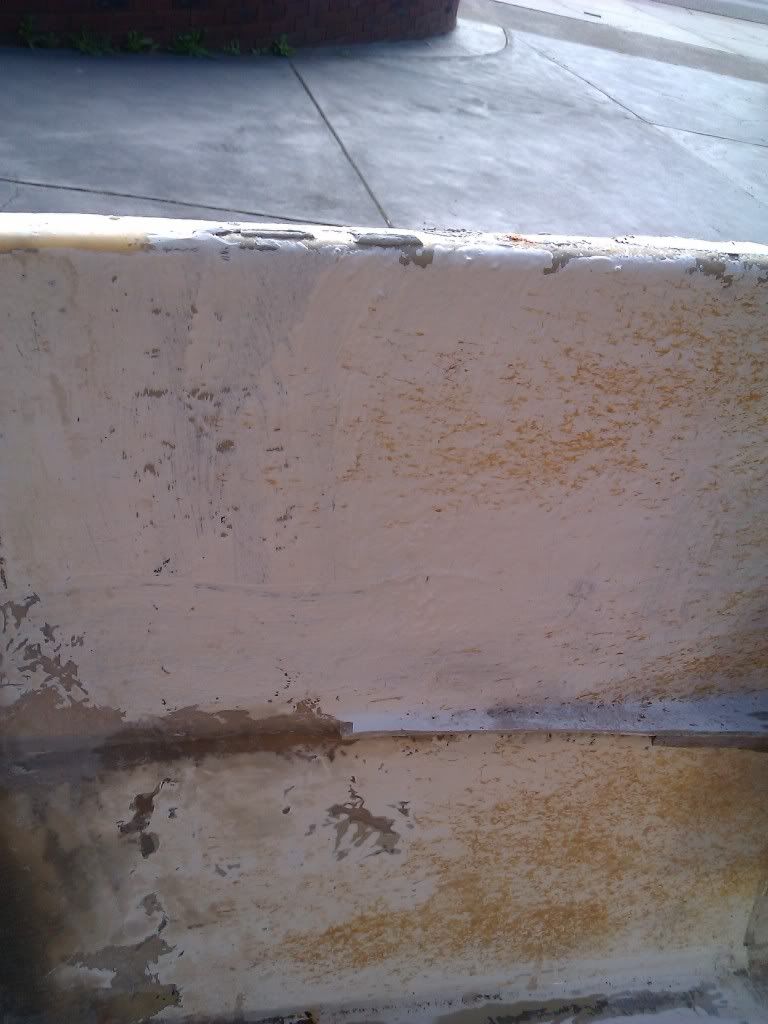
The damage in the next 2 pics was caused by me when taking off the cap, it riped because of all the pb

IMG_20120213_125923.jpg


IMG_20120213_125931.jpg


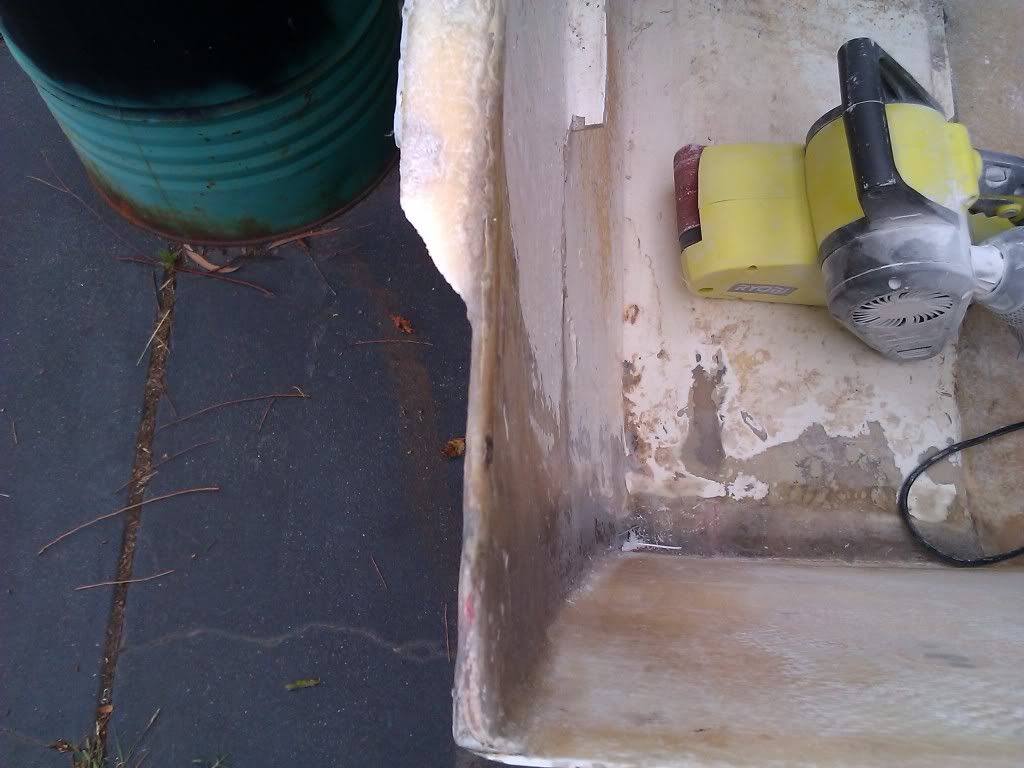
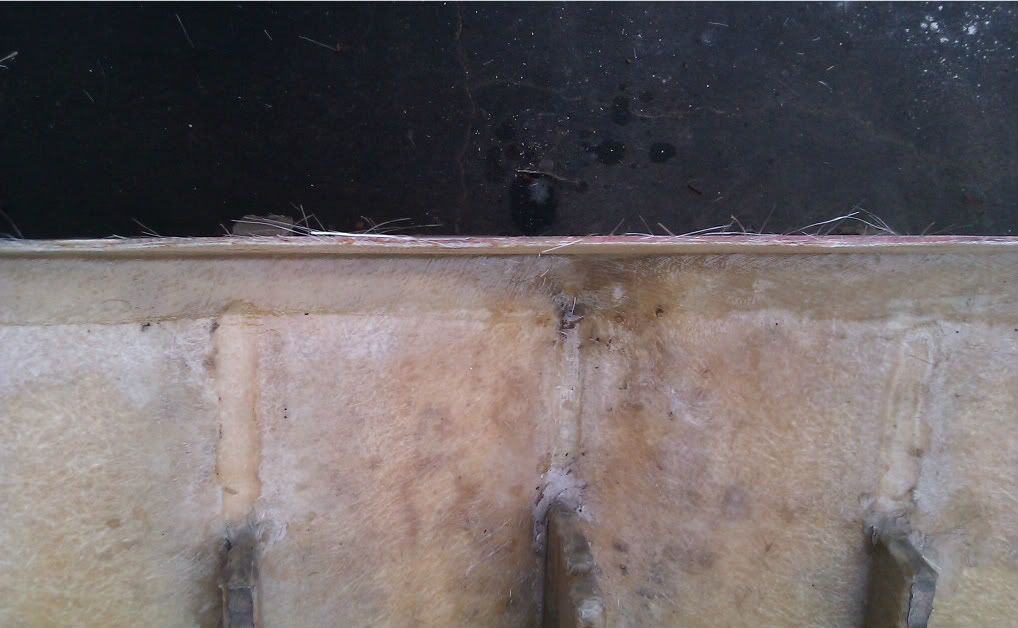
Waiting for the glass to set and getting very worried about the air bubble near the top edge.
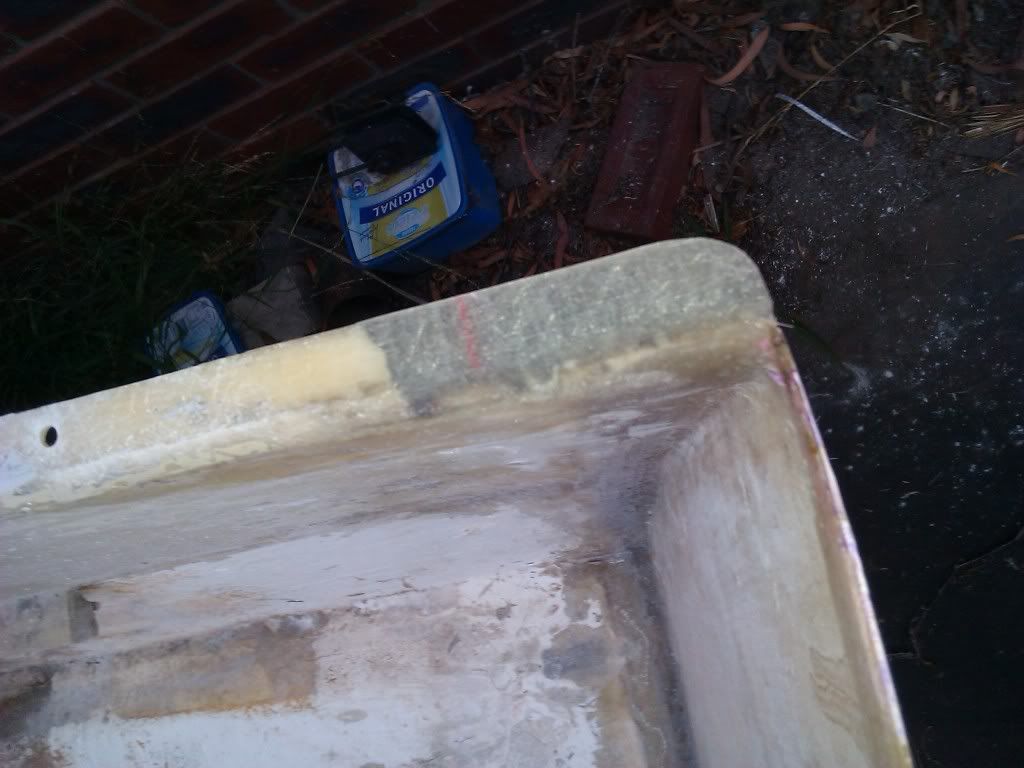
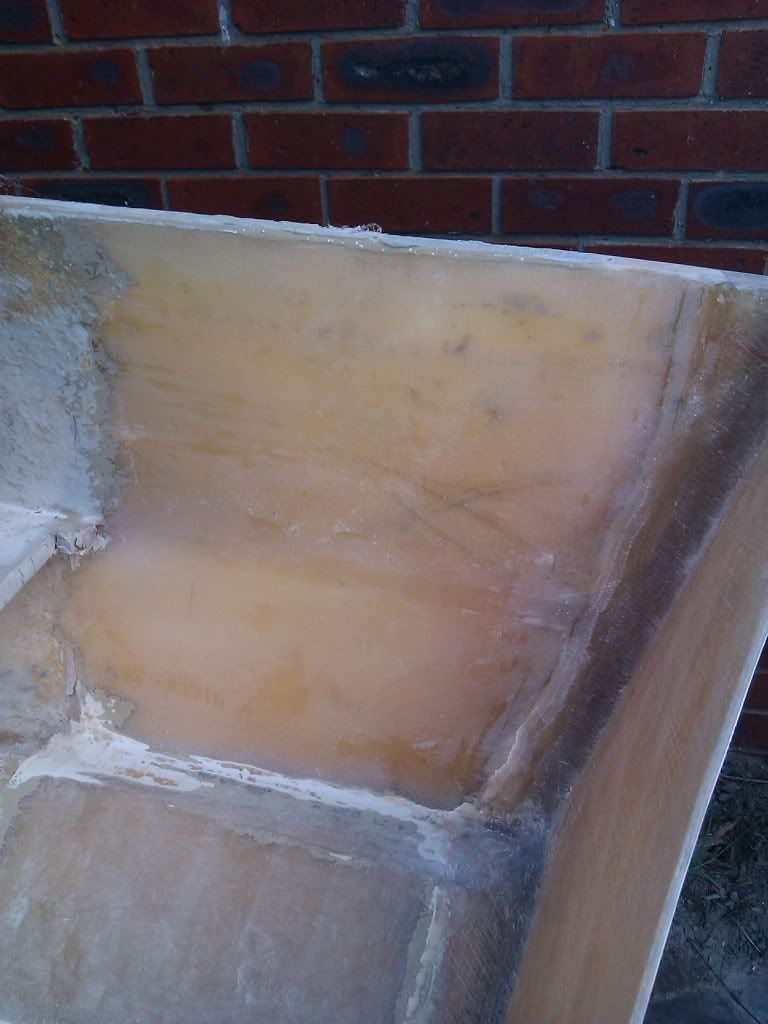
That's a formica type board, it's like thin wood with a shinny white coating on one side. On the edge that's against the hull it's glued to the skinny end of a 1x2 for support and to hold it in place. Reason for the air is I didn't round the inside of the hull where the csm was wrapped around.

IMG_20120213_140949.jpg


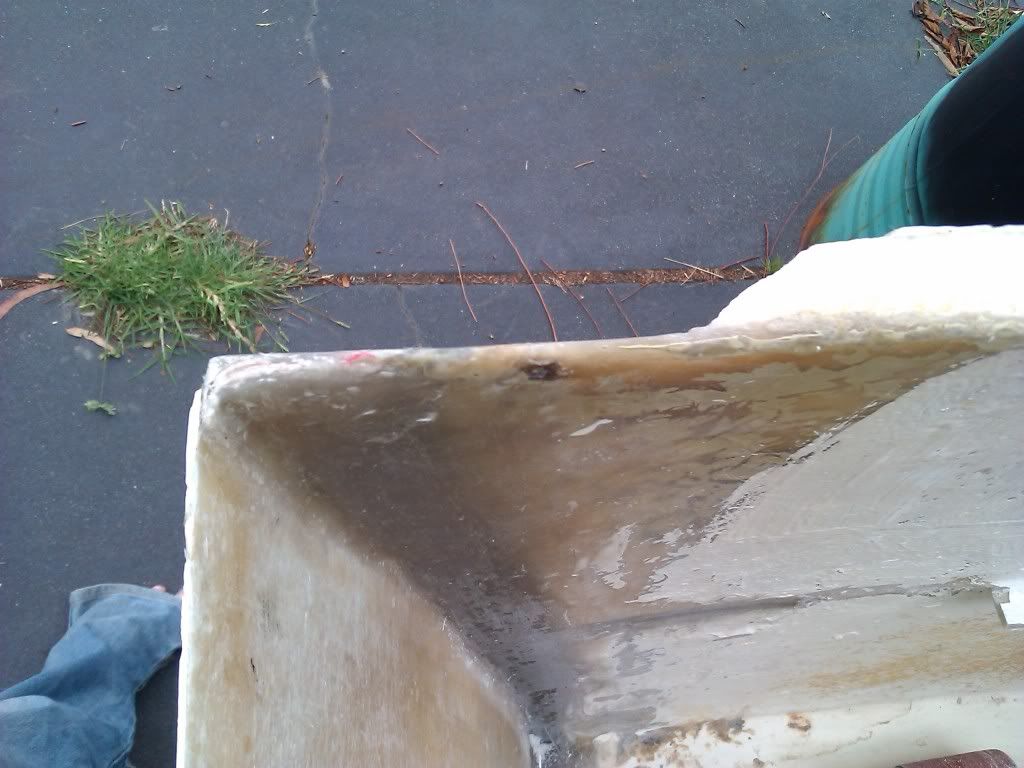
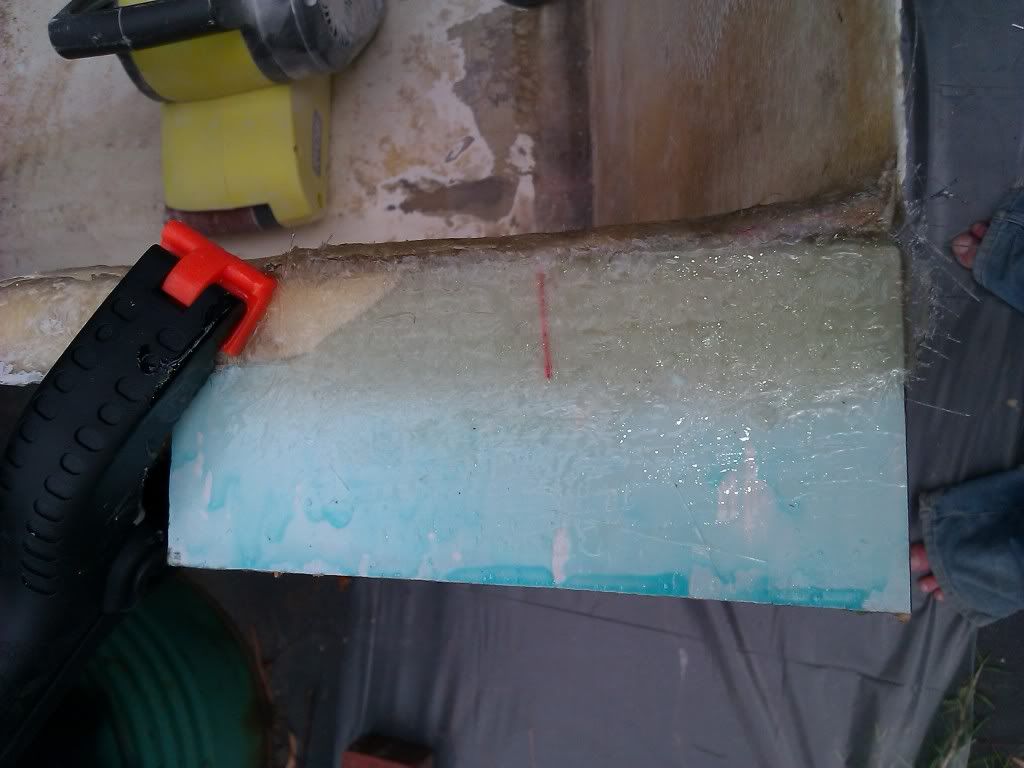
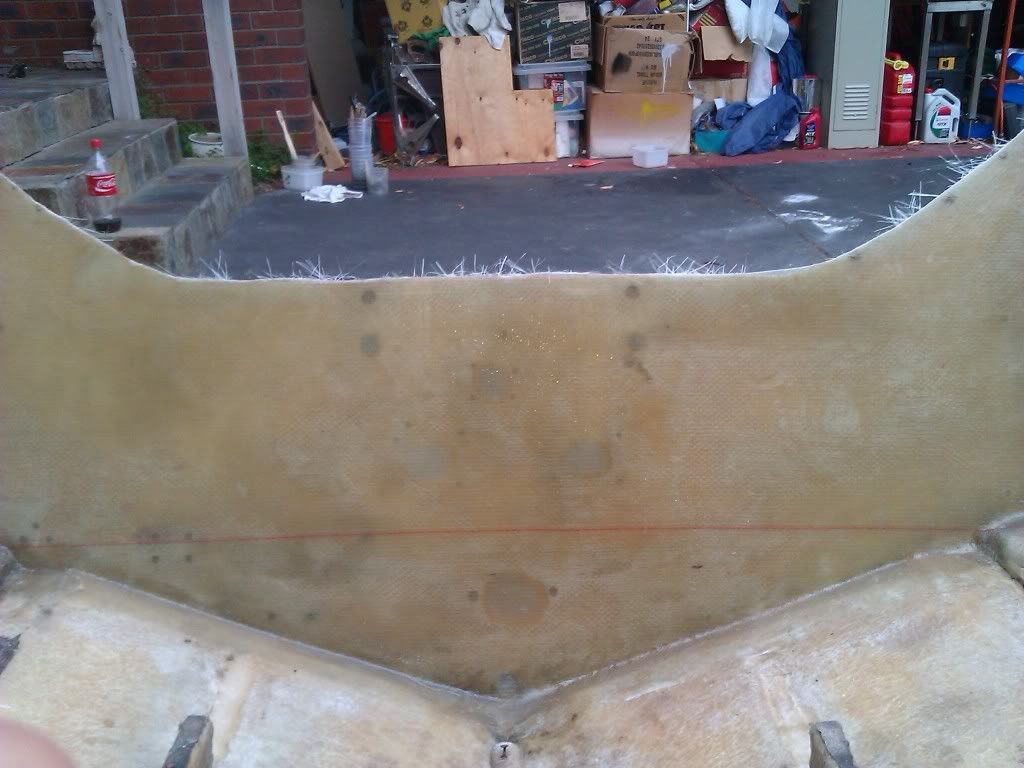
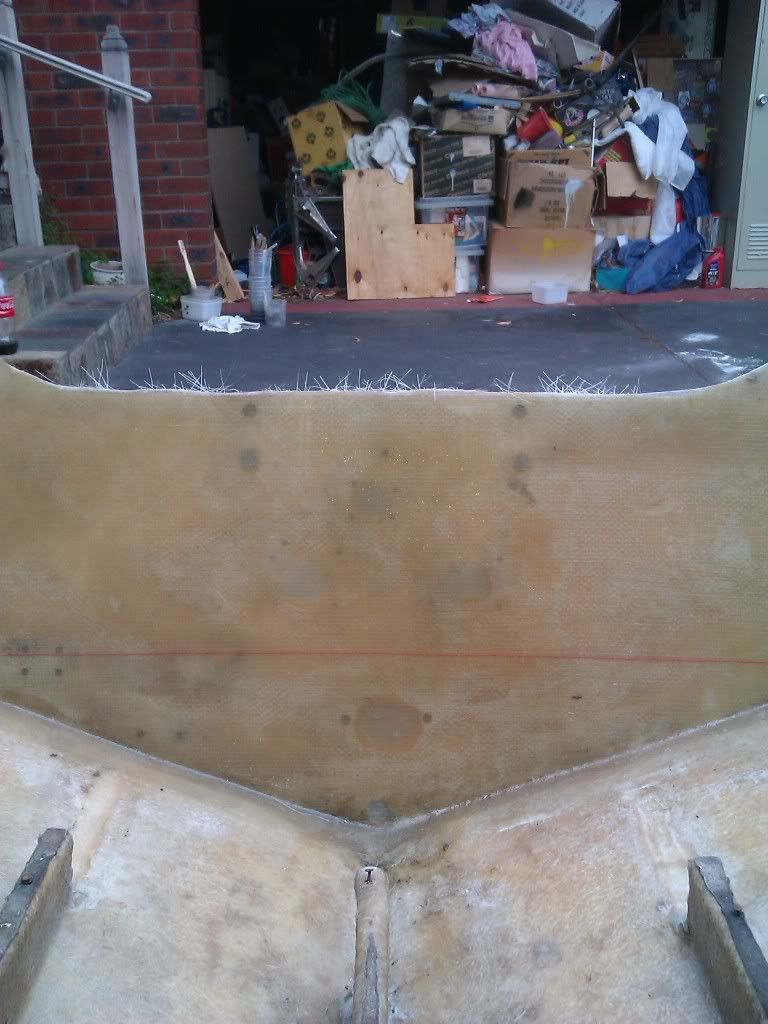
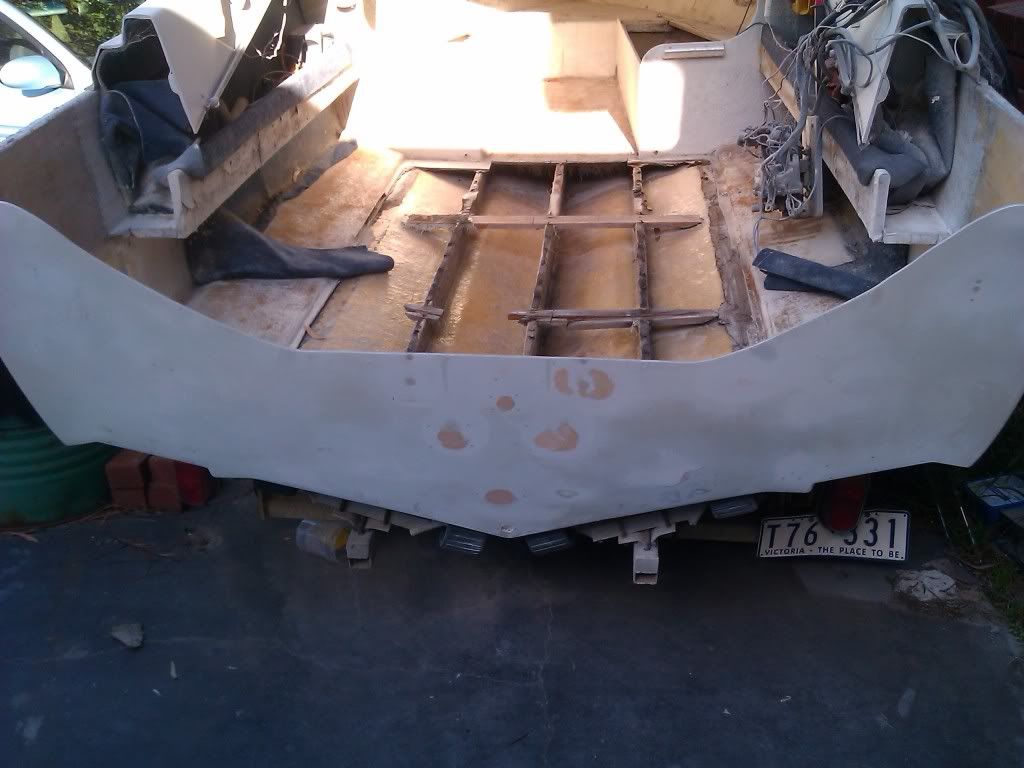
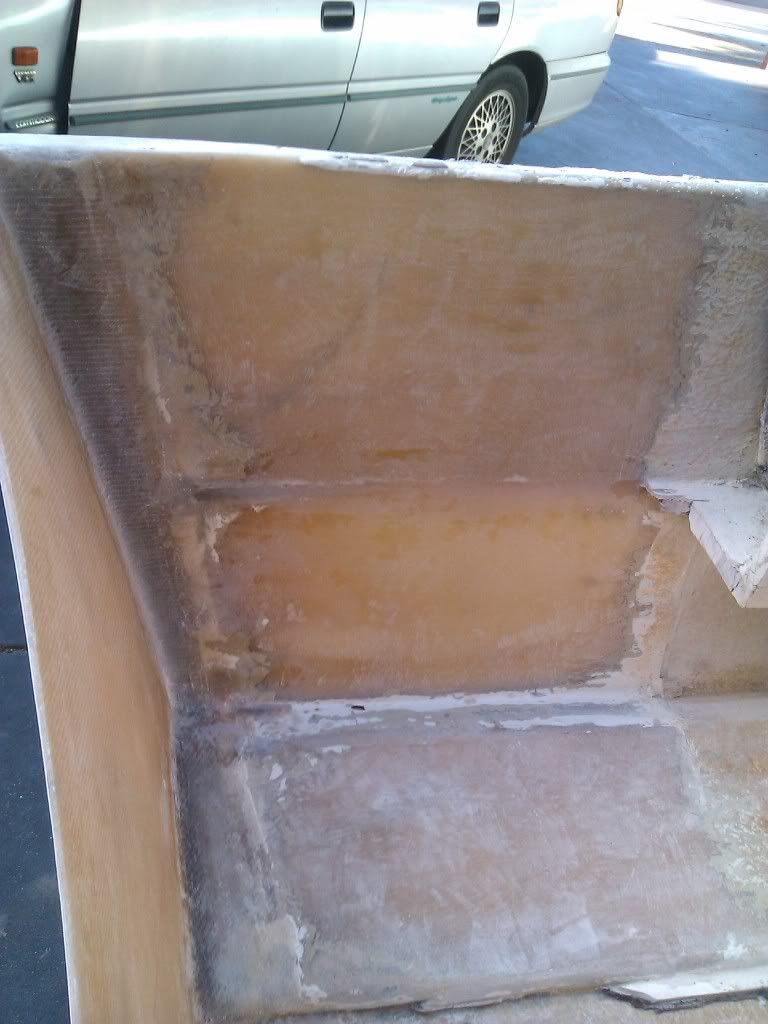
The next 2 show the finished product, except I have to grind out that air bubble and fix it up and it could use 1 more layer of csm too.

IMG_20120213_164231.jpg


IMG_20120213_164219.jpg


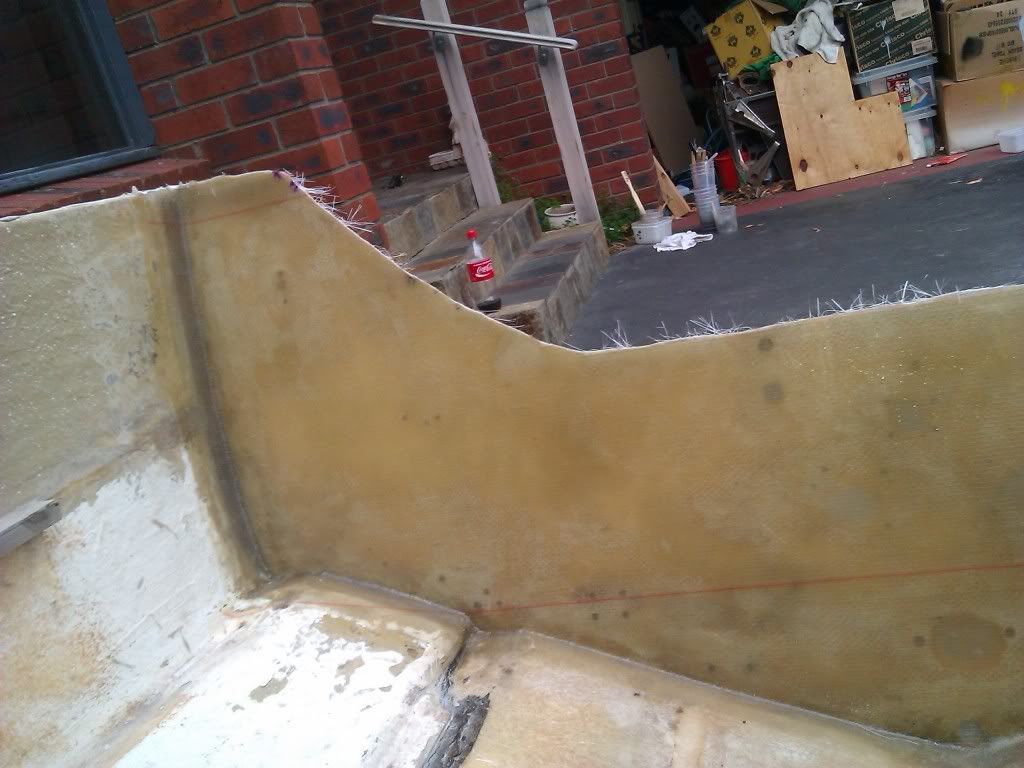
I clamped the mold to the undamaged section of the flange, then I built up the new section until flush with the top of the hull using 2 layers of 1808 the first butted against the outside of the hull and fitting inside the missing section but not going over to the inside of the hull, and just stretching over the old section of flange a tiny bit.

The second layer is basically the same but a little longer so it over laps the old flange a little more and with the fibers just stretching onto the top of the hull.

To finish it off I used 2 layers of 1 oz csm, each with a little more overlap than the last and this time wrapped around to the inside of the hull.

This is where I went wrong, I didn't round off the inside top of the hull so I had a square corner and ended up with air bubbles that I have to fix tomorrow but it's really strong and (other than the bubble) looks good. made it over sized and then sand it back flush.

Did some more grinding where the stringers have been cut back so I can fill in the slight low spots to allow for tabbing the transom in.
 

zymox

Petty Officer 2nd Class
Joined
Dec 1, 2011
Messages
104
Re: Seafarer transom and deck replacement - Updated

Re: Seafarer transom and deck replacement - Updated

I have done mine pretty much like what you are about to do.
My thread lacks all it's picture for now but check out the links and you should be able to see how I did mine.
http://forums.iboats.com/showthread.php?t=525821&page=2&p=3630230&viewfull=1#post3630230

I skipped the mat on the outer transom skin and bonded it with PB as told. I only reinforced my corners all around with overlapping laminates until I got almost the same thickness as the material I removed.

I don't think it matters if you attach the transom to the new laminate or the old one if you do it the right way. ie. grinding and cleaning well. The PB for sure will take any uneven surface without letting any air in but the laminate often wont. You need a pretty smooth surface with good rounded corners if you want to laminate over something without letting the possibility for any air-bubbles to achieve.

About the air you got trapped, you should grind em out and redo your job. Air is evil in a laminate.

See my thread and try to get the hold of those helping me out there, Ondarvr, Oops!, Woodonglass, GT1000000.
They are experts in this and has done a tremendous job helping me out.
I'm not an expert, I've only done what you are about to do and I'll bet there is several ways of doing this. I follows their instructions word by word and so far it has gone really smooth.

Also you can read Oops! thread http://forums.iboats.com/showthread.php?t=234392 about his work. It will cover everything you can imagine incl. how much you will have to tab and how 2. It has really helped me a lot.
 

Three08

Petty Officer 2nd Class
Joined
Oct 24, 2009
Messages
111
Re: Seafarer transom and deck replacement - Updated

Re: Seafarer transom and deck replacement - Updated

I'm planing to pickup the plywood tomorrow, the original transom was 1 1/8" total and rated for 150hp but I think I should make the core 2" and the skins 1/4" due to the extra weight it will have to support from the pod and swim platform. Does a 2" core sound alright or is this over kill?

I removed the air bubbles in the last repair and done the repair to the flange on the other side. Made a template out of MDF for the transom, I used the bottom of the hull as the starting point for the each piece of MDF and cut it to fit against the last one. After it was all clamped in place I made up some pb using just airosil and resin and used it to glue all the joins together using the off cuts of the MDF, the glue held the MDF in place without the need for more clamps. I'll transfer that on to a single sheet of MDF so I don't have to worry about the joints breaking during storage. I didn't get any pictures of it going together but I'll post some pictures of the finished product tomorrow.
 

Three08

Petty Officer 2nd Class
Joined
Oct 24, 2009
Messages
111
Re: Seafarer transom and deck replacement - Updated

Re: Seafarer transom and deck replacement - Updated

zymox that wood work looks great as does the glass work, top job. Looks like a nice size boat too.
 

Three08

Petty Officer 2nd Class
Joined
Oct 24, 2009
Messages
111
Re: Seafarer transom and deck replacement - Updated

Re: Seafarer transom and deck replacement - Updated

Well I've got quite a bit of work done in the last week.
I've removed and repaired those air bubbles and the flange, I also fixed the fange on the other side, that one came out perfect first shot.
The problem last time was to sharp a corner and a little movement in the mold.

IMG_20120221_192632.jpg


I filled in all the low spots in the transom skin so I have a nice flat surface to work with and I filleted the coners where the transom and hull meet as I needed to add some glass to the skin. I didn't take any pics of it at that stage as you really couldn't see any changes.

The rest of the pictures show the outside transom skin being beefed up with new glass because it was way to thin, this is 1 layer of 1oz csm and 1 of 1808 it needs 1, or maybe 2 more layers of 1808, to bring it up to a 1/4 inch. I was very happy with the results and amazed with how easy the 1808 is to work with, I found it easyer working with the 1808 then the csm it just takes a little longer to soak up the resin.

This was my first big layup and everything went perfect. Well execpt for the tiny blob of pb I dripped on the skin when filleting, I didn't notice it until I found a big hard bump as I was wetting out the csm so I had to grind that out and fill it with pb in between the 2 layers
IMG_20120229_180742.jpg


IMG_20120229_180723.jpg


IMG_20120229_180715.jpg


IMG_20120229_180700.jpg


IMG_20120229_180651.jpg


More pics in the next post
 

Three08

Petty Officer 2nd Class
Joined
Oct 24, 2009
Messages
111
Re: Seafarer transom and deck replacement - Updated

Re: Seafarer transom and deck replacement - Updated

Oh, I almost forgot to mention I found a guy on another forum doing almost the exact same conversion as I am. His boat is the same make as mine but a little smaller and its not a halfcab, the layout was all the same. He's filling the transom and adding a bracket too. I'm thinking of making the bracket and swim platform myself as well, I found a great thread about building a fiberglass brackets. I'll post the link up here later.

The thickness so far, I think 1 or 2 more layers and I should be at a 1/4 inch

IMG_20120229_180815.jpg


Time to clean up...lol

IMG_20120229_201938.jpg
 

Three08

Petty Officer 2nd Class
Joined
Oct 24, 2009
Messages
111
Re: Seafarer transom and deck replacement - Updated

Re: Seafarer transom and deck replacement - Updated

Whats the best way to fill the cutout in the transom? is it best to fill it from the inside using a mold then fit the new core or should I fit the new core and then lay the new glass directly onto the plywood core.

I've got 2 sheets of 18mm marine ply for the transom core but that only comes to 36mm or 1.4 inches what size should I make the core? I was thinking about 1 3/4 inches and aiming to get a total transom thinness of 2 1/4 inches
 

Three08

Petty Officer 2nd Class
Joined
Oct 24, 2009
Messages
111
Re: Seafarer transom and deck replacement - Updated

Re: Seafarer transom and deck replacement - Updated

I can't seem to find any information on how dry the plywood core should be before installing it. I have a wood moisture level meter and it's reading at 10% (3% more than when I first got it thanks to the evaporative air cooler) is that too moist? I'm using marine ply if that makes a difference.

I also think I need to get another sheet of ply, I have 2 sheets of 18mm for the transom, that will only give me a 1.41 inch core plus the csm used to encapsulate to the core I was thinking of getting another sheet of ply I can get 9 mm that would bring the total to 1.77 inches or if that's not enough I can get 12mm giving me a 1.88 core. The original transom was only 1 1/8" and rated for 150hp

Does anybody know how much setback the bracket will need to get full tilt I a Mercury 90hp inline 6 blue band? Should I start a new thread in the Mercury forum for this question?
 

Three08

Petty Officer 2nd Class
Joined
Oct 24, 2009
Messages
111
Re: Seafarer transom and deck replacement - Updated

Re: Seafarer transom and deck replacement - Updated

Finished beefing up the skin today, the layup was 1 layer of 1 oz csm & 2 layers of 1808 it's now a 1/4 inch thick. The next step will be to fill the motor cut out. If nobody tells me to do it differently i'll pick up another sheet of marine ply, 12mm this time and make the core 1.88 inches plus the csm

NOTE:
The white patches are not air bubbles there what was left of the woven from the original skin.

bIMG_20120305_184230.jpg


bIMG_20120305_184222.jpg


bIMG_20120305_184147.jpg


bIMG_20120305_184057.jpg
 

Three08

Petty Officer 2nd Class
Joined
Oct 24, 2009
Messages
111
Re: Seafarer transom and deck replacement - Updated

Re: Seafarer transom and deck replacement - Updated

Update

I checked the stringers and the outside 2 are rotten the center 1 has no rot but is a little wet so I'll be replacing all the stringers. The problem I'm going to have is that I'm using a roller trailer and I saw a post by oops the other day that said you should never do stringers on a roller trailer.

When glassing the transom in how do you guys get the 1808 to wrap around the corners where the transom meets the bottom and sides of the hull, do you cut?

Some pictures of my progress:

Spider cracks ground out, filled and sanded low. Not sure if i should leave it at that or finish it off before filling the cut out. I don't want to get any wax on that join.
Transom-Patchingspidercracks.jpg


Sanding the hull sides in preparation for the transom tabbing. Thanks Woodonglass for the advice on sanding all that down, I was going to soda blast it but instead used a combination of the belt sander and orbital sander with 40 grit papers there's still a small section that I think ill have to get by hand in the corner.

Before
Starboardbefore.jpg

Portbefore.jpg


Filled the low spots
Port-patchinglowspots.jpg


All sanded back
Starboard-After.jpg


Port-After.jpg


Next I'll fill the cut out and fit the core.
 

Three08

Petty Officer 2nd Class
Joined
Oct 24, 2009
Messages
111
Re: Seafarer transom and deck replacement

While trolling for info, found moisture content:
http://forums.iboats.com/showthread.php?t=234392&page=16 Post #387

Work so far is looking good. My project Nova(Mustang)1700R is just starting.
Thanks mate, I knew it would be somewhere in the hull extension thread I just couldn't find it. Welcome to iboats

So it should be less than 10% for those who are wondering.

I bought the wood for the mold tonight. I found a small problem, the outside of the transom is bowed slightly. Hopefully
it will pull out when i attach the mold to the cutout. Then again it could just be that the sides of the transom are slightly raised and stopped my straight edge from sitting flat, we'll see tomorrow when i cut the mold to size
 

Woodonglass

Supreme Mariner
Joined
Dec 29, 2009
Messages
25,929
Re: Seafarer transom and deck replacement

You cut the glass and overlap it to make the corner transition.
 

j_k_bisson

Lieutenant Junior Grade
Joined
Oct 6, 2010
Messages
1,082
Re: Seafarer transom and deck replacement

Is it me, or do you really like walking around an active fiberglass site in bare feet?
 

Three08

Petty Officer 2nd Class
Joined
Oct 24, 2009
Messages
111
Re: Seafarer transom and deck replacement

j_k_bisson, I was wondering how long it would take for someone to notice the feet, I always wear boots when I'm grinding but most other times I'm in bare feet, I stuck my sock to my foot with resin the other day.....

Thanks Woodonglass, I also took your advice on not using the soda blaster, used 40 grit instead. It took hours but i got done.
 
Top