seven_magnum's 76 Starcraft Islander 221 rebuild

CheapboatKev

Vice Admiral
Joined
Oct 4, 2008
Messages
5,813
Re: Well, I did it!

Re: Well, I did it!

Welcome!
That "thing" that came out of the outdrive is actually a "shutter" for the bellows, stops (kinda) water from being sucked back into the motor when you are scooting along then quickly shut it down. Your wake catches you,lol
Volvo has left them off for awhile, so do what you like..but I think there is another half to it still in there (?)
I will post a link for your OEM manual next
 

GA_Boater

Honorary Moderator Emeritus
Joined
May 24, 2011
Messages
49,038
Re: Well, I did it!

Re: Well, I did it!

Seven, once you get started it's hard to stop. :p Good progress. It is a good idea to label the wires even when you plan on replacing. For a wiring diagram post in the Mercruiser forums. The guys there know where the manuals are hidden. Again, great start.
 

rheagler

Senior Chief Petty Officer
Joined
Jul 14, 2007
Messages
662
Re: Well, I did it!

Re: Well, I did it!

Congrats on getting started. Looking forward to more progress!
 

ezmobee

Supreme Mariner
Joined
Mar 26, 2007
Messages
23,767
Re: Well, I did it!

Re: Well, I did it!

Great progress!
 

jasoutside

Supreme Mariner
Joined
Dec 20, 2009
Messages
13,269
Re: Well, I did it!

Re: Well, I did it!

On your outdrive...

I wouldn't start throwing money at it till you know it's good to go. You can easily throw big cheddar at that thing rebuilding when $1200 buys you a brand new SEI with a 3 year no fault warranty.:)
 

ezmobee

Supreme Mariner
Joined
Mar 26, 2007
Messages
23,767
Re: Well, I did it!

Re: Well, I did it!

Speaking of throwing money....I would also look into buying new seats as opposed to reupholstering yours. News seats aren't really that expensive and are often made with rot-proof plastic bases.
 

seven_magnum

Petty Officer 2nd Class
Joined
Oct 4, 2011
Messages
127
Re: Well, I did it!

Re: Well, I did it!

I didn't make as much progress today as I was hoping... I had the day off of work because Im going on a trip to North Carolina on Wednesday. My plan was to spend the day on the boat and engine. Well, at 8 this morning I got was called in for a service call in Baltimore. Long story short, I didn't get to start on the boat until a little after two.

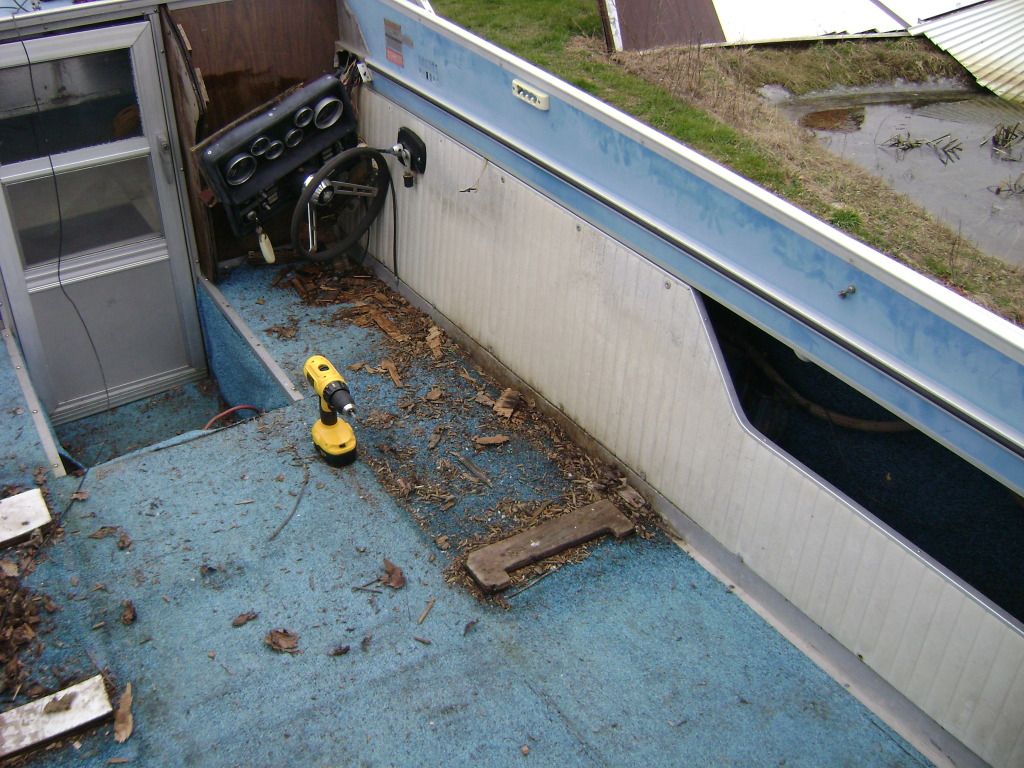
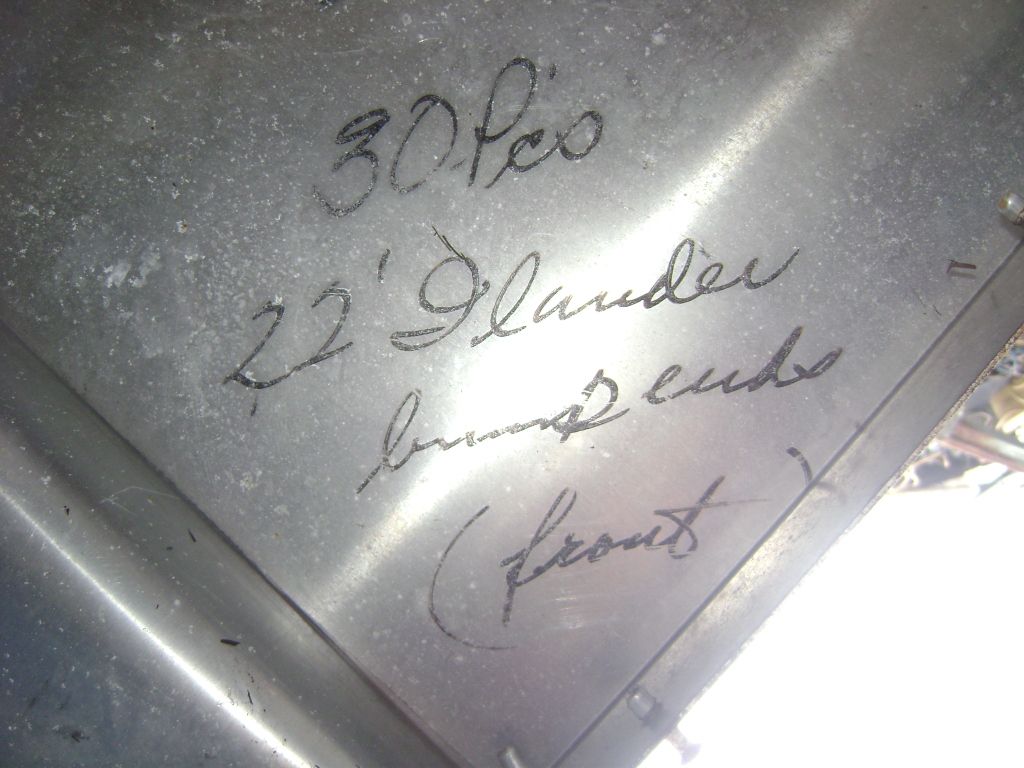
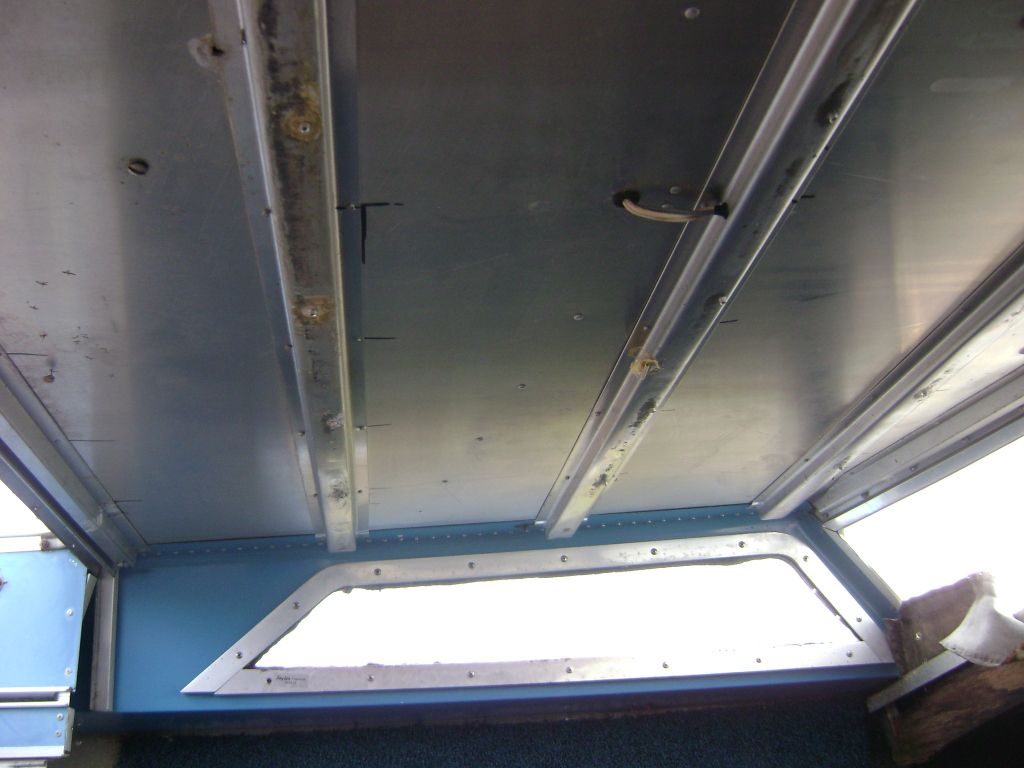
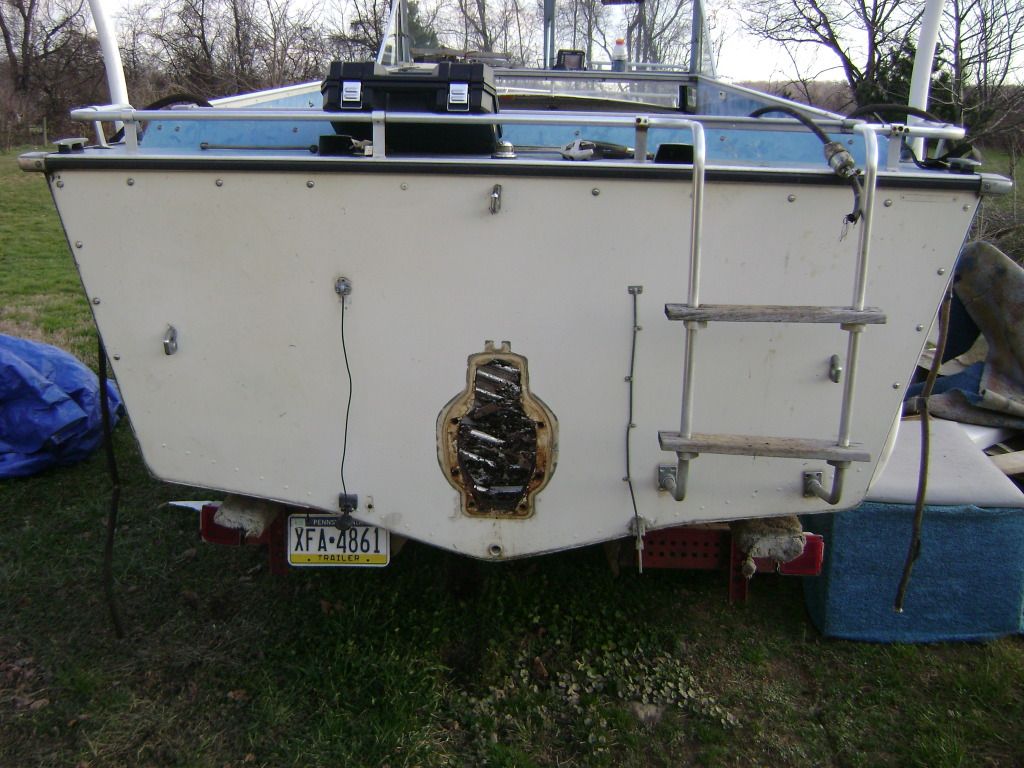
I decided with the little time I had, the floor was the biggest priority. I took a few pictures of what was in place now with trim and started ripping and tearing.

DSC00006.jpg


I pulled out all the carpet (Except for in the cabin) and started pulling up boards. Most of the screws either broke when I tried to remove them, or wouldn't budge. (Heads rusted to the point I couldn't get on them.) I used a crow bar and broke the heads off of those stubborn ones. The wood was very soft and offered little resistance. I also had to remove the fuel tanks to get to the screws underneath. These were riveted in place. I was unsure of the correct way to get them out, but I used a cold chisel and a hammer. (I was very careful about not creating any sparks. My chisel is coated in plastic on the striking end as well.) The rivets broke free and the tanks came right out.

DSC00025.jpg


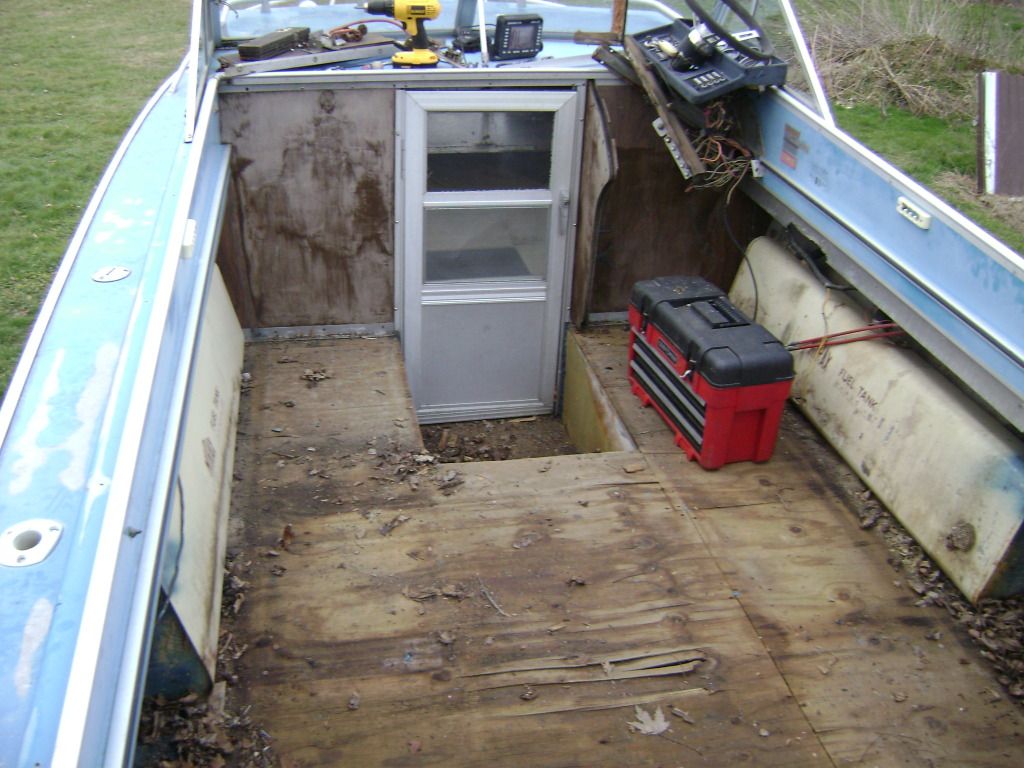
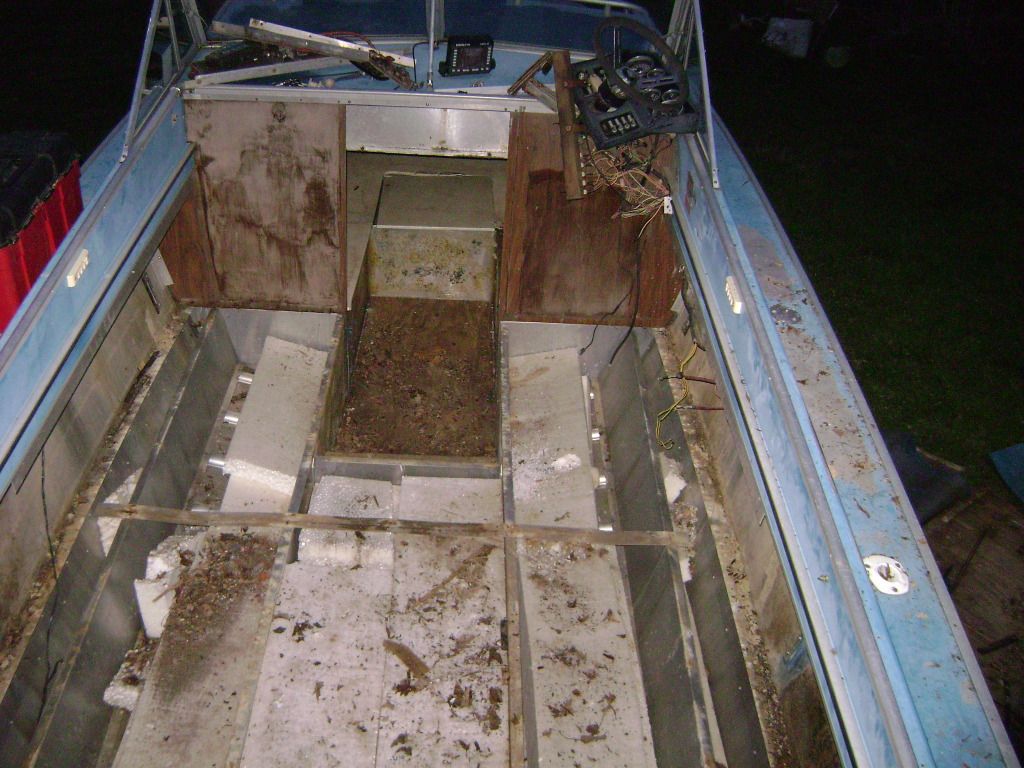
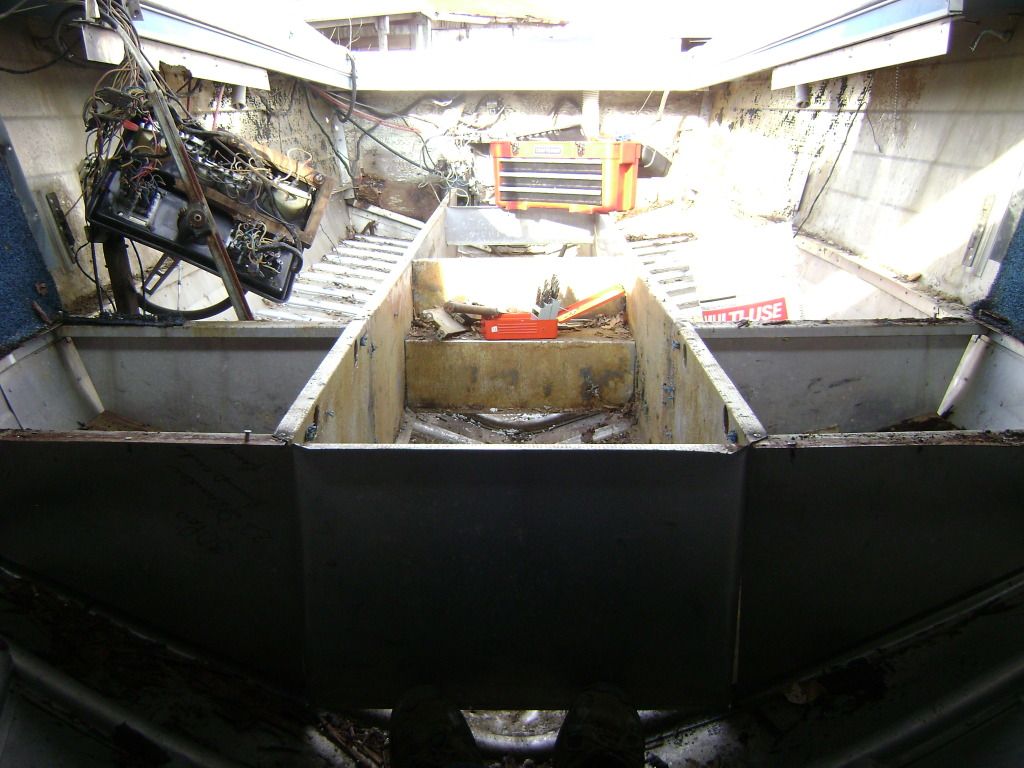
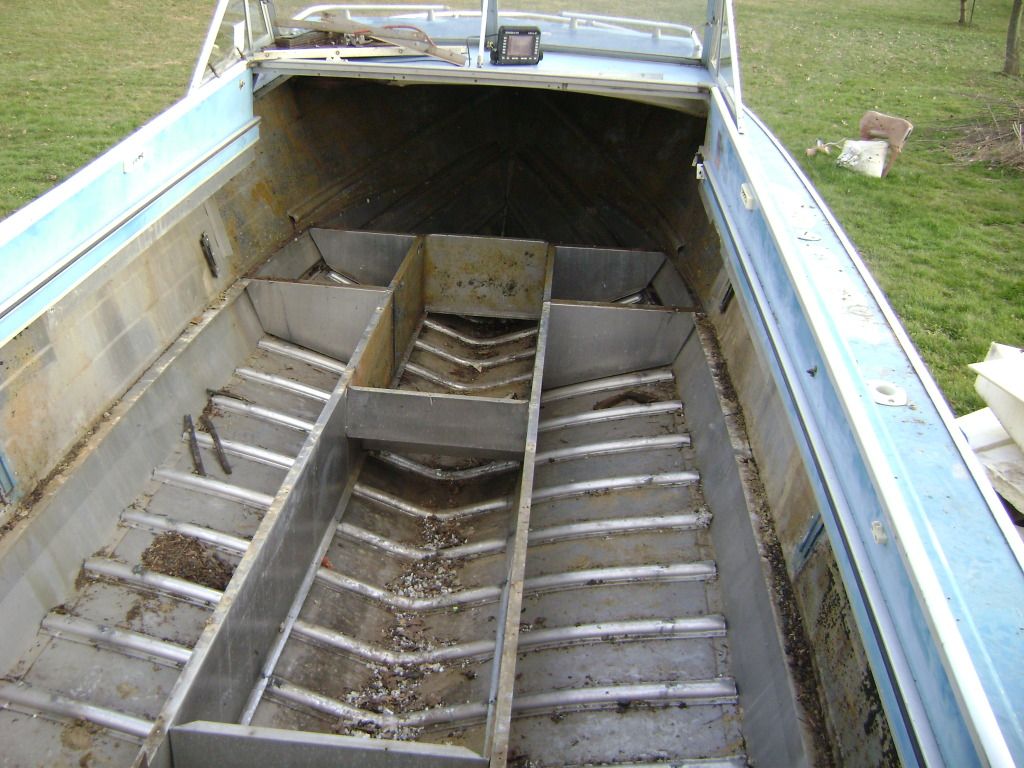
Then I tore up the rest of the floor. I did not remove any foam yet, but it is just laying in the boat loose and is dry! I will pull it all out tomorrow (Don't have to work tomorrow either) and see how far I can go. I am going to take out the cuddy wall next, and see about the aluminum framework that supported the floor.

DSC00060.jpg


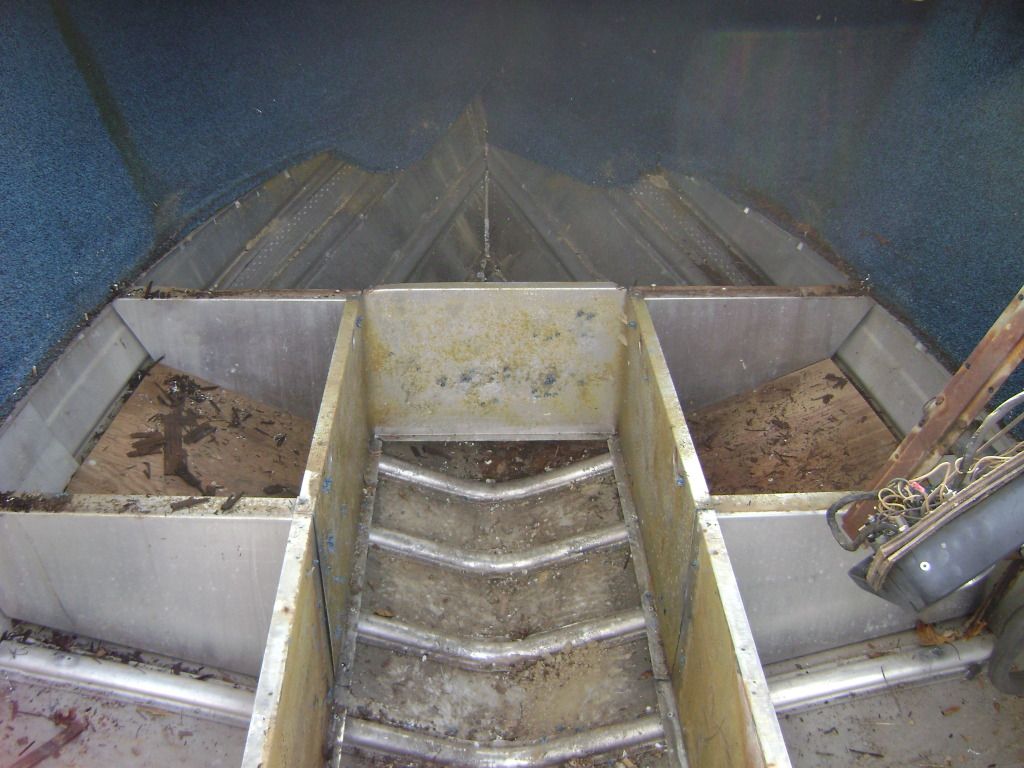
The two main beams in the center are solid except for where they meet the transom. The wood there is gone and the beams are just floating. The outer two beams are completely loose. It looks like they were riveted to the ribs of the hull at one point in time. The floor was replaced once before (I could tell by the number of holes from screws in the aluminum) and I guess they never fastened these outer beams?

My question today, is there any problems I will create by removing these support pieces? I need to get it to the point where I can fix any leaky rivets (there seem to be bunch at the front of the boat) and apply gluv-it. I need to haul the boat to work to perform most of this work. It's heated in there all winter, and they have a few over head cranes. They also gave me the ok to do this work because we won't have anything coming in for a while. I want to flip the boat but am a little concerned with damaging the hull if I remove this structure. Hopefully I am just parinoid, as it seems plenty strong.

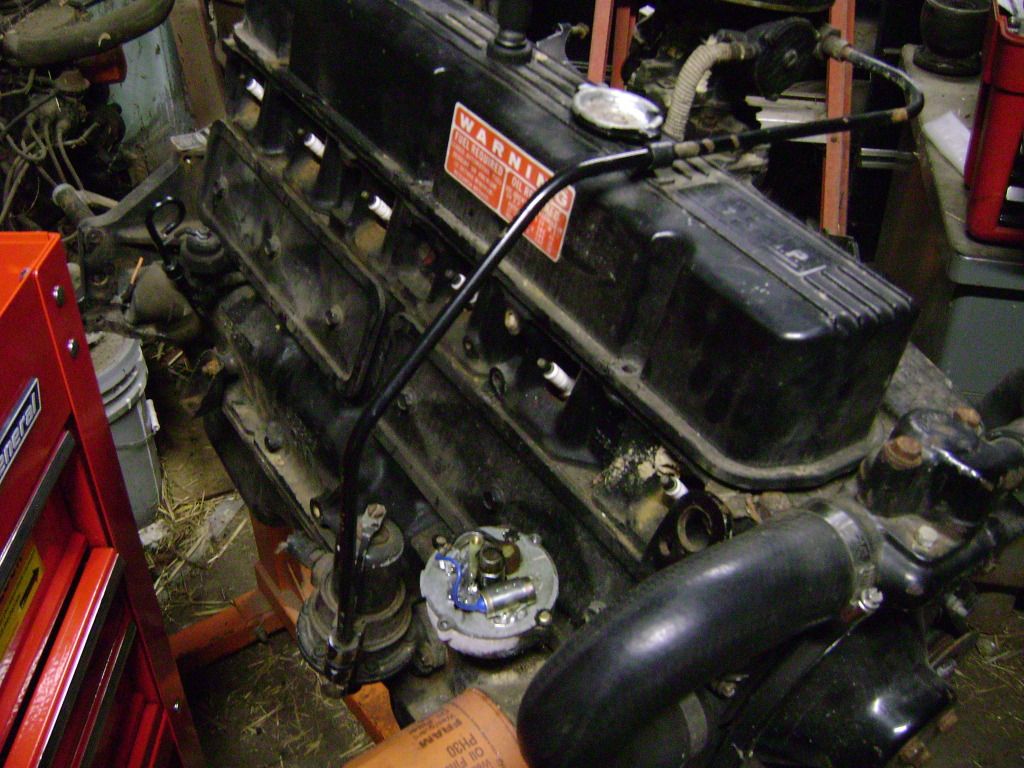
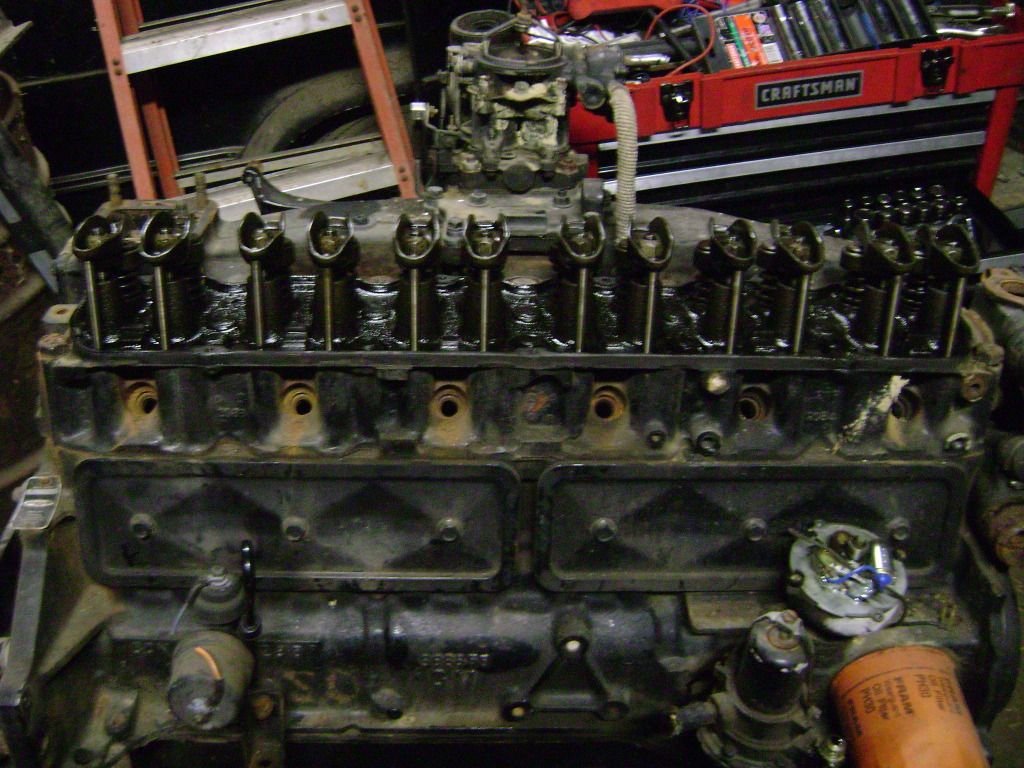
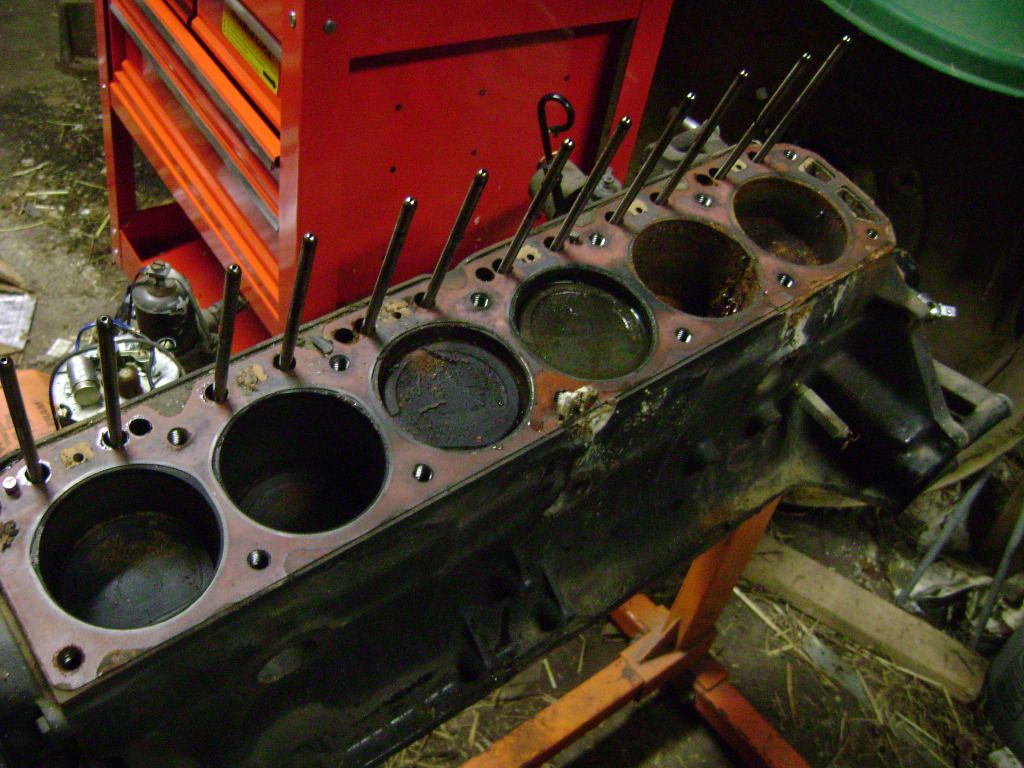
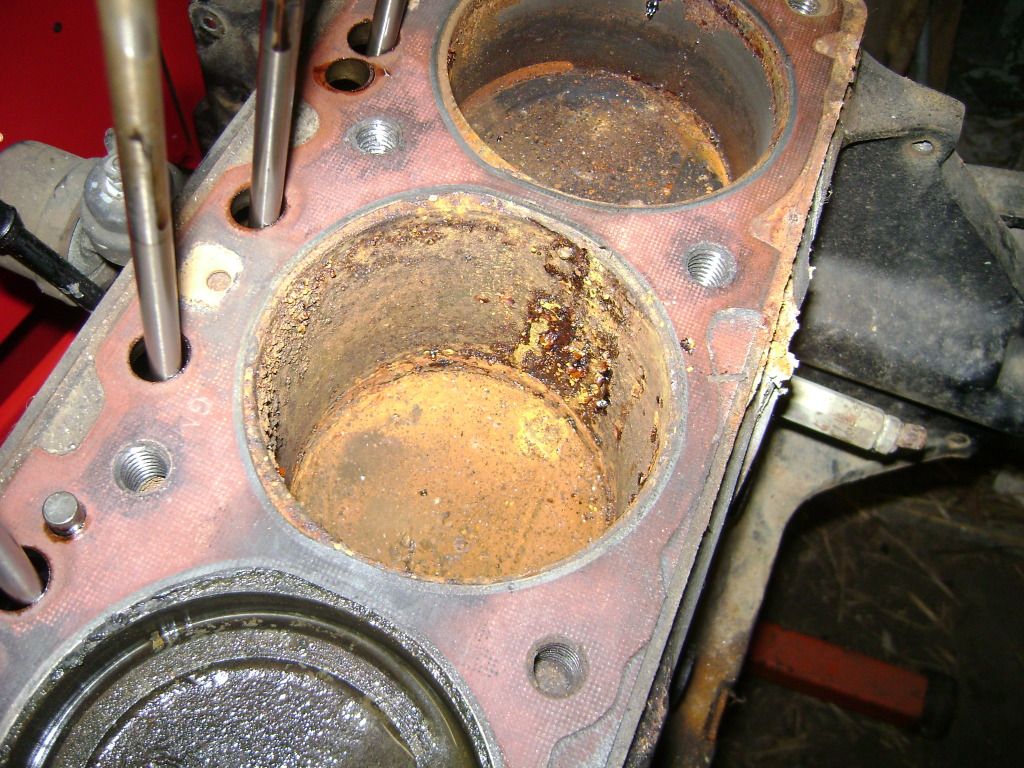
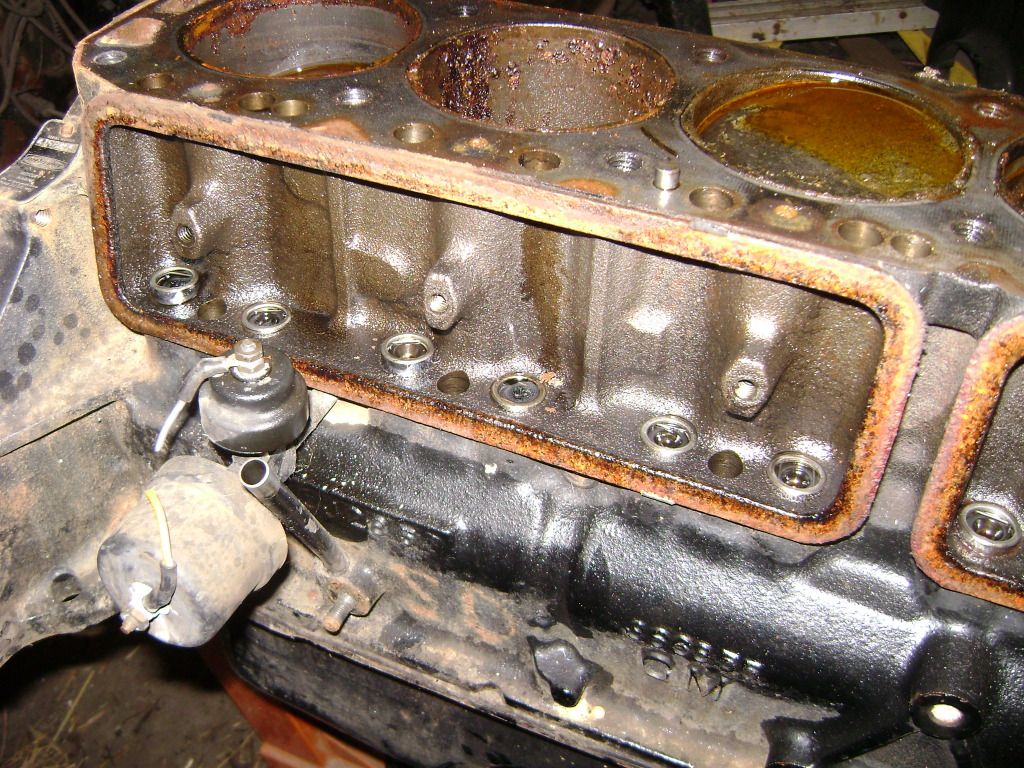
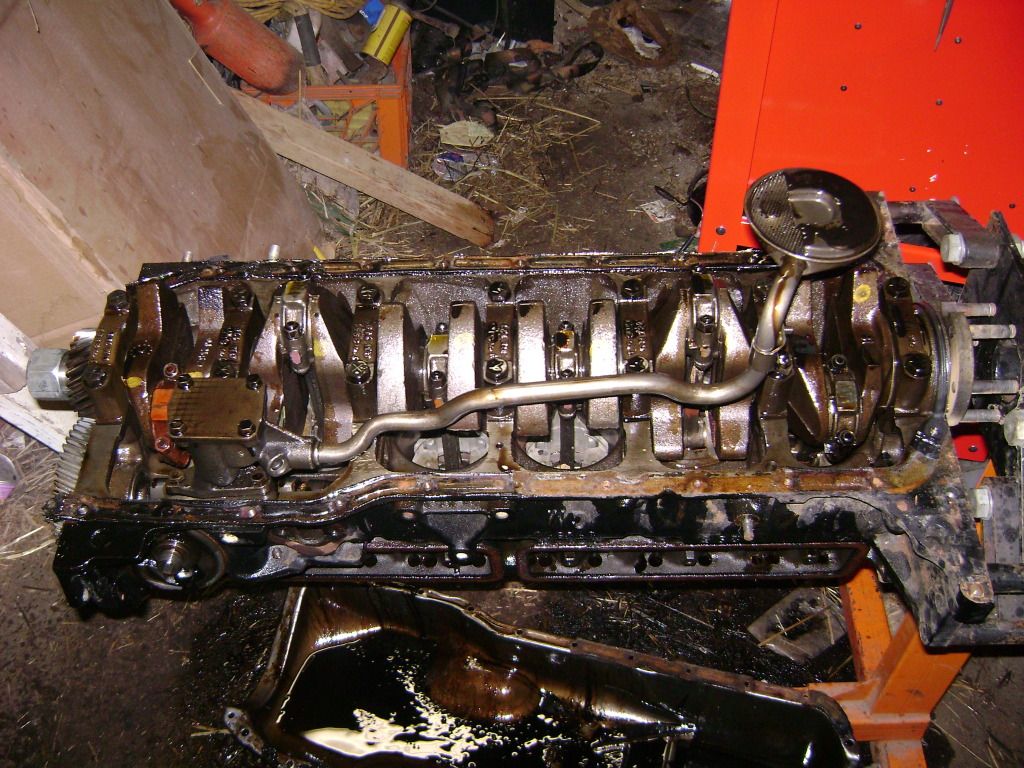
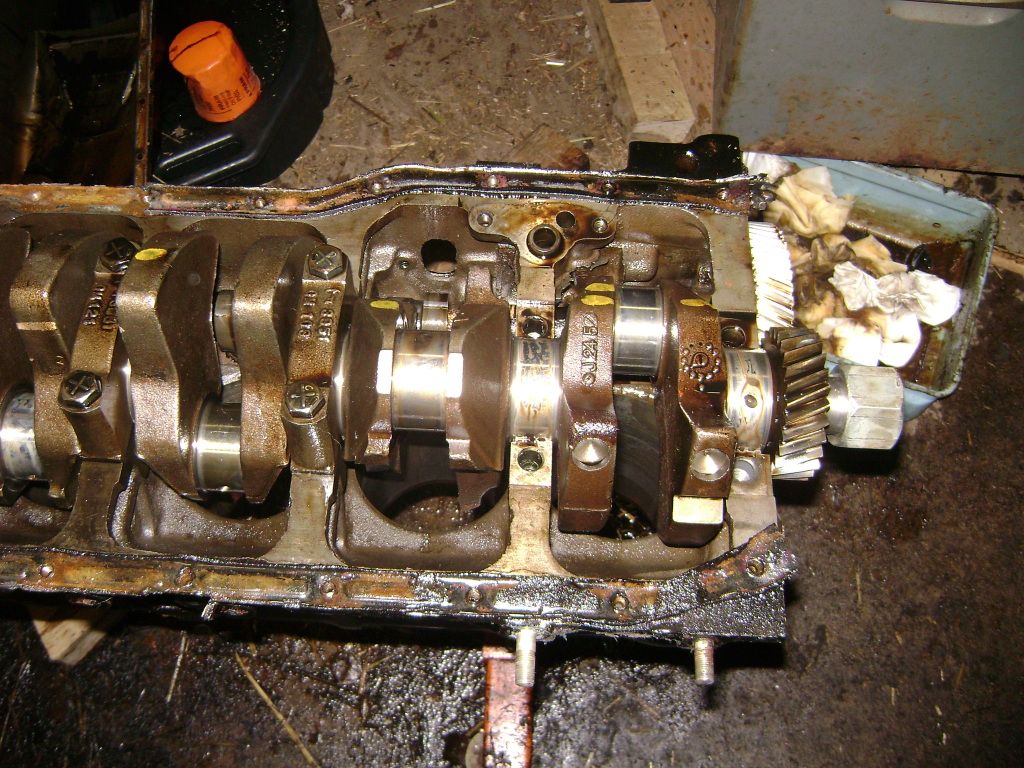
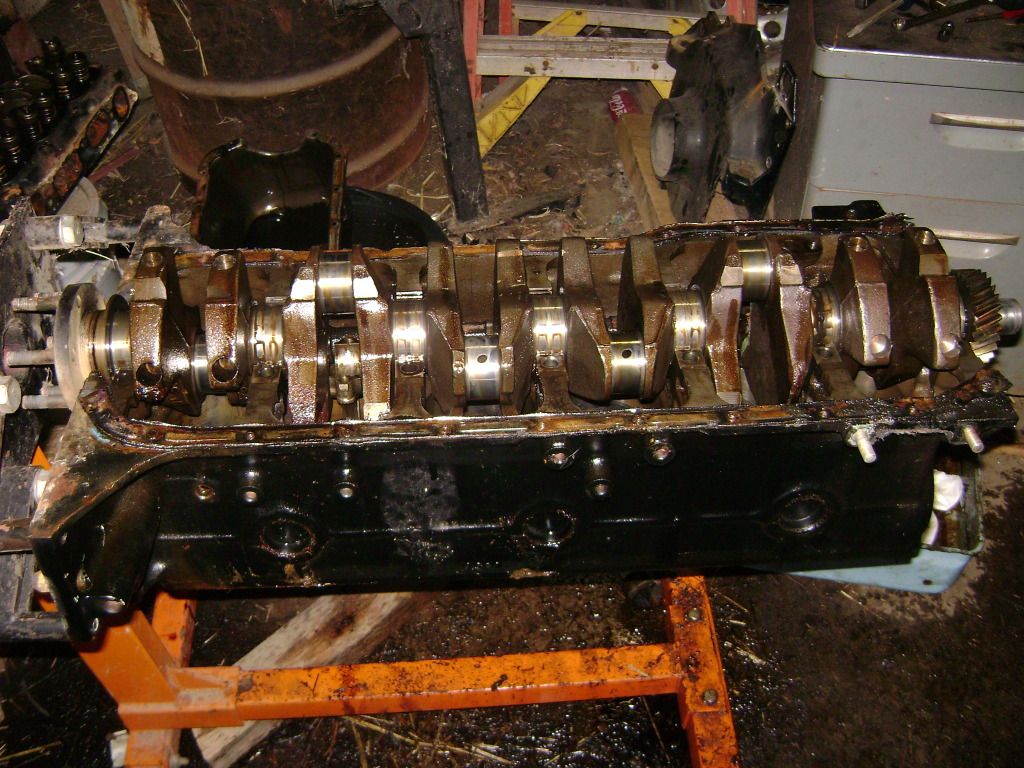
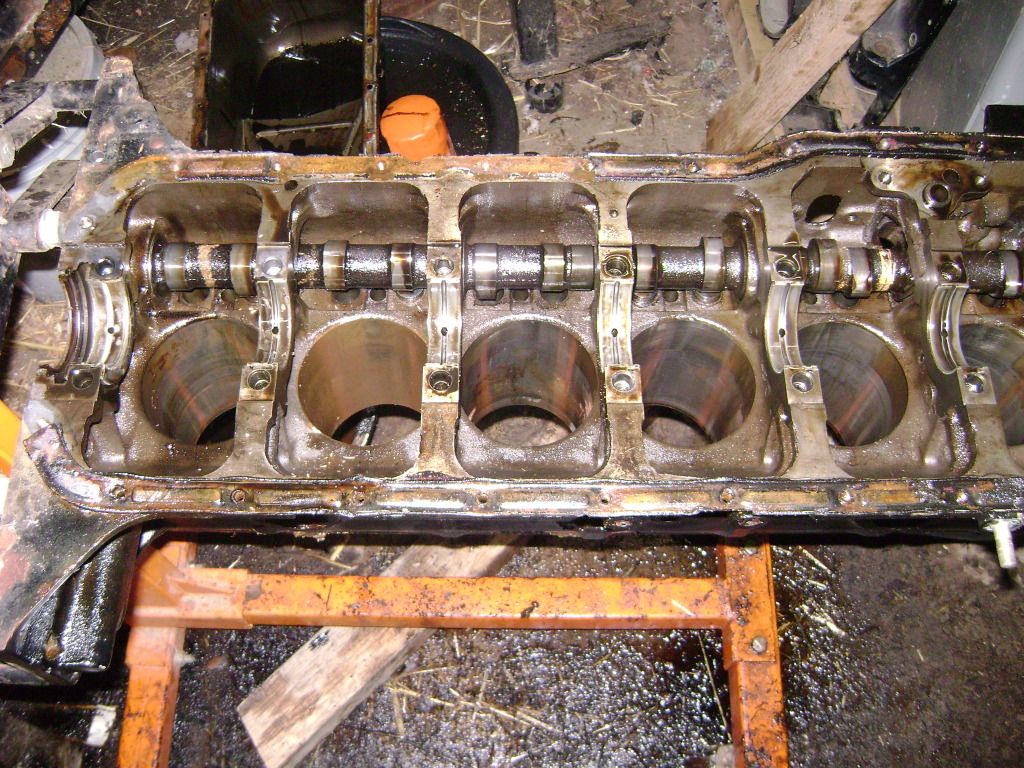
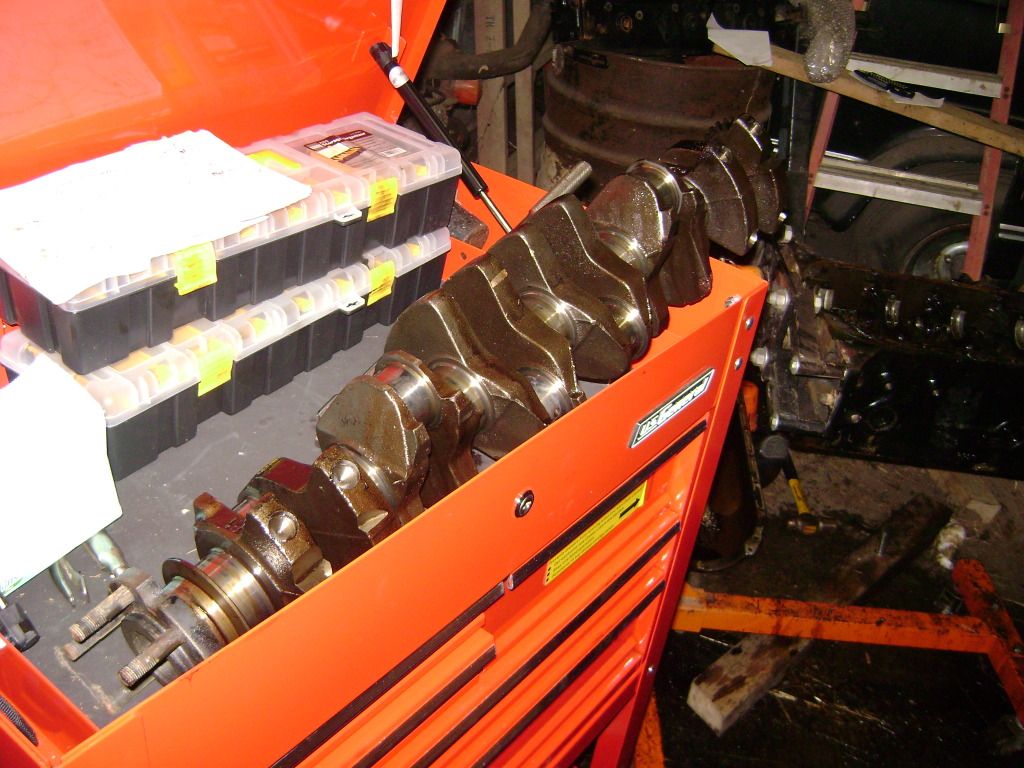
Also tomorrow, I am going to work on the engine. She seems pretty tight to me, but I am planning a complete rebuild anyhow. If it wants to be a real pain, I have an automotive chevy 250 sitting on the floor right now that I will put in. It only has 35000 miles on it and ran like a top when the vehicle was scrapped.

Once I see what is going on with the engine, I need to see about ordering parts. Except for the valves, valve springs and cam are there any internal differences between this marine engine and an automotive? I don't want to do this job again for a LONG time! haha.

I thank you for your time!

Foster
 

GA_Boater

Honorary Moderator Emeritus
Joined
May 24, 2011
Messages
49,038
Re: Well, I did it!

Re: Well, I did it!

Hey, Foster. I believe the head gasket is marine as well. On the stringers, I seem to remember that Jason kept tripping over them and finally pulled then out until he got ready to put the plywood back in.
 

rheagler

Senior Chief Petty Officer
Joined
Jul 14, 2007
Messages
662
Re: Well, I did it!

Re: Well, I did it!

Nice progress!
 

heyyou325

Chief Petty Officer
Joined
Feb 17, 2011
Messages
649
Re: Well, I did it!

Re: Well, I did it!

My stringers were real pliable. I placed an old piece of plywood, unattached so I could move it back and forth on mine. This way I didn't have to sit down all the way on the hull, and I worked on the aluminum sitting on the plywood. And, I'm not positive on the head, didn't think it needed to be marine. The intake manifold may need to be marine tho, I'm not positive on it as it's fuel related. I believe it's just electrical and fuel related things. The inside of the hull I can see in your pics looks pretty clean, and not much corrosion. You got a good start, keep up the good work.
 

jasoutside

Supreme Mariner
Joined
Dec 20, 2009
Messages
13,269
Re: Well, I did it!

Re: Well, I did it!

On the stringers, I seem to remember that Jason kept tripping over them and finally pulled then out until he got ready to put the plywood back in.

Pretty funny you remember that GA:rolleyes::facepalm:

Yah, I should have pulled mine out at the outset, it really made the rebuild process a bit easier once I did. Learn from my mistakes man:D
 

GA_Boater

Honorary Moderator Emeritus
Joined
May 24, 2011
Messages
49,038
Re: Well, I did it!

Re: Well, I did it!

I believe the head and probably intake gaskets are marine is because of salt water in an raw water cooling system and no antifreeze with rust inhibitors in freshwater cooling.

Pretty funny you remember that GA:rolleyes::facepalm:

Yah, I should have pulled mine out at the outset, it really made the rebuild process a bit easier once I did. Learn from my mistakes man:D

I feel like Einstein after reading your whole thread before I joined. When I start I'll try to avoid your mistakes and only make my own :redface:
 

seven_magnum

Petty Officer 2nd Class
Joined
Oct 4, 2011
Messages
127
Re: Well, I did it!

Re: Well, I did it!

I had a the better part of the day to keep working on the boat. First, I pulled out the cuddy walls and floor in the cabin. Then I removed the plywood that was under the cushions in the cuddy. I also pulled out the cross braces so I would not trip over them. The outer two supports that run the length of the hull were not attached to anything except for the plywood of the floor. I pulled those out of the way as well. I think I am going to leave the rest of the structure in there. It gives me a place to sit and put my toolbox and doesn't seem to be in the way for the rest of the process. Then I pulled out all the foam. It was fairly dry and no work at all to pull out. It was just big blocks laying here and there.
DSC00065.jpg

DSC00066.jpg


One neat thing I found was all the ribs had there number written on them, numbers 1-18. I also found this writing on one of the compartments in the cuddy.
DSC00067.jpg


Then out came the headliner
DSC00072.jpg


Next, out came the steering and controls. I simply unhooked the cables from the transom assembly and slid them out the way they were routed. I also pulled the rest of the wires off the transom assembly and unhooked everything to get the harness out of there. I pulled out the dash with the wiring harness still in tact. Wow, the boat is open now!

DSC00149.jpg


Then, before I had to pack everything up was pulling the transom assembly. I loosened the 8 bolts and the two halves pulled right apart.

DSC00148.jpg


Well, thats all the progress I can make this week. Work is calling down in North Carolina. I covered the boat up and will get back at it next week!

I thank everyone for there comments and support! I don't know if I would have been brave enough to take on a project of this size without this site. I have done little boats before, but nothing like this. Thank you for your help!!

Foster
 

Pugetsound

Lieutenant Commander
Joined
Apr 5, 2009
Messages
1,824
Re: Well, I did it!

Re: Well, I did it!

Wow looks like fun Been there done that results are well worth the effort. Just price a New One.
 

jasoutside

Supreme Mariner
Joined
Dec 20, 2009
Messages
13,269
Re: Well, I did it!

Re: Well, I did it!

Nice job 7, looks like you are just about down to the bare bones of this Islander, excellent:)
 

seven_magnum

Petty Officer 2nd Class
Joined
Oct 4, 2011
Messages
127
Re: Well, I did it!

Re: Well, I did it!

Sorry I have not had time to update this thread recently. I have been busy at work, then busy at night with the engine. Usually when I get done I am tired and go straight to bed.

That old 250 turned out to put up more of a fight than I was expecting. Everything was working out well on the tear down. All was normal until I got the head off. Cylinders 1-4 looked really good. Infact, I could still make out cross hatch! 5 and 6? Rusty. Really, really rusty.:mad:

I guess this is why I could not turn the crank by hand. Oh well, I have dealt with rusty blocks before so I will just have to make this happen. One thing was odd; most of the ugly spots look to be some sort of deposit? It looked kind of like a zinc deposit more than rust. I picked at these spots and they came off, leaving minor surface rust on those cylinders.

DSC00173.jpg


DSC00175.jpg


DSC00182.jpg


DSC00184.jpg


DSC00194.jpg
 

seven_magnum

Petty Officer 2nd Class
Joined
Oct 4, 2011
Messages
127
Re: Well, I did it!

Re: Well, I did it!

Off to the hardware store I go. I bought 3 cans of PB Blaster, a can of wd-40 and a can of liquid wrench. This thing is tight, but I will win! I sprayed a bit of each in every cylinder every day for a week, while trying to move the crankshaft with my crank socket. (Fits on the crankshaft in place of the harmonic balancer. It torques on the key and not a bolt.) I could not get this thing to budge.

Tonight, I had enough. I don't like waiting for frozen rings to decide to cooperate and I have my mind made up most everything inside will be replaced. So, out comes the hammer.

I removed the rod cap nuts but couldn't get the caps off. I lightly tapped the bolts with a punch and this loosened the caps enough to pick them off. Pistons 1 and 2 actually about fell out of the engine when they let go. 3 and 4 were not going to come out because they were sandwiched between the crank and the block so I could not get them out yet. I removed their caps and decided the crank will have to come out before they do. I will try and save that part at least.

5 and 6 wanted to play hardball. I cleaned out the cylinders the best I could of rust and broke out my breaker bar. I put one end on the thick end of the piston where the wrist pin is and my hammer on the other. Guess what? It convinced them to move. I was then able to rotate the crank and pulled out #3 and #4. I gave #6 a little more love and it popped out as well.

#5 was still stuck but that was ok with me. I took off the main caps and pulled the crankshaft out of there. Then out came the breaker bar and a little more love. Soon it was out as well! I still have to pull out the camshaft, but then she is off to the machine shop! I will call them tomorrow and see when it suits to drop it off.

In the end, the cylinder bores don't look all that bad. There is only one spot in the #5 cylinder that may not clean up with a hone. I will probably just have the block bored over and put new oversize pistons in it. I don't think I want to use them again after what they just went through!

DSC00221.jpg


DSC00223.jpg


DSC00226.jpg


DSC00227.jpg


DSC00229.jpg


Now I have to start working on the boat again. I have all the old parts for templates and the transom still needs to come out. I have to make up a list of material and I will fab them up awhile. There is also a crack in one of the ribs in the front of the boat that needs addressed. One foot in front of the other I guess!

Foster
 

CheapboatKev

Vice Admiral
Joined
Oct 4, 2008
Messages
5,813
Re: Well, I did it!

Re: Well, I did it!

Your kicking it into high gear now..
Post as many pics of the motor rebuild as you can please?
 

GA_Boater

Honorary Moderator Emeritus
Joined
May 24, 2011
Messages
49,038
Re: Well, I did it!

Re: Well, I did it!

That's takin' her apart, seven. Those old Chevy 6s are easy to work on, especially with a BFH. With all that rust in it check your exhaust manifold and riser. That could the source of the water. Good luck on the re-bore.
 
Top