seven_magnum's 76 Starcraft Islander 221 rebuild

seven_magnum

Petty Officer 2nd Class
Joined
Oct 4, 2011
Messages
127
The transom and floor are entirely coated in epoxy now. The transom has been installed and once I get the aluminum stringer back from the weld shop the floor will go in. The stringer had some areas that were torn up at the mounting flanges. I don't know when this happened, but they were loose in the bottom of the boat when I tore the floor off.


seven_magnum

Petty Officer 2nd Class
Joined
Oct 4, 2011
Messages
127
Back to today, I am working hard getting all the holes filled and cracks repaired so I can finally paint the topside! There were holes everywhere, and 3 cracks that were problematic. I believe all is fixed now, it just needs a lot of sanding.

I also had a problem in the winter, the snow load build up and broke the brace I had i the front of the boat to support the roof of the cabin. When it buckled under the load, it ripped out a ton of topside rivets. They have now all been replaced except for the few at the front window. I am leaving that loose until the painting is complete because the gasket gets tucked under the seam.


seven_magnum

Petty Officer 2nd Class
Joined
Oct 4, 2011
Messages
127
I did have a question, since I will be painting the boat without the rub rail installed, should I use some type of calking after the rub rail is back on to get it water tight? Would something like 3200 marine silicone be the trick for this job? I just want to make sure I get it right the first time and don't have to mess around with it once the paint is on.

Also, for the track the windshield slides in. I assume this should be tapped and not painted. There is a foam gasket in some areas of the track, is this critical? I want to know if I need to source it and replace it when the windshield goes back on.

Many thanks to everyone helping me along!


jasoutside

Supreme Mariner
Joined
Dec 20, 2009
Messages
13,269
For that window track...

You may want to paint that up as some small slivers of it might be in view and it would look weird. Keep it a thin coat though so the windshield slides back on easily.

The foam is important as it'll give the windshield a nice solid/tight install.

Great to see you back at it!:thumb:
 

seven_magnum

Petty Officer 2nd Class
Joined
Oct 4, 2011
Messages
127
I have been away for a while, I had to work in Ohio again and then had a vacation scheduled in Oregon, so not much boat progress. However since then, I have done a ton of sanding and am about ready to paint. I just want to make sure I have a solid plan for the rub rail. Should I seal the joint between hull and cap before I put the rub rail over it? Or should I paint, install rub rail, and then caulk the top side seam? Or just not worry about it and slap the rub rail on after paint and go fishing? Thank you for the help!
 

Watermann

Starmada Splash of the Year 2014
Joined
Jan 12, 2013
Messages
13,822
I didn't use any sealant around the bow cover or gunnels when I put them back on my Chief, there isn't a way for much of anything to get through that narrow gap and I assume that's why SC didn't put anything on it either.
 

pckeen

Commander
Joined
Jun 20, 2012
Messages
2,067
Paint first, then install the cap and rub rail. Only use sealant if you get some sign of water coming in. Nice work so far. Did you end up getting the motor done?
 

seven_magnum

Petty Officer 2nd Class
Joined
Oct 4, 2011
Messages
127
Ok, sounds like painting first and then the rubrail and not worry about sealing it. I figured the sealant was important, both the Chieftain and Islander had an epoxy sealant along the top edge of the rub rail under the paint. I have been sanding on that lip of epoxy for days trying to get it flat.I will just seal along the joints in the cap and be done with it then. It's raining here today, so not much work on the boat. Shop space is tight at the moment so she is anchor'ed in the driveway. I have the lights warming up right now, as soon as they are bright I am tackling the motor. I want to get the riser on, carburetor bolted down, and figure out what I need for hardware for the alternator bracket. The Barr manifold I have uses different threads than the stock Mercruiser. I also have a thermostat I am going to install while I am at it. Thank you for your help!
 

pckeen

Commander
Joined
Jun 20, 2012
Messages
2,067
I thought you were talking just about the cap. Do you have pics of the issues you were having along the rub rail - are you indicating there was sealant over the entire length of the boat, both sides?
 

seven_magnum

Petty Officer 2nd Class
Joined
Oct 4, 2011
Messages
127
I just snapped some quick pictures of the top of the boat. I don't know if I will get to work on it tonight, I have a car hood that is about to be painted. Hopefully that goes well and I can put in some time scraping and sanding.

The brown is an epoxy coating of some sort, it is the entire way around the perimeter on the top side of the rub rail. It's hard and nasty to get off, if it wasn't for this ridge I would be painting by now.


GA_Boater

Honorary Moderator Emeritus
Joined
May 24, 2011
Messages
49,038
That looks like the same stuff that seals the sides of the bow plate. And cracked/weathered the same too. I don't recall seeing the stuff along the rub rails and bow cap on any other resto here and mine doesn't have it. Also, it isn't sealing anything. Strange. Can you tell if the boat has been repainted and the sealant added at the same time?
 

seven_magnum

Petty Officer 2nd Class
Joined
Oct 4, 2011
Messages
127
The stuff is definitely from the factory. It is always under the paint everywhere I check. It was also used on the chines on the bottom and the joint where the transom skin was riveted to the hull- those rivets were coated in it. I feel confident saying this is the first the boat was repainted. When I took off the rub rail, the epoxy sealed that top seam. I had to break the epoxy to get the rub rail off, it was keeping the crack between the rub rail and the cap sealed. I don't have access to the pictures I took when I first started, but here is a picture of the rub rail. Sorry it's hard to see, I have a cheap camera here and it just doesn't like the dark.


If you look close you can see there is epoxy on the edge with a little blue paint.
 

seven_magnum

Petty Officer 2nd Class
Joined
Oct 4, 2011
Messages
127
I guess the only question I have, should I keep sanding away at that epoxy and get it off, paint and install the rubrail?

Or install the rubrail, caulk the seam between deck and rail with 4200 to conceal the epoxy and waterproof it, and tape and paint?

I am going to sand more tonight on it and try for another few feet clear of the mess. It's a bear to get off!

Thanks for the help!

Foster
 

seven_magnum

Petty Officer 2nd Class
Joined
Oct 4, 2011
Messages
127
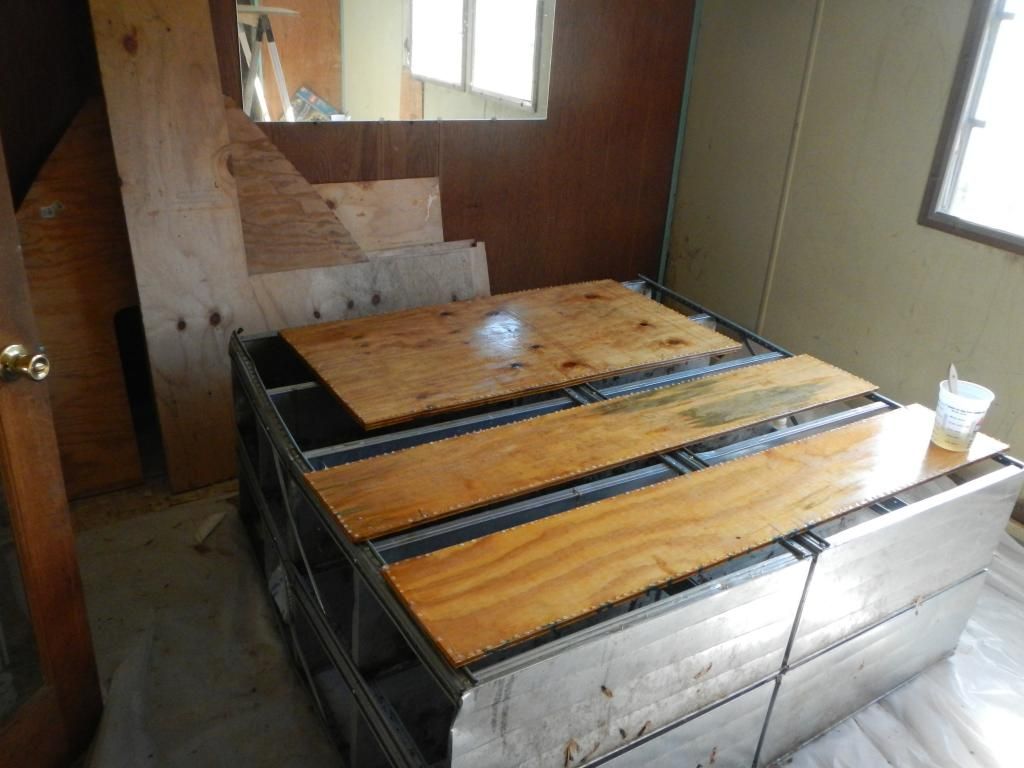
Looks like it's been a while... I have been making some progress! I wound up getting a fine grit flap disk on the angle grinder and did a nice job on the epoxy. Then I spoiled myself and got a $19 HF dual action orbital sander and got it all sanded. I should have bought that a while ago, the vibratory palm job just doesn't compare. I put two coats of Macropoxy down and am final sanding the second coat tonight. Tomorrow or Wednesday at the latest I will be spraying the first coat of blue. I can't wait!

I did see some other threads where Macropoxy/Acrolon was brought up and nobody seemed to have a concrete answer, and a reference was made to this thread. I will share what I found with this paint.

First off, Its very tough paint. Bumps and brushes don't have any effect on it what so ever. I did have a rough time trying to paint it, but that was using gravity fed hvlp guns. Since then, I bought a binks 2100 and a CA technologies 1 qt pressure pot and that has made all the difference. I still thin both, right at 10% and don't have any problems. If your not spraying, I wouldn't thin it and not worry. This stuff really is great so far! We use it exclusively on our equipment at work and even on old machines they still look great and the paint holds up well.

I will have pictures in the next few days, I am scheduled to leave for work again soon so I am going to try and get the paint finished before I leave.
 

jbcurt00

Moderator
Staff member
Joined
Oct 25, 2011
Messages
25,112
Welcome back

Sounds like nice paint to use, looking forward to the pix.

Have a great week to end 2014
 

Woodonglass

Supreme Mariner
Joined
Dec 29, 2009
Messages
25,929
Being an unsatiable researcher I did some searching on the Macropoxy. The Tech Sheets state it's optimum when applied to aluminum that it's thickness should be 20mils. Man thats the same as Gelcoat. It does appear to be some extremely durable Paint designed for extreme Marine use. The only potential issue I could forsee is UV issues. Epoxy has no UV protection and will break down when exposed to direct sunlight. I'm going to call Sherwin Williams tomorrow and speak with their Tech's and see what they say. Tech sheets speaks about it being used in Total immersion applications and for tank linings where UV wouldn't be an issue. Couldn't find anything about UV protection so I fear it has none. This could be a problem for a Hull Coating.
 

seven_magnum

Petty Officer 2nd Class
Joined
Oct 4, 2011
Messages
127
True about the UV Protection, the Macropoxy definitely needs it. I am priming with the Macropoxy and then top coating it with Acrolon 218. The bottom is all white and turned out great! The top is going to be blue, we will see how that works. At work, the Acrolon is all red and it seems just as durable as what the white was. I know they don't recommend tinting the Macropoxy, but the Acrolon seems fine with it.
 

Woodonglass

Supreme Mariner
Joined
Dec 29, 2009
Messages
25,929
Well, I just got off the Phone with Sherwin Williams and this appears to be one heck of a Marine Paint system, especially for Long time immersion. The MacroPoxy is basically used as the epoxy based primer and the Acrolon as the Acrylic Polyurethane topcoat. It can be tinted to any color you desire. Not generally sold Retail but in some cases you can get a Cash Account. MacroPoxy is sold Part A and Part B Gallons so you end up getting a 2 Gallon Quantity that you can mix the quantity you need. Acrolon comes in 3 quarts of Paint and 1 quart of Hardener so you get a total of 1 gallon of Paint. Macropoxy costs about $105 for the 2 gallon mix and Acrolon runs about $110 for the 1 gallon mix. That's what I was quoted in Oklahoma. Shelf life IF you keep a good seal in Cool Dry conditions is 1 year. NOT recommended for Fiberglass. GREAT for Aluminum and Steel. They make their own reducer but basically it's Xylene for the epoxy and MEK for the Acrolon.
 

seven_magnum

Petty Officer 2nd Class
Joined
Oct 4, 2011
Messages
127
I need some advise- looking at my old pictures and online, I see the front motor mount rests on a wooden cross member, with a wooden support between the center of the cross member and the rib on the hull. Should I stick to something like this? The doner boat the motor came from had a steel cross plate directly on the fiberglass floor. I was thinking it might be best to put the wooden cross member in, and the steel on top of that to keep it from sagging. (Wood covered in epoxy of course) It looks like I will have to be careful with the height, a 2x seems to be a bit tall, and were recessed between the stringers in most pictures I saw. I don't want to get the motor in and then find I can't adjust it enough to get the alignment right.

Thanks for the help!

Life has been busy, I have traveled a lot for work this past year, am getting ready to move in a few weeks, and will be getting married as well. But this project will march on.
 

seven_magnum

Petty Officer 2nd Class
Joined
Oct 4, 2011
Messages
127
Following images found here-
http://forums.iboats.com/forum/boat-...er-restoration
http://forums.iboats.com/forum/owner...=1439844117014

The one I removed looked just like the one on top.
032112027.jpg

fetch
 
Top