seven_magnum's 76 Starcraft Islander 221 rebuild

GA_Boater

Honorary Moderator Emeritus
Joined
May 24, 2011
Messages
49,038
Who is that masked man? :welcome: back, Mag.

What has been done by some who were switching motors like 4 to 6 or 8 cylinder, was install the transom mount parts, put the front mounts on the motor and hang the motor on the rear mounts. Adjust the height while using an alignment bar. Once you have good alignment, then measure for the front mount supports and fab/install them.

When you do the final motor install, the alignment won't be perfect but you will be able to do the adjustment.
 

seven_magnum

Petty Officer 2nd Class
Joined
Oct 4, 2011
Messages
127
That sounds like a good method. I ordered the gasket, new rear mounting hardware, and am going to fab the alignment bar. Should I stick with wood, something like an epoxy covered 2x6 spruce or should I go with something with more backbone? Think the top metal plate is a good idea? One of the threads I read said the ply from the factory was to dampen vibration, but I don't see that being an issue. If possible, I want to put something in that I don't have to worry about it sagging over the years.

Thanks for the help!
 

dozerII

Admiral
Joined
Oct 25, 2009
Messages
6,527
Good to see you back Mag, congrats on the upcoming wedding. I would use laminated ply, to the right thickness it is far more stable than dimensional lumber.
 
Last edited:

seven_magnum

Petty Officer 2nd Class
Joined
Oct 4, 2011
Messages
127
Ok, I will use some of the marine plywood I have left, and laminate it properly to the correct thickness. What about this support in the center touching the rib, should I include that as well? It seems like a poor spot for wood, being any water in the bilge will be there. This is what I was hoping to eliminate with the steel top plate, but I will do it like the factory if that is the consensus. (once again, I will smother it in epoxy)
 

GA_Boater

Honorary Moderator Emeritus
Joined
May 24, 2011
Messages
49,038
I haven't done any work on an IO tinny, but that wood resting on the rib doesn't look like a good idea to me either. I understand the purpose, to stop the sag. But Instead of a wood block support, maybe something like this?

mm.PNG

Yellow is the new ply, blue is the rib and the black is some bent heavy gauge aluminum stock riveted to to the rib and fastened to the ply. No wood in the bilge water, still have the vibration dampening and good support for the center of the motor mount.

Or do the the original way Starcraft did it. Worked for decades. :noidea:
 

dozerII

Admiral
Joined
Oct 25, 2009
Messages
6,527
All the inline I/O I have worked on have been done this way, it seems odd they would put that piece under the motor mount to the rib, but really there should be no water over the rib to begin with, and any small amount will run back through the limber holes.
 

seven_magnum

Petty Officer 2nd Class
Joined
Oct 4, 2011
Messages
127
Thanks for the help guys.

For the gasket on the gimbal assembly, It's a foam ring of sorts. I was going to install it with it's joint at the top of the gimbal assembly. Should I put any adhesive on this to keep it in place? Does it just install dry? Thanks!
 

Woodonglass

Supreme Mariner
Joined
Dec 29, 2009
Messages
25,929
I'm NOT an I/O guy but...from my research and what I've learned on this forum, most people don't use any sealant for the gasket but they do use just a bit of gasket adhesive to tack/hold it in place.

459facd78b9dbaf6122bdf065188fec7.jpg
 

seven_magnum

Petty Officer 2nd Class
Joined
Oct 4, 2011
Messages
127
Sounds like a plan. I will put a tab or three of bellow's adhesive just to hold it in place if needed, no more. I tell you, the more I mess with this stern drive the more I see the light of an outboard. Maybe the Big Chief will get some bracket love when it's her turn.

Many thanks!
 

seven_magnum

Petty Officer 2nd Class
Joined
Oct 4, 2011
Messages
127
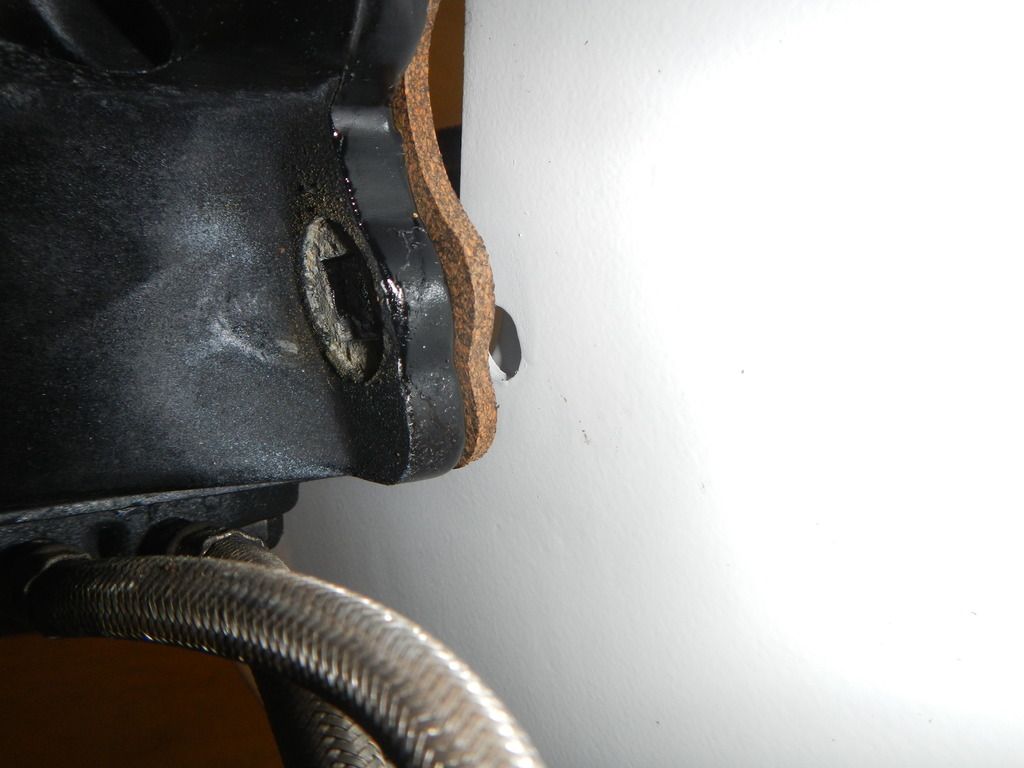
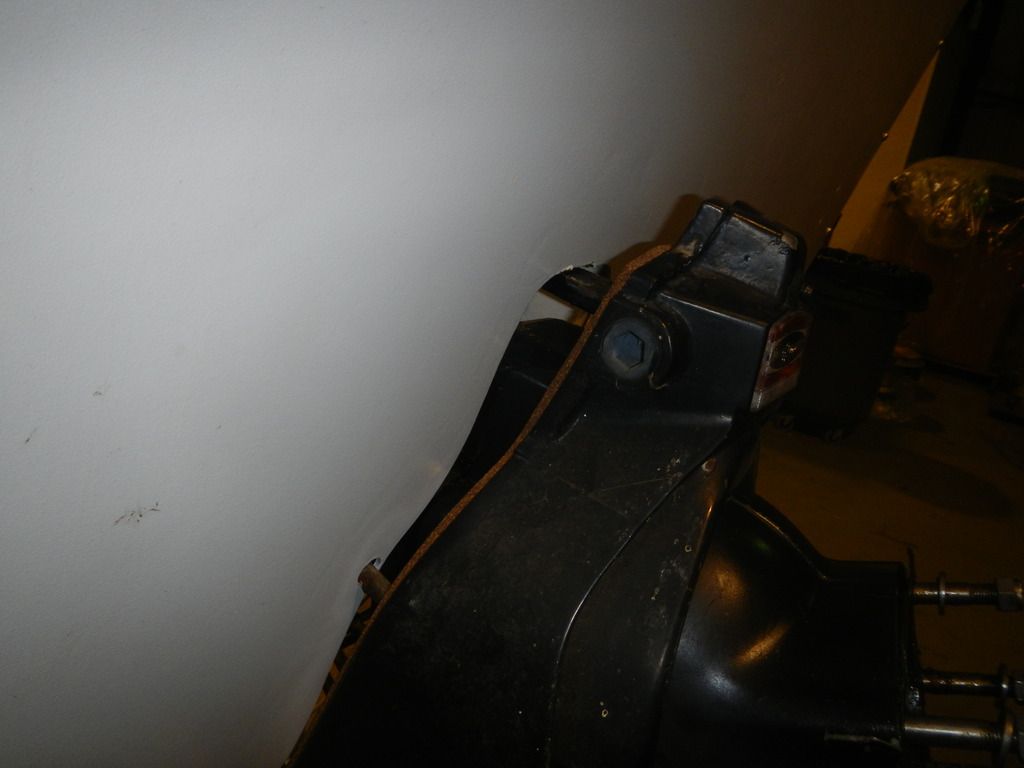
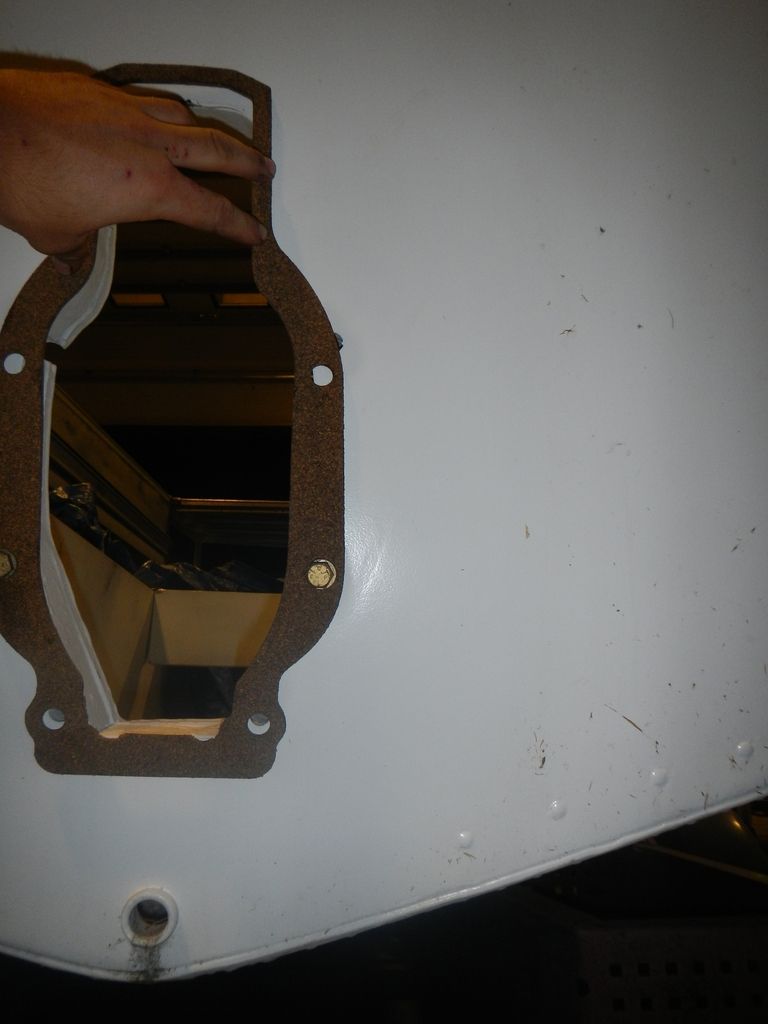
I'm up against a wall- I am trying to get the gimbal assembly in the boat but its not happening- the steering arm at the top interferes with the top of the key hole? I can't get it in for the life of me. I am trying to use the "new" gimbal assembly and wondering if there is a difference? The boat had a '76 Mercruiser 165 with MC-1, I am installing another Mercruiser 165 with MC-1, at least I thought? I took the gasket, and it matches the gimbal ok, but needed trimmed- the local boat shop I bought it from just said make it fit at the bottom, that's why she's cut down there. Anyhow, the bottom holes match up fine, but then the top two studs are in the wrong place? I would like to use this housing because it's in much better shape than the old one, but to do that I need to drill new holes in the transom at a minimum. Any help would be great!


seven_magnum

Petty Officer 2nd Class
Joined
Oct 4, 2011
Messages
127
Anyone know what's happening with this gimbal assemblies? Should I try to make the new one work by drilling the holes, or am I better off going back to the old? Any other problems this could create? Thanks!
 

jbcurt00

Moderator
Staff member
Joined
Oct 25, 2011
Messages
25,113
If you havent posted this fitment problem in the Mercruiser forum, please do. And please link this topic there, and that topic here.

Not an I/O owner, so I'll be no help. Surprised I've never seen this come up before, seen lots of Merc swaps/updates in glass and tin....
 

Watermann

Starmada Splash of the Year 2014
Joined
Jan 12, 2013
Messages
13,822
Jeez this sucks if I've missed or forgotten another SC project in the regular resto forum. Guess you've been away for a while but now back at it!
 

dpotter

Petty Officer 2nd Class
Joined
Oct 4, 2015
Messages
191
Interesting on the out-drive problem. I'm in the process of adding a Islander to the fleet and it has a rebuilt motor, but I'm also looking for a donor boat with a 4.3 and alpha drive to get more current on the power plant.
 
Top