vandentr
Petty Officer 3rd Class
- Joined
- Jul 26, 2010
- Messages
- 88
In case your original style shift interrupter switch goes bad, I came up with a $3.00 repair that could potentially get you back on the water while debating whether or not you want to spend $160 on a new style plate/switch assembly and waiting for it to arrive.
For me the failure of the switch wound up being caused by carbon buildup on the contacts in the switch after years of use. Fully depressing the plunger by hand with the engine running had no effect, so I knew something was screwed up in the switch.
The switch is riveted together, and since you can't buy a replacement I figured I had nothing to lose by carefully drilling out the rivets and seeing what was up.
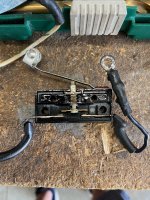
I only drilled enough of the crimped side of the rivets to loosen them up, then carefully tapped what was left of them out with the butt end of a drill bit. After that work, the cover came off without issue:

As you can see there's not much to these things, but there are a couple of things to take note of.
1) There are two separate springs on the white plastic plunger that press against opposite sides of the plastic divider, make sure that these wind up in the same configuration when you put it back together.
2) Use a fine-grit sandpaper or other abrasive to clean off the affected contacts.
Securing the cover back on was the trick, good luck finding those specific rivets locally.
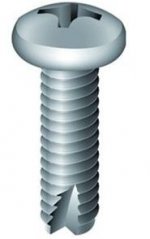
My work-around was to go to the hardware store and grab one 8-32 thread-cutting machine screw and two 8-32 pan-head stainless steel screws. I drilled out the two small screw holes in the cover (upper two holes in pic) to allow the 8-32's to pass through and then used the thread-cutting screw to "tap" the same two smaller holes in the main switch body.

I then used the new SS 8-32's to secure the cover and filed off the remnants of the rivets and re-inserted them into their respective (larger) holes where the retaining screws pass through to attach the unit to the shift plate.
So now, when you look at the switch, there are two additional screws holding the cover on, but they do not interfere with the function of the switch.
After re-mounting the switch to the plate and adjusting the trigger arm a little bit, the switch is back to working like it should!
For me the failure of the switch wound up being caused by carbon buildup on the contacts in the switch after years of use. Fully depressing the plunger by hand with the engine running had no effect, so I knew something was screwed up in the switch.
The switch is riveted together, and since you can't buy a replacement I figured I had nothing to lose by carefully drilling out the rivets and seeing what was up.
I only drilled enough of the crimped side of the rivets to loosen them up, then carefully tapped what was left of them out with the butt end of a drill bit. After that work, the cover came off without issue:

As you can see there's not much to these things, but there are a couple of things to take note of.
1) There are two separate springs on the white plastic plunger that press against opposite sides of the plastic divider, make sure that these wind up in the same configuration when you put it back together.
2) Use a fine-grit sandpaper or other abrasive to clean off the affected contacts.
Securing the cover back on was the trick, good luck finding those specific rivets locally.
My work-around was to go to the hardware store and grab one 8-32 thread-cutting machine screw and two 8-32 pan-head stainless steel screws. I drilled out the two small screw holes in the cover (upper two holes in pic) to allow the 8-32's to pass through and then used the thread-cutting screw to "tap" the same two smaller holes in the main switch body.

I then used the new SS 8-32's to secure the cover and filed off the remnants of the rivets and re-inserted them into their respective (larger) holes where the retaining screws pass through to attach the unit to the shift plate.
So now, when you look at the switch, there are two additional screws holding the cover on, but they do not interfere with the function of the switch.
After re-mounting the switch to the plate and adjusting the trigger arm a little bit, the switch is back to working like it should!


