The $160 Starcraft Jet Star Restoration!

jbing81

Chief Petty Officer
Joined
May 22, 2010
Messages
421
Re: The $160 Starcraft Jet Star Restoration!

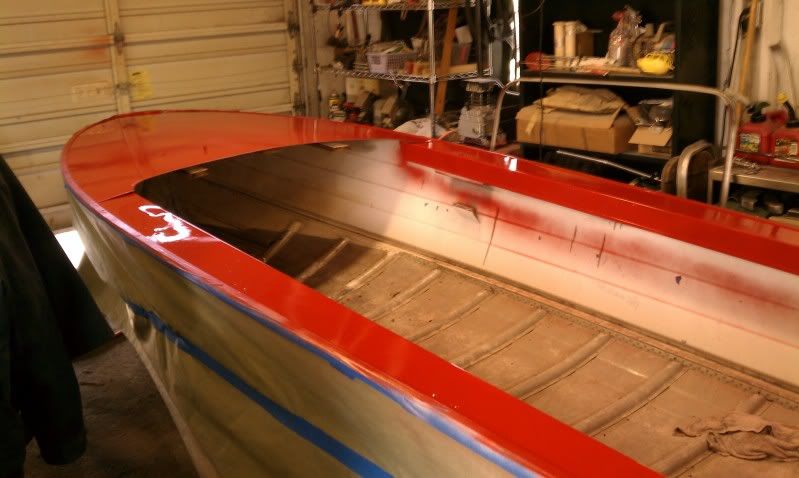
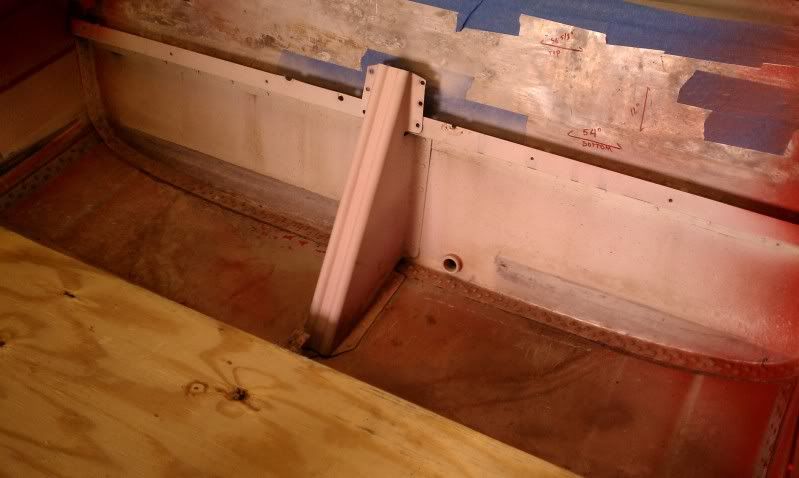
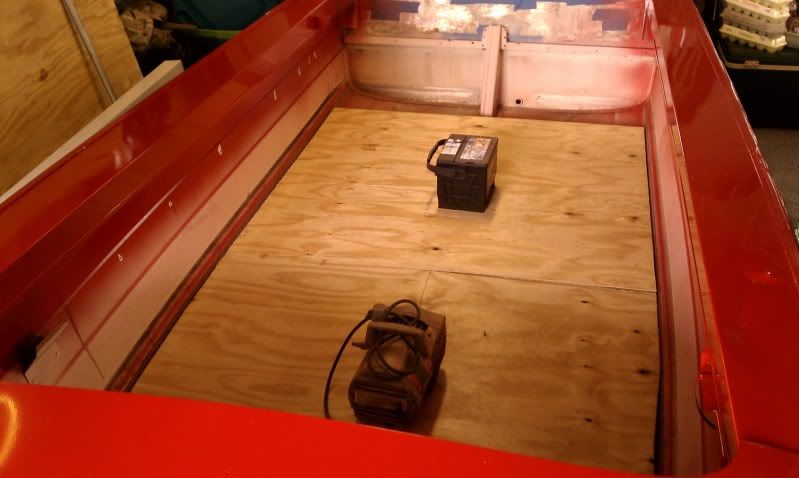
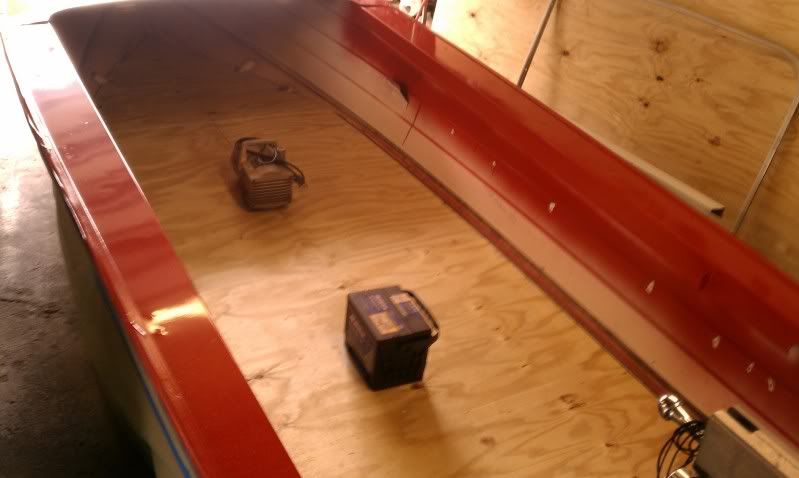
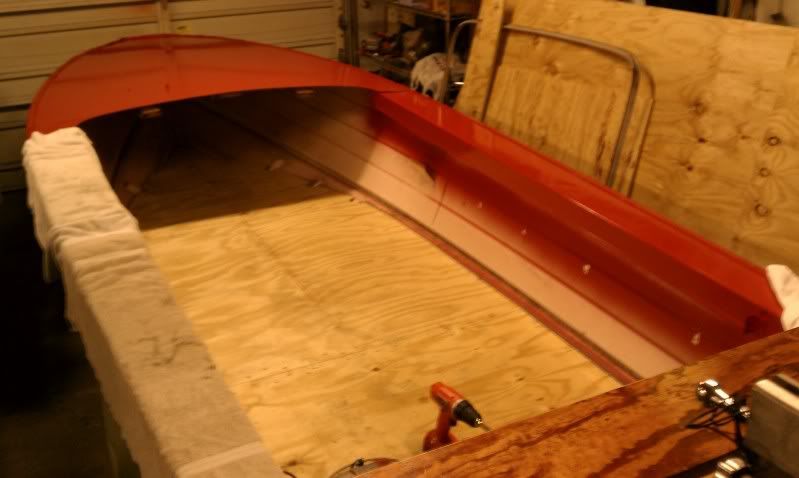
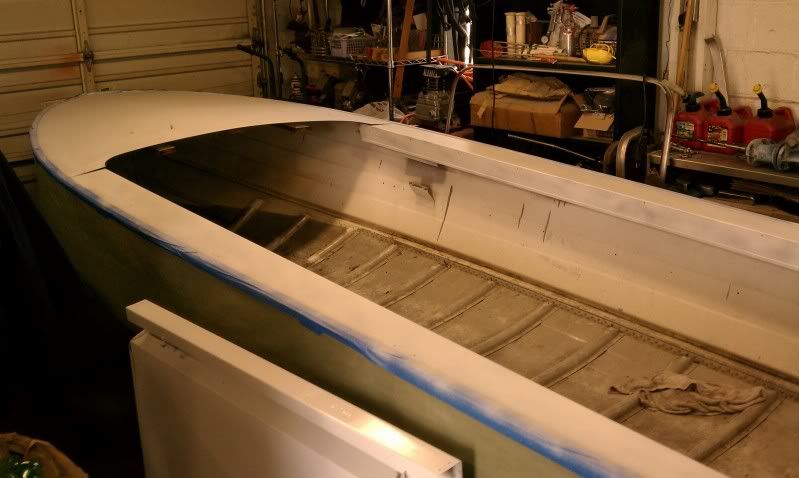
I'm still making progress on this tub, though its slow at best... I decided to move it into the garage as a right side up boat tends to collect a bit more water... So far in the past two days I've sprayed one coat of primer and the first of 3 top coats. This boat originally had a maroon and white scheme, so I've decided to continue with the two tone but with a 21st century touch. In reality, what that really means is I'm cheap and I had extra read and white left from the SS ;). Here are a couple updated photos of where I'm at.

IMAG0648.jpg
 

barato2

Commander
Joined
Dec 7, 2010
Messages
2,956
Re: The $160 Starcraft Jet Star Restoration!

itsa lookin purty....
 

jbing81

Chief Petty Officer
Joined
May 22, 2010
Messages
421
Re: The $160 Starcraft Jet Star Restoration!

Well I cut the floor this afternoon and I cant believe it fits as well as it does! I left the last rib to the transom open so I can have a removable bilge and easy access to the drain plug and pump. Here are some progress photos. I also was lucky enough to have my little helper with me today! I have a feeling that's why my measurements were so spot on ;)

IMAG0683.jpg


IMAG0682.jpg


IMAG0681.jpg


IMAG0680.jpg
 

GA_Boater

Honorary Moderator Emeritus
Joined
May 24, 2011
Messages
49,038
Re: The $160 Starcraft Jet Star Restoration!

JB - the last pic shows why the floor worked well. The little one is a future quality control guru. :)
 

DirtyHarry83

Petty Officer 1st Class
Joined
Jun 5, 2012
Messages
305
Re: The $160 Starcraft Jet Star Restoration!

JB - the last pic shows why the floor worked well. The little one is a future quality control guru. :)

Hah I was thinking the same thing. Someone's being supervised.
 

jbing81

Chief Petty Officer
Joined
May 22, 2010
Messages
421
Re: The $160 Starcraft Jet Star Restoration!

The last few days if found some time to measure, cut, and stain the transom. Instead of 2 sheets of 3/4 I used some left over 1/2 and laminated three sheets together. I got to say, this thing is a tank! I set the transom on some saw horses and loaded over 250 lbs right in the center of it and there was zero deflection! If I ever have to replace the transom in my SS again i will use this method. It did use more epoxy, but it was worth the added strength. With the completion of the transom I really feel things are finally starting to move along at a regular pace, and I can finall start to see a finished product! Here are a couple pics of the transom.

IMAG0687.jpg
 

jbing81

Chief Petty Officer
Joined
May 22, 2010
Messages
421
Re: The $160 Starcraft Jet Star Restoration!

Once it was all cut and sanded I applied a coat of red chestnut stain. I think it turned out well. After letting it dry for a few hours I hit it with some 220 sand paper to lighten it up a bit. Next are a few coats of epoxy and in the boat she goes!

IMAG0729.jpg
 

jbing81

Chief Petty Officer
Joined
May 22, 2010
Messages
421
Re: The $160 Starcraft Jet Star Restoration!

The transom also made up for all the good fortune i had with the floor... It took nearly 4 hours to fit the damn thing without having it all gouged up! But by the end I had it sliding in like butter.
 

jbing81

Chief Petty Officer
Joined
May 22, 2010
Messages
421
Re: The $160 Starcraft Jet Star Restoration!

So today I pull the old dash board out of storage, took some measurements, and then headed over to Lowes for some 1x8" red oak. I remembered when I took it out I had to cut it in half to get it out, as it was wedged in there pretty good. ( they must have installed the dash before the deck) I'm wondering if anyone else had to do this when they removed their's? I'm assuming if I measure the width of the old dash the curth sp? of the cut will allow enough room to squeeze the new dash back in? For the life of me I cant remember if the original dash gave me any trouble after I cut it.
 

jbing81

Chief Petty Officer
Joined
May 22, 2010
Messages
421
Re: The $160 Starcraft Jet Star Restoration!

JB - the last pic shows why the floor worked well. The little one is a future quality control guru. :)

You know it, I had to go out and buy her her own tape measure! All she kept saying days later was, "Daddy measure, Daddy measure". So now she has her own!
 

jasoutside

Supreme Mariner
Joined
Dec 20, 2009
Messages
13,269
Re: The $160 Starcraft Jet Star Restoration!

(kerf)

I recall as I was cutting mine out I was thinking "The only way to get that back in would be to completely remove the bow cap to install. I'm glad I don't have to do that!"

Maybe one of the other fellas have "the trick."
 

jbing81

Chief Petty Officer
Joined
May 22, 2010
Messages
421
Re: The $160 Starcraft Jet Star Restoration!

Jas,

It seems to be supported fairly well underneath the deck. I was thinking of installing it in two pieces, then try to tie it together with another piece of oak from behind. Then finish it off with a piece of molding or something in front to cover the gap. What do you think?
 

jasoutside

Supreme Mariner
Joined
Dec 20, 2009
Messages
13,269
Re: The $160 Starcraft Jet Star Restoration!

Yah, that should work just fine so long as you get a good solid join. To get that full board in there I just can't figure any other way besides taking the cap off.
 

ezmobee

Supreme Mariner
Joined
Mar 26, 2007
Messages
23,767
Re: The $160 Starcraft Jet Star Restoration!

I don't remember having any major issues with my Jupiter dash. Perhaps the Jet's had a tighter fit. On my SS's bow piece (similar) I had to cut out the original. When I replaced it, I just made the new one a little shorter and only utilized one set of the brackets underneath (one set was on the gunnel and the other on the hull).
 

jbing81

Chief Petty Officer
Joined
May 22, 2010
Messages
421
Re: The $160 Starcraft Jet Star Restoration!

I'll see what happens. I have to cut a new dash regardless, so if the whole thing doesn't fit, I'll just cut it in half.

Nevertheless, progress continues... I opted to forgo the epoxy on the floor in favor of 4 heavy coats of a oil based barn paint. I also ditched the metal tie strips that connect the floor boards from underneath. Instead I cut four 5x18" strips using left over 5/8" ply and then screwed them all down connecting all 3 floor boards, then installed the floor as one piece. Now there's absolutely no flex where the floor boards come together, and the floor is as solid as a rock! Once I paint the inside of the boat I'll the add another four coats of the oil based barn paint to the goodies of the floor. BTW, I decided to use deck screws instead of rivets this time around, and not only was the install much quicker but I think it attributed a great deal to the rigidity of the floor.

IMAG0736.jpg
 

kfa4303

Banned
Joined
Sep 17, 2010
Messages
6,094
Re: The $160 Starcraft Jet Star Restoration!

It looks good. I used SS screws on my decking along with good 'ol Rustoleum Oil Based enamel and they've held up very well. While the high gloss rustoleum can get a little slick, it cleans up like a dream.
 
Top