The 2010 FrankenMerc Project

Faztbullet

Supreme Mariner
Joined
Mar 2, 2008
Messages
15,930
Re: The 2010 FrankenMerc Project

That dont enen sound right as block and sleeve will expand at close to same rate, sleeve just as tight at room temp as at 450 due to expansion. I use: A) air die grinder to split sleeve and B) wire welder, just run a bead down cylinder wall and when it cools it will draw sleeve and you can pop it out with puller.(works great on wheel bearing races also) I use the die grinder 99% as it is quicker....
 

sschefer

Rear Admiral
Joined
Nov 13, 2008
Messages
4,530
Re: The 2010 FrankenMerc Project

That dont enen sound right as block and sleeve will expand at close to same rate, sleeve just as tight at room temp as at 450 due to expansion. I use: A) air die grinder to split sleeve and B) wire welder, just run a bead down cylinder wall and when it cools it will draw sleeve and you can pop it out with puller.(works great on wheel bearing races also) I use the die grinder 99% as it is quicker....

Not sure we're talking about the same animal. These are steel 200 sleeves in an aluminum block. Aluminun goes to a relaxed state at 425-450 and lets loose of the steel. The sleeves should just slide right out undamaged. In fact I'm buying a sleeve that was taken out of another 200 using the same method. Saves on blending work.

I just did a upper bearing carrier about an hour ago as a test. Heated it up to 425 in a toaster oven then tapped it on a old paint can and the bearing sleeve fell right out. If it works there it'll work on a block.
 

Faztbullet

Supreme Mariner
Joined
Mar 2, 2008
Messages
15,930
Re: The 2010 FrankenMerc Project

Makes no difference if 115 or 200 a sleeve is a sleeve(Merc or Johnrude) I have heard of this but much quicker the way I do it and only have to heat block once to install replacment sleeve/s.. only question is how are you sure the sleeve you are getting is the correct lenght as donor block could have been decked a couple thousands off, that why replacement sleeve is longer so it can be milled.
 

sschefer

Rear Admiral
Joined
Nov 13, 2008
Messages
4,530
Re: The 2010 FrankenMerc Project

Makes no difference if 115 or 200 a sleeve is a sleeve(Merc or Johnrude) I have heard of this but much quicker the way I do it and only have to heat block once to install replacment sleeve/s.. only question is how are you sure the sleeve you are getting is the correct lenght as donor block could have been decked a couple thousands off, that why replacement sleeve is longer so it can be milled.

Good question about the sleeve. I'll pull it this weekend and see if he's got a match. If not, I'll order a new one from LA Sleeve.
 

IGIFF

Cadet
Joined
Mar 22, 2010
Messages
26
Re: The 2010 FrankenMerc Project

This is a very interesting read and what a great job you are doing.Tell me,is it feasable to bore a 2.0 to a 2.5,looking at your pics there seems to be a lot of boreable material in the cylinder.Obviously there would be a fair amount of port work to do.The reason I ask is that I have a very good low hour 135 and would like a 200.
 

sschefer

Rear Admiral
Joined
Nov 13, 2008
Messages
4,530
Re: The 2010 FrankenMerc Project

This is a very interesting read and what a great job you are doing.Tell me,is it feasable to bore a 2.0 to a 2.5,looking at your pics there seems to be a lot of boreable material in the cylinder.Obviously there would be a fair amount of port work to do.The reason I ask is that I have a very good low hour 135 and would like a 200.
Feasible, probably. Sensible, probably not. I think if you build a 3.125 bore right you can get pretty close to 200. Stock, the 150's were closer to 160. You can pick up 15hp just with lightening and balancing. Another 10 with the reed blocks. The spacer and front half cut are worth 5-7. The crankcase porting is worth 5-10 and removing the oil pump and stuffing the crank is worth another 5. This motor of mine should be pretty close to 200 when it's done.

Boreing a 3.125 to 3.50 would probably require cutting some off the top of the cylinders and then some off the tops of the pistons to raise the ports.
 

Faztbullet

Supreme Mariner
Joined
Mar 2, 2008
Messages
15,930
Re: The 2010 FrankenMerc Project

Tell me,is it feasable to bore a 2.0 to a 2.5

Nope... The sleeves are thick enough but the intake bridges are to thin to bore this large. If ya want a duece buy a late model "popped" one and rebuild it.
 

sschefer

Rear Admiral
Joined
Nov 13, 2008
Messages
4,530
Re: The 2010 FrankenMerc Project

Nope... The sleeves are thick enough but the intake bridges are to thin to bore this large. If ya want a duece buy a late model "popped" one and rebuild it.

Or build a 150 to make 200..:)
 

Faztbullet

Supreme Mariner
Joined
Mar 2, 2008
Messages
15,930
Re: The 2010 FrankenMerc Project

Or build a 150 to make 200..
You can get 10-20 with some bolt on and cleaning up mod's but to get the extra 30 horses out of a 150 block to make 200hp will need some major port work to block/sleeves and pistons as there is no magic "bolt ons"for this.
To get 200Hp from a 150 block you will need block ported to SST-120 or Champ spec's,which have extra boost port and intake/exhaust spec's than the standard 135/150. Anyone who says they can get 200 hp from a 150 with stock block is :(a) running nitrous (b) Full of it.
Below is link the SST-120 Spec's
http://docs.google.com/viewer?a=v&q...KCgKjS&sig=AHIEtbTt7YLILaOfrK_V0Z2CDCO0KVAU3w
 

Attachments

  • viewer.png
    viewer.png
    1.5 KB · Views: 0

sschefer

Rear Admiral
Joined
Nov 13, 2008
Messages
4,530
Re: The 2010 FrankenMerc Project

FB, wait till you see Franks block when it comes by from Engine Dynamics...:D It's supposed to be done by May 1st.
 

sschefer

Rear Admiral
Joined
Nov 13, 2008
Messages
4,530
Re: The 2010 FrankenMerc Project

O.K. back to Frank. I finally broke down and bought a blast cabinet and 60 gal compressor. The shop time for the sand blasting to get that Merc paint off was killing me.

I went to Harbor Freight and picked up one of the floor style cabinets on sale for 219.00 and then found a 60 gal Husky two stage compressor with Curtis heads for 400.00. It was advertised as a Husky 60 gal on Craigs List and I was thinking it was the newer one with the single stage pump but it was the older style that was made by Porter Cable. I use to be in the Tool and Supply business and sold Porter Cable products when they were owned by Pentair so I knew what it was the minute I saw it. I gave the guy 400 and he delivered it to my shop.

I wired it up, fired it up and it was perfect. I then set to the task of blasting paint. I tried glass beeds but they just barely dulled the paint. Then I tried Aluminum Oxide and it worked pretty good but it was raining and the humidity was high and if you've ever worked the AO media you know that means that it clumps up and clogs the gun.

I'm going to get a pressure tank and switch to soda ash and see how that goes. Someone on another board suggested garnet but I've used garnet and the stuff is just plain nasty. I'll try the soda ash or bi-carb before I go to that extreme. Keep an eye on this subject it will save you a lot of time getting setup should you decide you want to venture down this path.
 

sschefer

Rear Admiral
Joined
Nov 13, 2008
Messages
4,530
Re: The 2010 FrankenMerc Project

Got a 20lb pressure tank yesterday and rigged it up. I didn't go with soda ash since it takes a different tank and would leave me with no other options to try. I got a cheapo tank at Harbor Freight for 59.00 just to see if was going to be the answer.

I used the 50/50 glass bead/AO mix I'd been using and it worked GREAT! Glass beads are not the right thing to mix with AO since they have a peening affect so I ordered 25lbs of crushed glass and will use that. I'll finish up the intake front crank case cover and post some pic's tonight.

I also got the WH40 carbs yesterday. The came with a full set of reeds on a Vertical intake. Don't need the intake but the reed blocks are 5 petal large and can be cut and used on a horizontal so I might play around with that.
 

sschefer

Rear Admiral
Joined
Nov 13, 2008
Messages
4,530
Re: The 2010 FrankenMerc Project

I've finished blasting all the paint of the front half now. Here's what the 200 front half and intake look like for comparison -

sandblasting002.jpg


Here's Frank's front half, spacer, intake and the WMV carbs off the 200. I've got WH 40 carbs for Frank but they're really ugly right now. --

sandblasting004.jpg


From an above angle -

sandblasting009.jpg


There's not quite as much sparkle as I would like so I've ordered 25lbs of crushed glass to finish it off with. After that I'll clean up any machined areas with a scotch brite disk and my angle grinder.

I'm liking what I'm seeing so far.
 

sschefer

Rear Admiral
Joined
Nov 13, 2008
Messages
4,530
Re: The 2010 FrankenMerc Project

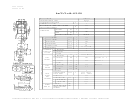
It's time to rebuild some carbs. These are WH-40 Carbs off a 1989 XR4 as near as I can tell.

The main jets are .074 and the idles are .048 but there are no vent jets. With the smaller mains I suspect someone removed the vent jets not understanding their purpose and the motor leaned out on the top end. That's guess work not fact. I'll order up a set and put them back in.

The first thing I do is take a Plano tackle tray and number it. When I pull the parts out I put them in a tray and write down a description with the tray number.

WH40s001.jpg


Next, I clean the carbs in paint thinner to get the surface gunk off then I take a bunch of pictures and store them on my computer and on PhotoBucket.com. This gives me a backup and lets me display them on this board.

The first pic I take is off the carb model number. This is not the serial number. The number 40 indicates the model and the first letter after the dash indicates the positon. This is top carb so it's number starts with -1.

WH40s003.jpg


Talk about beef, these are some throaty buggers, I'll bet their thirsty too!.

WH40s008.jpg


Now I dissassemble them. I always take the jets out first because it's easier to hold on to the carb. Then I take off the linkage, butterfly's and rod. Finally I remove all the fittings. DO NOT TRY TO REMOVE THE SMALL FITTING ON TOP OF THE CARBS THESE ARE PRESSED IN AND NLA. These small fittings are for the enrichner circuit and can easily be cleaned without removing them.

When everthing is off the carbs I remove the bowl.

WH40s010.jpg


Finally I remove the float, needle and seats.

Once I have them all apart I wash them in paint thinner one more time then blow them out and put them into the carb cleaner. I use Gunk carb cleaner in the gallon can. I have for years and it's served me well.

Next I take all the parts that I have carefully separated and cataloged and put them all in the parts bucket and drop them into the carb cleaner.

Now if you think that sounds silly that I sorted them all out then mixed them all up you should think twice. Jets don't necessarily have to be the same size for each side of the carb and I've found parts that look identical but are not. If I separate and catalog them and later find out I didn't need to that's o.k. but if I didn't and they were different I'd have problems later down the road that would be hard to diagnose. I'll go through the same routine with #2 and #3.

Also notice that I do one carb at a time rather than tearing all of them down at once. This way when I put the first one back together I can use #2 as a reference. I also don't want to mix anything up between the carbs. They're marked 1,2,3 and it's for a reason so don't mix parts.
 

Dukedog

Captain
Joined
Oct 6, 2009
Messages
3,439
Re: The 2010 FrankenMerc Project

"The main jets are .074 and the idles are .048 but there are no vent jets. With the smaller mains I suspect someone removed the vent jets not understanding their purpose and the motor leaned out on the top end. That's guess work not fact. I'll order up a set and put them back in."

Some of tha wh carbs didn't have vent jets. Some have 2, some 3, some 4 and so on. Those jet sizes sound about right. If I get home anytime soon (working outta town). I can look up tha 40's for stock jetting unless you have already found tha right information. Its all on my other computer............
 

sschefer

Rear Admiral
Joined
Nov 13, 2008
Messages
4,530
Re: The 2010 FrankenMerc Project

"The main jets are .074 and the idles are .048 but there are no vent jets. With the smaller mains I suspect someone removed the vent jets not understanding their purpose and the motor leaned out on the top end. That's guess work not fact. I'll order up a set and put them back in."

Some of tha wh carbs didn't have vent jets. Some have 2, some 3, some 4 and so on. Those jet sizes sound about right. If I get home anytime soon (working outta town). I can look up tha 40's for stock jetting unless you have already found tha right information. Its all on my other computer............

Thanks DD, I have the jetting chart. Stock for a 89 vert reed 150 is 80 44 and 78 (all six).

I've got a wide variety of jets so I think I'll start with 80's in the mains, 44 in the idles and 78's in the vents. I have a shielded O2 sensor hookup and EGT's that I'll run on it just for tuning purposes. It's pretty easy to get it in the ball park using those.

If your chart shows something different I'd appreciate the input. The chart I have is from the Merc Service Manual. I have to remind myself that these did come off a vert intake so I won't be suprised if the more efficient horizontal front half works better with smaller jets.
 

sschefer

Rear Admiral
Joined
Nov 13, 2008
Messages
4,530
Re: The 2010 FrankenMerc Project

Here's a cleaned carb compared to a dirty one - Normal soaking in gunk won't get them this clean. I also glass bead them with 80 grit glass beeds. You don't have to do this unless you want to. Extra steps cleaning steps (lots of them) are involved but can be worth the effort.

WH40s015.jpg


Cleaned parts washed, sorted, counted and placed back in the parts tray according to the log that I kept.

WH40s017.jpg


And here's the carbs after re-treating with Aluma-Prep, De-ionized water, and Alodine 1210. If your wondering why not just leave them shiny and brite, the answer is corrosion and E-10/15 gas. Alodine is a metal conversion chemical that convertes the surface of the aluminium to a highly corrosion resistant substrate. It was what was on the carbs from the factory. If you've scrubbed all the alodine off your carbs, you should seriously consider re-treating them.

WH40s019.jpg


Not as pretty but super clean and highly functional. These just came out of the tank. They've been fully rinsed and dried but the process will continue for a couple of more hours. When completed they will be a yellow gold color. I'll take another pic tomorrow...

It will be another week or more before the full carb repair kits get here. I orderd the full kits from merc because these carbs are being returned to "As New" condition. These kits are 70.00 each give or take a couple of bucks. Normally you can just buy a gasket kit and be good to go but this is the Franken Merc and, well, that's the way I want it...;)
 

sschefer

Rear Admiral
Joined
Nov 13, 2008
Messages
4,530
Re: The 2010 FrankenMerc Project

Zoom Zoom comming soon... Actually this is the 200 block under franks front half. I just wanted to see how it was going to look. It'll darken up after I hit it with the aluma prep.

frank004.jpg


You can see how the front half has changed color as it begins to oxidize. I like it. I shot the intake with clear lacquer and I don't like the way that looks. I'll re blast it and then alumaprep it and clear alodine it like I did the intake. The carb was done in Gold alodine. You can see in the first pic how it turned a sweet golden color. Not for the block but it's just the ticket to set the carbs off from the rest of the motor. I'll probably do the heads the same way.

frank002.jpg
 

sschefer

Rear Admiral
Joined
Nov 13, 2008
Messages
4,530
Re: The 2010 FrankenMerc Project

Just had a thought... You're probably thinking that blasting all that paint off and getting it to look right is pretty easy if you have the right equipment. Well.. no.. It's definitely cheaper to buy the equipment and do it yourself but it aint no cake walk. The block took about 10 hours and it's still not done. There's probably 3 more hours of blasting with crushed glass to do. To top that off, this is the 200 block, Franks not done yet:eek:

My hats off to the guy's that do this for a living!!!

Is it necessary.. no. But, I wan't this thing squeaky clean when I put it back together and this meets my insane criteria. Besides, I think it looks cool.
 

sschefer

Rear Admiral
Joined
Nov 13, 2008
Messages
4,530
Re: The 2010 FrankenMerc Project

Been fishing more than working on Frank but I should get the carb repair kits in today and it's raining so I'll get the first one back together and then I can do the rest.

I blasted all the paint off the heads and divider plate and then used my 40g flap wheel to get rid of the ugly's (casting breaks, etc.).

I also made a monumental decision and that was to go ahead and Alodine everything aluminum. The look is not what I was going for so I'm following that with a coat of zinc chromate and Moller Phantom Black engine paint.

Why, you ask? Well there are a couple of compelling reasons. Allodine 1201 is a gold toned chemical that causes a chromatic conversion of the aluminum. Saltwater spray testing at 5% salt see's corrosion starting in one hour without Alodine and 165 hours with it. That's reason number one. Reason number two is that it dramatically increases aluminums ability to conduct electricity. I think we all know how important grounds are on these motors so anything you can do to make that better is a good thing. The third reason is that it creates a superior bonding surface for paint. Without it, whatever paint you use would go flat and look bad in a very short time. That's because untreated aluminum will continue to oxidize beneath the paint and the oxidation with affect the gloss and general color of the coating.

This actually answers a couple of questions as to why that factory Merc paint is so hard to remove. It's because of the Alodine beneath the paint. I tested that theory on a piece of scrap aluminum and it held true. Without Alodine the Moeller engine paint came off easily with Jasco paint remover. With the Alodine I needed to resort to the blaster. Pretty amazing!

FYI - Using Alodine has another benefit. You have to clean, clean, clean to make it work right so the benefit is that your parts will be super clean when you re-assemble your engine.

I'll try to remember to take some pics and post them tonight.
 
Top