transom and Stringers

JASinIL2006

Vice Admiral
Joined
Feb 10, 2012
Messages
5,713
I think generally you want to glue the two pieces together before you coat the ply with resin. You essentially want to make a thicker piece of plywood, which then gets encapsulated with resin/cloth. No point in wasting resin on a joint that will be in the middle of a sandwich of two layers of plywood.

I also think you'd be making the surfaces to be mated less flat, which means you'll get a poorer glue joint.

Hope this helps,
Jim
 
Last edited:

CT River Runner

Petty Officer 2nd Class
Joined
Jan 5, 2015
Messages
115
Makes sense guys. Wood, I've read that over and over. It's a very good read. That's where I got the tb 3 from, screw patterns, pb method. I'm going to have to do a different clamping procedure with 2x4s on edge with full thread bolts, 3 of them. Bottom, middle, and the top. I already have holes through my transom that hold my eye hook bracket. The 2x4s, one will be on the inside for the bottom and one on the outside same spot, same for middle and top. That should be sufficient enough? We want it tight but not too tight right guys? Don't want squeeze all the pb out that creates the bond?
 

CT River Runner

Petty Officer 2nd Class
Joined
Jan 5, 2015
Messages
115
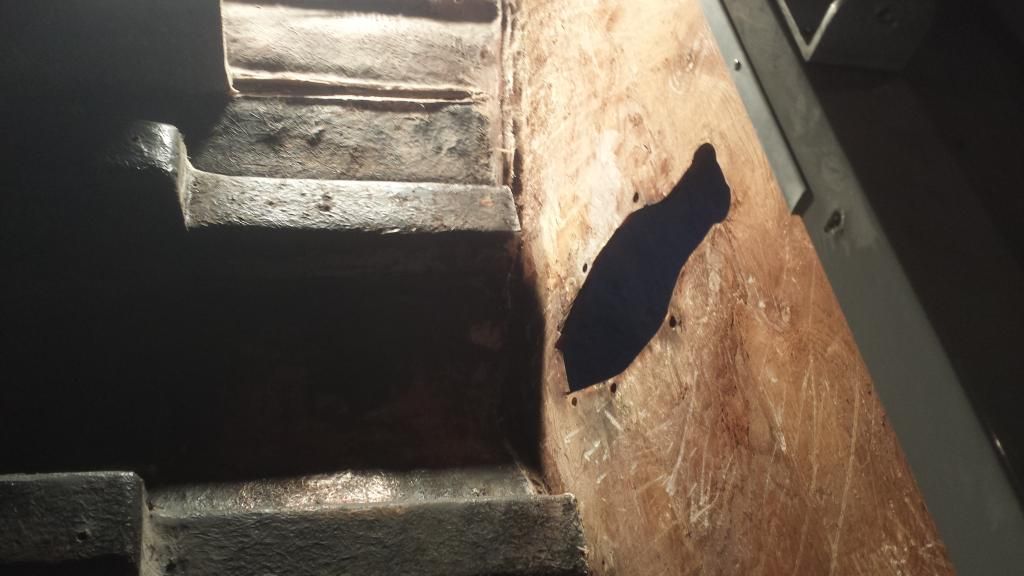
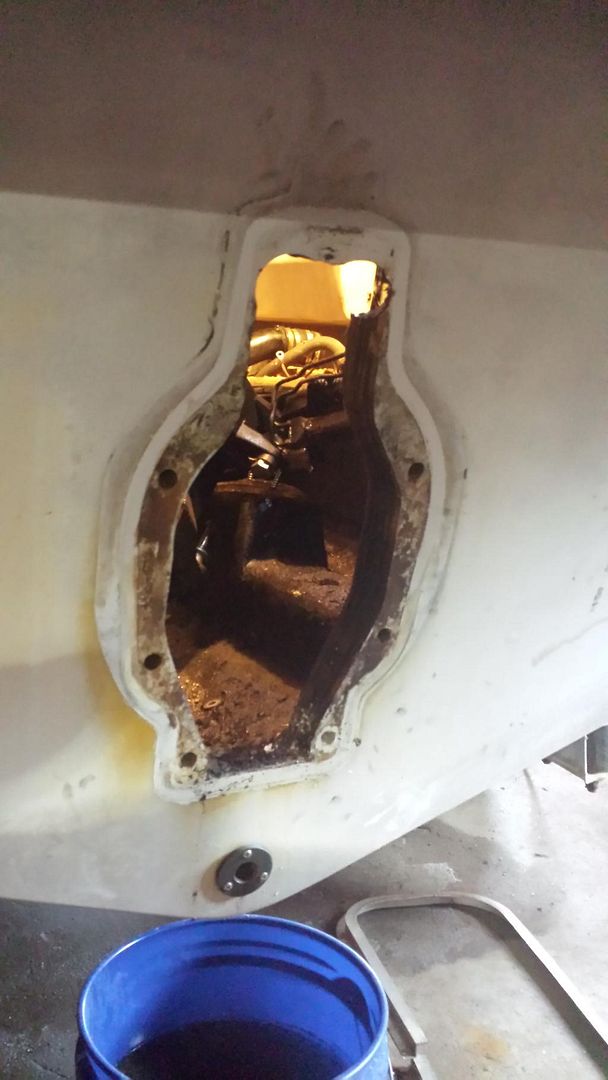
Have you guys seen all my pics? How does the prep look for the transom. Do you think it's ready for new ply?
 

kcassells

Fleet Admiral
Joined
Oct 16, 2012
Messages
8,738
Yes the area based on pics looks very good.
_Make sure you have pre-fabbed clamps ready for the install
--Make sure your comfortable with the "texture" of the PB that will be used to secure the transom to the glass.
-- I like woods idea of overdrilling some holes in the glass transom and thew new wood transom so you can see the ooze of the pb but also the chemical bond happening
-Cover up the rear transom/existing glass as much as possible to prohibit excess pb then having to sand it out later
-Typically this size should not be a 1 man job
-Test fit prior with someone to help so the install flows smoothly.
-Remember while your making the pb and mixing prior to install your time frame is somewhat limited so a hlper is great to have.
-Rough sand the areas, soapy water with bleach to remove blush/mildew, acetone to triple clean, let air dry
Install
 

kcassells

Fleet Admiral
Joined
Oct 16, 2012
Messages
8,738
Above...meaning texture...too wet alot will simply roll out. Make it stiff, trowel it on, compress and then work the pushed out materials to make filet. around the area.
 

jigngrub

Fleet Admiral
Joined
Mar 19, 2011
Messages
8,155
We want it tight but not too tight right guys? Don't want squeeze all the pb out that creates the bond?

There's no possible way to squeeze all of the adhesive out, not even with a 100 ton press. The tighter the squeeze the more durable and rigid the bond.

Here's an experiment for example:

Go outside and find a fresh pile of dog doo, get a pinch of it between your thumb and forefinger and squeeze them together as hard as you can. Now open them up, you can see and feel that there's still a coat of dog doo on both you finger and thumb. Now pinch your thumb and forefinger back together tightly and rotate them in a circular motion until all the dog doo feels like it's gone and where the thumb and finger meet now feels dry. Now open the thumb and forefinger, it looks dry and looks like all the dog doo is gone. Now smell them, yep it's still there!

If you haven't already bought the tb3 glue, I suggest using your epoxy putty to bond the 2 pieces of ply together. Epoxy is a superior adhesive compared to the wood and craft glues.
 

Woodonglass

Supreme Mariner
Joined
Dec 29, 2009
Messages
25,929
Uhhmmm you only need to clamp it hard enuf to get the pb to start oozing out around all the edges and ensure it's making good contact with the outer skin at all points. One of the reasons you thicken the resin to allow it to fill any irregularities in the glue up. If you squeeze it all out this won't occur. Do some searching on Glue starved joints and Resin Starved laminations and you'll get some knowledge about glueups and clamping. I personally would not advise using excessive clamping pressure when clamping the transom. If you do a proper job of spreading the PB on both the transom skin and the transom wood you will not have any voids in the PB some people like the idea of drilling holes in the transom to form a better mechanical bond, others don't. I'll leave that decision to you as well as the clamping pressure. It's your boat and your decision. Go with your Gut!!!
 

jigngrub

Fleet Admiral
Joined
Mar 19, 2011
Messages
8,155
This:
The sheets are then patched, graded, glued together and then baked in a press at a temperature of at least 140 ?C (284 ?F), and at a pressure of up to 1.9 MPa (280 psi) (but more commonly 200 psi) to form the plywood panel. The panel can then be patched, have minor surface defects such as splits or small knot holes filled, re-sized, sanded or otherwise refinished, depending on the market for which it is intended.

Is from here:
http://en.wikipedia.org/wiki/Plywood

200-280 psi is a pretty tight squeeze when they laminate the plywood together in the factory. And when we bond 2 pieces plywood together to make an 1-1/2" piece for a transom, we're actually try to make an inch and a half piece of plywood that is at least as good as the two 3/4" pieces we're bonding together.
 

JASinIL2006

Vice Admiral
Joined
Feb 10, 2012
Messages
5,713
You are getting good advice here. I would echo the point about doing a dry run or two with clamps before you mix up any PB. I would also, while you're doing the dry run, measure the thickness of the transom and the hull together. That will give you an idea of how much you need to squeeze the PB. It is much easier to have the transom too thin, and the build it up with layers of glass, than it is to have it too thick, and then have to find some way to grind it down later. I would also be ready to do some measurements around the keyhole, as you are clamping the transom board. You want to have a target thickness such that you can add a few layers of glass after the transom is installed.

I like your idea about using the 2x4s in the clamps on edge. That helps give you a much stronger clamp, I believe. That's how I did mine also, and I felt it worked very well.
 
Last edited:

CT River Runner

Petty Officer 2nd Class
Joined
Jan 5, 2015
Messages
115
What do you mean by to thin? I am assuming Theresa required thickness then? I've read several threads on people having two layers of glass on the inside.
 

CT River Runner

Petty Officer 2nd Class
Joined
Jan 5, 2015
Messages
115
Wood, do you mean by drilling holes in the outer fiberglass skin? Or the 2 pieces of ply on the inside for the mechanical bond?
 

JASinIL2006

Vice Admiral
Joined
Feb 10, 2012
Messages
5,713
What do you mean by to thin? I am assuming Theresa required thickness then? I've read several threads on people having two layers of glass on the inside.

Mercruiser specs for the transom thickness are, I believe, 2" to 2 1/4", with a uniform thickness around the keyhole. If the finished transom thickness is greater than 2 1/4", the inner transom plate and the gimbal housing may not fit correctly. If your transom is to thin (i.e., if the finished thickness is below 2"), it is much easier to add layers of fiberglass until you reach a thickness of 2"-2 1/4". If you make the transom too thick (e.g., more than 2 1/4" after fiberglassing), the only way to get it with spec is to grind/sand it down.

After the transom core is epoxied/resined in, it's easier to get it up to spec by adding material than by trying to remove material.

On my boat, the transom thickness after gluing in the transom core, but before skinning it with 1708, was about 1.95". A few layers of 'glass got it to just over 2".

Does that make sense?
 
Last edited:

CT River Runner

Petty Officer 2nd Class
Joined
Jan 5, 2015
Messages
115
As you can see there I have to fit in between the motor Mount rails. I guess I could cut them back s little ifi were to big?
 
Top